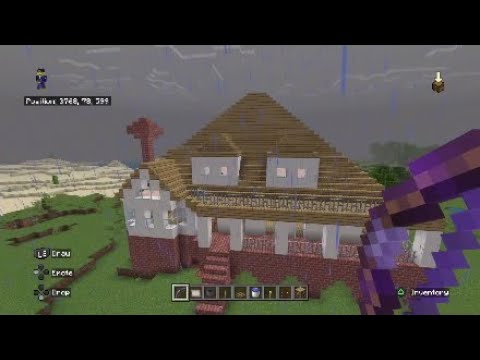
Foreign Foreign we are building the Barbie dream house in Minecraft part two the materialists and dimensions are in part one which are linked in the description below we are going to build the column parallel to this column five blocks over starting with chisel port and then 13 Quarts pillar on top of that we are going to play some stripped Cherry logs going upwards a crimson door a block of light gray glass and now some more stripped Cherry logs against this wall we will begin making our veranda our Veranda will consist of six columns Our columns will begin with the Chisel quartz three quartz pillars another chiseled quartz and then a full block of Quartz on top of that all of the columns are three blocks apart in both directions we will place an upside down smooth Court stair on every quartz block facing outward Going from that stair up one two three we will place an upside down quart stair and we will keep placing them all along this side now we will mirror that on this side on these back columns we will place strip Cherry logs and then quartz pillar on top of that We’ll make a little Cherry beam across and then Place some more logs going downward let’s make another Cherry Bean behind the stairs and another one on this side let’s use Cherry slabs to fill out the rest of the floor placing down from our Cherry beans we’ll Place more cherry logs and start Building our arch frames for our Archway we are going to use smooth quartz slabs in the middle we’ll put a double stop two Upside Down Smooth Court stairs on the end using smooth quartz slab we’ll make a little frame here using cherry leaves will make a whole Layer up here and it’ll make a beautiful Cascade of petals whenever we walk by for the balcony above our veranda we will put some quartz pillar here we’ll begin to frame out the doorway in light gray glass blocks strip cherry wood and a crimson door let’s polish it off with the Crimson Trapdoor and some smooth quartz slabs foreign let’s sign our entire balcony with Crimson finsky on top of the Cherrywood using Crimson trapdoors let’s add some cute details placing two on this side and two on this side as well some upside down Court stairs along here On the other side of our Tower let’s put chiseled Quartz in a row quartz pillar going up Upside Down Smooth Court stairs along the top and another line of quartz pillar coming down on the Block behind that one we will start making rows of stripped Cherry logs Two over from the side we’ll place our window this little box will have four windows in it total two on top and two on bottom the bottom row windows are four blocks tall and the top row windows are two blocks a line of birch signs all along here And smooth quartz slabs above the window and below for the bottom row we’ll put the smooth quartz slabs above the windows on the bottom we’ll make a flower box with some grass some bird strap doors and some pink tulips now going to the side we will go five blocks over from this column Chiseled cork quartz pillar a chiseled Corks And More quartz pillar a row of stripped cherry wood and then some cherry Leaf blocks here we’ll put a cherry door for the floor of the next balcony we’ll Place some cherry slabs here for this wall we’ll use strip cherry wood thank you Light gray glass blocks some Birch signs here three smooth cord slabs and a crimson door extending out from here we’ll begin filling out the balcony floor going from here to here let’s fill it in with cherry slabs and then some upside down cords along both sides On this side of the veranda we are going to build five columns chiseled quartz two blocks of quartz pillar another chiseled quartz and then a full block of Quartz on top and over here five more columns parallel to those each column has three blocks in between using light gray glass blocks we are Going to fill in between the columns on this side while leaving a space for a walkway let’s fill in the spaces in between the some columns with chiseled cords quartz pillar and more chiseled boards behind the stairs we’ll start filling it in with stripped Cherry logs and on this side too Upside down Court stairs for the archway we’ll use an upside down smooth quartz stair and then a smooth cork slab and then a double slab in the middle and another slab and then an upside down stair we’ll repeat the same pattern in here foreign the back we’re using a different pattern We’re going to put a double smooth quartz slab double slab and then in the middle a slab and then an upside down smooth Court stair and then double slab again and double slap on the top for the balcony we’ll use Crimson Gates foreign Crimson trap doors now it’s time for Barbie’s Closet let’s Begin with quartz pillar going up chiseled quartz and now a cherry beam above that at the end of the Cherry Bean we’ll do another pillar going down starting on the left we’ll put stripped cherry wood three quartz pillar a chiseled quartz on top of that And now a space of three for the window and now three quarts pillar just of quartz again and light gray glass panes in the middle some strip cherry wood and three chiseled quartz above the window pour our window frame we’ll use smooth upside down Court stairs one here and Then another one on the inside turn smooth cord slabs here and here and then double in the middle a line of strip Cherry logs and now three more pillars and chiseled quartz Behind These we’ll Place full quartz blocks some strip cherry wood and chiseled quartz And now we’re going to frame it out the same as on the left Upside Down Smooth cords turning in and smooth quartz slabs double in the middle a lovely Crimson door strip Cherry logs a row of quartz pillar three blocks and then another row and then more strip Cherry logs Light gray glass panes and then we’ll frame out the window the same as on the left foreign let’s fill it in with strip cherry wood leaving space for the window upside down quart stairs all along the top we’ll fill in the window with light gray glass panes Let’s place an entire row of smooth quartz slabs under the window sticking out two additional ones in both directions Court scan an upside down smooth Court stand above that a smooth cork slab another slab to the right a smooth cord stand on the back of the smooth forward stair We are going to place a slab and another slab and these wines are going over the window a little we’ll double the second slab and then put a smooth quartz stair on the back of the stair we’ll put another slab a smooth Court stair and now a slab on the right of it Another slab underneath it going in the window and another one on the right of that one a smooth quartz stair a slab another slab an upside down Court stair under that sleigh and now a smooth Court stair and a line of birch signs turning to this side of the closet we’re Going to make a pillar in the corner with chiseled cork quartz pillar and a chisel cords along the top another beam of cherry going across here against the Cherry Bean we’ll put upside down pork stairs we are just going to fill in this side with cherry logs Against this wall we’ll do four rows of stripped Cherry logs going all the way up here’s our first window six blocks total and our second window a line of birch signs and now smooth quartz slabs above and below our window on the back of the closet we’ll go to The corner and make another pillar a cherry beam along the top will cover the beam and upside down Court stairs quartz filler going up four blocks and then this window is also four blocks long we will use light gray glass panes for this window smooth quartz stairs along the top of Both pillars and the bottom smooth Court stair for the frame and now smooth cord slabs we’ll put three rows of strip cherry wood three rows of strip cherry wood over we’ll repeat the same window thank you and a line of birch signs foreign Bean to close off the back of our closet Upside down Court stairs three rows of strip cherry wood the window is made out of light gray glass paint three tall another row of three strip Cherry logs the window in the middle is three thick and the middle one at the top goes up one higher than the other two foreign Smooth quartz slabs above and below up higher on the one in the middle and now we’ll finish it off with some Birch signs all along this row foreign we have made fabulous progress today please join me next time for part three of the Dreamhouse Video Information
This video, titled ‘✨ Minecraft Barbie Dream House Tutorial Part 2 🎀 Cherry Wood Build 🌸’, was uploaded by DreamyMoonGlow on 2023-08-09 22:12:30. It has garnered 293 views and likes. The duration of the video is 00:20:31 or 1231 seconds.
#Barbie 🌸 Everything’s fantastic, When you’re made of plastic, Welcome to life at the Dreamhouse!!! Learn how to build the Dream House block by block with guide. While creating this video I would ask myself… would Barbie like It? And that has been my guiding light. 💕🌴 This mansion is made with the new cherry wood! Cherry wood is one of my favorite woods! I love it, it is so beautiful!!! Are you enjoying the new cherry grove biomes? 🌸
🎀 Part 1: https://youtu.be/TLOljZyb3Tw
Barbie is awesome, you know I love having the right outfit for every occasion and Barbie is queen of that. We both have a shared passion for fashion. But what more I really like about Barbie is what an excellent role model she is. She is true to her heart and what she feels is right, has the courage to follow her dreams and is always, always, unfailingly kindhearted. That is the part about her I love and respect the most.
You can be anything!
☆ Chapters ☆
00:00 Barbie’s Cherry Dreamhouse 00:50 Beginning the first Veranda 04:36 Barbie Balcony 05:44 Barbie Box next to the Tower 08:01 The Second Veranda 11:43 Barbie’s Beach View Balcony 12:11 Barbie’s Closet / Garage / Storage Room 20:07 Barbie Aesthetic Reel
☆ Mods & Texture pack ☆ 🌸 Mizunos 16 Craft Resource Pack for Java: https://resourcepack.net/mizunos-16-craft-resource-pack 🌸 Mizunos is also in the marketplace for Bedrock Edition


![🔥HUNT DRAGON NOW! 🐉[MINECRAFT ADD-ON] #ADSA](https://img.youtube.com/vi/pmoP3_R4czw/0.jpg)