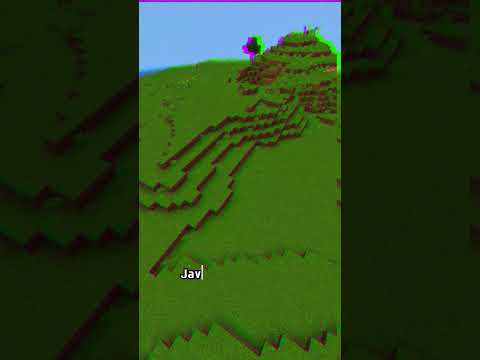
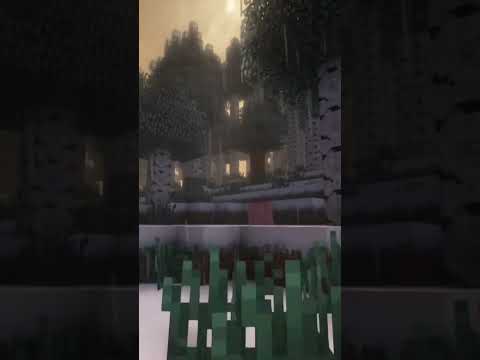
In this video i’m going to show you guys how to make a custom tundra biome in world painter now if you’re new to the channel tool we do a lot of time lapses and tutorials just like this one so make sure to hit the subscribe button Also guys if you’re new to world painter i’ll leave a link in the description to my full world painter playlist also if you’re interested in more world painter biome tutorials i’ll leave a link in the card above as well as in the description to the playlist anyway guys Let’s get into world painter alright guys so here we are in world painter so we’re not going to be doing any sort of terrain changes or anything like that um i have got tutorials for that if you are interested uh so what i’ve done is i’ve created A very basic little island i say basically island um it’s island with some some kind of like beaches some some slopes uh and some mountains and i’ve also used the river layer um i’ve got tutorials to do all of that uh has got some clips but they’re like They’re pretty small clips on this one um yeah i’ve got tutorials to do that already on the channel and that is in my world painter playlist which i’ll link uh in the description if you guys are interested in that instead this is purely on basically making a custom biome instead so it’s really Laggy now so i’ve zoomed out a little bit too much i do find that especially with recording lags but yeah so that’s what we’re gonna be doing so for it what we’re gonna need uh we’re actually gonna need to do a couple custom terrains um So i’ll go through all the ones that you need even if you haven’t done my tutorials before and you’ve got your own area that you want to do um so one that i’ve called gravel nice and simple it’s on the complex tab it’s using the material of gravel and That is a count of 10 and and a site with a count of one so set up a material called gravel if you haven’t already got one uh i use this all the time i quite like it as a slightly variated gravel texture it just it just breaks up with a Tiny bit of andersen in there it makes it feel less repetitive um so that’s number one the next material we’re going to need is actually a dirt i’ve called it dirt dash tundra um you can call it the same if you want to i’ve actually got And i’ll link in the in the description as well um this which has got all the settings for creating the biome using what i’ve come up with for it uh and all of these have got these specific names with it so we’ve got like the grav was called gravel dirt gravel normal Tundra i’ve tried to categorize them a little bit but it’s still still not perfect but for your dirt tundra it’s again on complex on the noise setting and with coarse dirt you’re gonna want five grass block you’re gonna want 15. brown terracotta is five podzol Is 22 and brown concrete is one so with the brown terracotta and brown concrete both of these are mixed in in order to give it a bit of a dark muddy kind of look of it uh the podzol obviously is already quite a grassy mossy kind of looking block so That kind of works as well as the grass block as well looks quite nice especially when we apply the bad lines bad lands biome to it so we do that it looks quite yellowy color as well so it mixes in with the pods also it kind of gives You a bit of a clearer looking one so that’s the other texture um make sure if you guys do need to pause the video pause it set these up um you know you know feel free to do that so what i’d recommend doing another one we’re actually going to be doing White rock for this for mount mountain rock which is actually white um i’ve previously shown you how to do grays rather than whites or any sort of black rock or anything like that or darker materials um this i think just looks really good when i was playing around with making this biome The white rock looks look the best by far um i don’t know why it just does so for this one i’ve called it rock dash mountain white in brackets uh because i’ve got rock dash mountain like gray and light gray and black and things like that so i’ve kind Of categorized mine that way um so with this we’ve got diorite and that’s that makes up 100 so majority of it is diorite we’ve also got smooth quartz which is 30. white concrete which is 10 white concrete powder which is 20 and mossy cobbles mossy stubble stone mossy Cobblestone which is one so it’s just got a tiny little bit of mossy rock in there um and we’ll see that with some of the rock layers as well i put mossy cobblestone in there and it just adds that kind of look of having a bit of moss and a bit of a Darker gray in there which you it kind of breaks up it just breaks up it looks good and it mixes better with the gravel layers that we’ve already got so there we go that’s those settings for that one we’ve also got another one which is dirt gravel normal so In my previous tutorials i’ve used this dirt gravel wherever it is dirt gravel um which i’ve kind of called it dirt gravel i’ve now got it green because it’s got green concrete powder in it um with the this biome in particular green concrete powder looks really weird It does not work at all because it’s so green and of course it doesn’t get colored by biomes because it’s just a normal block it doesn’t look right so um all i’ve done is i’ve taken that layer and i’ve removed the green concrete powder so for coarse dirt you’ve got five gravel You’ve got three little grass block you’ve got 15 and then brown concrete powder you’ve got once the baron concrete palette is still in there and that really works quite well so there we go those are your custom terrain layers for the custom layers we do have a couple i’ve actually built three new Custom layers actually i just remembered i haven’t even told you guys how to make one of these if you haven’t done it before if you haven’t done it before click on terrain do one custom here do create custom material i’m just gonna quit yeah call it dirt there we go and It will create this custom tab and i’ll move it down to the bottom so that’s where you can do it from there i’m just going to remove that one yes i don’t want that um there we go just like that and you can then just create it from Here and do create custom material or select import from file or other worlds all of that’s in there with the custom layers on the layers tab you click on here and we’ve got custom object layers and we’ve also got custom plants layer uh we’re actually going to do the I believe we do the plants layer first but either way when you click one of these it’ll create the custom tab yeah we’re gonna do the plants so click on that to create custom plants layer and this one it’ll take a little while to load um but we’re using lots of the nice Plants that we’ve got so i’ve got it plant dash tundra and for the settings on this one we’ve got grass with ten tall grass with one fern with three large fern with one and dead shrub with three we’ve also got and this is one of the Most important bits of it and this is what gives it this really good look is the sweet berry bush without that it’s kind of quite colorless so the little bit of red berries that come through on these and also the slightly off green color and you’ll see it when we load it Right into the world really really works with the tundra biome so sweet berry brush i’ve got two on that um with the grave from one to four because why not and that is it for your kind of layer you can i’ve given mine a uh it’s weird isn’t it look i’ve got the Color down there it’s red but it’s up here it’s yellow yeah figure that one out no idea so i don’t know why that’s a different color but apparently it looks red there but it’s not um the next one we’re gonna need is some custom objects so what i’ve done is in the Uh description again guys the mcg schematic pack i’ve updated it with a couple extra um rocks and things like that so there’s i’ve just done an update to add in exactly what we need for this tutorial at the minute and maybe added in a couple extras Um from that it’s just a zip file what you’ll do is you will download that obviously uh onto your pc you’ll then unzip it and all you need to do if you haven’t done it before uh for me i’ll grab this onto the screen in just a sec There we go so all i’ve done is i’ve got on my d drive world painter projects schemes um and then in here you’ll get the zip file unzip that and you’ll get a big folder called schematic um and that should have everything that you need um there’s quite a lot in there If you want some trees uh some rocks it’s mostly trees to be fair it’s a lot of the kind of um uh coniferous trees is the majority of those but what you’ll find in there is diorite rocks so all you need to do is you need to click On plus and you go and grab all of those are underscored direct rock from l01 to l02 and there’s four small ones um there might be more at the time when you’re watching this video might expand it uh we might not have expanded it who knows Um but yeah these are the ones that i’ve used it’s up to you play around with different rock variations add your own if you want to and just make them as schematics in world edit and you can then load them into a painter as well so through each of these once you’ve Loaded those in what you’ll have is you’ll have to offset them manually because um at the minute i can’t do bo2s or bo freeze which which basically do this automatically in world painter um i’ve been looking i can’t find it it’d be great if i could because it Makes my life a lot easier as well as your life a lot easier for the time being we’re just gonna have to go through them and i’ll tell you what what to do manually so with the diorite rock lo1 you need to do this on minus three on the vertical axis the y Axis so that’s what that one is um with lo2 it’s again minus three on the y-axis these are the two very very big rocks with so1 is minus two so2 is -2 let’s see a little pattern going on here so3 is -2 and so4 is -2 so there you go nice and easy Really um what i’ve also done is sparseness is a 80 just in case you want to match that i’ve called it rock dash white for my custom object layer and i’ve given it like a grayish color it doesn’t really matter what color you give it next one We’ve got is some tundra forest so tundra doesn’t usually have any forests but because we’re in minecraft and because it looks pretty cool with the bad mounds uh biome coloring of the leaves i’ve added in a couple trees there is there are some trees in the tundra um obviously you’ve got like border Regions where you could have some trees there’s no real reason why you couldn’t have a couple it’s just that um it’s a pretty hospitable kind of climate basically uh most of the time it’s actually covered in snow we’re actually doing obviously a non-snowed version uh so for the The four or eight weeks i think it is or something like that a year that it gets enough whether the snow melts um that’s the kind of one we’re doing it looks very scary mask it looks really cool and it’s really nice as a different biome in minecraft so i’ve picked out Some of the trees from the tree pack um the douglas fir i’ve gone for the entire collection so that’s lo1 lo2 lo3 lo4 so1 to 4 eu larch lo1 lo2 elarch so1 to so2 so just in case you don’t know s means small l means large nice and simple uh lodgepole is lo1 So1 and so2 so these are all ones because uh so spruce leaves don’t get colored by biomes but pretty much all the other leaves do so a lot of these have got like oak leaves on them because that fit the the kind of color initially so these now go like a brownish orangey Yellowy color with bad lines by them and it looks really cool we’re gonna have a really sparse forest so for each of these i’m gonna have to go through unfortunately because again no bo2’s or anything like that but for douglas fir lo1 minus three douglas fir Lo2 is minus three as well douglas fir alo three is minus three douglas douglas fir minus four is minus five this one’s huge but it looks awesome in this biome i love it in the spine uh i didn’t like it before i built it and spent like a hour making the tree And i didn’t use it difficult but i’ve used it in this time and i really like the look of it it looks great uh douglas fir so1 minus one uh so2 is minus one question so3 is minus two double spur so4 is minus one eu large lo1 is minus two Eu large hello2 is minus three e large so1 is minus one e large so2 is minus one lodgepole lo1 is -2 lodgepole so1 is zero so there’s nothing need to do with that one and lodgepole so2 is minus one i think at some point and i think it’s Probably gonna be quite useful and you guys are gonna be asking for it in the comments is can you add these to a spreadsheet and i will what i’ll do is i’ll expand the spreadsheet that i’ve got here i had an extra tab on it so that you guys can actually see those I think i’ll just do that because that’s going to be a lot easier especially for me because i have to then i usually render them out and then go from there so anyway we’ve got all these objects now we’ve got all the layers we’re now ready to do it So what do we actually need to do to get this done so i’ve got is the order uh what textures we need to do and want me to apply um and again i’ll link this in the in the description so that you guys can go and grab it And you know it’ll be quite good i can expand things and i’ll add biomes onto it as we as when we kind of like need to so first things first we’re going to do is go on to the pencil tool we’re going to go on to our custom terrain so actually actually we Can do something um i haven’t shown you guys because because the way that feathering works let’s go on to selection so we go into edit selection work your intensity up to like 100 and what we’re going to do is i’m just going to click around the area that you want obviously I’m doing it very uh roughly around this island because because i am um there we go something like that hopefully i haven’t got any nope that’s good so i’ve got this selection in here what this means is we can actually go into edit global operations when you click this Inside selection it’s only going to apply these operations to that selection it’s really really useful um so fill with terrain type that dirt tundra that we’ve made earlier and what we’re going to do is at or above 55 with feather now this is where you can’t do it If you paint it onto it manually the feather doesn’t work you’d have to do it manually but it works perfectly with global operations this is really good also i should note that the terrain i’ve got here has been defaulted all the way back to sand so there’s just sand Underneath it there’s nothing else at all that’s all it is so we just click on go for that it’ll quickly go with through and we’ll get a nice feathered effect around the um like 54 block so we did it at 55 we’ll get it around like 54. I think it goes down to 53 or 52 or something it goes down a couple blocks but it gets lighter and lighter it’s really cool next global operation we’re going to do another fill with terrain type also make sure you click inside selection i’ve done that a couple times where i’ve Not clicked that and um tried to paint the whole map the same thing i did not want to do that i’m going to go with dirt gravel normal this is going to be at or above 75 and again it’s on that spreadsheet um but you can always hold it there What’s going to do above 25 degrees let’s give a bit click on go i’ll go off there uh we’re going to do another global operation straight away click on inside selection because i think that’s probably a good thing to get used to doing and we’re going to grab that gravel So we’ve got that gravel mix that we had before this is going to be above 40 degrees no hour above or anything like that just above 40 degrees click on that next one inside selection fill with terrain type this is going to be our white rocky mountain and this one’s going to Be above 45 degrees so we haven’t got any sort of cliff layer for this biome for this this one i’ve just been really liking the white kind of color i did think about doing a cliff for it but then it i don’t know it just doesn’t look quite right with The way that i’ve set this island up um so i’d end up kind of overwriting in areas and it becomes a real pain when you start doing that but fill with train type rock mountain white i never knew why this moves around when you move around but it’s very cool Inside selection above 45 degrees so it means that we’ve then got gravel that kind of gray gravel at 40 degrees all the way to basically 44 and then 45 degrees and above is all this white rock and it gives us a nice really nice look actually it looks cool So what we can now do is we can deselect this there we go we’ve now got our muddy looking rock muddy looking island with some nice uh white on there i’m gonna move on to layers now so the next lot is layers so onto our layer tab here click on the pencil We will do the let’s do the forest tundra layer first should we do that now we’re going to yeah we’ll get we can do actually it will do the forest tundra layer why not um i’m going to go with a really soft brush on this and What i want is at all below 170. i didn’t want them that high it just didn’t make any sense to me and also below 20 degrees and only on land as well so really important and we’re actually going to put the intensity down to 30. There we go 30 there now i don’t know actually if i did any changes i did okay so on the layer as well sparseness one object per 50 blocks is what i’ve gone for so i did change that setting and i didn’t say that sorry guys So what i’m going to do for this one is have a really soft brush i’ve got it on um i’ve obviously not got it on 30 but it’s close enough there we go 29 i’ll do for now um i’m just going to do it around these Kind of areas here i’m not going to do it in like loads so i’ve just got like a little bit of forest in here it’s like quite cool with that river actually there we go something like that we’ll do so i’m just going to have a tiny little Bit just to show you guys what it looks like in either way and this is probably what i’m going to end up doing on on this island in fact i think it’ll look really good so the next thing we’ll do is the rock layer so rock layer is going to be our below 170 so we don’t need to change anything on that we’ve got below 15 degrees so the reason being otherwise the rock sticks out in in weird places it looks strange we’re going to knock the intensity down 10 and have this pretty much solid so this is going to be across the entire Entirety of the biome so i’m just literally going to paint it everywhere on this up a bit as well so it’s just adding some nice rocks they’re just jutting out of the ground and i think it looks really quite cool so from some of the pictures i’ve seen i’ve been inspired by I could see these nice white rocks sticking out um so of course it’s quite cool right next one is the plant tundra layer so this one is going to be at or above 55 not or below one Out above 55 um and we’ll do is we’ll do only on terrain custom tundra and it’s not going to be below anything no not below anything 100 on the intensity so out or above 55 only on dirt tundra paint this everywhere there you go so this will give us some nice Coverage you can turn it down if you don’t like the intensity of 100 turn it down um i i really like it for this one i wanted a really grassy kind of looking um biome so that’s why i went with this same settings we’re just going to change the only on To terrain oops terrain custom and then we’re going to switch this to the dirt gravel normal layer because of course as you can see we’ve got these dirt gravel layers going around and we haven’t filled those in so otherwise you just get this sudden cut off where you just get like bits of Grass blocks that don’t have anything on them and it looks really weird so um at least this way because we’ve got a mix between dirt and gravel you end up with just the grass blocks having plants on them and that looks good it actually looks like it fades out um Quite naturally it’s interesting um actually also thinking about it what we can do on this and i’ll update my settings that tundra i’m actually not going to do out or above because of this bit that’s been faded in otherwise we’re not gonna have any on the beaches So i just saw that quickly in the corner of my i will update that so that doesn’t say any of that so out or above will be gone from now now on from that because we’re just gonna be doing it on that custom place where we’ve done it Right so biome now you’ll be glad um so on the biomes tab you want to click onto badlands click on the pencil tool and this is nice and easy it’s only on dirt tundra 100 whack it in so we’re gonna whack this in full blast only on this Like that there we go get all of that and the other layer we need to make sure we capture is only on terrain custom terrain custom and then where is it the dirt gravel normal as well if you don’t do this it looks again you get these weird um because the color changes Um if you’ve got a tree going over it or you’ve got grass on anything it then starts to go green and it looks really weird having this like green layer above everything so i’m just making sure i’ve got everything because i have a tendency To miss it and if you do need to get a bit more clarity because you’ve got too many layers on uh just switch them off and then when you zoom in you can then see it a little bit better sometimes it helps sometimes it doesn’t in this case i I don’t think i can tell at all what’s going on um there we go that’s it for that um you can do obviously more biome painting on for example the sand you might wanna uh say like only on where is it layer terrain terrain sand you might want to actually do a biome Of beach is that beach or is that desert that’s beach there we go so you might want to do whoops that perhaps and that or above was it 50 i’ve got 50 for mine yeah i mean however you’ve set it up but you might want to do that for those I usually do um personally i would end up doing that because i have my beach thought at the same level um i would end up doing that as part of a global operation instead just to finalize that up probably as a first layer and then do a second layer on Uh my anything i manually do on top of that but you can do that same with the mountains as well these ones um actually switch to autobiome snowy tundra which i think is pretty cool um same with the frost layers i know i’ve done some stuff on frost layers Before but if you did want to put your own frost layers on oh why is that changed to just gone a bit weird oh it’s fine it’s just deloaded i’ve seen what’s going on it’s changed it’s like half my own thing um but yeah if you didn’t want to put Your frost days on i’ve got a video on that so i won’t go through that in this one i’m actually not doing frost days on this i i will do but um i won’t do it for this export so then finally guys go on to file export Export as a new minecraft map select your tiles i think i’ve already got mine already selected because i yep i was testing this out beforehand i’m just going to cut down a little bit on on what i’m exporting um set your spawn point as well so i’ve Got mine in the top part of the corner i’ll export this out and i will show you what it looks like all right so here we are in the rendered kind of world so i’ll talk through a couple of different things of what i was trying to go for with the Terrain in general you can see the effect of the kind of yellowing of the grass um the brown browning yellowing of the grass kind of brown yellow color tint um yeah really nice kind of browns brown colors going in on the whole thing the rocks as you can See look quite interesting i think they do and there’s not overpowering there’s not too many of them around for it to be a little bit too much but you can kind of yeah see that they kind of just like jut out as well as the bits of mossy rock on them Um for the gravity mountain i might actually go over onto this area here we go so for these kind of areas you can see the white rock um and how that kind of looks against uh this terrain i just i really like the look of it i think it looks uh fantastic I love it um and you can also see the little bits of gray that come in with the um with the gravel and how that kind of mixes in because it’s such so kind of like uh there’s so little of it um it doesn’t kind of Affect the white i find so i was playing around with that for ages before i actually settled on the on the percentages of it but there you go those are the nice white mountains that we’ve got and then here’s our trees as well you can see That one there’s got a little bit of green in it because of where it’s ended up sitting um massive tree really high up and then over here we’ve got the the smaller trees um so these were purely picked these trees were the way you guys purely picked because of the leaves Rather than actually any sort of natural thing i know that’s bad i should have gone like with what would actually potentially appear in these volumes but um yeah i went with the color and also just we’re trying to get a bit of variation like these gigantic douglas douglas furs Um i love the look of these the leaf leaf color looks really good makes it really interesting and different um yeah it looks really good with the rivers as well so you know whack your rivers in they’ll make it look a lot more natural although i’m not really too sure how Much water actually flows because a lot of it is permafrost underneath it so i think it gets quite boggy in fact in in tundra type biomes instead um so yeah i mean it looks pretty good i’m really happy with how this spam turned out also guys if you’re happy with it um or If you’ve made any tweaks to it as well i mean you know if there is anything that you guys think can do to make it look better that’d be awesome as well let me know in the comments section below uh or you can also message me on twitter As well so send me a tweet with any pictures that you’ve made using this biome and also let me know what you want for more biome tutorials if this is something that you’d like me to go over it’s something i definitely have been enjoyed doing a specific biome and i need it for My world anyway so it kind of has a nice dual purpose um hopefully you guys have enjoyed this tutorial if you have comment like and subscribe i’ll see you guys on the next one You Video Information
This video, titled ‘🗺️ World Painter Tutorial – Tundra Biome’, was uploaded by Lord Dakr on 2021-03-31 16:00:09. It has garnered 11574 views and 484 likes. The duration of the video is 00:27:01 or 1621 seconds.
I show you how to create custom maps for Minecraft using World Painter. This episode teaches you how to make a custom Tundra Biome, creating an interesting , cold and wild landscape.
📑 RESOURCES MCG Schematic Pack – https://www.planetminecraft.com/project/mcg-schematic-pack-trees-rocks-amp-bushes/
📝 PLAYLIST World Painter Playlist – https://www.youtube.com/watch?v=6eEdE9EWL-M&list=PLDVEZfMJl93ME2EVREw5GpEUcRM59vgg2 World Painter Biome Playlist – https://www.youtube.com/watch?v=9tV4vLRt9UQ&list=PLDVEZfMJl93Mrs12ihb1MRP3pmbas6I-F
💸 SUPPORTING THE CHANNEL Help support the channel, and become a Member or Patron Today! Become a Member – https://www.youtube.com/channel/UC2P3piug_WKvJ2cVJHCZhsw/join Become a Patron – https://www.patreon.com/LordDakr
🎮 GAME INFORMATION Game – Minecraft Version – 1.16.1 Mods – Optifine (Shaders), Journey Map, World Edit, Replay Mod Texture Pack – Default / Vanilla Shader Pack – SEUS – https://sonicether.com/seus/
💬 SOCIAL MEDIA Youtube – https://www.youtube.com/subscription_center?add_user=LordDakr Twitter – https://twitter.com/LordDakr Discord – https://discord.gg/xGG9K4q
🎼 MUSIC Bonnie Grace – A Celtic Blessing Bonnie Grace – Highland Hymn Bonnie Grace – The Goths Bonnie Grace – Peace in the Realm Bonnie Grace – Tudor Bonnie Grace – The Wedding Feast Bonnie Grace – Call the Herd
https://www.epidemicsound.com/
#WorldPainter #Tutorial #CustomMap


![Insane Collaboration: Holo Zoughz Masters Skills with Fuwawa and Mococo [Hololive EN]](https://img.youtube.com/vi/1ucwUZvETm4/0.jpg)