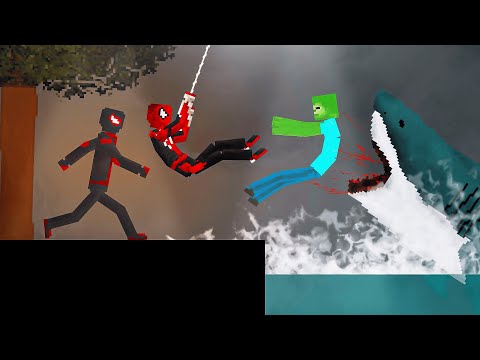
If you want to learn how to make Minecraft animations like these then you’ve come to the right place hello I’m M flank and I’ve been making Minecraft animations for over 7 years in this tutorial series I will be teaching you how to use blender 4.0 which is Completely free and I will show you how to get started with making Minecraft animations so first of all what is blender blender is a powerful amazing and free 3D software which is used for many things such as 3D modeling sculpting VFX rigging animation and so on in this tutorial series we will be Focusing on the animation aspect of blender and specifically we will be learning how to animate Minecraft characters which are not complex and easy to move around and they are a great way to start your 3D animation Journey we will also touch on the subjects of lighting compositing and rendering don’t Worry if you don’t know what those are I will be holding your hand throughout the series and explaining everything step by step after you finish this tutorial you will have a basic understanding of blender scene setup lighting animation and rendering and by the end of this series we will create this animation Inside our world pretty cool so this tutorial series will have five parts in total let’s break them down before you begin in part one I will show you the basics of blender and I will teach you how to navigate inside the software how to create and move objects how to Organize your folders and much more in part two we will import our Minecraft world and our Minecraft character inside the blender and we will prepare to do the lighting in part three we will light our scene and give it a cinematic look in part four we will start animating the Character and we will make this cool short animation in part five I will show you how to add sounds and music to your animations to spice things up and improve your storytelling now if you’re excited let’s get started with part one so first go to blender.org or click the Link in the description and then go to this download section download the latest version of blender by the time of recording this the latest version is 4.01 but maybe you’re watching this later and you’ll have a newer version Don’t don’t worry about it just download the current version which will be here Also if you’re on Mac or Linux you can click here and download any of these versions click on download blender 4.01 and then wait for it to finish downloading and then also install it I won’t go through the installation process because it’s pretty easy now that we’ve downloaded and installed the Blender let’s talk about a very important topic organizing if your folders look like this then but if your folders look like this and they are neatly organized well done you have my respect and keep it up so why am I talking about folders because while you are making Minecraft Animations and creating projects you want to have your folders neatly organized for example here I have my Minecraft animations folder and if I click on it inside I have different folders so I have folders specifically for HDR Skies iTunes and blocks Maps MC prep mindways and so on and don’t worry What those are I will explain everything step by step so what I’m trying to say is when you are creating projects you want to have folders for every separate thing so that if you want to locate them later you can go and choose them easily and don’t worry if you’ve never Organized files for projects before I will show you that as well and you can follow along now let’s continue with the tutorial once you open blender you should see this menu so if you want to choose objects with the left click then keep the left click enabled also there Are different themes you can choose from for example default one is blender dark but you can go for example for like Maya or if you are a psychopath then you can go to the light mode version I’m just kidding do whatever you want and use whichever version you feel Comfortable with also you can change them and customize them later so don’t overthink them choose whichever you want right now I’m going to stick with blender dark and I’m going to keep the left click and once we agree on that we should see this and then feel free to Click on General and then here we are welcome to the amazing world of blender now if it’s your first time opening blender and you get confused I have one advice for you don’t get confused but yeah yeah on a serious note I will be explaining everything step by Step so don’t worry so first thing you might notice is this 3D space right here which is called the viewport and we will spend the most of our time here and here we have three objects so this is a cube we have a camera and we have a point Light as well now let’s talk about how to navigate around the 3D scene which might be a tricky part for some newcomers so let’s cover that I have enabled my screencast Keys add-on so that you will be able to see what I’m clicking here in case you need to take a look So how do we move around the 3D scene if you want to zoom in and out on an object you can use your scroll wheel so scroll up is zoom in and scroll down is zoom out if I want to rotate around the 3D scene and orbit around the objects I can Click and hold on my middle Mouse scroll wheel and then I’m going to rotate my mouse so going to move either left or right and then you can see I’m moving around the 3DC if I want to pan around so if I want to go side by side I can Click on shift and my middle Mouse and then you can see if I drag my mouse over either left or right I’m panning around I’m moving from side to side so again click on the middle Mouse to rotate zoom in and out and then pan from side to side which is pretty easy Now let me show you how to select the objects so since in the start screen we selected the left click then we can choose our objects with left click so if I left click here I can select my Cube if I left click on the point light I Select the point light and same pose for the camera as well left click on the camera and I select the camera as you can see the selected objects have this orange outline here and that’s how we know they are selected also if you are used to older versions of blender like 2.7 and you want to keep the right click then in the startup menu you can choose the right click selection as well or you can change it later in the preferences I will show you that as well now let me show you how to select multiple objects CU sometimes we will need that as well so we have our Cube selected right and we want to select all the objects together so if I shift and then left click on my point light then you can see that both of my objects are selected if I shift and then left click on my camera I can select my camera as well and I have all of my objects selected if I want to deselect every object I click on alt a now what if you want to select all the objects together in your scene Without selecting them one by one you can do that by pressing a if you press a that selects everything and ALT a des selects everything Also let’s say I select all my objects and let’s say I accidentally deleted them so I pressed the delete key if I want to undo my last Action so in this case if I want to bring my objects back I can click on control z contrl z is the undo in blender just like in many other software as well now I’ll showed you how to do the basic navigation how to pan around And how to select objects but I will talk about the other view options as well which might be important at time so right now we are looking at the default 3D view inside blender but blender also has the orthographic view which is like the 2D flat view which is Sometimes useful so if I click on my numpad 5 I go inside this view which gives it more like flat and wide look but instead of five we will mostly be using numbers 1 3 and seven on the naad and let me show you what I mean so I’m Going to click on five again to go back to the default view and if I click on one npad one I go into into front view and it gives me this 2D look of the scene and it’s very handy sometimes if you want to select specific areas of an Object or a character if I click on three npad three I go into the side view if I click on NAD 7 I go to the top view so again one is the front view three is the side view seven is the top view on The NAD also if I want to go to the opposite directions for example if I want to go to the back back view instead of the front view then one NAD one is the front view and control NAD 1 is the back view same goes for control NAD 3 Which is the left view instead of the Right View and control NAD 7 is the bottom view instead of the top view and if you want to exit this view you can simply click on the middle Mouse button and you’re going to exit this view also If you want to rotate around your scene using the middle Mouse button but you have a laptop trackpad and you don’t use a mouse first of all and second of all I’m just kidding don’t worry you can use these tools over here so if I click on the hand if I Click and hold on my mouse and drag you can see that I’m panning around the same same thing which we do with shift and middle Mouse button and if I use these buttons which are called gizmos I can click on the middle hold and then I can Move around and as you can see we’re rotating and panning around the SC just like we’re doing with the middle Mouse hold button so you can use the hand tool and and you can use these gizmos as well also if you want to access the orthographic views if you want to access The 2D views then you can use these as well so instead of holding them you can just click on these points so if I click on Z I’m going to go into top view X is going to be the front view and Y is Going to be the side view and as you can see it’s pretty simple but if you don’t have an npad and you don’t have a scroll wheel on your mouse first of all I highly recommend to get them if you want to get into 3D animations but if you Don’t want to use this and you still want to use the shortcut then there is a way to change that as well so if we go into edit and preferences on the top left corner then I can go into the key map and then first of all right here you Are able to change the selection method so if you’re more comfortable with using like older versions of blender like 2.78 and Below then you might be used to the right click selection so you can choose that here as well also if we go into the input and we check emulate npad and Emulate 3 button Mouse now these will give us different options so if I’m not mistaken emulate 3 button Mouse basically does this if you click on alt and then left click let me minimize this so you’ll be able to see whether so if I click on alt And then left click so let’s say you don’t have a middle Mouse then you can do alt and left click and rotate around the same just like you would do with the middle Mouse scroll read and also we did emulate numpad as well so what this does Is if you don’t have a npad if your keyboard doesn’t have a separate npad then once you enable this you will be able to use the numbers on your keyboard on top of your keyboard like you would use the npad so if I click on one on my Keyboard that’s front view this says NAD one but I’m actually clicking on top of my keyboard and then three on my keyboard is the side view seven is the top view so that’s how you can enable these shortcuts but for now I’m going to disable them because I have the numad And I have the mouse as well and I recommend you get that as well if you don’t have now that you know how to navigate around the scene I would recommend to practice this just open up lender file and practice navigation and after that let’s learn how to move the Objects inside the blender because that’s a very important part if you want to do animations so let me first delete my camera and my point SL because I will not need them so if I select my camera and then I click on X I can click on delete another way of deleting objects Is if I select my point light I can just click on delete and that’s it so now we’re left with the skew let’s learn how to move objects inside the blender and I’m going to demonstrate it by using the Ste default Cube and I’m not going to Delete the default cube a running joke inside the blender Community is that you always delete the default Cube and create a new one but let’s not delete this for now so select the cube and then right here we have the side panel if you don’t see it for example if it’s like This you can press on this Arrow to bring it up also the shortcut to bring out the side panel is T So if I click on T I can bring it out if I click on T I can make it disappear so if I bring out The sidebar I can see that we have different buttons here the main ones we will need are this which is called move this one is called rotate and this one is called scale so if I click on the Move tool you can see that different gizmos appear here we have like top Which is the z-axis y- axis arrow and an x-axis arrow and blender has three dimensions so basically the red line here is the xaxis green line is the Y and the Z is I believe the purple one but it’s not visible on the default you can enable that but it’s distracting and Most people don’t enable it but even though in math y AIS is the top one in blender you can remember that Z axis is the one that goes from top to bottom so we have these three different axes so if I left click and hold my mouse and then I drag my Cube you can see that I’m moving my Cube on the Y AIS which is this green line so I can release it and release it in a new position same goes for the red if I click on this I can move my Cube on the x-axis and I can Move my Cube on the y- AIS as well so click here drag it up or down and it’s that easy to move around the objects so I’m going to control Z multiple times until I get my cube in the starting position and yeah I showed you how to Enable the move tool now the second thing we will be using is the rotation so if I click on rotate you can see the gizmos change if I click and hold on the red and then move it down or up you can see that I’m rotating my Cube around the X AIS now the same goes for the green and blue axis so if I click on the green one I can rotate my Cube on the y axis and I can rotate my Cube on the z-axis as well like this and also if I click in the Middle I’m going to be able to Freer rotate the cube anywhere I want now I’m going to control Z multiple times as well and let’s show you the third option now the third option is important but we will not be using that often in animation we will mostly be using move And rotate but I’m going to show you the third one as as well which is scale in blender you are able to change the scale aka the size of your objects so you can see our Gizmo’s changed again if I click on this white circle if I click hold and Drag you can see that my cube is changing size so if I move it up you can see my cube is increasing in size and if I do it separately so if I move my mouse in the cube is getting smaller so I can make it bigger like this and I can make It smaller like this also I can scale my Cube on different axis so if I click here it’s going to scale on xaxis then y AIS and z-axis as well so that’s how you move rotate and scale your objects inside the blender but if you want to Get good at blender and if you want to be cool then I recommend you to get used to the shortcuts in hot keys let me control Z multiple times again and I’ll show you a faster and more efficient way to move the objects we can click here to Make all the gizal disappear click on the select box I can click on T to make the sidebar go away and then I’m I’m going to show you how you can move objects faster first we discuss the location so if you want to change the Location of the cube you can press on G you can remember this by G for grab if I grab my Cube you can see that I’m moving it around if I want to release it in a new position I can do left click again move it with G and then left click move It and then left click if I move my Cube and I don’t want to do that operation I can do the right click and it’s going to snap it back to its previous place again G is basically moving it freely but what if I want to move my Cube around on the Specific axis I can do that by pressing G and then choosing either X Y or Z so if I want to move my queue up and down I can press on G and then Z and then it’s going to only snap on one place and I Can move my Cube up for example if I want to move it on x axis I can press on G then X and same goes for y g y it moves on the Y AIS now if you’re a beginner feel free to practice with these arrows as well but you can use This method as well which most people use now let me show you another way of moving around the cube as well so press on G for crab and then if I click and hold on my middle Mouse and then I for example move it on the right side on the Y AIS it’s going to snap it only on the Y AIS and then if I click on G and then middle Mouse and then move it down you can see that it only snaps on one axis I like this method a lot so if I press on G and then hold my middle Mouse and I want to move this on the x- axis I’m going to hold my middle Mouse and then move the cube right on the line and it’s that easy to move the cube now what if you don’t like the location for example I moved my Cube here and I want to return it to its original place so I want to return it here then what we can do is press alt and then G so alt is basically resetting either the location rotation or even scale now that we’ve Learned how to move the cube with G let’s ask out rotation rotation H key is pretty easy to remember as well if I press on R to rotate I can rotate my Cube around like this if I press on RX I can rotate it around X And same goes for Z and then y AIS as well what if I want to Freer rotate my Cube if I press on R and then R again so RR I can move my Cube freely and I use this method personally very often while making Minecraft animations because it Allows me to rotate my object pretty quickly so if I do the left click I can release it in a new position if if I do the right click I cancel the movement and if I want to return my Cube to the starting Place starting pose then I Click on alt R and it’s going to reset or clear the rotation now let’s discuss the scale as well so we can change the scale by pressing s s for scale so if I press on S and bring my mouse out or in I can change the Size if I press on SX I’m going to scale only on the x axis if I press on s y I’m going to scale on the Y y- axis and if I press on SC I can make my C taller or shorter so I’m going to scale on y AIS also if I want to return it to the starting scale again alt s and then the cube returns to the starting position so I recommend to exercise with these you can either use like G method middle Mouse method or you can use like GX g y Or if that’s too hard for you then you can press on T and then practice with these so you can enable these arrows and then learn how to move the objects and I recommend doing that for like 10 to 15 minutes to practice and get very very comfortable I recommend you practice Moving around as well so like middle Mouse rotate shift pan around and so on and now that you know how to navigate around the scene let’s change some preferences inside blender to make our lives easier so if I click on edit and then preferences we can change different Preferences here I won’t change too much so that I don’t confuse use you so first let’s go into the system and let’s talk about rendering so if I click on system I have different options to choose here but default blender should be rendering with the CPU AKA Central Processing Unit But you want to change this to your GPU because it renders a lot faster so if you have a graphics card you can choose one of these options so if you have an NVIDIA GTX card you can choose Cuda if you have Nvidia RTX card you can choose Optics and if you have an AMD card I believe you can choose this option which is hi P so I have a GTX 1660 and I’m going to click on Cuda and then you can see my Nvidia GeForce GTX 1660 is enabled now if you have RTX again you Can click on Optics which is a way faster renderer and hip is for AMD video cards as well now I have NVIDIA GTX 1660 so Cuda Nvidia gtx660 enable the GPU now over here on memory and limits we have the undo steps and it says 32 so you’re Able to undo your last action 32 times so you can press contrl Z 32 times but I have it all the way up which is like 256 so if you click on hold your mouse and then drag this on the right side you can see that I’m increasing this number if I Drag it on the left I can make it zero but you know everybody wants to undo their last action so you can increase it all the way I have it all the way up because why not so on the system that’s all we need we need to enable our Graphics card and we can increase the undo steps as well now let’s go to keymap so on keymap we want to change a few settings so if I search for fly we have this shift Tilda for fly but the easier method to do is the shift F Method so if I left click here I can do shift F and now I have it set as shift F and the Fly method is very useful in terms of navigation you can click on shift F and then you can move around like you would move around in a video Again basically and I will show you that as well in a bit the second thing we need is frame select so search for frame selected make sure you’re in the key map name and then search for frame selected and on a 3D view where it says on the Third row it says numad period I recommend to left click and change it to F and I will show you that in a bit I will show you what that does in a bit as well so we mainly want to change these settings and also we want to change this In a graph editor so when we’re in a graph editor we can left click and then change it to an F so make sure it’s set to F on 3D View and in the graph editor as well and also blender has some add-ons which basically speed up our Workflow and make our lives easier so let’s go into add-ons and then search for node Wrangler so I’m going to type node Wrangler and then enable this node Wrangler add-on and it’s going to come in handy in the future episodes where we’re going to do the lighting and all The compositing and so on so enable this that’s all we need for now we’re going to download a few add-ons in the future in the future episodes but for now that’s all we need now click on Save the preferences but by default you should have auto save preferences enabled but Still click on Save preferences and turn it off now if you remember we change shift Tilda to shift F if I click on shift F in my viewport shift F and you can see I’m entering this view when I’m moving my mouse it moves like this now This view allows us to move in blender like we would move in a video game so if I press on W ASD as you can see I am moving around if I press on Q and E I can move up and down if I press on shift and then W I Can move faster and then I can use my mouse to basically rotate and as you can see it’s a pretty useful way to navigate around the scene shift s makes me move back and shift W makes me move forward faster also another way to go faster is if I click On W and then I use my scroll wheel to scroll up as you can see if I scroll up I’m going fast if I scroll down I’m going to go a lot slower and shift f is very useful especially when you’re in the camera view you can use shift F to move around In the camera and I’m going to show you that as well in a few seconds also another thing we enabled if you remember we changed frame selected from npad period to F let’s say I’m working on the scene and I’m very far away to this Cube If I select my Cube and left click I can press on F and then it’s going to jump me in front of this Cube and then when I orbit around the scene you can see that it orbits around the Cube easily so again if I’m far away to the scene I can Select this click on F and it’s going to zoom on the cube and I can rotate it around pretty easily and also let me show you how to create new objects new things in blender and let me show you how you can enter and exit the camera View because that’s important as well in terms of animation so I’m going to deselect the cube first for so shift a now we can create objects in blender by either coming here and clicking on ADD and we have different things to create or the shortcut for it is shift a so Shift a and then if I go down here where it says camera I left click and then I create a new camera but we cannot see it because it’s right behind this Cube if I want to move my camera out I can press on G and then move it somewhere over here Now if you remember NAD was useful to move around the scene with like 1 3 and seven and if I click on NAD zero I go inside this camera view now I’m looking at the scene from my camera and if I click on shift f i can rotate and move my camera just Like we did with the w method so I’m clicking W ASD q&e and I can move my camera and if I left click I’m going to place my camera in a new position but if I start moving and I don’t like this new position I can right click to cancel the Movement so you can shift f move it closer move the camera outwards and let’s place the camera somewhere over here if you want to exit the camera view you can press on zero and then it’s going to exit the camera view also if you want to exit the Camera view you can click on the scroll wheel and that’s it you exited the camera view now that we know how to navigate around the scene how to move the objects and so on let’s talk about the different panels here which might come in handy in the future so right Here on top we have different panels as you can see we have like layout modeling sculpting and UV editing and there are a lot more so the main ones we will be using is layout and we will spend like most of our time here also we will be Using animation in the future so if I click on animation as you can see my screens are changed they are rearranged in different order and right we have this different panels over here and if I click click on compositing I’m going to go into compositing panel and we will Use that in the future episodes as well so we will need to know animation compositing but we don’t need to know them like in depth we just need to know the basics of how to use them animation compositing and also layout so these three will be the main ones we will be Using while making Minecraft animations so let’s go back to the layout here and then I’m going to explain these side panels as well so right here we have the outliner in the outliner we are able to organize different objects and character characters and so on so as you can see This says SC collection and under here we have collection and collections are basically like folders where you are able to organize different objects so let’s create a point light so I’m going to click on shift a and then go to light and then point we have four different Lights to choose from and I’m going to create a point light because that’s what we had in the default view so let’s make this look like we have just opened blender so I believe we had something like this I’m doing this because I want to organize the importance of Collections and importance of of like organizing our files from the outliner so the first thing you might have noticed here is we have these names and objects so we have camera with a camera icon Cube and then point basically what we see here is also what we see here but Then in the text format so if I’m lost in a scene for example if I’m somewhere here and I want to go in front of my Cube and I cannot find it the reason outliner is useful is because I can left click on my Cube so basically my cube is Selected and it’s also selected in the 3D view Port as well so if I click on F as you can see I can jump in front of my Cube and same thing goes for the camera I can select my camera over here and I can select my point light and also if I Select my Cube it’s going to be selected in the outliner as well while you’re working on Minecraft animation projects you want to have different folders here for example you’re going to have different objects folder or collection you’re going to have like characters collection you’re going to have like it Collection and you can to have like Lights Collection and so on so let’s practice creating different collections here and feel free to follow along because this is a very important step to organize your folders the way we create new collections is if I right click somewhere here on this empty area and Then I click on new collection I have collection two but we want to name our collection so that it’s more organized so if I double click on this and name this something like camera collection you can see that I created a new camera collection so if I want to Move my camera inside this new collection there are two ways one is I can left click select my camera and then left click and drag it inside the camera collection and then release it and now I have my camera inside this camera collection and I can disable this and Then I hide the camera that way also if I click on this I bring my camera back let me show you another way of moving an object into a new collection if I’m inside my 3D View and I select my camera with left click I can press on M and and you can See we have different collections over here so if I press on this camera collection which I just created or I can also create a new collection which is going to appear here later so if I press on M and then camera collection it’s going to move inside the camera Collection as well now let’s practice and let’s do the same for the cube so select the cube create a new collection name this Cube collection or let’s have this something like objects collection I can left click on a cube M and then move it inside the objects Collection and let’s do the same for the point light and for the point light let’s create something like Lights Collection right click new collection double click on this to rename it Lights Collection and then if I left click am and then Lights Collection I can move it Here but let’s use the previous method which is Drag and Drop It Here and Now if I want to minimize these folders I can click here separately or I can just click on them together so if I left click and drag my mouse down it’s going to minimize them Together if I left click and then drag down it’s going to extend them so let’s minimize them and you can see how organized and clean they are so if I want to for example find my camera I have my camera collection over here I can extend this left click and then Select my camera and move in front of my camera if I want to hide my collections I can press this and track down or track up and it’s going to either hide or reveal the collections also I didn’t show you how to hide the objects inside The viewport so if I’m working on a scene and I want to get rid of this Cube temporarily I can press on H and then it’s going to hide the object if I press on alt H it’s going to bring it back and it’s that easy now that I showed you how To organize different collections let’s go down here now down here we have different properties these sections are called the properties but for now you don’t have to know all of them I’m going to show you the different properties and what they are basically I’m going to Explain them and we’re going to change a few settings here as well but it won’t be too much information so don’t worry now if I click here on this TV icon this is called render properties and right here it says EV and we have 64 and 16 Samples on the sampling tab now let me talk about the different render engines inside blender so blender has EV and cycles and there’s also workbench but workbench is not used for final renders now I’m going to talk about e and Cycles so so EV which is the default when we Open up blender is the real time render engine it renders pretty fast it renders in real time but the thing is it’s not as realistic and as high quality as Cycles so Eevee renders fast but it doesn’t have any like realistic reflection or Shadows but you can still Fake some stuff and make it close to cycles and you can use it in your animations as well if you have a weaker PC for example even if you have a strong PC and you prefer Eevee then you can go for that as well but for this tutorial We’re going to be going with with Cycles now Cycles is way more realistic rer engine there’s a lot of technical stuff involved here as well but to explain this easily cycl is basically way more realistic but it takes a way longer to render it doesn’t support like real-time Rendering you can render it in real time but it’s going to take a lot longer to load and also when you export the animation and in the final render so for example if I have a Minecraft scene rendered in EV it might take 5 to 10 seconds but in Cycles the same scene Might take like three four or even more minutes ending so basically eeve is real time and it’s pretty fast and Cycles takes way longer but it’s more realistic for this tutorial we’ll be using Cycles now under here as you can see we have CPU but since in the preferences earlier We enabled our GPU our graphics card then we can click on device and then GPU compute now if you don’t see this options or this option is like dark here then you didn’t enable your GPU from the preferences or you don’t have a GPU in Your laptop or your PC so you might be using C GPU as well so if you have a CPU and you don’t have a graphics card I recommend switching to Eevee because it’s easier to work in but for those of you who enable GPU click on cycles and Then click on GPU over here so that in the final render we will be rendering with our GPU now let’s go down here and we have sampling we have reort sampling and we have render sampling now these numbers are way too high and we don’t need to use them that high and basically To explain samples is that the more samples you have the better your scene looks but you don’t want to go way higher so less samples means basically your image is going to be noisy it’s not going to be high quality more samples mean your image is going to be cleaner More high quality and for the viewport we don’t need like 1024 we can click and choose like four and then I choose four and then I basically left click outside of it or you can click on enter to confirm it let’s go down to render and for now let’s choose Max samples and Let’s type something like 20 for now and in the future we’re going to increase it but for now we just need 20 and press on enter and over here as you can see we have this D noise option and be sure it’s checked on D noising basically Makes the image cleaner and it gets rid of all the noises so this is basically all we need to know for now about the render engines and render properties but under here we need to change one more thing we have light pads over here so left click on that to expand this menu Also if you want to minimize the sampling we can just click on this and it’s going to minimize the sampling and we’re going to extend the light paths under here we have reflective and refractive costs we don’t need them to be enabled in Minecraft animations so they’re going to increase render time And the quality is not going to be a lot higher so it’s not worth our render time so we’re going to click on these and then disable the reflective and refractive cos stics and then you can minimize them as well and that’s all we need to know for now but in the future We’re going to come back to the strr properties because it’s very important to know some of the settings but for now keep these settings and then come down here and this is the output properties so here we see we have 24 FPS if you’re familiar with video games you know what FPS is we have the resolution of the final image which is 1920 x 1080 so we can keep 1920 x 1080 which is like HD and standard today in the past 720p was HD we often use 720p but you know it’s no longer considered HD so let’s use 1920 x 1080 by default and frame rate I recommend to change it to 30 FPS so click on this and choose 30 you can keep 24 but 24 FPS is mostly used for like films and 30 FPS is mostly used for like YouTube videos and basic like internet Content and so on so you can click on 30 FPS choose it and I use 30 FPS and a lot of other people use 30 frames per second as well right here we have frame start and and then step and these things are basically the same that are here we have Start and step step means which frame we’re currently on but I’m going to explain those in detail in the animation chapter which is going to be part four so don’t worry about those for now and and then right here all we need to change is basically the frame rate so we Chose 30 FPS and then we’ll change the things later right here uh on the third section we have a few layers and we can enable different layers so that we can work on these with the compositing in the lighting episode so for now we don’t Need to enable any of these so I’m just going to leave this here for now right here we have the World Properties we’re going to come back to the World Properties as well and we have the material properties and this material properties appear only when you select The search an object I’m going to show you an example so if I select my point light this option is going to disappear instead I’m going to get this new lighting option if I select my Cube and left click you can see that the material options appear again now we don’t need To change any materials or colors for now this is like an introduction episode I’m mainly showing you how to navigate move around move the objects and change different settings so for now we’re not going to be needing this so we can leave it like this and let’s go back to the Render properties and for now these are all the settings we need to change for now as you can see we changed a few settings and if we close this our changes will not be saved and we want to keep these changes all the time we open Blender right and also one more change I recommend is if I go down here on this panel this is a timeline section so if I move my mouse on the edge I get these arrows so if I left click and drag up I can extend this layer I recommend to Keep it somewhere over the size or choose the size which you’re comfortable with the default one right here is pretty hard to see so extend your timeline and leave it like this and also I recommend to choose the start frame to zero so I can either use this to make it Zero or I can just type here type zero and then left click and move this to zero as well and now I changed all of these settings and I want to keep them every time I open blender if I close this the changes will not be saved so what you Can do is click on file and and then default and then I can click on Save startup file and then I click on this again so left click and then now if I close blender and open it I’m going to be greeted with everything that we changed so we’re going to have These collections we’re going to have these settings the same so basically we’re going to have like reflective and reflective turned off we’re going to have zero as a starting frame and it’s pretty useful so that concludes part one of our Series in the second part we will import our world and our character Inside blender and we will set up our scene as well so on this first part I showed you how to navigate inside blender how to move around how to move your objects how to create and delete objects and we also change some preferences and our settings to make our Lives easier and make our workflow a lot faster and I also showed you different panels and settings and now after this you will be ready for part two thank you for watching this episode if you want to support this Channel and get cool rewards then you can check out my Patreon page linked in the description and if you finished watching this well done on following and congratulations on taking the first step into the 3D animation Journey if you’re watching this by the time it’s uploaded then part two will come out soon but if you’re watching this a bit later then you can Click on the screen and you will be able to jump into part two so see you there Video Information
This video, titled ‘Minecraft Animation Tutorial (Blender 4.0): Part 1 – Bender Basics’, was uploaded by Woodplank on 2023-12-13 13:51:39. It has garnered 656 views and 65 likes. The duration of the video is 00:39:15 or 2355 seconds.
#minecraftanimation #blender #minecraft Download Blender: https://www.blender.org/download/
🎬 Welcome to the first part of our exciting “Minecraft Animation Tutorial” series! 🎮 In this episode, we dive into the fundamentals of Blender, focusing on the latest Blender 4.0 release, with insights applicable to Blender 3.0 and Blender 2.8.
Become a member on my Patreon and get various rewards to elevate your animation skills and knowledge: https://patreon.com/woodplankmc?utm_medium=clipboard_copy&utm_source=copyLink&utm_campaign=creatorshare_creator&utm_content=join_link
🔍 Curious about how to make captivating Minecraft animations using Blender? You’re in the right place! This Blender tutorial covers the basics to get you started on your animation journey.
🌟 Whether you’re a seasoned Blender user or a complete beginner, this video will guide you through the essentials, providing a solid foundation for your Minecraft animation projects. Learn how to bring your virtual worlds to life with our step-by-step instructions.
🤔 Ever wondered how to create intense Minecraft fighting animations? Look no further! Our tutorial breaks down the process of making dynamic Blender sword fights. Discover the tips and tricks to make your animations stand out.
👊 Ready for action? This Blender animation tutorial covers the methods and steps of creating engaging fight scenes, offering insights into Blender fight animation techniques.
🔄 Missed the previous versions? No worries! While we explore Blender 4.0, the concepts discussed are applicable across Blender 3.0 and Blender 2.8, ensuring everyone can follow along.
🚀 Dive into the world of Blender Minecraft animation with our user-friendly and FREE tutorial series consisting of 5 detailed and step-by-step chapters.
🎥 Subscribe for upcoming tutorials, and let’s craft some epic animations together!
00:00 – Introduction 01:45 – Downloading Blender 02:17 – Organizing Folders 03:10 – Opening Blender 04:30 – Blender Navigation 05:15 – Selecting Objects 07:00 – Orthographic View 08:20 – Alternate Navigation Methods 11:00 – Moving, Rotating And Scaling Objects In Blender 18:40 – Changing Preferences 22:10 – Fly Navigation 22:15 – Frame Selected 23:50 – Creating New Objects 24:20 – Camera View And Navigation 25:20 – Different Panels 26:10 – Outliner And Collections 30:35 – Properties Panels 37:40 – Saving Startup File 38:35 – Conclusion

