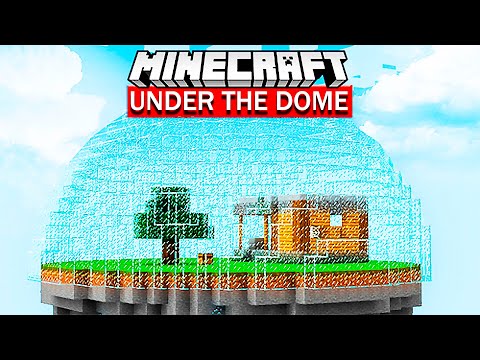
Hey what’s up youtube in this video i’ll be showing you how to make your very own never house by the way i have also designed the inside for you but you’ll have to wait until the end of the video to see it here are all of the materials That we will need to make our house please do make sure that you have access to all those materials and enough of them as well and now that we have all that stuff we can get started so the first thing that we are going to do is place a row of five Polished black stone bricks extending up from the ground so one two three four five we then want to extend right by two one two and then we want to extend all the way down to the ground and on the ground you can connect it back together I want you to extend the right hand side of this structure backwards by one row i then want you to extend the entire row to the right by one row as well i then want you to take the top of this and extend it to the right by four one two three four And then extend down like this and then i want you to extend to the right an entire row extend forwards an entire row and then take the top and the bottom extend to the right by two one two and one two and then join top and bottom just kind of like this So you can even join the bottom of the inward part together like so and you can even place upside down polished black stone stairs or polished black stone brick stairs that’s a tongue twister in the two corners we can then place warped planks directly behind and then that will give us this really Cool effect where our door is going to be as a matter of fact we want to have three warped stairs extending outwards from the bottom two corners of the entrance like this we want to have them placed upside down like so so if we can it’s hard to place Without other blocks so like one two and three just like this and i’m just going to have to excavate this area a little bit like so and then if on the end you took yourself some chiseled polished black stone and then join it together using warp stairs Place soul sand on the inside of the left and right extending backwards towards the door and then we’re going to have polished black stone bricks in between the sole stand extending further back so just like this right what are we going to do next well i want To make the upper part of the build as it is a little bit trickier so to make the upper part of the build we want to focus on this row of black stone brick here so we’re actually going to extend it one row back like so to create a little bit of a Platform and then we are going to one row inwards on the platform that we’ve made so on the left and right sides this lines up with the left and right of the entrance we want to place a row of five one two three four five blackstone brick one two three four five Extending up from either side of the entrance like this and then you can join it together at the top and you can place polished blackstone brick stairs in each one of the corners like this also we should create a little bit of an entrance i think i mentioned earlier That this is the entrance hopefully it’s obvious if even if i didn’t mention it with all of the stairs and stuff but we’re going to have a door here and this is going to be a never portal it’s only really accessible from the inside but as you actually like exit the portal You can easily just jump out if you like so that’s sort of the reasoning for having it there The next thing that i think that we are going to do is we are going to focus a little bit more on the walls of our build so why don’t we come to the right side of the build now and we are going to extend the Right of the build backwards so this row of black stone here we’re going to extend it backwards with the bricks 10. so 1 2 3 4 5 6 7 8 9 10. and we want to extend the entire row backwards like this so ten entire rows will make us a nice wall And we will also want to extend across the back of the build as well although the back of the build is a tad bit different you see we want to take the top and the bottom and we want to extend it inwards by two so one two And one two and we want to join top to bottom like this and honestly why don’t we also extend the opposite side of the back opposite side of the build backwards by ten as well so one two three four five six seven eight nine ten we’ll extend the Entire wall we are going to texture the walls by the way all the way around this is just a very simple method of starting off the walls it is going to get way better and then we’re going to take the top and the bottom of the row we’re going to Extend it inwards one two and also one two and then we’ll join it top to bottom like so right and then we want to extend those inward rows well inwards we want to extend the inward rows inwards like this and then we’re going to join the wall Together like left to right just like this so right in the middle we’re going to have something which should look like so so what we will have is this shape which is fantastic the next thing that we’re going to do is we’re going to make a couple of windows On the back here so the windows basically we want one here on the left so that’s one row away from the left and we also want one here on the right so we want to leave a gap of one on the right so that kind of centers our windows they Want to be three rows high in total so about this high and we want to fill them in using black stained glass pane um you could also use say cyan glass that might look cool i might even test it a little bit later we’ll have to see The corners of the pillars that we’ve created on both the front and the back actually the middle of the pillars want filling in or with the warped planks so this will actually give us our second color so there’s two primary colors here we have the black Stone which is well black and we have the warped planks which i would call a cyan color rayleigh and that really helps to it helps to establish a nice color scheme to place it in the corners like this so what do we have to do next I think that we’re going to do some work on the left and right sides of the build and also the back as well and the way that we’re going to do it is we’re going to place on the left side here we want to leave a Gap of three so that’s one two three and then we want to mark out the next part which would be the fourth block we want to leave another gap of one two three and then we want to mark out the next block which is the fourth block and we Want to extend these rows upwards up to the top and we want to in the middle of this area we want to knock out the free middle blocks and we’re going to place black stained glass panes so in a window formation essentially and we want to do the same on the Opposite side and i’m thinking that it might be cool to use iron glass we’ll test that out later on um on the left or right side it doesn’t matter which you want to count inwards from the bottom one two three find the fourth block mark it out one two three find the fourth Block mark it out extend it upwards like this take the middle destroy it and place some glass pane in the center just like this and that is looking pretty good so what do we do on the back honestly the back is looking pretty decent at the moment And i think that it might be time to make a little more of the upper part of the builders i think that that will help shape things a little bit so i want you to come behind the portal that we’ve just made and what we’re going to do is We’re going to extend the left and right sides of the portal backwards an entire row just like this we’re then going to take that entire wall and we’re going to extend it outward so do this simultaneously and equally on the opposite side we’re then going to take those two walls That we’ve created that we’ve extended back and then outwards and then we’re going to extend them back by six rows so one two three four five six and one two three four five six and these entire rows want extending backwards just like this so here like this and like This so that’s looking pretty good so on the back of the build we have something which would look like that we’re then going to take these two rows and we’re going to extend them inwards so the ends of this we’re going to take the two rows and we’ll extend them Inwards we’re then going to extend the two rows outwards one row towards us like so and then we’re going to join them left to right so just like this Fantastic so a little bit later on we’re going to be extending the back of this out and we’ll be able to place a little bit of a walkway around here but if you wanted to you can just extend this road down and kind of just join the uh the Top corners of this together to form a solid shape we can even take out the warped planks along the top here we can destroy the water planks and we can make this entire platform this entire surface black stone brick so just like this right so you can see that we’re now Dealing with a bit more of a solid structure i think that we’re now going to add the fanciness as i will call it around the top of the build so on at the front of the build um we have the pillars don’t we on the left and the Right well on the right pillar out we’re going to start here i want you to place upside down polished black stone brick stairs along the outsides of the pillar i want you to place a chiseled black stone what’s it called chiseled polish the black stone in the corners of the pillars like this And we’ll decorate those later on so we’re going to extend around to the right side of the build we’re going to place upside down polished black stone brick stairs extending across the top of this extending all the way back we have the same pillars on the back so we can Place the upside down and polished up black stone brick or yeah the polished black stone brick stairs i’m still learning the names of these ladies and gentlemen and there’s a lot of words involved and then we want to place the actual chiseled polished black stone in the Corner uh we want to place it on the end here as well where we have the upside down stairs and then we also want to just extend to the right we want to go right by one two three and then we want to place the chiseled polished black stone three upside down stairs Chiseled polished black stone extend round the corner free upside down stairs move through place three more stairs move through place three more stairs you can place a chiseled polished black stone on the end three more upside down stairs and then place a chiseled polish black stone on the end there as well so You can see that is actually going to make things look a little bit fancier as we go around i also want you to mark out on the sides of the build this is a little bit weird but i want you to wear the stone brick pillar is here just Mark it out with an additional stone brick on the left and right sides like this that’s perfect um oh we also want to extend the two inward polished black stone inwards we want to place the bricks just behind and what that will actually allow Us to do we can place a row of warped fence extending from the bricks that we just placed and it can kind of just extend backwards and connect to either side of the portal like this so we can have an effect that should look a little bit like that I think that it might be best that we start placing some stairs on the side of here because it’ll actually help us in making some of the rooms that come off uh adjacent to the central portal room so one of the good reasons for placing those um stone bricks a little bit Earlier so this one right here connected together with the stairs is that we can now place a warped stairs on the side of it we want to then extend the warped stairs backwards by six rows one two three four five six like this and then we want to find a way To extend these stairs up and join it to the center part of the build exactly how you would expect a normal roof to extend so however you want to do it it doesn’t really matter as long as you create this effect here underneath these stairs we’re going to place upside down never Or upside down warp stairs rather and then we want to fill inside of this in using black stone like this we’re going to destroy the two middle blackstone because it’s just easier to have used blackstone and we’re going to place some windows here the way that we’re actually going to be getting Inside of the portal is that we are going to be creating a little entrance somewhere here-ish uh we’ll we’ll actually figure that out a little bit later on but we’re going to be creating a little portal inside um anyway so now that we’ve placed these stairs here on the Front um we want to place the upside down warp stairs along the back we want to place the polished black stone bricks but with the end goal of placing some glass in the middle but i find it so much easier to place glass in between things rather than as a primary sort of Placement material here and then on the opposite side we want to do the same and before we do the exact same thing to this side i feel as though that i should just show you what this looks like in its completion so you can see that we Have these stairs we have the little window kind of like encased it’s like layers upon layers of depth and as we swing around the back we also have the equal but opposite thing so we actually want to do the exact same thing to this side as well i just thought that i Should show you that side too so now that we have done that we want to place our walk stair on the outside of this brick and we want to extend the stair backwards by six so one two three four five six we then want to find some sort Of way to extend these stairs up and inwards until they eventually connect to the central part of our build so extend the stairs up and inwards until they eventually extend to the center we’re going to place upside down warp stairs wherever we can we’re going to place the polished black stone Bricks on the inside but again that’s with the end goal of either you can leave it as an entrance or you can place the glass it’s actually a complete choice i think that we’re going to use them as either you’ll see what i mean a little bit later on so we’re going to Then place the upside down stairs which helps us to frame the inside of the wall here and then we can take the two middle blocks and then we can destroy them and place a little bit of glass there so that’s looking pretty good so you can See we’ve added a good amount of detail here now we’re going to place warped fence all the way along the back here We might even consider extending the back of this outwards a little bit or at the very least the middle part of this to create a little bit of depth so something that we could do here is that we could take from like where we have this warped stair we can Kind of like extend it outwards like this an additional row and we could take this warp step and we can extend it outwards like an additional row like turn it sideways extend it out an additional row stick the chiseled polished black stone in between and then add another row of Bricks and then that will give you is a little bit of a walkway so you’re going to want to destroy the original chiseled and extend it outwards or the original polish and extend it outwards it is actually chiseled isn’t it no it’s not yes it is chiseled polished black stone I always think of it in my head as polished chiseled black stone but it’s actually chiseled polished you guys get the idea very confusing so that will allow us to walk out onto this little balcony and that’s what this area is it’s kind of like a little bit of an Entrance um it’s on the side here if you leave a gap of one here on the left and just create a double gap and then on the right if you do the same thing but on the right we’re just going to have a little bit of glass pane inside and then That will do us and honestly that’s looking pretty good so now you can walk out the back you can walk out onto your balcony we have some roofs kind of like framing things a little bit we’ve got the sides of the build done um What do we want to do next well i feel as though that i want to make the upper part of our house which i would call i suppose i’d call it a spire it’s kind of like right in the middle kind of like maybe what a church would have although I’d i guess that this doesn’t particularly look like a church maybe in shape but not really in the materials or the locale so what are we going to be doing next well we’re going to extend the middle of this upwards we’re going to extend the two middle rows on the front of the House this row here we’re gonna extend it upwards by two so one two like this what we’re then going to do is we’re going to take the three middle rows of the five that we have just extended upwards and we’re going to extend upwards by two And then we’re going to take the top middle row so just this middle row right here in the right frame we’re going to extend it all twice by one and two so you can see how it creates kind of like a long spire effect and we want to Quite honestly you can just extend this front to back so you can just extend this right onto the back of the build we can even extend at these sides as well so here here we just want to have the exact same effect the the back is a little bit Different to the front in the fact that there’s not a nether portal there and there’s also like a little entrance and a window but and we can make all of those differences a little bit later so we can extend this back and this back as well And this back and then we can just fill this in so we can just create quite a solid structure although it’s not going to stay that way for long it’s going to be a little bit different so now that we have this i want to add a roof to it so The roof to it is actually quite simple to make it’s made out of warped planks and warped stairs and basically what we’re going to do is we are going to place a row of warped planks on top of the black stone that we have on the Right and left side of the build the planks are going to overhang the front of the build by one and the back of the build by one so we have a row of planks and then a row of stairs on top and then we move on to the next layer so Then we add on like the next part of the roof we add a row of planks and then we add a row of stairs and we keep doing this we extend up and inwards exactly how a regular roof might and we place the rove planks and then the row of stairs Eventually we reach the top and we’re just going to have a row of planks extending front to back kind of like this and then on the opposite side the build will have the same thing as well so we’ll just have the planks sitting on the black stone front to back like this And then we’ll have the warp stairs so on and so forth so it’s it was kind of interesting is this house has three complete different styles of roof you’ve kind of got your classic style which is a little bit below us which is just the stairs you’ve Kind of got this which is a little bit more of an advanced roof and when we actually get to the actual main entrance it has yet another style too um we’re going to place upside down warped stairs underneath the overhanging parts like this stick a plank right in the top middle so That’s looking pretty good and i really enjoy this style of roof i really like it almost looks a little bit medieval to me i don’t know why i separated the words medieval but it looks a little bit med evil to me separate it even more and we’ll we’ll have something which looks a Little bit like this so what i’d recommend doing above the portal that we have here on the front is knocking out the three middle blocks turning them into glass so that we make a window not that you can really even see it that much and doing the same thing on the Back of the build as well so on the back of the build one two three just up at the top you can see it lines up with the one on the front and having the exact same thing so now that we have done that what are we going to be doing next We should probably make the entrance area because then we can start decorating a bit so for the entrance area we’re actually missing one material to my chagrin we need ourselves the blackstone wall here we go polish blackstone brick wall it will have been in the item list but i I forgot myself quite honestly so we needed that and we need ourselves the warp slab we need ourselves i want to make sure that this is right and that that is actually that but then later on we’re going to be using the warped fence chain warped buttons lanterns will need a Warped door we’ll also need obsidian and we’ll need some other things as well no doubt so what do we want to do next so on the entrance area here we’re going to place two polished black stone brick wall extending upwards from the two corners we’re then going to place Is it only two or should we make it three hm we might make it free okay so let’s do three polished black stem brick wall on the corners and then we want to place warped slabs on the walls we want to then extend the warp slabs forwards We want to extend them like down and out and then we want to connect them back to the house kind of like this and you want to do the same with the any slabs that we have so like the other hanging part you extend down out extend it back to the house Like this and then take the super slab and connect it backwards we then want to take the overhanging slabs and we want to extend them in and up and in and up like this and then we want to join these back to the house as well so we want to extend These slabs and then this makes the third different style of roof that we have placed on this house which i think is actually pretty cool the middle row of slabs will extend backwards and it can actually join together in between these two stairs here and um this is the sort of effect That you’ll have so i i really like this i quite like the variety in this build and you might be looking at this and you might be like ah it looks a little bit plain but here’s how we can make this look a little bit better anywhere that you have the polished chip The ch let’s let’s get this right the chiseled polished black stone you can place buttons on the side of it i actually think that this makes a big difference you cover the little it kind of looks like a pixel or something or kind of like a little face you cover those parts Of it but you add another color element to the block which i think is really cool it just highlights the build a little bit in certain areas which i really like there’s a few different places that this house also benefits from some hanging lanterns i like to do this in the same Way so underneath the chiseled uh the chiseled polished black stone i like to have a fence a chain and then a lantern hanging underneath like this on each one of the four corners of the build we’re also going to be doing this a little bit uh to the top As well i say a little bit it’s actually the same sort of thing it will make the build brighter it will make it lighter it will make it it’ll also just kind of like add a vibe like i’m specifically using by the way the regular lanterns rather than what i Assume they’re called warmth lanterns i actually haven’t even used them yet anywhere um the reason that i’m doing that is because i like the come on there we go i like the color contrast of the orange against the black and the cyan i like it a lot um we also want to Do it up here so where we have kind of like the spire i want to have the exact same style of lantern hanging off each one of the four corners of the build so we’re going to be doing exactly that so hanging off each one the four corners fence chain Lantern feel free to change it to i i’m going to check the name on but it’s got to be warped lanterns right that’s what it’s got to be called i mean everything else is warped of that particular color so surely um it’s got to be warped lantern i think that to satisfy my Curiosity soul lantern well i was wrong not the first time okay so we’re using the regular lanterns instead of soul lanterns i bet that was driving some of you guys crazy i’m very sorry about that um we also want to create the never portal inside of the Build so basically as best we can we want to place obsidian around the edges of kind of like the stairs constructed area so we just want to place obsidian in this pattern just kind of like around the stairs area and we want to light it up using a flint And steel or however you want to light it up if you want to get a bit fancier than that and you can see that adds yet another cooler element to the build which is really really cool really really interesting not only that we’re actually going to Make use of the are we we will not we will need our doors and um we also need soul soil and never water and the soul soil is wrong how is it that i have managed to get the wrong material we don’t need soul soil although it would seem We it is identical we need soul sand soul soil actually looks quite nice and it would make sense that in seoul soil you could place neverwar i don’t know why you can’t but anyway the reason that we have salsa soul sand instead of soul soil is so that we can place some Netherwart along the left and right sides of our walkway that lead into our house you can even use either some wall or you can use some fence to kind of just like clad the outside of your little porch area as well i originally used a wall but i quite Like the uh i quite like the fence as well we’re gonna stick a door in the in the middle where the door should be around the edge of the build we’re going to place soul sand not uh not so soil apparently apparently never wart needs sand Not soil it is the succulent of the plant world of the never plant world it would seem apparently it can only thrive in sand and not soil who would have thought about that that that a plant literally growing in the midst of hell or however you would define this area Would be so picky as to what it grew in it’s literally surrounded by fire and lava and yet it needs soil and not it needs sand and not soil what anyway so we’re going to be filling all of the sand in using never wart because it’s just nice And colorful like obviously around us we have the never rack um which is nice and colorful as well like it’s a red but it’s not as vibrant as the neverwood so um you can even if you like kind of like add a little bit more Soul sand kind of like a round you could even place it underneath oh no i knew that would happen you could even place it like underneath the porch area as well or you could use a different block underneath the pouch i’m just gonna get rid of that there we go I’ll just replace it here we are you could even use a a different material just like underneath the porch but i quite like it and do you know what material i actually really do like is uh i really love the crimson crimson nylon and i quite like the warped nylon as well but The crimson more so because uh i really like the color red quite a bit but um you can place this if you kind of want to just like outline your house a little bit um just to kind of like make it stick out um if you want to have you know just Just make it a little bit fancier looking i think i really i just like the color of it a lot like i know that it’s red on red but there’s something about the contrast of it even against the color of which it’s of its own milk Really um i i just really like how it looks it’s it’s the same with the never was the exact same thing but it’s just such a nice color it’s um it’s very powerful color i really like the i also really like using the two blocks the two new blocks in tandem like um The crimson the nylon the crimson nylon and the warped as well like just the red and the cyan just go together in kind of like a weird way they’re kind of like um almost opposite colors kind of like like white and black or something like that But i they just they just look really nice together so says me anyway so um i think that this really helps to kind of like outline the house a little bit and if you wanted to you could use either soul sand or i would recommend because i don’t think it slows you down But i could completely be wrong about this soul soil to kind of um just make an entrance in an ideal world we wouldn’t have built this housing kind of like in front of this little ridge here but you know it is where it is so kind of like this would Look cool and i think that just helps to frame the house a little bit you know it just looks as though it’s integrated into the nether it almost looks like a little bastion of of of hope in the nether despite the fact that it is a Little bit gothic looking i really do i think that just goes quite nicely and what else can we do so on the back of the build here we have to add a door boom we’ve done that um you can get in and out of this particular side of the House if you want to get out onto these balconies i’d recommend removing the windows or perhaps on the sides here you know you could create kind of like a can you you can’t really create a gap you might just have to remove the windows if you want to get out onto These balconies quite honestly or you could perhaps uh introduce like a ladder on the side and that can be like a little sneaky secret way we’ve actually finished this house tutorial but i just want to try out cyan glass because i have a feeling that it might look good Gonna have the black glass out on deck just in case oh i do like it the okay so the cyan glass i just that just reminded me of will smith from the most recent uh youtube rewind ah that’s hot i really quite like the that was horrible uh anyway That was the worst impression ever anyway so that’s the cyan stained glass i really like it against the black actually that looks so good i honestly if i hadn’t have already have made the item list that uh that that would be there instead of the black but um it’s up to you it Depends sort of like whether you want such a striking contrast but i’m replacing it all now because i i think that that looks awesome i really like it yeah there we go yeah it i mean the black’s cool because it kind of like it’s it kind of like just fades in Like you can barely tell that there’s a window there but the cyan cyanide just goes so well with the rest of the colour of the house i i just really like it almost may it it highlights the windows in such a way that they almost have kind Of like a little bit of a glow to them i i don’t know if you added like a light source behind them i think that that’d look really cool but ladies and gentlemen that is the house um i’m going to decorate the inside of it For you just so that you kind of get a little bit of an idea of how you could decorate the inside if you wanted to or how much space that you have or how you might lay it out but that’s the house actually made i hope that you’re as Happy with it as i am so this is what your house will look like once it has been 100 fully completed ladies and gentlemen i haven’t added any more additional details to the outside so we should both hopefully have the exact same build but the inside has changed drastically so Why don’t we take a look at it so that i can give you a little bit of an idea how you may want to lay out how it was designed so the ground floor i have chosen to have a brewery a giant brewing area and also an enchantment area with a Little bit of a storage and we also have a little bit of an indoor farm because i think it kind of looked cool and we have some of the nice new nether plants on a table in the center however we do have a second floor so if we come up here we Have a bit more of a general crafting theme up here kind of like built into the alcoves which i think is really really cool so we have one alcove on the left and one alcove on the right with all of the different crafting implements that we could need we also have access To the nether portal which is very important as well and we have a really cool set of army here too and finally if we head up to the third floor that’s right there are three floors then we have the bedroom with the ender chest with a bit more storage now obviously it Can be laid out in a completely different way you’re more than welcome to but i just wanted to give you guys a little bit of an idea of how much space you have and that’s it i do hope that you guys have enjoyed this tutorial if You have please do remember to hit that like button as it really helps me in the channel out very very much if you’re new around here please do consider subscribing and clicking that little bell next to the subscription button that will ensure you get all my videos Sent directly to your sub box and if you do want to make anything else buy me check out the card system description below at the top of the comment section for more thank you so much watching everybody i love you all very much and i’ll see you guys in the next one goodbye You Video Information
This video, titled ‘Minecraft Tutorial: How To Make A Nether House “2020 Tutorial”‘, was uploaded by TSMC – Minecraft on 2020-06-30 15:25:00. It has garnered 109642 views and 1938 likes. The duration of the video is 00:36:45 or 2205 seconds.
In this tutorial i show you how to make a Nether house for all of your nether exploring needs 🙂
If you are looking for an awesome and super simple, easy to make modern mansion this video is for you! for pocket edition ( mc pe ) xbox xbox360 , ps , ps3 , ps4 , pc
#tsmc #tutorial #minecraft
Minecraft Build Tutorial | Modern House 1 “2020 Tutorial”
#Build Minecraft #Minecraft #Wildlife Minecraft ASMR #ASMR #MSMR #Architecture #build #tutorial #architecture #modern house #Wild house #wild architecture #architecture #LetsBuild #LetsBuild #Comoconstruir #Hurmanbygger # Π ?? ναοικοδομ? Σουμε #Wiemanbaut # Какпостроить #Cachxayd? Ng #Hogyanepitsunk Check out My Instagram! instagram.com/tsmcyt/