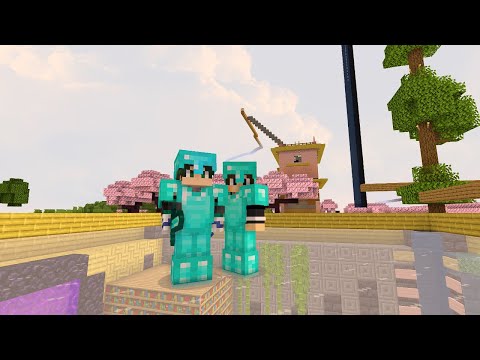
Hey what is up guys and welcome back to part 2 of our Nordic style mages house tutorial today we’re gonna be finishing up the exterior of this which includes a little small roof in the front of course the mages tower in the back and then to Finish it off we’ll be making the main roof of this thing and also some of you have been wondering what the shortage of videos on my channel is for so I will cover that hopefully at the end of the video as long as I don’t forget so Without further ado to begin this thing what we’re gonna grab first is our dark oak wood logs and you’re gonna skip from this thing we’re gonna go one two three four and then on the fifth block is where we’re gonna do a little tiny pillar of three with our dark oak wood Logs and then after that you’re gonna grab your stone brick half slabs and then on the bottom half of this block you’re gonna place one and then go up one from there and then we’re gonna start to make a little tiny archway so we’ll go up one more and then to top it Off we’ll do that final one right there and then I think that should be good for now so we can go ahead and start coming back down on the other side until we get to that block so right now it is pretty even in symmetrical although it does Look still a bit too plain so we’re gonna switch it up by grabbing our stone brick stairs placing this one right here and then we’ll go on the other side and do the exact same thing and then of course since this side does look sort of Bland and a little bit too boring I guess we’re gonna sort of raise this up and give this a nice little I guess stone brick outline as well and then this is where we kind of have a choice you can either do all spruce wood or you Can mix it up and do this so if you want to do this you can keep your stone brick half slabs out and then just kind of give yourself a nice little angle that goes up all the way until about here I guess we can leave it to if you want you Can have that covering up a little window or you can just delete it so the whole window is showing either one it’ll look just as good now for our next step what we’re going to do is grab our spruce with half slabs and we’re just Gonna do is sort of like pyramid shape I guess you could call it or just kind of slowly crests up creating nice little stairs although that’s not what’s gonna be used for and then the left side of course will be the exact same and then after doing this as long as you didn’t Argue fix it yourself you may have noticed that there is this weird little stair right here which looks quite odd to be honest so to fix this up all we’re gonna do is delete that stain and replace it with a stone brick half slab and then we can fly in here delete These two iron bars and this cobblestone block as well not to match it up both sides we’re gonna switch the cobblestone block with this stone brick half slab and then we’ll do the same thing right here so nice little mini archway under there gets everything looking all nice And fancy and then the roof ends up being a lot more symmetrical as well which is quite nice especially since this is sort of a doorway I guess and is there anything else we could do right here I’m gonna try placing this pillar in here I guess you guys could do this If you wanted to although that doesn’t really connect to you nicely but it does if you’d like the symmetrical look you can definitely do that although I’m not so sure that I’m digging the whole thing with this little hole right there I think I’ll leave it for now I guess it Is like a nice little cool touch but we are going to move on so the next step that we’re gonna do and by the way we are going to be saving the tower for last so the next step is to do the roof now the triangle shape so we’re gonna do On the roof are getting placed one right here and then if we move to the left side we’re gonna do one on this as well and then we’ll do one on the back and then if we move over to the right side of the build we will also be placing one right here So after we’ve done those the general shape will just be the same for all of them so all you really need to do is copy this first one and then you should be good so for this we’re gonna go up two on both sides like this and then We’re just gonna continue that pattern all the way up until we meet in the middle so it’s going to be a total of six blocks tall in the end just like this and then the sort of design in the middle which kind of be an upside down T If you want to you can also do this little thing like that which i think is pretty cool and there we go so after you’ve done all those you’re gonna end up with one on the right one on the front and there’s this little corner thing in the back which i think is Pretty cool and then the next step is actually quite easy to be honest all it is is connecting all of these together just to make it easier to place in the stairs because when you don’t have sort of like a little guideline the stairs can tend to face the wrong way which Does get sort of annoying and just makes the whole building process not as fun so just by doing this little quick thing with these cross beams it does make building a lot easier and I guess in the end a lot faster as well which is quite nice because you end up building Or buildings within a shorter amount of time so just keep doing this all the way around to tell all of them are connected together and then we’ll move on to sort of the little outlines of the roof so after completing all those cross beams that should end up looking like this and You may notice that this section right here does look a bit plain and could honestly use a window so if you guys want to you could place one in there but for this case since I do want to draw a little more attention to the tower I’ve Decided to leave this off just so the roof looks a bit more plain and sort of draws the I guess whoever’s running around on the ground it draws their attention to the tower itself so our next step for this is to actually grab some stone brick full blocks so we’ll Grab those really fast and I guess we will also need the stone brick stairs and maybe the half slabs as well so just keep all those handy just in case now to make this a little I guess outline of the roof not sure what the real legit name is I’m sure it’s Floating around out there somewhere but you’re gonna do one of these on the top of each one of the the dark oak wood logs except on the very tippy top although we could use one you know I think we actually need one for this build so we’ll put it on there so I Guess my statement still stands true so just do one on top of each block and then it’s also a to be moved over one to the right so it creates a bit of an overhang so just keep that in mind and then on top of each one of the full Blocks you’re gonna place a stair and then the same goes for underneath them just to kind of make them flow a bit nicer and give them a bit more depth and I guess what else it just really makes it look a lot more fancy than if You just did all the weird little jiggy jaggies which is really just not it it doesn’t look as good I’ve seen some people do it where it’s just like this so there’s just this empty little block or a box and personally I think that looks quite ugly to be honest there’s Some cases where it can look good if you don’t have any of these big full blocks and I guess that can work for some people but I’ve never really managed to figure out how to make it look good when doing that so you’re gonna end up with This in the end and then to make that little Nordic design that I usually use there are by the way lots of ones you didn’t do so you don’t necessarily that could copy mine I just wanted to sort of keep it nice and simple so you guys Could follow a little design along but I know there are like dragons or wolves you can make for these things or just bigger flicky bits so just if you want to and you’re feeling crazy try some new stuff out maybe you can come up with your own little thing that no one’s done Before which would be quite cool so I’m gonna fill in the last three and then we’ll be able to move on to actually adding in most of the spruce wood to our roof so after all those little triangle design things are complete we’re gonna move on to the next step which probably Is the easiest step you’re going to encounter while building this thing and that’s just to connect all of these roofs together with the stone brick stairs across these little empty spaces and then once all that’s done we can move on placing in our spruce wood so For this all we’re gonna do is pretty much copy the pattern we did with the stone brick except in two different materials as we go up we’ll do a full block skip one whole block skip one and then full block and then where we have the stairs on the spruce wood or excuse Me stairs on the stone bricks that’s where we’re gonna have the stairs in the spruce wood as well so it’s pretty much it’s gonna be quite simple just do that all the way around for now go ahead and leave the top open like this and I’ll Figure out a cool little design we can do for that so when you’re done filling in all the spruce wood for the roof I figure what looked best was just adding a bunch of these stairs sort of all combining and facing towards the middle I was going to at first go for like a more rounded out shape but in the end it just did look a little too weird in my opinion so now it’s time for probably what some of you guys have been waiting for the most in this build and that is The mages Tower honestly not sure how this will turn out in the end but I’m probably got a guess it’s gonna be hopefully one of the best-looking parts of this build although that may take some work so to begin with what we’re gonna do is start In this corner right here and this is by the way at the back left side of the build and we’re just gonna raise that up one and then if we come over to here on this spot we’re gonna place in a cobblestone block instead then we’ll switch it back Up we’ll do a dark oak wood block skip one place one more in there and then we switch it up back to the cobblestone and then back to our dark oak wood and then we’ll fill in this gap with a cobblestone and then this is going to be Sort of the pattern for this thing oops and then also you can see how those circles starting to sort of take shape so this is sort of like one half of it and then the other half is sort of I guess inside the building in fact just So you guys can see that completely what I’m gonna do is just kind of show you actually this is gonna be right here isn’t it yeah and then we’ll switch it up and go to our cobblestone that’s gonna be there and then wow I think we’ll actually build to fit this whole Thing in here so I can show you guys this even better so it’s gonna end up being somewhat like this and then I guess just to make things easier if you want you can raise these blocks up eight more so in total they’ll be nine tall Pillars so now that we have our base done which is by the way nine blocks tall still yeah what I’m gonna do is they got the roof put a little bit so you guys can see what I’m gonna be working with and we’re gonna try to for The next half of this tower just condense it down a little bit so it’s a bit smaller so by digging that out and really has shown us kind of all the room we have to work with and also by the way feel free to dig all of this extra stuff Out once you are done at the tower and by doing that it’s gonna give you a lot more room in the house than if we didn’t add the actual Tower to begin with so the tower it’s really gonna add a nice I guess visual factor but also kind of be A bit more functional since people can go up defend from it here there’s like a mage stone spelled down or something but it also does add a lot more room to the build which is quite nice especially for building the interior and stuff we’ll Have a lot more room to work with so our next step and I think to make this easier to demonstrate I’m going to show you guys the outline of really what we have to work with in here and where we’re gonna be placing our next blocks So everywhere where I have a one of these oak wood planks that’s we’re gonna be placing our next set of pillars for this tower so and then the pattern for this is going to be once again I think we’ll do the logs on the outsides and then the stones in the Middle and we’ll use cobblestone again I think that should look pretty cool and then this I think we’ll do this one up should we do seven or should we go up nine again I think let’s do up nine blocks just so we have a nice big Tower So now you can start to kind of see the tower almost poked out from the top of the roof and instead of doing one where it’s at the four corners like this what I wanted to do to make the tower even more tall and I guess look more like a Wizards Tower I kind of want to give it a nice pointy medieval look so it’s a lot more it comes like a big giant point at the very top and it’s a lot more tall instead of just sort of fat like that one over there so hopefully we can Accomplish something somewhat similar to that and to sort of start I guess the base of this thing what we’re gonna do is do some sticky adding bits everywhere we where we have the pillar and then I think from each one of these begins sort of start to come out a couple more or Maybe if we do let’s just place a half slab right here here and then on these two corners as well and then from there we can add in pillars that will be five tassels so if we go one two three four five on each one of these and then Here’s where we really have to change it up and to do that we’re gonna go out one here out one here and then if we come over we’ll do that same thing and you can see that this really gives it a more circular shape instead of really square Like that one where we have to do sort of the archways so this one’s got to be all flat it’s not only gonna have the arches and I think it’ll just add a nice new effect that looks really different and gives it a nice new sort of style And pointyness I guess so we’ll do that and then I think that should be good now if we just start to kind of work our way up to the top so we’ll do one on top of all these little oak wood or dark oak with blocks I should state putting Sideways and instead we can raise these up to maybe give this a nice height instead of just being a nice or ugly little flat thing so we’ll just keep going up to instead of just the one I think for the next step we can add some blocks in these corners also once you Are done with this I might recommend maybe clean these things up so they maybe face all the same way or something but yeah once again we’ll go up to and then maybe from here we should be able to finish it up on the top by going up People do one on each one of these and then we’ll finish it off on the top by going up to let’s see how this looks we can always change this up I actually think that’s a really nice point oh yeah we’ll definitely continue with that I Really like how that turned out and then these two sticky out of it since they are like right above each other this will be good for sort of stabilizing it so I think this will be quite cool so our next step is just gonna be to sort Of round this tower out just a little bit more so we’ll just kind of place these blocks in where we have these gaps and then now what we can do is start to sort of clean this tower up and give it a lot more detail because I see you can See it is really plain right now so our first step is going to be to support this part right here and to do that what we’re gonna do is grab some stone so with our stone stairs we’re gonna place two upside down stairs put me each one Of these little sticky bits on the bottom just like this and then we can start to give it some Flair so on the sides of these we’ll go up to like this and then make them just flick up like that so on each of those we will do that same thing And in fact it might look better if we turn all of these facing sideways and then maybe do a cool little design in the middle maybe something like this and we’ll grab ourselves a cobblestone wall and give it a tiny spike maybe let’s see how this would turn out and then after We have that that’s almost cool yeah let’s do that I was gonna add a little roof over this bike but I think that’s almost cool on its own and then for the tower up here I did notice that we do have these gaps still so one thing we Have left to do is just place a block right here and then we should be able to start filling in the rest of the roof with some spruce wood and just for this case we’re gonna use this Bruce wood first unlike we usually do where we Start with a stone outline and then fill it in the Spruce but after I think by filling it in with spruce wood to begin with that should make it easier to sort of figure out where our guidelines are and you usually do have to do that when You sort of fill in pointy roofs like this so we’ll grab our full blocks is Bruce would place these things in wherever they are needed I think we’ll have one here so to do something like this all the way around do the same thing on the corners as well for now I’m Gonna leave this middle block out just to see what we can do with it later so we’ll fill this Tower in all the way around and let’s see I almost am tempted to do a stair right here but that might look kind of weird so instead we’re Gonna go up one two like this everywhere where we have that block and then on these sides we’ll go up two again and then in the middle we can go up to like this so it still is pretty much keeping that nice rounded out pointy shape although on top it almost Is getting a little bit too flat so we may have to do some adjusting or adjustments but it should be quite minor so that should be all we need for now so our next step is going to be raising these each up two and then after this we Can sort of add in some stairs and some half slabs wherever they are needed I actually do like the the shape this is keeping right now so we keep it somewhat like that maybe we’ll keep this up three and then start adding some stairs on top Of each one of these I’m a cool thing by the way when this is done I would recommend doing is adding a flag I think that could be really cool so if you can follow along just try to keep placing in stairs where I’m doing him but in all Honesty I think anywhere where you place them should end up looking good as long as you think they look all right and keep a nice shape that’s to your liking I think it should be fine so just keep doing these I’m hoping it doesn’t become almost too rounded out but then again I Think it’s it’s looking quite nice so far so maybe that’ll be all the stairs we do for this one and then I think now we should maybe be able to start with the outline although maybe we should place in something right here hang on let me grab some half slabs really fast I just want it right above the stairs where it becomes too flat almost I think that’s where we might need to add in some half slabs although I know some people are thinking that what the hell are we doing this for people from the ground aren’t really Gonna be able to notice that but I mean if I do like a video later showcasing this thing flying by I think I’ll just help it look a little bit better so that’s some things you can keep in mind if you are maybe filming your builds or something or taking screenshots later on Definitely try to make things look nice even from the air or I guess a bird’s eye perspective so our next step is going to be to add the outline to this thing and there’s many different ways we can do that although I’ll try to make it as fancy as Possible and not just like a straight line all the way across the bottom but that’s what we’re gonna do to start out with is just a straight line just to sort of give it our guidelines and then we’ll mix it up after that but you’ll See me doing a lot of simple stuff that doesn’t look good at first for this tower and then as we move on it gets more and more complex so such as for this one we’ll take out that block and if you switch this up so it’s two stairs And then an upside down one right here and then maybe a little flick IATI bit if we can place that in right here and then we’ll do the same thing all the way around so once those are done you can see the roof is still looking a bit too Plain and it doesn’t have much shape to it so what we’re gonna do is actually remove both of these and replace them with these spruce wood blocks and then from there to sort of round out the rest of the roof we’re gonna place a half slab coming down here actually make that Two of them and then same thing right there and then in the middle we’re gonna have to have the meet if I can get this to place in right right there in the empty corner and we’ll extend this down one and as you can see that rounds out The rest of the roof so go and do that to all four corners and then we’ll try to add some more little stabilizers in this thing so now to stabilize the roof since is a little top-heavy right now we can grab some cobblestone walls and then from these little sticky edits we’re Just gonna raise them all the way to the top just like that on all four sides so then for the very top of this thing all I did was grab some of these stone brick stairs and facing towards the outside and then right in between those I just Stuck to a little cobblestone wall and then filled in the floor with some oak wood planks and then just had a little ladder them continue all the way down to the ground floor of this tower now some more things you can do for this build to Sort of I just fix up this tower oh and we almost forgot by the way you do need to fill in all these walls with the spruce wood I was kind of holding off on this just because I thought the tower might interfere with that although for This wall I think we are pretty much set to fill those in same with all the rest of them so I’ll save that for later but for the tower some more stuff they can do is add a lot more stabilizers to the bottom and then also if you want the Cobblestone to look a lot less plain there’s one awesome tip you can use and that’s just to switch out most of these blocks for some stairs every once in a while so if you just randomize that up to your heart’s content you can add or end up with some cool effects for the Corners I might recommend leaving those out since it does tend to look a bit awkward when you have some of those blocks missing there tends to be a lot of open gaps and it looks quite weird but for all the flat spots I would definitely recommend doing those And then so yeah onto some more stuff we can try like maybe adding some sticky I think that’s right here and then maybe a sort of room from the middle I guess we could try so what we’re gonna do is just grab these things and then we’ll place a Block here one on this side and then maybe place one in the middle so it kind of creates a nice little archway then we’ll also go down one here and one here now since this does look quite odd with these little spruce wood logs what we’re Gonna do is instead extend them one out like this and then delete the previous ones just so we have a nice little bit of overhang and then we can sort of continue to circle onwards to the right over on this side and you’ll move it Over to the left on this side if you can do that let’s see will they connect and they will so I think we’ll leave it right here actually we do need to do we’ll do one more block I think this is the point where we actually start to Have our archway go back up so do the same thing over here instead so have that come up and then just create a nice little I guess sort of stepping stone path thing up to the top so the roof is a nice little circular shape I guess So just something like this it really doesn’t matter how messy you make it look just try to keep it symmetrical on both sides and there really is no need to remember how you did the pattern since this is the only section where you needed to place this thing so if you Just get something that looks like this that should be perfect but as you can see that does add a lot more detail to this little Tower and there still is a lot more stuff we can do for this I think I’ve got to leave this plane how It is although there is I guess you know what I’ll show you some stuff so that’s what I’m here for show any of the details and everything you could do so I’m just gonna add in these things and then in between them you can either add fences or cobblestone laws whatever you Really like I think I’ll add cobblestone walls in here and then maybe on the corners I’ll place in some fences I think that might be a cool little mixture let’s see what it looks like there really is no telling if it’s gonna look good or bad really all you have to Do is trial and error and I think that does look quite cool actually definitely adds a nice color that we haven’t seen although that could be a bad thing in fact I think it might be I really do want to keep this build nice and kind of Stony I guess so I’m gonna go without those fences and then underneath here I’m not sure if I showed you guys this before but I have been placing these things in just to get rid of this ugly little gap which people will actually end up seeing from the ground level and Then some more details you can do is just add some more stabilizing blocks on the bottom and for those I usually just like to grab a bunch of stone stuff stone brick stuff to be precise and just throw them in like this no really need for the half slabs in This but I’ll go up one too everywhere we have a log or right here we’ll do something like this then I’ll switch it up grab my stairs play something like here and there and then we’ll also need two more sets of them on this side as well one more thing We didn’t need to fix up this wall because that’s looking quite weird to be honest in fact all we really might have to do is connect all these and I think it will be back to normal in fact oh yeah well and then maybe connect this One as well swap this back out for that log and then same for both of these and then I think yeah that that should be good we’ll place oops we’ll place the iron bar back if I can grab it there we go finally and then I think is that all we needed The corners still do look a bit clean so maybe maybe we’ll raise these up even higher usually I think the corners lower but I think for this case since this is such a big tower you might need even more stabilizers so we’ll do something like that and we’ll do the same thing Over here as well so we go up 1 2 3 and then 1 2 3 and then switch it back up crashing thing yet I got run to the stair here it is so we’ll switch back to the stair place both of those in move Over to the left and I think that should be all if you want to knock yourself out in place one here as well although there really is not too much of a need for it fact that should be good for now I should have done this you know what Forget that side just leave it how it was guys although one thing I did notice though just considering everything done just imagine that there’s a wall filled in here one thing I did notice is that I know I said it end at the beginning but this thing does really need a window I Think so what I’m gonna do to finish this bill law is place that thing in here so we’ll just go up two at a time until we meet in the middle and then this is gonna be the exact same as all of these so I’m sure there’s no need for Me to really show you that so I’m gonna skip ahead show you the finished product of this build and hopefully you guys will enjoy it alright guys so it is completely done now and I gotta say I freaking love how this turned out without the window I don’t think it Would have been half as cool as it looks right now on the front but man I I didn’t know if this is gonna turn out good or not but especially with the tower but I think it did so I can’t remember who it was that recommended This to me I think it might have been a few different people but thank you for the recommendation definitely never probably would have tried a mages building out before unless you guys did that so thank you for that I want to let you guys have a little secret really Quick if you are running out of builds for your town a nice little thing you probably know this but you could just use the same building because I mean if you flipped it around amid the door on the back side as well you can place it In there make this the front of the building and no one would ever notice except maybe the friggin huge tower but I think I mean you could get away with it probably just have a bunch of the same buildings fill up different ways but yeah that’s just a little tip I Think I used to do the bunch not too much anymore since there’s really no need since I just get so many new suggestions for Billings from you guys I just really never have to build the same building twice which is really fun because doing that sometimes can get Boring but as I said in the beginning I was gonna mention to you guys why there might be like a little shortage of videos there has been I think for the past maybe a few weeks and probably will be for the next month or so and that’s Because I have school and the cross that I’m doing now so there really isn’t too much time for me to make a whole lot of videos which is kind of sad I’m kind of limited to like three videos a week now which really sucks because I mean I love The whole part of video editing and YouTube I love playing the games I even have like a lot of fun editing and making thumbnails and doing all that so kind of sex but pretty soon after the next month we should be back to be able To do I think pretty much a video every single day which will be awesome and also I think coming up in the next few months there’s a lot of new games we can do Let’s Plays on and stuff Grand Theft Auto is almost out which will be fun to Play online and stuff I actually haven’t ever tried the online multiplayer on that game which is pretty sad but then I think in May The Witcher 3 comes out I’m really excited for that that should be quite a lot of fun but um yeah just want to thank you guys for watching and Putting up with me sorry this video came out so late I should have probably had this out by last Friday or something but yeah I’ll have the interior video out by tomorrow and hopefully that should be soon enough but thanks again for watching guys hope you did enjoyed this tutorial stay tuned For that interior video also don’t forget to let me know any suggestions you have for future videos but yeah guys thanks again for watching and as always I will see you in the next one you Video Information
This video, titled ‘Minecraft Tutorial: Nordic Mage’s House (Part 2)’, was uploaded by BigBadBam on 2015-03-30 15:39:25. It has garnered 17895 views and 249 likes. The duration of the video is 00:27:18 or 1638 seconds.
Part 2 of a detailed nordic style mage’s house tutorial. Enjoy the video? Don’t forget to like the video and subscribe. https://www.youtube.com/subscription_center?add_user=TheBigBadBamGaming or check me out on twitch. http://www.twitch.tv/bigbadbam
Cheap Games! https://www.g2a.com/r/bigbadbam
Music: Hero Theme – MK2