Hey almost every Minecraft builder loves to throw this word around texture texturing texture texture texture texturing but there’s a pretty big misconception so let me explain and show you exactly how to improve your Minecraft building almost instantly in traditional art texture is a visual sense of how an object in a Work of art feels so if you drew a cat in order for it to have texture it needs to look like it feels fluffy but the blocks in Minecraft already have texture so if we really want texture we would use the Cobblestone because it looks like it Feels like stones right well sort of when Builders talk about texturing really what we mean is coloring we use blocks as colors not textures this is the most important part of this video so let me give you a little example when you get far away from a block you see Less and less of the texture it starts to become a solid color and you can’t really tell that this is Cobblestone at a certain distance just like how you can’t tell that this is diamond or what if I told you that these two blocks are the exact same color seriously when you Back up and look the color of crafting tables and nether gold ore are almost identical even though one has dark geometric lines and the other has very organic shaped bright gold spots you can only tell the difference when you’re really close up this villager house uses cobblestone in the bottom layer and that Makes sense because of the scale we’re close enough to the house to see that this is a bunch of stones packed together but when we look at this build that I made with my friend painter we can’t see the Cobble texture because it’s too far away we’re just see a gray Color which looks really boring so as a builder I don’t texture I color our stone with other blocks which are really just colors of this distance and now our stone is way more appealing even though these blocks don’t look like Stone close up the sooner you start using blocks Like this rather than this you’re going to start to improve really quickly so how do you texture a build well before texture comes Shading shading refers to the darkening or coloring in art with lines or blocks of color so in a drawing of a cat for example it’s shaded with lines of color which create texture it looks fluffy because of how it’s shaded in Minecraft we can shade with lines of color Gradually getting darker going up down you can shade to the side you can shade diagonally too if you’re really going bananas you can shade in multiple directions at once too with a starting point in the middle getting darker one block at a time going outwards or you Can do the opposite of shading which is called tinting now here’s the first hard part I want our shading to fit inside of this box and have it go from light here to dark here so we can’t get darker one block at a time we have to skip some so How’s that going to work how do we know what blocks to skip well you don’t actually skip any blocks you just put less of each it’s easier if I just show you in a loose circular pattern I’m using my lightest colors around the middle block but not only the next Lightest block my two next lightest blocks then another layer out I’m using slightly dark ER blocks but not a solid line of one block I’m using two or three of them and then the last layer out I’m using our darkest blocks this technique allows us to control the size of the Area that we’re shading so I haven’t skipped any blocks but there aren’t any solid rings of one shade by compacting the blocks you’re using even more you can have two light spots next to each other and then blend them into each other so that they overlap the beauty of This is that it’s not supposed to be perfect it doesn’t follow any super strict rules but this does mean you’re going to have to practice another thing you can do with this technique is control the shape of the area that you’re shading see in this example I’m shading in more of a teardrop Shape and then in this example I’m shading in a square manipulating how fast our shading goes from light to dark based on what direction it’s going in you can see in this example of the square shading it gets much darker much quicker going down and left than it does Up and right when people texture with multiple colors in Minecraft we often do one of two things we’ll blend the Colors by transitioning through a tint or a shade essentially we make both colors brighter or darker so that they’re more similar but if we want to transition from these two colors without passing Through the shades or the tints we have to find blocks that are roughly the same brightness but in between them in terms of hue I was able to find these three colors which are roughly in the middle of this shade of blue and this shade of green without getting too much darker or Lighter just a quick side note blending colors in making gradients like this takes some knowledge of color theory or at least a decent eye for color so if you guys want I can make a whole separate video about color theory in Minecraft but it’s way too much to get Into in this video so now that we can blend from blue to green without using the shades or tints of the colors since we found a few colors that are in between these that don’t change the brightness I can explain how I would texture this Square I have blue on this Side of the square and then green on this side of the square and the darks and lights of each color are in opposite Corners we can start off by connecting the light to dark colors since we already have those here so the blue and green sides are pretty easy we just Learned how to go from dark blue and light green so I have a couple of our dark blue blocks and then I transition to Green in the middle and then I finish off the side with light green on the opposite side I take a couple light blue Blocks transition to Green in the middle M and then finish with dark green as we go inward another layer our darks get slightly brighter and our lights get slightly darker then around here I’m going to start shifting from green to blue or blue to green until it’s all Filled in then I go back and make some edits until I’m happy with it once again it’s never going to be perfect but it really shouldn’t be and remember that from far away it’s going to look different than closeup so make sure to fly back and check your progress every once in a While so even though in a sense we are just coloring with textures that is what texturing is so for an example of not just coloring but creating the element of art that is texture in a build I made this with one of my friends jopi it’s a Recreation of art by Josel and KES we really liked how in the front doors of the barn it had this eye-catching old wood texture and we wanted that in our build so rather than coloring the front doors we made thin strips of colors using fences glass and desaturated red Colors that from a distance resemble the old wood from a barn door thus giving our build texture all right now that we have an example of texture let’s try to do something Similar I’m going to use these two references mainly for the wooden section here and the building and environment from this one for this build I’m starting with some simple terrain I used a teragen command for the base and then added rocks in with an arc brush then I Ransom replace above and below commands to get the base coloring and fixed it up by hand now in this picture I’m going off of you can see how the wood in the middle is very worn down so I need to use a lighter color for this and a Darker color for the wood on the edge that looks less worn down I grabbed some blocks that were roughly the right color and made vertical strips and then I went over it with glass panes some of which were half connected to a block which I achieved with world edit you can see Where I used the lighter colors the wood looks much more weathered than on the edges on the left I threw in some Oak blocks and yellow terra cotta because the wood the reference is much warmer there and I mixed in some blocks from the right section because I want it to Look very pieced together and rough when we back up I think that it definitely looks more like old wood than if we just used full Blocks hi I wanted to revise the Rocks directly below the building to create the illusion of more Jagged rocks to do that I shaded these Boulders more intensely starting with our darkest color and only adding highlights where rocks would be jutting out when we back up notice the difference in texturing Between the left and the right rocks if you’re were going to brush your hand over the rocks on the left you can imagine that it would feel very sharp while on the right it would feel very smooth I went ahead and finished up this build it’s available for download on my Patreon if you’re interested along with the other builds showcased in this video anyways thank you guys so much for watching I’ll see you in the next one bye Video Information
This video, titled ‘The #1 Trick to Build Better in Minecraft’, was uploaded by Snarple on 2023-10-07 15:30:10. It has garnered 135938 views and 9229 likes. The duration of the video is 00:08:36 or 516 seconds.
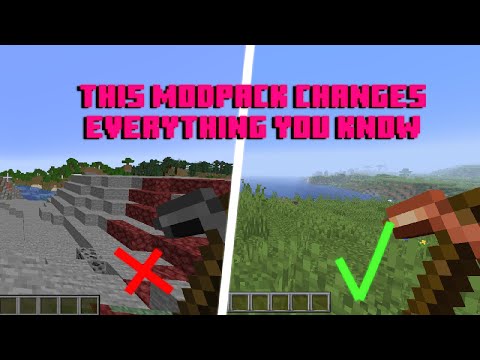
This is the single best building trick! “Use blocks as colors instead of textures”
Download all of the builds in this video on Patreon! https://www.patreon.com/snarple Discord: https://discord.gg/bakerybuilders Minecraft Server IP: bakery.dedimc.io – Music in this video: 1. https://www.youtube.com/watch?v=Fu5iMcEELaw 2. https://www.youtube.com/watch?v=tyLNm-OIzt0 3. https://www.youtube.com/watch?v=qB6Gq55fExo 4. https://www.youtube.com/watch?v=8N6L70jtD64 5. https://www.youtube.com/watch?v=H4sRL7bmrc4