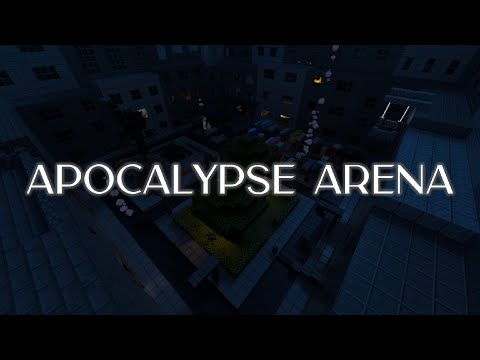
Hello this is karen from server pro and today we’re going to be doing something a little different we’re going to be doing a series where i’m going to be teaching you how to set up a very basic faction server so this is going to consist of five different episodes which Will be released on a weekly basis they’ll be short episodes where i’ll be teaching you how to install plug-ins change your server version to speaker or craftbukkit install a world set up the world with world guards that’s protected and you’ve got a flag so you can enable PvP in certain areas and we’re going to be setting up factions essentials kits and probably a shop and maybe some other things along the way so this is going to be a nice little fun series which we’re going to be doing so hopefully this should help you understand how to set up A good basic faction server so let’s get straight into the first episode so here I’ve rented a very basic minecraft server from our website at server dot pro and the first thing that we need to do is make sure that the server is running evil craftbukkit Or spigot so that we can install plugins so to do this go to the control panel and then click change under this type option here and I’m going to be selecting spigot as spigot is a bit better than craftbukkit as it’s based on craftbukkit and all craftbukkit plugins Work on spigot so if you choose spigot it’s slightly faster and includes more bug fixes so make sure you select spigot select the latest version or the version that you want to run the server on if you want to run out on one point eight point eight feel free to select that or Any version that you choose but this tutorial I’m just going to use the latest and then select Java rate and then either select yes or no to remove files I’m going to select yes as this is going to be completely fresh installation so we’re going to click yes And then click install and then click OK and then that will install spigot on our server so now that we’ve installed spigot we can go ahead and start choosing some plugins to install so if you go to the plugins tab then we’re just going to install a couple of Plugins so to start off we’re just going to install three we’re going to install worldedit so click install latest there we’re going to install essentials and world god so what do these do so we’ll do that allows you to edit your world and it also allows world guards work World Guard is a protection plugin which allows you to protect your spawn and different areas of your world so that people can’t grief it and then essentials includes a collection of useful commands and features for your server including nicknames TPA and heal commands etc that it’s got hundreds of different commands So it’s very useful and it’s great to have on a faction server so what only you install on these free for now we will be installing more later but just keep out these for now to keep it simple so once you’ve installed them click restart to load the plugins so once You’ve installed these plugins and restarted the server it’s a great idea to find a faction spawn that has already been pre made by someone on the internet so if you go to Google and just search faction spawns and then feel free to choose one of your liking I’ve already Found one on planet minecraft that I’m going to be using today and you can build your own if you want to I’m just going to be using a premade one for the tutorial as it saves a lot of time as building faction spawns can take up Loads of time so once you’ve found one you’ll need to download it onto your computer so for this one they’ll be a link to it down below if you’d also like to use it and then click the download Minecraft world bottom so we’ll need to download this onto our computer and just Save it to your downloads folder then once you’ve downloaded the world that you want to use it doesn’t have to be this one it can be any Minecraft world on their internet that you want to use then go back to the control panel go to the file manager click upload file Choose files and then select the file that we just downloaded and then click upload from computer then once it’s uploaded select the dot zip or dot R or whatever file it was you just uploaded and click unzip and then this should reveal a folder so as you can see here It says faction spawn 98 so each world is laid out differently so some worlds are just buying a folder by themselves some on in this case you have to go inside of this folder and then you have to move this folder into the main directory so select it click move and Then select home and movie and then go to home again and select the factions born 98 folder and the dot zip and delete them just to keep your files clear and then we can rename this to whatever we want I’m just going to call it factions – world and then click OK Feel free to rename it however you want though double check your world files are correct go inside of the folder and you should see a level.dat file that indicates that you’re in the correct folder so once you’ve established that you have got the correct world folder Copy the folder name so you can see it just here so just copy it right click copy and then go to the my server tab and then here where it says level name under the configuration just highlight all of this text and click paste so what this is going to do is Select the correct world to load the server on so once you’ve entered that click save and restart and in your server should start up with that world and all the plugins loaded so now let’s join our minecraft server and take a look at the world and the plugins that We’ve installed so as you can see I’ve just joined my minecraft server and I’ve spawned in this and cave or ravine so what we’ll need to do we’ll needs a teepee to the spawn so for the specific world that I’m using on planet minecraft the creator has specified the coordinate So as you can see it’s minus 25 72-66 so because we’ve got essentials we can use the command slash teepee POS which stands for teepee position and then we can type the coordinates but before we do this we need to give ourselves access to use this command so if you go to the Control panel and then go to the operators tab and then you’ll need to open yourself so type your user name in game and then click Add and then you should be able to run the command in game so now that we’ve done this let’s go back let’s get the coordinates and Let’s type them so if we type slash TP POS and then – 2572 and then 66 and again this may be different for you or you may just spawn in the world so this may not be a necessary step however here we go so as you can see I’ve teleported to the Spawn and it’s all fantastic so now let’s just go into game mode one just to become fly around and take a quick look as you’ll want to take a quick look at the spawn just to make sure it’s something that you want usually on a faction server you and a drop-down area Like this into the PvP zone so that’s fantastic that this has this so you may want to include this on your sponsor if you’re building on yourself so now that we’ve got 12 spawned we’ll need to set the spawn point so if you go to the Center of the spawn and stand on the block face the way you want players to spawn so I’m going to have them face this way so then once you’re stood in that location facing the direction you want them to spawn type slash set spawn and then now players will be able to use The spawn month and when they join the server they should be teleported to this location automatically so that’s all we’re going to be doing in today’s episode so we’ve got a world we’ve got a couple plugins installed ready for the next episode and we’ve set our spawn Point so in the next episode we’ll probably be protecting the spawn with world guard we’ll be smoothing out the edges so it blends in with the world with world at it and we’ll be doing a couple of other things so keep tuned next week when we release the next episode feel free to Leave any comments down below of anything you like to see in these future episodes or for any tutorials you’d like to see added to the channel so thank you for watching I hope that you have a fantastic day goodbye and see you next time Video Information
This video, titled ‘How to Setup a Factions Server | Episode 1 – Minecraft Java’, was uploaded by Server.pro on 2017-11-10 21:55:39. It has garnered 65729 views and 932 likes. The duration of the video is 00:07:01 or 421 seconds.
https://server.pro We are doing something slightly different today! We are starting a series where you can learn how to set up a basic Factions server, from scratch.
In this series we will be covering the main aspects, install plugins, a spawn, protecting your server, configuring plugins including permissions, kits, and much more! We will be releasing new episodes every Friday, so turn notifications on so you don’t miss out! 🙂
Factions Playlist: https://bit.ly/2Ts0pvK
∎ Need help? https://server.pro/contact ∎ Twitter: https://twitter.com/ServerProHost
More Minecraft Tutorials: https://www.youtube.com/playlist?list=PLQwjHJKOa4IRULoZdBMjqQg3whqZzaoXM