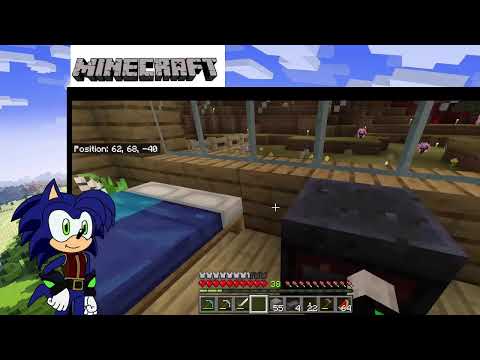
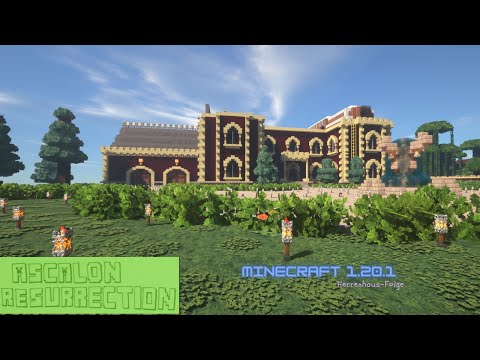
Today we are finally back with another much requested a build tutorial this one is for the medieval barn from my survival series now this is a pretty large build and i have slightly tweaked it for this version so it should look even better So with that being said here are the layout and materials you’re gonna need let’s build this we’re going to start by building up our pillars as shown on the floor plan these have been color coded to make it easier to tell how high each pillar should be Next we’re going to go ahead and build up our walls with stripped oak wood these are going to be four blocks high and we’re gonna leave a seven block gap at the very front for our doorway do now we’re going to add two more additional pillars behind the two Largest pillars at the very front of the build we’re then going to connect them together on the fifth block up from the top using stripped dark oak wood now we’re going to raise the front and back balls up by one more block making sure that we ignore the blocks on the very corners Avoiding the two main pillars at the front we’re gonna add a single pillar at the front and sides of all of the pillars around the build then gonna place a spruce there on top and on the left and right side of the build we’re Gonna add an upside down stair at the very top of the pillar facing out to the sides do on the front and back of the build we’re going to add a row of upside down stairs in between the largest pillars and the medium-sized pillars we’re going to connect It on the six block up from the top and we’re going to do the same at the back of the build at the back of the build we’re going to add a beam using dark oak wood and we’re going to place that on the fifth block up We’re then going to leave a three block gap and place another one on the fourth block above we’re gonna make a start on the roof so we’re gonna start by getting the dark oak edging on On the right hand side of the build we’re gonna head over to our smallest pillar here and we’re gonna place a slab here with one in front and then break the one behind we’ll place two more facing Out like this then we’re gonna step this up with two so we’re gonna go two two and then two once we’re one away from this pillar here we’re going to put a stair and an upside down stair with a Full block on top like this we’re then going to grab our stair replace another stair here upside down stair behind and then one on top we’ll place another stair here upside down one behind and then we’re gonna go stair and then another upside down stair like this We’re gonna place a slab here with a ball block just here then we’re gonna place a slab with one up and then a slab with one up just like so now let’s head over to this side and do exactly the Same thing so bring our slabs out here we come out by two so we should have three in a row we’re gonna go two here two here two here place a stair and then a upside down stair on top With a full block on top of that one we’ll place another stair with an upside down stair behind it a full block on top again stair upside down stair stair upside down stair slab and then we’re going to bring it over by one we’ll do the same again and then one more there And then we’re just going to join these three up in the center like so so we should have a really nice curve let’s go ahead and do exactly the same process on the back of the build now we have the lining in place let’s go ahead and connect them at the sides We’re going to head down to the front and just bring it down from the very end here all the way across and then repeat it on the opposite side now that the roof lining is in place we’re going to go ahead and start adding in some pillars and Supports for the inside of the build we’re going to head into the front here right from the very front pillar on the left here we’re gonna leave a three block gap and place another pillar here and We’re gonna raise that all the way up until it’s the same height as the tallest pillar just here at the back of the build we’re gonna do the same thing from where the pillar is here we’re going to come to the block in front leave a three block gap and place another one Here and again we’re going to raise that all the way up to the same height as that tallest pillar we’re then going to go ahead and connect it all the way across and we’re going to do the same on this side here so from this Pillar here we’ll leave a free block gap bring this pillar all the way up and again from the pillar at the back come across to here leave a free blood gap and place another pillar here and bring it all the way up to the same height And then of course connect them at the very top now we’re going to grab our spruce planks and starting from this side here we’re going to place a row of them across the wall here then we’re going to go ahead and we’re going to Move over to this one and we’re gonna bring them all the way across to here okay so make sure we leave this one on the corner here we’re gonna bring it all the way across and basically bring it over to the pillar again Run it down and then connect it all to connect all of the middle together once that’s in place we’re going to go ahead and repeat the same process on the other side of the build On the front of the build here we’re just going to cover up a little bit of detail so we’re going to add a slab here here and here we’re going to do the opposite on this side of the build And then we’re going to do the same around the very back of the build before we start working on the roof we’re just going to finish up some more details on the interior let’s head on the inside and we’re going to go ahead and build up a pillar so where this First pillar is on the lift we’re going to leave a two block gap and build another pillar that brings it all the way up to the floor we’re then going to get some spruce stairs place them just here And we’re going to step them all the way up until we join to the next level just like this now if we go up the stairs we’re going to go ahead and break the first two at the Front here and the rest behind it all the way until we break the last two in this gap here break the two at the very top and turn those into stairs and then we’re gonna go ahead place two upside down stairs just here Now over on the other side of the pillar we’re gonna continue our stairs all the way across just like so bring them down this side here and then from this pillar here we’re going to connect Them across to this pillar just here we’re then going to use our strip dark hook log and we’re going to make a beam all the way across here all on the floor level now let’s get our spruce planks And we’re going to go ahead and just put a beam across the edge here and fill this bit in then we’re going to head down to the back of the build and we’re gonna do the same thing We’re gonna put some spruce planks across here and then just fill this remaining piece here in now that we have our stairway in for our second level we’re going to go ahead and come down the stairs here we’re going to grab our strip darko log and at the very back here In line with this pillar again here we’re just going to bring another beam all the way down here to match up the other side like so and then we’re going to get our strip dark oak wood and we’re going to just make a panel all the way across like this Let’s add a little balcony to the front where else bruce planks are in the center we’re going to place three spruce planks here we’re going to place a stair at each side and we’re gonna place another stair each side of here we’re gonna place a full block here And then we’re gonna place a slab in the two corners and then three in the center like so at the bottom here we’re going to place two stairs like this and a slab just in the middle like this Just to create a nice little kind of shape we’ll get our spruce fence we’ll place two from this side and two from this side we’re gonna do something very similar at the back of the build So we’re gonna start by coming to the center and placing three of our spruce planks in the center we’ll place a stair at each side and then we’re gonna curve one that way one that way and then we’re gonna bring them all the way across and join just there Then we’re just gonna place two upside down stairs like that in the gap and then underneath the edges here we’re gonna place an upside down stair at each side this time we’re gonna go ahead and we’re gonna just add our fences around the edge All the way across like so just to create a little balcony at the back we’re gonna go ahead as well and just remove this beam here and move it up by one because it won’t give us very much headroom at all if we leave it at that height at the very top Here we’re going to come inside and we’re just going to bring three of our logs all the way up like this and then use the spruce in the other gaps like this to create a kind of tudor effect We’re gonna go down to the front of the build and we’re gonna do something again very similar we’re gonna leave a one two three block gap and bring a beam all the way across on the front again inside we’re going to make a bit of a tudor effect so we’re going to leave Two of our strips dark oak logs like this all three and then three of the oak in between now we’re gonna grab our spruce stairs we’re gonna place a one at the very top just here and leave a One block gap place one underneath we’re then gonna get our strip darko gloves and place one two three four five with an upside down stair on the end and then a slab just sticking out like so Then we’re going to go back to our strip oakwood and on the front here we’re just going to fill in these gaps here so we want to bring these three up by three then we want to place two rows of two And then one at the top over to the left side we’re going to do the same thing but reversed and then exactly the same at the back of the build let’s add a few more details to the outside we’re Going to start by placing in some windows we’re going to put a two high window here and a free high window here this side here we’re going to do the offset so three and a two down the sides here we’re going to put two high windows in the center of all of these And then round to the opposite side we’re going to leave the back as it is and then we’re going to place two high windows in all of these and inside them we’re going to place two of our spruce fences With our windows in place let’s go ahead and make a start on the roof we’ll start on the right hand side and we’ll head over to the back of the build and we’re going to bring two rows of full brick blocks all the way down to the front on the first edge Then we’re gonna go back by one block so we’re gonna skip this one here and we’re gonna go to this one and we’re gonna bring another row all the way across again from here we’re gonna skip the stair and go to the full block here and bring another row all the way down We’re gonna go up again and bring it all the way down again from the full block all the way across basically we’re connecting full block from one side to the other now we’re gonna jump up a few here all the way to this next block Here which is right on top of the beam and we’re gonna bring that all the way over now we’re gonna do the center part here which is these three here and run that all the way down to the back now if you are in survival i do suggest you Use the scaffold block as it will make it so much easier to do this now we’re going to go ahead and repeat exactly what we’ve done on this side so starting with our two blocks we’re going to bring it all the way down Now with all our four blocks in place let’s go ahead and jump over to our brick slabs we’re gonna come down here and we’re gonna start by bringing our slabs all the way across this first gap here Then we’re going to go ahead and get our stairs and we’re going to do stairs all the way across on the next one now keep in mind we are going to be breaking a few of these to Make a window section on each side in a minute but it’s much easier if we do it this way first we’re going to bring our stairs all the way across here all the way across this one here again we’re gonna bring our stairs across this one here Now we’re gonna leave the two stabs for just a moment and we’re gonna jump over to the other side and we’re gonna do exactly the same thing let’s do our slabs all the way across here Now that we have both sides in i just wanted to leave these last bits at the very top here because we’re gonna go ahead and we’re just gonna fill some planks in this gap here for the roof This would just neaten it up from the inside and make it a little bit easier to reach and then we will cover it with our slabs and again on this side here we’re gonna go ahead from here and we’re actually gonna get our upside down spruce stairs And we’re gonna place them from here and just bring them all the way across from here it’s just a little easier to place them from here than it is to try and jump or climb from the inside once they’re in place go ahead get your slab out And then we can go ahead and run them down the whole side on top let’s go ahead and do exactly the same on this side now before we add our window in the roof let’s go ahead and add a few details just below We’re going to start by coming over to the left hand side and just in these gaps we’re going to add some upside down stairs to create a bit of an arch we put a lantern in the middle and then we’re going to place three trapdoors just like this We’re also going to place three trap doors here with some cool stuff behind and then close those trapdoors and you can put some flowers on there of your choice we’re going to do that in all these gaps down this side here and then we’re going to repeat it on the opposite side do Adding the window into the roof is a pretty simple we’re going to start from the center here so we’re gonna go to this pillar here and then this pillar just here and we’re gonna come just above it To this one here so we’re gonna go one block in from the roof and we’re gonna place two blocks here and again in line here we’re gonna place two blocks just here now in the gaps we’re gonna go Ahead and get rid of the stone of the bricks like this even the stairs the blocks just here and then finally this stair just here for the moment now we’re gonna go ahead and we’re gonna break that One and that one what we’ll do is replace two just here put a temporary block here to place these two get rid of those there and place one just there again over here do exactly the same thing just like so Now get your dark oak slabs and we’re going to place a rav them just here until we come in front of this block by one and the same down this side here we’re gonna come over by one and we’re gonna Go up and in up and in we’re gonna get ourselves a stair and an upside down stair stair upside down stair and then we’re gonna go slab and a slab in slab and a slab in and then basically one There and just put three on top like this to create this nice kind of little swooping arch then we place two of our fences at each side replace one in the corners just like this now We’re gonna place a row of spruce planks just in here and then we’re gonna go ahead and we’re gonna grab our stripped oak logs and we’re gonna place a row of those just in here all the way to the End at the end we’re gonna place two here coming up on these two and then two coming up just here now we’re gonna place one here one here temporarily put some blocks here of a row just on top and then break those three there to give us this two by three high window As you can see from the outside here we’re gonna add two trapdoors at each side of the window now we’re gonna go ahead and put lanterns on top of those we’re gonna grab our fences and we’re gonna Put three fences here and then free just above it like so then we’re gonna grab some of our coolster place it free in the middle and then again we’re gonna surround this like a little flower pot Trap doors and again you can put any plants in here of your choice in the gap here i’m gonna place three of the spruce trap doors like this then we’re gonna grab our spruce stairs place an upside down one here and here and then the same on the opposite side like so Now coming up to the roof level we’re just gonna basically join our blocks over so we’ll bring the four blocks across here we’re gonna get our stair extend the stair by one and then bring it over so that it connects with this one In the center here let’s get our three four blocks we can bring these all the way over and then a slab all the way across here nice and easy again slab all the way across full block at the bottom And then a stair just coming around that corner and joining up like so and then over here i’m gonna place one two three just to give us a little bit of a sort of cleaner sort of Edge to the roof there there we go let’s go ahead and repeat that on the opposite side let’s go ahead and add a few details for a lift and a few finishing details to the front here I’m going to start by coming up to this stair just here we’re going to get rid of that we’re going to place a grindstone here and a grindstone just here we’re going to place a trapdoor on each side of this grindstone just above it then we’re gonna place some chains coming across Like so and then we’re gonna place another one here and we’re gonna come down by about five or six so that we’re sort of just a little bit lower than this landing now that we’ve got that in place we’re gonna go ahead and we’re gonna get our spruce stairs We’re gonna place an upside down one at each side just here like this we’re gonna do the same just underneath here like that just to finish off the detail for the doors in here we’re gonna go ahead and we’re gonna place four of our trapdoors Like this we’ll place another four just coming up like so and then we’re gonna come back here and we’re gonna place them from this side this time and that way it almost looks as if the door is slightly jawed open so we’re gonna do the same over here as well There we go so it looks like some barn doors that are open underneath the chain here this place a slab slab and a slab and then each side we can go ahead and add three of our trapdoors just like so to make it look like a bit of a lift To complete the exterior we’re going to add some lanterns to the outside on the front and back of the build and we’re going to use some oak planks to texture up some of the walls don’t forget to finish off the final details for the back of the build too With the exterior complete let’s make a start on the interior we’re gonna head straight inside and on the left hand side here we’re going to start by adding some light in where the beam is we’re going To head back by two more blocks placing a chain and a lantern right in the center of this gap in the center of the gap here we’re going to do exactly the same thing so we’re going to place A chain and a lantern and then again on this side here in between these three blocks we’ll do exactly the same so that we can get a nice bit of light in over on this side of the bond Round to this side here we’re going to come around to the back we’re going to get our script out wood and we’re going to bring it all the way across this gap and just fill in a wall Just like so now to add a bit of lighting over here we’re going to kind of do a similar thing so what we’ll do is we’ll start from here where the beam is we’ll go to back we’ll place a chain and a lantern we’ll do the same over this side Just like so now we’ve got a little bit of lighting down here let’s go ahead and we will add in a couple of fences here we’ll place two here and two here one here one here and then we’re just Going to section off these two sides so we’ll go ahead and we’ll put in some fence down here and we’ll go ahead and put some fence all the way across here as well at the back here we’re gonna go ahead and we’re gonna just get Our spruce stairs and we’re gonna place a row all the way across from one side to the other and of course we’re gonna go ahead and do that on this side as well just like so and then we’re going to add a light Just in the center here for a little bit more lighting now as for details down here we’re gonna go ahead and we’re gonna first of all break these stairs on the back part here so just the back ones not the front ones and then what we’re gonna do is we’re going to Use this for a bit of a storage area so we’re going to fill this up with some of our barrels now if you don’t wonder for these here you don’t have to you can just put a wall here but i think It adds a nice little detail one thing you can also do is you can actually leave these ones at the bottom here maybe just put some empty blocks in there and then bring some of your barrels out Like this all the way across that way we have a little ledge and we can place a lantern just there and i think this looks pretty cool now i’m gonna place a trapdoor on all of these stairs like this And then i’m gonna place extra ones to bring up here and if we close them we kind of section off the entire stairway just like so and i think it just makes it a little bit neater for going up And down the stairs and keeps everything sort of organized you can also go ahead and remove them so you place one against the stair if you want and then you can place one on the inside Like this going up the stairs then that gives you a little bit more of an open look so it’s entirely up to you how you want to do it i think both of them look pretty cool so for now i’m just Going to leave it as is now with that being said we’re going to jump up to the first floor here and we’re going to start by surrounding the edge here with some of our spruce fence now we’ve got that in place let’s get a bit of lighting in here because it is Pretty dark so on the third block up we’re gonna place a fence here and a fence here this is on the side where we have the window we will also do the same on the opposite side and then we will place a lantern just on top of it like this Okay that looks good now i’m gonna place some trapdoors down the side here like this and then on the corner here i’m gonna place two more and that just sections off our stairway now decoration up here is entirely up to you but one thing that i think works really well Is using it for a bit of storage so placing some barrels just on the side like this and then we’re gonna just finish up some of these walls so i don’t like seeing the brick on the inside because i don’t think it works well for the interior So if we cover it up like so and then get our trapdoors and we can place them across here it just adds a nicer finish to the area i’m going to go ahead and i’m going to run some upside down Stairs all the way across in here so this has come across all the way from one side to the other now i’m going to get my trapdoors and i’m going to cover up the last remaining bit of brick so going across like this And then i will repeat what i’ve done on that side over to this side finally to finish off this side i’m gonna go ahead add some trapdoors to the ceiling here and i am gonna leave one of them open just there Because i’m gonna place a lantern for a little bit of light in the corner here now i’m gonna repeat everything i’ve done on this side here over to this side as well now we have details on both sides let’s go ahead and add a little bit of detail to the seeding We’re going to start by coming over to the front of the build and leaving one block gap we’re going to go ahead and put a beam in here breaking that stair on each side and then we’re going to do on every other block all the way across from one side to the other Finally in the gaps here we’re going to place some of our spruce trap doors and then we’re going to place upside down stairs under the actual pillars now i don’t think we really need the extra light in but just in case we’re Gonna go ahead and the second pillar in from this side we’re gonna add two chains and a lantern and then we’re gonna go ahead to the opposite side and do exactly the same thing so second pillar in right in the middle two chains and a lantern and i think that really Brings everything together on the ground level we’re going to go ahead and add in a few of our fence gates so let’s just put three of them so one on each side now at the back here we’re going to go ahead and let’s get ourself a pillar and we can actually Put a pillar here so right where this beam is all the way to the ceiling we’ll do the same just here now inside the gap i’m gonna go ahead and place three trap doors and then another free and we’re Gonna open them all up and then we’re gonna crouch and we’re gonna place some water in there for a little trial for the animals to drink from in here on the back we’re gonna do the Same thing he said we’re gonna put one at the side there first let’s do three and then one that way and then three more here and then open them all up and then place our just inside finally again on this side let’s do the same thing In here i think i’m going to go ahead and paste a shelf just there we’ll place a little shelf just here and then also on the end here we’ll place another little shelf here And but now i’m gonna put a barrel on that one and maybe a barrel on that one we’re gonna put hay on the rest of them and i think that just about does it for this little section here now around the back here you can use this for just storage if you want Or if you wanted you could go ahead and section it into another little pen maybe for some horses maybe like a little care sort of a unit so maybe in here could be where we care for them And do sort of necessary works on them so let’s do something like that maybe let’s put in a little cauldron just here with some water put the little um tripwire hook on there so it looks a little bit Like a kind of uh tap we’ll place in an anvil here maybe when the horses come in here you know you need to make some shoes for them or something like that so we can put that just there And then i think finally what we’ll do is we’ll add a little shelf and i think we’ll put it on this side maybe and again we’re just gonna for now we’re just gonna put one barrel up there like that and we’ll put some more stuff up there in a little bit Finally we’re gonna add the last couple of details so let’s start by getting in a bit of a path coming through here i’m gonna keep it to three wide now i’m gonna go ahead and just add a few sections where the entrances are Something like this and then inside these we’re gonna go ahead and just randomly go ahead and turn a few of these into pathways we’ll go ahead and do that in this one as well something kind of like this now if you want you can go ahead and turn These in to coaster i think it just adds a little bit of a more realistic kind of texture rather than grass growing in here but it’s entirely up to you if you want to leave it as it is do Because the grass path is a little bit lower than the normal blocks you might want to go ahead and just replace some of the ones in the ground like this so that you don’t see the grass underneath them something along these lines same with the walls here just go around and Make sure that any blocks that you can see the block underneath let me go ahead and replace it so that it looks like it blends all the way down into the ground finally just finish up by adding some last minute details to your liking so things like some hay Bales or some barrels maybe some chests maybe even some campfires and then go ahead and put them out and they can look like some stored firewood and stuff like that so just go ahead and fill the area with any little details that you want and then that just about completes the interior One last thing you can do to finish up the roof is add some textures so granite and polish granite work great they really add a little bit of variety to the roof and just make it look A little bit more roughed up and a little bit more realistic now with that being said let me know in the comments what builds you want to see me do next and i’ll catch you in the next one Video Information
This video, titled ‘Minecraft | The BIGGEST Storage and Animal Barn You’ll Ever Need’, was uploaded by BlueNerd on 2021-10-13 15:07:58. It has garnered 510007 views and 13797 likes. The duration of the video is 00:40:35 or 2435 seconds.
How to build a large medieval barn in Minecraft! A large barn design for animals and plenty of storage. Learn how to build this brick roof barn with this step by step tutorial.
A perfect barn for a farm or village in you minecraft survival world. This build has many beautiful features and is detailed to work perfect with a cottagecore village.
What house or build tutorial should we do next?
This house can be found in my survival series – https://www.youtube.com/playlist?list=PLKZ36uW8Bdjh48snvAv2UoAi3l-sc0ZEh
00:00 – Medieval Barn Intro 00:18 – Layout for the Barn Tutorial 00:35 – Minecraft Materials for This Barn/Farm 00:41 – Step by Step Barn Tutorial 27:30 – Barn Interior Tutorial
******************
Join my Minecraft Survival Server =)
► https://www.patreon.com/bluenerd ► https://www.youtube.com/channel/UC1ANc72wQdusmOHwOL1-93g/join
******************
Video Info:
► Minecraft 1.18 Java Edition ► Texture Pack: BlueNerd Vanilla Basic (download on my discord) ► Shaders: BSL Shaders ► Music: EpidemicSound.com
*******************
Follow Me:
► Twitter: https://twitter.com/BlueNerdYT ► Discord: https://discord.gg/mmPqzEK