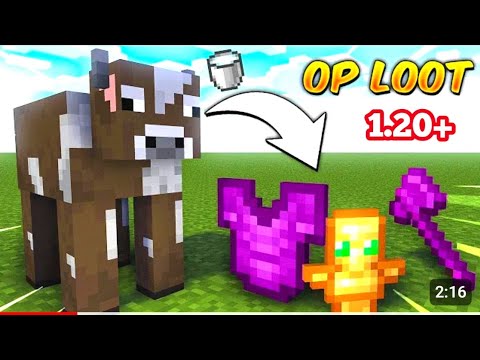
Hey guys it’s bonnie and today i’ll be making a tutorial on how to create add-ons for minecraft bear rock edition or pocket edition however you call it this is going to be part one in this video i’m going to show you what programs i use how to install them and a Little bit of how to use them and i will be making other tutorials showing you how to create custom entities this is an entity that i’m working on i’m also going to show you how to create custom items and custom blocks and i’m also going to be making other Tutorials showing you how to create uh custom crops or anything else that you guys want to learn so if there is any specific thing that you guys want to learn just leave a comment and i’ll see if i can make a tutorial on it and all The programs that i’m going to be using are compatible with pcs and with mobile devices so if you are on a mobile device uh you could follow along i’m going to be doing everything on the pc but everything should work the exact same way on on a mobile device and Let me show you how all this works once you’re in your computer uh the first thing i want to show you is what programs i use uh so for this tutorial all the programs that i’m going to be using are compatible with pcs and mobile devices so it doesn’t really matter what device You’re using this will work on both and the first program i’m going to show you is blockbuster is for creating your custom models and to get blockbench all you want to do is open up your browser and you want to go here to blockbench.net and you’re going to get Two different options here you can either download the application or you can use it directly from your web browser if you’re on a mobile device click here where it says open in web app and this should open it in your web browser this also works on pcs uh but if you’re on a Mobile device it will tell it will ask you if you want to install it from here so you just want to install i would recommend installing it if you’re on a mobile device and if you’re using a pc uh then you want to go here it says download And here you just choose whatever operating system you’re using so if you’re on windows linux or mac os uh for me i’m using windows so i’m just gonna click here it says installer and they should start downloading it but i already have it downloaded so i’m not going to download it again Once you download it you just want to install it and you should get this the second program is going to be bridge for all these tutorials i’ll be using bridge v2 since it is compatible with pcs and mobile devices to get bridge you are going to need a chromium browser so You can use either microsoft edge which already comes pre-loaded if you have a windows computer or you could also use chrome either one of these will work it doesn’t really matter which one you use these are just gonna be used for installing the application uh another thing is if you’re using firefox this Will not work it has to be either one of these two uh same if you’re on a mobile device if you’re on android you will also need either one of these two so if it’s not working on your regular browser you just want to download either chrome Or microsoft edge uh for me i’ll be using microsoft edge but just like i said it doesn’t really matter which one you use and you want to go here to editor the bridge core that app if you’re on a mobile device this might look a little bit different but it Should still work the same way once you’re here the first option that it’s going to give you is if you want to install bridge i would recommend installing it or you could skip it if you don’t want to install it but i would recommend installing it so here i’m just Going to click install then click here and then it’s going to ask you if you want to pin it to your taskbar to your start menu and if you want to create a desktop shortcut then just click allow and like i said this might be a little Bit different if you’re on a mobile device but i’ll show you how to install it if you’re on a mobile device right now the second step it’s going to ask you to create a folder where we’re just going to save all your projects like i said This mine this might not it might not give you this option if you’re on android uh when i was doing this on a mobile device it didn’t give me this option but all you want to do is click here where it says select folder and then here you just choose anywhere in Your computer where you want to save your bridge files uh for me i’m just going to click here it says documents and then create a new folder and you can call this folder wherever you want but i’m going to call it bridge and then all you have to do is click select folder Then view files save changes the next step is going to ask you to drag your com.mojin folder at this only if you have the windows 10 edition of minecraft if you do not have the windows 10 edition of minecraft i would recommend buying it it does help out a Lot especially when when you’re going to do a lot of testing it’s much easier than transferring your project to another device and then testing it so if you do have the money for it i would recommend buying it uh but if you do it but if you don’t Have it you could just skip this step and if you do have it the way you find your condom motion folder is just opening up any folder doesn’t really matter which one it is and then go here to the address bar and then you want to Type this in i’ll leave this in the description too if you just want to copy it and paste it here and this will open up the location of your com.mulching folder your com.emoji folder is where all your behavior packs resource packs and worlds are saved and bridge will place all the Add-ons that you’re creating inside the development behavior pack in the develop resource pack so once you’ve found your com. margin folder all you want to do is drag this folder inside of here and then click yes and then save changes and for the last option it’s going to Ask you how you want to edit your json files you get the option of using raw text or tree editor if you’re new to creating addons i would recommend using the creator it’s much easier to understand but you could also switch back to raw text or to the tree editor inside of the Program i’ll show you how to switch that right now so for me i’m going to be for all the videos i’ll be making i’m gonna be using the trader since it is a lot simpler to understand so i’m just gonna click on that one once you do that it’s gonna ask You to create a project and here’s gonna give you a few different options then ask if you wanna create a behavior pack in their resource pack by default they’re both activated but if you wanted to create just a resource pack you could also click here and this will make the behavior pack inactive Or you could or if you want to create just a behavior pack without a resource pack you could also just click here and make this inactive it also gives you the option to register your behavior package your resource pack dependency and to register your resource pack as a Behavior pack dependency so what this will do is it will make it so whenever you activate the behavior pack if it’s missing the resource pack it will give you a messaging game letting you know that it’s that it requires the resource pack uh same thing with the resource Pack if you activate it without the behavior pack it will give you a message that’s really good if you’re making an add-on that requires both a behavior pack and the resource pack that way they know that it’s uh that it requires the other one it also gives you an option to Include a skin pack so if you want to include a scan pack you can just click here and set this to active but i’m not gonna include a scan pack uh but i’ll make a tutorial on how you can create your own skin pack using bridge v2 and you could Also make a world template i haven’t tested i haven’t played around too much with this so i’ll make a separate video on this and then if you go down here uh here you get a few more options the first option is if you want to change your project Icon this is the image that shows up whenever you act whenever you place your ad on the side of the game so you can leave this blank and this will set a default bridge image but if you have your own custom image that you want to Use for your add-on you can just click here and then just use any image that you want but it does have to be in a png format so if it’s not in a png format it won’t show up so for me i’m going to be using this image That i already had then you want to give your project a name and a description uh it doesn’t really matter what name you give your add-on for me i’m just going to call this tutorial and for the description you can type anything you want here it also doesn’t really matter But i usually just put created by me but like i said it could be anything you want doesn’t really matter then you could uh change the project prefix uh this is the name space by default is set to bridge uh but here you could set it to anything You want just make it something unique something that other people don’t use and this is used to identify all your items blocks or entities that you create i’ll show you what this is later on uh but for me i’m just gonna put tut for tutorial but you could type Anything you want in there just make it something unique and then the project author uh here i’m just going to put in my name then you choose your project target version so whatever version of minecraft you’re making your add-on for it’s usually better just to pick the Newest version so for me right now the newest version is 1.17.40 but this might be a higher version later on whenever you see this video so for me i’m just going to leave it at 1.17.40 and this last option is if you want to add the name and description directly to The manifest.json i usually turn this on but it doesn’t really matter it’s up to you if you want to turn that on and then you just want to hit create and once you do that it creates a behavior pack which is this red one right here and a resource pack which is This blue one it also creates some of the files and folders that you’re going to need same for the resource pack and if you’re on a mobile device or if it didn’t ask you to install the app at the beginning you should see this icon which tells you if you want to install The app just click here and this will install the app so once you have both of those programs installed first i’m going to show you how to use bridge so something important if you’re on a mobile device i i was testing this on an android device and it did give me a Warning letting me know that uh i might lose my progress if i don’t save it as a bridge project so to save it as a bridge project you want to go here and then click here where it says export as a bridge project this uh you want to Do this every once in a while that way you don’t lose any progress and then if you wanted to open your bridge project uh you could go here with this project and then import project and then look for your project but that’s only if you’re on a mobile device if you’re not But if you’re using a computer you don’t really have to do that and then whenever you want to export your add-on you can just go here it says export as empty add-on and then you can use this to install your add-on on whatever device you’re using and another Thing i want to show you is how the creator looks so this is how it looks whenever you’re whenever you’re using the creator it is a little bit more simple to understand in the raw text so but if you wanted to use raw text you go Over here where it says project and then go here where it says settings and then go down here where it says editor and then you can here you can change it from between tree editor and raw text so if i click here where it says raw text Uh that’s all i will have to do just click on that and then if i open the same file again this is how raw text looks uh it is a lot it’s it is a little bit more difficult to understand if you’re new to creating add-ons uh so i Would recommend leaving this as a creator so i’m just go back here settings and change it from raw text to tree editor since they say it is a lot more simple to understand and in this tutorial i’m not going to go over how to create anything specific uh but the way You create a new file is you go here you go over here to these three dots and you click here it says new file and here you get a few different options you can create a block entity item or just a simple file and if you go here where it Says block uh here it gives you a different knob a few different options you could create a blank block an or or a slab some of these already come pre with presets uh so if you just want to make a blank block you can go here and Then it gives you the options to create it or ignore and this will be this will come with a few presets uh same with the entities if you want to create like a b entity you can just click here and then just fill all of this in Or you could also just create a blank entity or any other type of entity that you want same for the items you could click here and create a blank item or a simple file here you get a few different options like attachables block you can also create functions items loot tables Or any other type of items you guys check those out by yourselves i will be making tutorials on all of this uh but that will be on a separate video or else this video will be way too long but if you do want to create any type of file This is where you can create it another really useful thing is you could go here where it says extensions and here you can download a few different things so you could download some compilers uh some presets for items for entities or there’s a few other things in here You could just look through that by yourself you could also download things for bridge so one thing i would recommend installing is here where it says utility i would recommend installing this one the minecraft documentation so you just want to click download and it gives you an option you could either Install it globally so it will it will be installed on all your projects or you can install it locally so that would just be on this project that you’re working on so i usually just install it globally and once that’s installed uh what this one will add is just the minecraft Documentation so if you want to know how any of the components or anything works uh for example if you want to see the components for blocks you can just click here where it says blocks and it gives you the name of all the components the description and some other information So you have any doubts you can you can just go here and read the information about whatever you you’re making i also wanted to go over some of these files and what they do but once you create your project it creates creates a few files and folders uh the first one is Here this the pack icon this is the image that it uses for your add-on and if you go here where it says manifest.json this is a very important file here you really have to worry about the format version or the metadata but if you go here where it says header Here’s where it saves the name and description so uh here was this name that’s the name of my anno i just called it tutorial and here is this description i just put created by me if you want to edit any of that information you could edit it from Here and then here was this minimum engine version this is the minimum version that they have to be on for this add-on to work so here it’s set to 1.17.0 uh then this uid is a universal unique identifier this just used to identify your add-on inside of the game uh this Is just a bunch of random numbers and letters for every add-on you create you want to make a brand new uid but if you are using bridge uh bridge uh creates creates a brand new one for every add-on so you don’t really have to worry about that but another thing i wanted to Mention is that if you ever think someone stole your add-on uh you could you could check and see if they left the same uuid uh since this number is almost impossible that anybody else will have it uh if anybody else has this exact same number uh that probably means they Just stole your ad on this how i found some people that stole my add-on all they knew was how to edit the name and the description uh but since they don’t know how the add-ons work uh they didn’t know that this number is almost impossible or Anybody else would have it so they left this this exact same number that’s how i was able to figure out that they stole my add-on so if you ever have any doubts you could just check this and then here where it says version this is the Version of your add-on uh by default it said to 1.0.0 uh something really useful that i wanted to mention is that whenever you want to update your add-on you want to make sure you update this version too so you can change any any of these numbers around As long as they’re a higher number what this will do is it will replace the old version of the add-on with this uh newer version uh so you could change this to a version 2 or you could just change either the zero or the zero so it’ll be like two point Zero point one or as long as it’s higher than the original number uh it should replace the old add-on with this uh new version this is also very useful if you’re doing that if you’re if you’re uploading your add-on to a realm uh if you ever Make an add-on and you upload it to your realm and then you add something new to your add-on and you want it to show up on your realm uh it’s not gonna show up unless you update the version number uh it will replace the old add-on with this brand new one and Then here it says modules it’s just a that’s just what tells the game what type of add-on you’re making so here was this type if it says data that means it’s a behavior pack and if it says resource that means it’s a resource pack and then This one also just has a uuid and a version number you also want to update this whenever you update your add-on it also creates a blank loot table you could delete this if you want you don’t really need this it also creates a functions folder with the tech.json If you guys don’t know what a tic.json is it it this you can use this to keep any function you want activated all the time if you want to have a a function running constantly you could add the function here inside of the tic.json and keep it running all the time but If you’re not going to be using function files you can also just delete this folder it doesn’t really matter and here inside of the entities folder you just have the player.json so if you want to do it at your player just give them some custom components to all the players uh This is where you could you could edit this file uh but if you don’t want to edit the player then you could also just delete this too and for the resource pack it will be exactly the same thing you also get a pack icon you can change This tool make it different if you want uh you also get a manifest.js and it would be pretty much the exact same as the other one except for the resource packs you also create some files for the sounds blocks and biome clients uh if you’re if you’re not gonna edit Any of this uh you could just delete them it doesn’t really matter you also get it it also creates a texture folder uh that’s where all your textures will go in and it’ll and it also has the text and the sounds folder i just want to show you another things that you can Download that are pretty useful uh so if you go here to your web browser i i would also recommend downloading the official behavior pack and resource pack so if you go to this page i will also leave the link for this in the description but so here i just want to Go down here and look for where it says resource pack you want to download this and you also want to download the behavior pack so you just want to click here and download both of these uh once you downloaded both them you should get two different folders just Like this all you want to do is just click on it and then click extract all and then just choose wherever you want to extract them i’m just going to extract them to my desktop so this one is the behavior pack and you also want to extract the resource pack So once you’ve extracted both of these if you go here it says vanilla behavior pack here we’ll have all the vanilla entities these the armor stand the arrow and pretty much any other mod it also has some of the vanilla items so if you wanted to see how any of this works uh This this is pretty useful because you could see how all the vanilla entities items loot tables recipes scripts how they’re made you could also use this to see how all the mobs work so just as an example if i went here where it says chicken i could open this up inside of Bridge so i would have to just just drag this one that says chicken and drag it into bridge uh once you drag it into bridge it gives you a few different options you could either just open the file or you could save it to your project so you could add The vanilla chicken into your add-on and then edit it so you can change how it behaves or what it does so i’m here i’m just gonna click save to project and then hit confirm and then here if i go into my entities inside of my behavior pack the chicken was added So if you wanted to change how the vanilla chicken works here you could change some of its components or component groups so if i go here where it says chicken adult is just an example i could go here where it says if i go here it says spawn entity And then here’s where here’s the component that makes the chicken drop an egg every three to six hundred seconds so i could edit this so i could change it so the chicken drops an egg every one second one to ten seconds so instead of dropping every three to six hundred Seconds an egg it will drop an egg between one and ten seconds you could also change the sound that it makes and you could also change the item so here it says that it’s going to drop an egg i could change this so i could change it so the chicken drops a diamond So now i’ll be dropping in a diamond every one to ten seconds uh you could also change its loot table so if you wanted it to drop something different when it dies but like i said i’ll go over how to edit the entities and how to create your own Entities on a separate video that’s just a quick example i also wanted to show you what the namespace is used for so if i go here and create a new file if i just made like a simple item i could go here where it says blank item i Could give it a custom image if i wanted to or just leave this blank that’s what an image for me but you could edit the image later on and then here for the identifier you could just give this any name so if i wanted to make an apple i could just put apple And then the display name uh whatever name uh you want it to be displayed as so i would just call it apple too and then here click click here it says create and this will create the item for me and it will create some of the files That it needs so like i said this red one is the behavior pack and this blue one is the one that goes inside of the resource pack so if i go here to this red one to the behaviors if i go here it says description this is the name of my custom item So this is the identifier that i chose at the beginning so i chose tut for tutorial as my name space and then the name of the item which would be apple uh just as an example if you wanted to give this item inside of the game you could Use the gif command so you could do give then that is and then the namespace for which i chose tut and then apple so this is how you would give yourself this item inside of the game and the identifiers used for a lot of other things and i’ll give more Examples how to create custom items in a separate video and that’s pretty much it i’ll be making other videos on how to create your own custom entities blogs and items and a separate each with separate videos or else this video is going to be way too long but if you guys Do want to learn how to create anything specific just leave a comment and i’ll make a tutorial do You Video Information
This video, titled ‘How To Create Addons / Mods For Minecraft Bedrock | Part 1 Setting up | PE / Win10 Tutorial’, was uploaded by BONY162 on 2021-10-17 17:43:45. It has garnered 112793 views and 3182 likes. The duration of the video is 00:21:05 or 1265 seconds.
This is part 1 on how to create addons / Mods for minecraft PE / Bedrock in this video i will show you what programs i use and howto install them, all the programs shown will work on PC and mobile devices
========================
Twitter: https://twitter.com/b0ny434445
MCPEDL: https://mcpedl.com/user/b0ny434445/
Xbox Gamertag: B0NY434445
TikTok: https://www.tiktok.com/@bony_162?
==========================
PROGRAMS USED:
Bridge: By SolveDev DOWNLOAD: https://bridge-core.app/
BlockBench: https://www.blockbench.net/ Creator: JannisX11
============================
OTHER LINKS:
Official Behavior/Resource Packs https://docs.microsoft.com/en-us/minecraft/creator/ Official BehaviorPack: https://aka.ms/behaviorpacktemplate Official resource Pack: https://aka.ms/resourcepacktemplate
com.mojang folder location Win10:
C:Users%UserProfile%AppDataLocalPackagesMicrosoft.MinecraftUWP_8wekyb3d8bbweLocalStategames
#minecraft #bridge #addon #blockbench