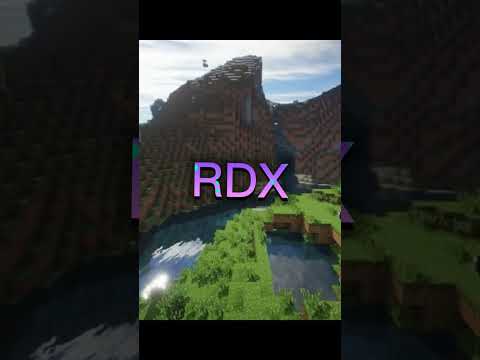
Hey guys i’m back with part three for this tutorial on how to build this mansion here in this video we’re gonna be finishing the main exterior of the house all we have left to do is the roof for the entire build be sure to grab some smooth court stairs Smooth quartz slabs smooth quartz blocks indecite stairs andesite slabs some anvils iron trap doors light gray concrete white stained glass panes and some pillar quartz blocks we’re gonna go ahead and focus on the lower sides first so i’ll just head on over here towards the left make sure you Have your smooth court stairs we’re gonna go here at the top layer of our walls and we’re just gonna start by placing these stairs upside down all along the edge so this is just the overhang for the roof we’ll go ahead and curve this around And now in each corner you just want to make sure to have a smooth quartz slab it’s just like how we did it for this front porch you see how in the corner we have a slab so we’re going to be doing that all the way around we’ll also do it for the Upper layer there and the right side over there so then let’s switch back to the stair we’re gonna place one here and then what we have to do is place one up against the pillar so it curves like that and then you can see we have another corner so place a slab And then we’re going to have a stair and a slab right here is going to be a triangle shape for the roof we’ll head on over here to this side i have another stair lined up with this pillar quartz block to the right of it we’ll have a slab And then another slab here at this corner switch back to the smooth chord stair we’re gonna have one up against that pillar and then have another one so those curve together then we have another corner so a slab and then just stairs wrapping all the way around towards the back side so you Can see here we have another corner so we have a slab wrap this around another slab here and then we are now in the back wrap around this corner another slab and pretty much just the same thing we did in the front so we have a stair like That and another stair then a slab there in that corner another stair and another slab we’ll go to this side we’ll have a stair lined up with that pillar slab towards the right slab in the whoops slab in the corner right there then a stair stair slab And then the rest of it will be stairs so wrap it around this corner and back into the wall here at the center area of the house so that is the entire overhang here for this left side now let’s go ahead and shape out the triangle points here at the front and at The back i’ll pretty much just show you how to do it here at the front and that i’ll quickly do it at the back so make sure you have your smooth court stairs and we’ll go right here on this corner right on top of the slab we’ll Have a stair on its side like that and then next to it we’ll have one upside down and then on top of that we’ll have another stair just like the first one then behind this will have an upside down one in that same direction and then on top of that another stair Just facing up and the center point is going to be lined up here at this left side of this window so lined up where this glass is so you just want to go up again with an upside down stair and an upward stair and then just one more time like that So now this side is brought up exactly where it should be so just make sure there is one two three four and five stairs facing up just like that now let’s go to this corner and we’re going to do the same thing we just did there so a stair on its side Then upside down and then on top of that then upside down and back and forth until you meet up with the other side so it’s going to be just like this so that is the first triangle shape all marked out we’re going to head on to the back side And do the exact same thing that we just did there so you could just match it up And now we have that one shaped out so now let’s fill in the space right here within this shape so we’ll start right on top of these full blocks of course we’ll make sure we still have our smooth court stairs and we’re just going to curve four stairs together Like this facing up the same way that we did it right here on this layer and then above that on each corner we’re going to have a full block of the smooth quartz and then in between those we’re going to have two smooth court stairs facing Upside down so it forms a shape like this and now all the other space that you see is going to be full blocks of smooth quartz so what we could do is just go from the inside and just fill this corner in then at this corner And then the extra two layers at the top so now from the outside it is all filled in and we have just this little design here we’ll go to the front and we’ll do the same thing And now both of those are done the next thing we’ll do is switch to our andesite stairs and start filling in the main part of the roof so now with your indecide stairs we’ll just start off by placing a layer right on top of our overhang so you can pretty Much just follow along right here curve it around and then eventually curve it into this stair here so it’s at the same layer as this first chord stair that we placed and we’ll go over here to this side and we’ll do the same thing so we can just start here And then wrap it around the corner and then along the side here and towards the back and we’ll do the same thing that we did at the front so you can wrap it around this corner and into that stair go to this side start here wrap it around the corner And into the wall for the center of the house oh hang on make sure it’s in that direction okay so we have that marked out we’ll just head on back up to the front so now let’s add the second layer so we’re going to be here on the same layer As the smooth quartz stair so the second stair here for the triangle point and pretty much all we want to do is just follow along the edge of the endocyte stairs that we just placed so we’re gonna place two here and then just right on the edge of our endocyte stairs And it’s looking like that we’ll go to the other side we’ll wrap this around and over to the back So we now have two layers we’re gonna go up on the third layer and just do the same thing So we now have the third layer and now you can see we have two more layers of stairs so just follow along with those and i’ll see you guys once i have it all brought up You can see here on this last layer these stairs are just side by side like that and then i’m just going to continue wrapping this around so here from the back side it is looking like this so far looking good so let me continue going towards the front We have it brought up like that we just have to go ahead and add one more layer of stairs so we’re just gonna follow along the edge of all of the stairs we just placed with one more layer And it is now like that so let’s go ahead and make sure to add some slabs right here on these smaller portions so grab the endocyte slabs we could just place a quick one like this or actually just place it there and then you could place another one Delete that so we’re gonna be placing a total of six just right there we’ll go to the back we’ll do the same thing and that’s good now let’s make sure to have the light gray concrete we’re going to go here on the same layer of these stairs and just Fill all of this space in so it’ll be like that now make sure you have your anvils we’re going to be placing it right on top of the edge of the light gray concrete we bring this all the way from one side to the other We’ll do the same at the back Anything here at the side we’ll just add an extra two on top of all of these anvils we’ll be sure to add some iron trap doors so you’re probably just gonna have to crouch and place them like this And there we go this lower side here is actually now done so that’s all there is to it just added some layers of the endocyte stairs we have a few slabs on each side here then the anvils with the iron trap doors we’ll head on over here to this right side And do this part next so now for this side although the shape is a bit different we’re actually going to be doing the exact same thing we just did over there so make sure to start with your smooth court stairs we’re going to add our overhangs so just the stairs here at the Top layer all upside down and remember in each corner we’re gonna have a smooth cord slab and then up against the pillar here just make sure that the stair is curving like that and then we have another corner here and then the stair and the slab there I’m going to continue going all the way around and like i said it’s just the same thing we did over at the other side and i went all the way around so i’ll just show you real quick we have the stairs we have the slabs in the corner We have just a slab a stair and a slab right here on this portion because we have our triangle shape that’s right here went all the way around over the garages just a strip all the way from one side to the other and then back up to the front So that’s all there is to it now let’s go ahead and shape out this triangle point here at the front and at the back and once again like i said it’s just going to be the same thing we did at that side so you know what the front is Going to be exactly what we did over there at that side the back one is just a little bit bigger it’s a little bit different in the middle so i’ll be sure to show you how to do that one but this one here is exactly how that one is So if that is the shape here at the front well head on to the back and it technically is pretty much just like the same thing except the middle it’s just going to have an upside down stair with the slab instead of the two stairs side by side like the front So i’ll start here at this corner and like i said just the same thing until we meet up with the middle which is just a little different So we’ll bring this up until it’s actually right there so lined up with this set of glass we’ll go to this side do the same thing So now there’s just an empty space in the middle these are at the same layer just side by side like that so we’re just going to have an upside down smooth quartz stair like that and then a smooth quartz slab to top it off now let’s do the little design that we Have right here within this shape so make sure to have your smooth court stairs and we’re just going to be right on top of these full blocks and we’ll start here and just have a total of five quart stairs all curving together like that and they’re all facing up then switch to Your full block so the smooth quartz will place it on each corner and they will have three upside down smooth quartz stairs above that now all the other space is just going to be filled in with the full blocks of the smooth quartz So now from the outside it is all filled in like that we’ll head on up to the front we’ll do the same thing so we’ll have four of the stairs all curving together so there at the back was five because that one is a little bit wider but here it’s four just like The other side then we have the full block on the corner and then the stairs upside down and then the full blocks everywhere else That is all taken care of so now make sure you have your andesite stairs and just like what we did over there i’m gonna go all the way around and add the layers of the stairs and i’ll bring it up until it’s at the same height as this point here at the front So i’m just gonna go all the way around i’ll just do the first layer so we’re just following along all of the courts here curving it into there we’ll go to this side do the same thing and just follow along this overhang wrap it all the way around towards the side Around to the back and then that’s about it So we have this oh hang on we have this side all filled in like that we’ll go over here So now you can just continue bringing up all the other layers until you’re at the same height as that point at the front So like i said i just matched up to the same layer as the point here at the front so it should be looking something like this i just went all the way around followed along that first layer of the andesite we had and this is exactly how it should be so Let’s just take a look actually let’s go ahead and fill this strip in so this is going to be the andesite slab here on the same layer as the quartz lab so we’ll just fill this in until it’s right there but yeah it should be looking like this We have a total of five spaces still remaining here and we could also pay attention to this side we have a total of four spaces all right and now let’s go ahead and switch back to the andesite stairs and we’re going to add one more layer following along all of these stairs And it is now all done with the stairs like that this grab is the light gray concrete well actually first right here let’s go ahead and grab the endocyte slabs i will have a total of six just right there and now all of the other space that you See you could go ahead and grab your light gray concrete go at the same layer as the stairs and fill it all in the same way we did it over at the other side So it’s now all filled in with light gray concrete like that the last thing we have left to do are the anvils and the iron trap doors we’ll start with the anvils and we’ll fill in the front side here so just right on top of the edge of the light gray concrete Bring it all the way along from one side to the other and then here at this side we’ll go ahead maybe just have two like that i have another two here and then we’ll go in this direction and bring it all the way towards the back And then once you get to the back we’ll go ahead and maybe just have another two there Another three actually we’ll have two and then the ones here at the back the three will all be in the same direction we’ll go to this side we’ll have two we’ll have another two here and then bring this all the way along it really doesn’t matter what direction You have these anvils in but i think this is probably the best way it’s gonna look so we have this side they’re all facing in the same direction all of this is facing in the same direction and then we’re gonna have this side so we’ll bring this along we’ll bring this over To right there and then we’ll turn it and bring it along here it is all looking good the front side is all in the same direction which is pretty much like the most important part as long as the front looks good then everything else should be all right But yeah i think that looks fine so now on top of all of these we’ll go ahead and add our iron trap doors And now this lower side is complete so we actually almost have the entire exterior of the house done the only thing that’s really left to do is the roof for the center area so now for the center we’re going to start by doing the overhang the same way We did it for the lower sides so we’re going to start with the smooth court stairs we’ll just focus on the center area first we’ll have a stair up against the pillar like that then a slab in the corner a stair and a slab we’ll go to this side do the same thing So have a stair lined up with that pillar a slab slab and a stair then we’ll go to the back i’ll go ahead and do the exact same thing And now all we have left are the upside down smooth court stairs wrapping around here at the back along the sides into the front in each corner where the pillars are there’s going to be a smooth quartz slab So now we just have to do the triangle points here at the back and at the front so it’s the same exact design that we did the other ones so the center point is going to be right on the center of this window so we’ll bring up this right side until we’re Lined up here at the right side of this window and that will bring up the left side to where lined up here at the left side and then the center point would just be a stair and a slab So it’s going to be brought up as you can see so we’re lined up here where this glass is we’ll go to this corner do the same thing And then it will both be the same layer like that leaving one space in the middle which would just be an upside down stair with a slab to top it off we’ll go to the front and we’ll do the exact same thing So we have both of those triangle points marked out let’s go ahead and switch back to our smooth court stairs We’re going to start right here so lined up where this quartz is in between the window and we’re just going to curve together a total of five smooth quartz stairs facing up so it’s similar to how we did this little design here so just five stairs right in the middle Will have a full block of quartz on each corner and then the three upside down smooth court stairs above that all the other space is going to be filled in with our full blocks of the smooth quartz so from the inside just one thing to Keep in mind to make sure none of the blocks are on the outside like that just make sure they’re all on the inside so you can still see each one of these stairs and the slab so it’s like this and then on the outside it’s all filled in We do the same at the back so we have the five smooth court stairs all curving together right here down the middle we have the full blocks on each corner the upside down smooth quartz stairs in the middle and then the rest of it full blocks of the quartz And now the back side is filled in so we’ll start back up at the front and we’re pretty much just going to start filling in all of our inside stairs wrapping it all the way around the sides to the back wrapping it around back to the front I’ll go ahead and show you just where it’s gonna be laid out all we really have to do is start off by following along the edge of the overhang so we’re going to start here at the same layer as this first stair wrap it all the way around And then we have that side all filled in and that it’s just the same thing over here so now you just want to follow along the edge of these andesite stairs continue working your way up and what i’ll do is just bring it up to the same layer as This stair here on both sides so just bring it up an extra one two three four five layers all the way around So just as an example i went ahead and did this entire side so just brought it up to that final stair that we have here at the center points like the triangle points so we’re just left with the slab here at the top so it’s looking like this I’ll go ahead and do the same over here at this right side so now i went all the way around on oh hang on on this side so it’s all looking good so far let’s go ahead and grab our endocyte slab and fill in one two three four five and six spaces Until we’re right here on the edge of our stairs we’ll do the same at the front So far this is exactly how it should be looking and now we’ll continue with the endocyte stairs and we’re just going to add an extra three layers following along all the other stairs we already have so just this rectangular shape so i’ll just start here on the first layer Go ahead and just add a random stair like that you could go ahead and maybe just delete it and just follow along this rectangular shape until you add an additional three layers So it is now like that that’s as far up as the roof is going to be we’ll go ahead and grab our light gray concrete and fill all of this in here at the same layer as these stairs so it is now like that Now i’m going to go ahead and mark out a couple just decorative chimneys that we have here at the top and the center so we’re going to be using the smooth quartz blocks slabs and stairs we’ll start with the blocks and we’ll go on each side so i’ll just start here on The right we want to delete two endocyte stairs right here down the middle so you should still see five including this corner one so we have one two three four five on each side then we’ll go ahead and fill this in with two blocks of the smooth quartz And then you just want to go ahead and shape out a square of four so we have that is one layer two layers and three layers so now this is a total of four right here we’ll go ahead and grab these smooth quartz stairs on top of this we’re just Going to have them upside down so we’ll just place one like that real quick and next to it we’ll have an upside down one we could then delete that and we just want to curve these all together and there we go so they all curve together And then we’ll top this off with some smooth quartz slabs we’ll go to the other side we’ll do the same thing so we have the two blocks of the stairs we have to remove here oh don’t delete that so just the two stairs there we have the full blocks And then an extra three layers of four the upside down smooth quartz stairs here on top of this anything at these slabs after that now we’ll go ahead and have the anvils we’ll just have three on each side we’ll go over here do the same thing And then oh hang on and then here at the front we’ll just bring it all the way from one corner to the other and same with the back so they’re all looking like they’re in the same direction and now we’ll go ahead and crouch and add all of our iron trap doors So now if this is all laid out the last thing we really have left to do are the windows in the roof so we have two here at the front and two at the back and then we’ll pretty much just leave it at that here for part three So we’ll start by just marking out where each window is going to be so i’ll start here at the front right side we always just want to make sure we still see two layers of the stairs here at the bottom so that means we’re going to be here on this third layer So start at the corner and just work your way over until you’re lined up with the seventh block so we have one two three four five six and seven you could go ahead and delete this and then two more to the left of it now we’ll head on over here to the other Side and we’ll do the same thing so we’re gonna be lined up with the third stair and then lined up till you’re over to the right by seven so delete the seventh block and then the two to the right of that we’ll go to the back and we’ll do the same thing So now i guess i’ll just stay here at the back i’ll go ahead and show you how to do the windows here and then it’s just the same thing at the front so make sure you have your full blocks of the smooth quartz we’ll go right behind this layer of the Stairs we’ll place three like that make sure you have your pillar quartz block we’ll place four going up on each side then we’ll go ahead and have an upside down smooth quartz stair at the top three white stained glass panes so now make sure you have your andesite slab We’ll go to each side of the pillar so here at the right and at the left and just place it at the top edge of those pillars make sure to have your smooth quartz slabs we’ll place one in front of each one of those into site slabs and then another one on top And then next to each one of those we’ll go ahead and have another slab one above that go over to this side do the same thing so those ones are lined up with the pillars and then right down the middle we’ll go ahead and have another one and then top It off with one extra at the top right behind this block right down the middle we’ll go ahead and have a smooth quartz block just to fill in that gap and then before we go ahead and fill in our ceiling here or like the roof let’s go ahead and delete This first layer of these stairs so we deleted three stairs right there we’ll go up in the next layer do the same thing go up in the next layer after that do it again and then just one more time here we’ll go from the inside make sure you Have your full blocks of the smooth quartz and we’ll go right in the middle of our window here so i have a full block there and there and then go right above it add two more and then at the top layer just one more time add three we’ll go back on the outside We’ll go ahead and grab the endocyte slabs here on this layer we’ll bring these in so an extra two go to this side do the same thing on top of that we’ll go ahead and have another layer of the slabs until you meet up with that stair so it was an extra four Next layer after that so just following along our quartz slabs bring this over until it meets in right there do the same here and then we have the final slab going all the way towards the back so now that it’s all patched up looks good The sides are all filled in we have our window so that’s all there is to it i’m going to go ahead and show you how to do it one more time over here at this side and then there’s just two more at the front that i’ll probably just fast forward through So we’ll start with our full blocks of the smooth quartz place three here at the bottom on each side we’ll have four layers of pillar quartz at the top of that we’ll have an upside down smooth quartz stair three white stained glass panes make sure to have your endocyte slab We’ll place one on each side at the top layer of the pillar quartz have your smooth quartz slab have it in front of those antecite ones and then another one on top and then to the left of this one we’ll have two to the right of this one we’ll have two And then right down the middle another two then go behind this empty space fill it in with the full block of the quartz and then before we go ahead and fill in our roof let’s go right behind here delete one layer of three then two three and four We’ll go from the inside make sure you have your full blocks of the smooth quartz we’ll line up here in the middle place one block on each side go above that place two and then above that place three go back on the outside we’ll go ahead and fill in our roof with The indecide slabs so here at the first layer oh wait hang on we have two here at the bottom and then on top of that we have four so this side two then four and then the next layer will be one two three four and five on each side And then right down the middle so now this side is done we’ll head on up to the front and i’m gonna do it two more times up here so i’ll just see you guys once i have it done So we now have both of those windows marked out here at the front and now that is pretty much all we’re going to do for the main exterior of the house so it’s technically done if you just want the house itself and don’t want any of the interior or any of the landscaping Then there you go you have the entire house done but there is just one more thing i actually want to do and it’s just like a little feature here for where the chimney is on the inside of the house so if you just want the exterior and not The interior you really don’t have to worry about this but i’m gonna go ahead and do it real quick and then we’ll leave it at that here for part three so make sure to start out with your smooth quartz slabs and we’re going to be four spaces away from the edge of the Wall here so we have one two three and four so we’re actually going to be on the fifth block and then you just want to make sure there’s three spaces of light gray concrete that you still see here so we see three here and then we see four here and then we Just have a smooth quartz slab now let’s go ahead and have a stair next to that and a slab and then go ahead and have two more pretty much going towards the back side then we have another slab and a stair so from up above looking Down from the front side it’s just a shape like this we’ll carve out two holes and then this is pretty much going to be lined up exactly where our chimney is going to be here in the living room for the first floor of the house so we’ll go ahead and delete these Blocks of the light gray concrete we’ll replace it with some full blocks of the smooth quartz then be sure to go ahead and grab some campfires we have to go down one more layer with our full blocks of the smooth quartz so we’ll just follow along the ones we already have Go back up and we’ll grab our iron trap doors and place these at the top of these full blocks of smooth quartz that we just placed so make sure it’s not on that layer make sure it’s at the top edge of these final blocks that we placed And then we’ll go ahead and grab our campfires we’re gonna have to crouch and place these on top of those iron trap doors now we have some smoke right there and that’s actually all there is to it i didn’t put too much time into this little feature here But uh yeah i just to say smoke coming out from here so it looks like the chimney is actually going it looks like there’s actually the fireplace and if the reason i actually wanted to be sure to add those iron trapdoors underneath is just because if you were to look Through the chimney from the inside and look up you just see some iron trap doors there so it looks like it’s part of the vent going out to the outside i’m gonna go ahead and leave it at that here for part three so we went ahead and actually did The entire exterior of the mansion so that’s all there is to it for the mansion itself for the exterior so now we have to do all of the landscaping and after we do that we’ll be sure to head on to the interior okay guys i’m Gonna go ahead and leave it at that here for part three for this tutorial on how to build this mansion if it helped you be sure to please leave a like subscribe for more and i’ll see you guys in part four Video Information
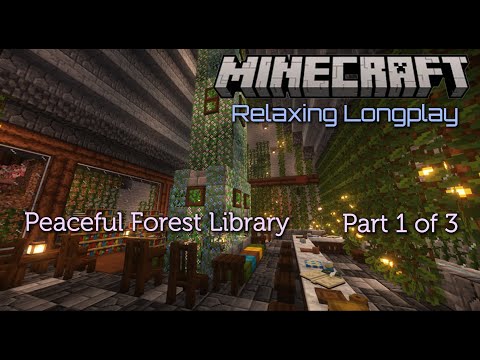
This video, titled ‘Minecraft: How to Build a Mansion 6 | PART 3’, was uploaded by Brandon Stilley Gaming on 2021-06-06 15:00:33. It has garnered 32221 views and 439 likes. The duration of the video is 00:38:13 or 2293 seconds.
Here in part 3 for this step by step minecraft tutorial on how to build a mansion, I will be showing you how to do the roof for the entire house, which then completes the main exterior of the mansion.
➤ Please LIKE the video if you enjoyed and SUBSCRIBE for more!
➤ Social Medias: ● Instagram: https://www.instagram.com/brandonstilley_/ ● Twitter: https://twitter.com/BrandonStilley_ ● Snapchat: https://www.snapchat.com/add/brandons…
➤ Music Used In Video: ● All music can be found at epidemicsound.com
#Minecraft #MinecraftMansion #MinecraftTutorial #MinecraftHouse #MinecraftMansionTutorial #MinecraftHouseTutorial