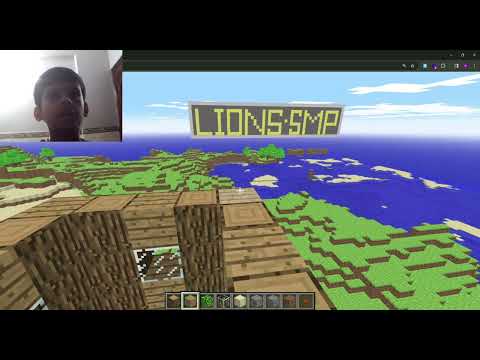
Welcome to season 15 of category 5 technology tv you know with the pinecraft installer you and your friends can play minecraft java together on your own self-hosted server it’s all powered by a tiny little single board computer robbie’s gonna answer the top five most common questions were asked after a minecraft server Installation i’ve got my raspberry pi 4 ready let’s get started this is category 5 technology tv starring robbie ferguson jeff weston And henry bailey brown also featuring bill marshall here’s the host of category 5 technology tv robbie ferguson i’m so pleased to have jeff and henry back with us for another season of category 5 technology tv and we’ve got bill joining us on the set now bill as the executive producer what is It that you actually do here i just give the people what they want okay let’s say we get started we’re all familiar with the raspberry pi micro computer virtually a super computer that can fit in my shirt pocket and with this i set out to create the pinecraft installer about a year ago Which turns a raspberry pi computer into a multiplayer minecraft java server that has led to some wonderful features here on category 5 technology tv over the past year but it’s also led to some great questions from our viewers all around the world jeffrey cunningham saw one of those earlier videos and says i Was looking for a project to use my pi 4 for and i think i just found it our first question has been asked by julia dominguez suspicious omnivan josh mandy and 15 frostbite151515 among others they all want to know how to edit the minecraft server.properties file on a pinecraft server to change Settings like the world seed or render distance or even enable command blocks yeah sure before i do answer that question though jeff i want to reiterate that the pinecraft installer simply installs configures and optimizes a minecraft server so editing the server.properties file is no different between a minecraft server that you Installed using the pinecraft installer or any other minecraft server so i believe the question is instead how do i navigate to the files on the linux file system like how do i break into this black box which is my raspberry pi because quite potentially the user’s not Very familiar with the linux file system and how to how to gain access to that i’ve also seen comments in on on our youtube videos saying to simply shut it down and pull the micro sd card plug it into your computer and then you’d be able to start manipulating the files and I’m going to suggest that that’s probably not a good idea reason is the very fact that you’re asking this question tells me that you’re probably not using linux because we’re not familiar with the linux file system if that’s the case it’s very likely that you’re using microsoft Windows and windows is smart so on windows when you pull this card and plug this linux micro sd card into windows it’ll ask you if you want to format it which as we know is bad because that will make you lose all your world files So i’m going to suggest we don’t do that instead we’re going to leave our pinecraft server running and head over to filezilla-project.org where we’re going to download and install the filezilla client not the server the client it’s absolutely free for all platforms once you’ve installed it it looks a little Something like this we’re gonna head up here and click on the open the site manager icon and we’re gonna click on new site call it whatever you want i’m going to call mine minecraft because i’m original and change our protocol to sftp now remember we know how to ssh into our Pinecraft server so we’re going to choose the ssh file transfer protocol choose your host which is the ip address of your pinecraft server in my case that’s 10.0.0.101 and of course this is the lan ip not the public ip your ip address is going to differ based on your home network Wherever you’ve got your pinecraft server running then i the username is the one that i use when i connect to ssh which in my case is ubuntu enter the password that i use when i connect to ssh and just verify that you have indeed chosen sftp otherwise you will not be able to Connect hit connect and that’s going to prompt me if i want to connect to this unknown server i’m just going to say ok and then we’re going to see we are connected to slash home slash ubuntu on my pinecraft server so i see my minecraft folder and within that folder Is my installed minecraft server and all my world and everything else it’s all here so now you see the server.properties file i’m going to right click on that and go view slash edit that’s going to say hey i’ve never seen a file with the extension called Properties so what the heck do you want to do i’m going to say well this is a text file i’m just going to i’m going to open it with the default editor for text files so hit ok and here we go now it’s open that in Notepad on windows 10 and i can see this is my minecraft server properties file and i can go through and make any changes that i want just keep a backup maybe save it to your desktop or something like that because if you break it your server is not going to start so In my case for today just for the sake of the demonstration let’s change my motd i’m going to call this robbie’s amazing server just so that i’ve made a change you can change of course any of the settings for your pinecraft server and i’m going to go file save When i’ve saved it now i can close notepad and you’ll notice that filezilla now prompts a file previously opened has been changed upload the file back to the server and i’m going to say yes now that you’ve modified your server.properties file don’t forget to restart your minecraft server so those changes can Take effect and we’re going to do that by heading over to ssh and then my username at 10.0.0.101 in my case and connect just like you normally would now go into the minecraft folder and type dot slash stop now that your minecraft server has been stopped safely type sudo reboot and when It comes back online in a few moments it’s going to be loading the settings from your modified server.properties file you need a raspberry pi 4 to build a minecraft server and there’s no better place to shop than ameridroid.com they sell and support raspberry pi and other single board computer brands from The ameritroy.com distribution center located in california support an american company we all love by shopping with ameridroid.com and get the gear you need for your pinecraft server and other maker projects directly from ameridroid.com our next question echoes throughout the youtube comments section by viewers like ashley smith wise joe 97 psych man david Lindblom some guy blue baits and leo they all ask how do i move an existing minecraft world to my minecraft server that’s a great question especially considering you’ve probably spent hours building your world who am i kidding it’s been years so losing all those master builds would be devastating now i’ve downloaded this World from planet minecraft you can get it from the link in the description below but really the demonstration is just to say hey if i had these amazing builds on my local computer on my minecraft client in a single player world well now how do i move those to a Pinecraft server so that my friends and family can collaboratively play with me on that same world that’s what we’re going to do so here in filezilla i’m going to connect to my pinecraft server and jump into the minecraft folder and within the minecraft folder we’re going to see some folders that contain our Existing world now i know it’s called world on this particular server so we see world world nether world the end if you’re not sure what your server is actually called you can right click on server.properties go into view slash edit and you’re going to look for level Dash name and under level dash name i see that mine is called world so if i look at my computer my folders and here i am on windows i’m going to go to percent app data percent it looks just like that hit enter and you see a folder called dot minecraft that’s where My minecraft stuff is all stored if you’re on linux or mac it’s in your slash home slash username folder you’ll again see dot minecraft go in there you’re going to see one called saves go in there and i can see my kingdom world so this is all of the world files for Kingdom so the reason i wanted to point out that my world is currently called world is because i want to make sure that i’m not i’m not already using kingdom as a designation for my world because if i was i’d have to back this up and delete It because i don’t want to upload this over top of one that has the same name it may cause some conflicts depending so in this case i’m safe to just simply upload this so the way i’m going to do that is drag the root folder of the World in the saves folder and drop it onto this white area on filezilla and this is in the slash home slash ubuntu minecraft folder on my server and i want to make sure again that i’m putting it in this white area not up here because see i would actually be Dragging it into a folder if i was to do that so drag it right here and drop and you’re going to see suddenly that we’re starting to upload this kingdom folder and there it is note also remember that pinecraft is running on linux and linux has a Case sensitive file system so with the capital k there it’s important to note that because a lowercase k on kingdom is not going to mean the same thing as a capital k on kingdom so now back in my server.properties file i’m going to simply change the level dash name to kingdom Again observing that it has a capital k kingdom and that is the name of the folder the world that i just uploaded which is right there in the root of minecraft in the home folder on my pinecraft server so now the final thing i want to change or possibly change within my Server.properties file is just look for the level dash seed in my case it’s blank and that means that it is going to it originally generated a random seed but now it’s going to honor the level seed of the level the world files that i have so because i want it to use the Same level seed as kingdom i’m going to make sure that this is blank if i had a seed there make sure i delete that before i restart my server otherwise it’s going to start generating areas using the level seed that i have specified here which may not be What i want so now that i’ve got everything the way that i want it i’ve got kingdom set as my level name i’ve got my level seed as blank i’m going to go file save and then close that file and filezilla will prompt me if i want To upload that which yes i do so now i want to simply stop my minecraft server and then reboot the pinecraft server so that it can load the new world files for kingdom and as i connect now that it’s rebooted i can see the kingdom is the Loaded world and now i can continue playing on that world on my minecraft server if you’re enjoying the show be sure to subscribe and give us a thumbs up on this video to show us you appreciate the hard work we put into it jeff what’s next well here’s another Popular question from minecraft users adrian zombie1 green shirt mr k maddie lissy clayk30 howdy my dudes craig dick simon mill trevor and crypto mania they all want to know how to add plugins to paper or spigot installed with pinecraft installer based on what we’ve just learned about using filezilla client to Access the file system of our pinecraft server it’s a lot easier to grasp because we understand now that pinecraft installer doesn’t change the way any of the minecraft server flavors operate let’s head over to spigotmc.org resources where we see there are over 54 000 plugins available for spigot and of course those are Compatible with paper as well you can go through select the ones that you want and just keep in mind you are running pinecraft on a raspberry pi single board computer so don’t go overboard with the plugins because they might affect performance however you can be smart About it and find the ones that are going to work right for you i’m going to just bring up g-sit as the demonstration here just so that we can install one on our minecraft server and gsit of course allows us to sit and lay down on our Minecraft server woohoo the kids love it so let’s download the jar file and just save that to my downloads folder and because we’ve already got our pinecraft server set up in filezilla client i can just simply click connect now we’re getting that prompt again i’m going to say always trust this host Because i don’t need to answer that every single time now i’m going to go into my minecraft folder and you’ll see one called plugins and then i’m going to just browse up here i’m going to go up to my downloads where i saved the gzip plugin and i’m going to simply upload That file by double clicking on it that’s going to place it in my plugins folder within my pinecraft server now i’m going to restart my minecraft server as per before and when it comes back up lo and behold i can use the slash sick command because g-sit is an installed And active plug-in on my pinecraft server one day i would love to be able to include a choice selection of plugins directly in the pinecraft installer because it just makes it super simple for you to install some of those plugins that i absolutely love running on our pinecraft server such as dinmap which Gives us an overhead map from outside of the game also red protect it allows our users to protect their areas from mobs and griefers and also to teleport between their areas which you might say is a little bit of a cheat for a survival server but it works great and The the players absolutely love it and finally i guess uh discord srv that’s another one that i absolutely adore because it allows our discord server members and our in-game players to chat back and forth that connects discord to the game which is absolutely brilliant robbie if i can interject you Can help robbie bring more great features to pinecraft installer by becoming a patron as a patron you’ll gain access to our high performance multiplayer minecraft server allowing you to build with other pinecraft supporters in our exclusive patron only minecraft survival world click the link in the video description Below to become a patron today or simply visit patreon.com pinecraft great point thanks henry i absolutely love creating the pinecraft installer for you and by supporting the project you’re simply enabling me to add new features and to continue to improve the pinecraft installer i’d love to see you in game on our Patron exclusive minecraft server world as well jeff who’s next well robbie big problem after installing pinecraft oguf cop’s level seed made him spawn on a tiny island [Applause] whoa i suddenly know how they feel when we come back robbie will show us how to generate a New world if we’re not too happy with the one we’ve got uh hello hello come back wait right after this Oh phew i made it back and i’m glad to see you did too since we’re still here give us a thumbs up to tell us you survived this far and post your comment below jeff moving on from that horrible tiny island what can we do well they’re not the only Ones left stranded henry ace kitty wasn’t happy with the world that they got either and wants to know how to completely blast it and create a new one without having to reinstall robbie can they generate a brand new world without having to reinstall oh Sure i got a great kick out of the tiny island guys thanks for the laugh just goes to show how absolutely random minecraft world gen can be and frustrating and frightening totally of course remember that recreating our world is a feature of minecraft itself not the pinecraft installer directly so The way to do this is the same as with any other minecraft server so in filezilla i’m going to connect to my pinecraft server go into the minecraft folder we already know that i’ve got a world called world and one called kingdom so those are the two names that Are off limits view or edit our server properties file and all we’re going to do is go down to level name and we’re going to give this a new name that does not currently exist on our pinecraft server so i’m going to call this new underscore world just so It’s easy for us to see next up i can if desired specify a level seed if i leave it blank in my server.properties file well it’s going to generate a new seed for me automatically i’m going to save this file and remember the only thing i’ve changed is the Level dash name so having saved that i can close it and then of course filezilla asked me if i want to upload and i say yes now just like normal i’m going to reboot my minecraft server and as soon as it’s finished booting i can just look at my folder here on filezilla And right click and go refresh and watch what’s going to happen as soon as i do that there we go new world and new world nether are already created now it does take a couple of moments time for the new world to be generated but we know That our minecraft server is now using new underscore world so let’s connect and take a look and here we go it is the same server the same connection but a brand new level a brand new world and a brand new seed so now you can explore your new world and Hopefully your world gen will be much more to your liking we’ve got a great one from aros uken and vazdam they want to know how do i move my minecraft server to an external hard drive on my pinecraft server ah that is an excellent question particularly with the raspberry pi 4 i Suspect you’re most likely going to be booting from a micro sd card if that’s the case that means your operating system’s on here your minecraft game binaries are on here and your world files are on here that’s probably not going to be a performance problem for You if you’ve only got two or three people playing all at once but the moment you’ve got 10 or 15 or 20 people all connecting to your pinecraft server at the same time well all your world gen is happening on here so if they’re on various blocks and the world gen is Trying to take place you are going to experience lag we can remedy that by moving our world files to faster storage media the fastest usb flash drive i could find is the kingston data traveler max it’s a usb 3.2 gen2 usbc device that can read At up to 1 000 megabytes per second and right at a whopping 900 megabytes per second of course the raspberry pi 4 only has usb 3.1 gen 1 which is also called usb 3.0 but the drive is fully backward compatible with an adapter so the bottleneck will be our raspberry pi bus Not the drive but while we’re not going to be utilizing the full speed of the drive right now we’ll still be getting faster speeds on a gen 1 port than any other flash drive i could find whatever drive you choose just make sure it’s as fast as you can get the faster The drive the better your pinecraft server will perform because the kingston data traveler max is a usbc drive we’re going to need a usb-a adapter so that we can plug it into one of the raspberry pi’s usb 3.1 gen 1 ports just make sure that it’s able to handle at least 5 Gigabits per second because that’s what the port can handle the main thing is to be careful to stay away from adapters that are slower such as usb 2.0 speeds and look carefully at the pictures and make sure you’re ordering the correct gender adapter the One that i chose is listed as gen 2 it supports up to 10 gigabits per second so that’s gonna work absolutely perfectly we’re about to get into some serious linux geekery here i’m going to try to go fast enough that i don’t lose you but slow enough that we’re learning and able To follow along ask your questions in the comments below if you have any trouble here i am ssh into my pinecraft server i’m going to go into my pinecraft folder and the first thing i always want to do is just to get pull i want to make Sure i’ve got the latest and greatest version in that folder there is now a folder called tools so i’m going to cd into tools and in that folder i’m going to go dot slash drive detect and simply hit enter that’s going to run this drive detect tool that I’ve created in order to make this process a lot easier for you now i’m going to select one of the two blue usb 3.2 gen1 ports on the raspberry pi 4 and plug in my drive and as you can see as soon as i plugged It in it gave me all this information so the main thing that i want to pay attention to today is the command wipe create partition and format noting all data on the drive will be lost that’s fine i want to copy all these lines of the command Put that in my clipboard then hit ctrl c to quit and then i’m going to paste that into my command line and hit enter that’s going to prepare that drive create the partition format it and it’s going to spew out my information that i need to add to etsy fstab so this Information here is already pre-filled copy this line to my clipboard and go sudo nano slash etc fs tab and hit enter this is a file that tells my raspberry pi what drives to mount and where to mount them on boot so i’m going to paste that line in And it’s filled in all that now the only thing i need to change is this default mount point which is slash mmt slash mount point i’m going to change that to slash home slash ubuntu in my case that’s my username slash minecraft okay just like that and hit ctrl o enter So now if i go control x to exit now go into that folder i’m going to go slash home slash ubuntu minecraft just to type it out long form for you to see and that is where all my minecraft files are located i’m going to stop that server And now that it’s stopped i can get that out of my way by going up to my home folder and then i’m going to move that folder so if we look at the list we see minecraft there see it there i’m going to move that somewhere else i’m going to go mv Minecraft and we’re going to move that to minecraft dash old so now once i’ve done that if i do an ls i see there is no minecraft folder there’s now one called minecraft dash old and if i look in that folder that’s my minecraft server so i need to go mkdir space Minecraft and we’re going to recreate that folder that’s no longer in existence and now i want to turn that into a mount point where we’re going to mount our external drive so i’m going to go sudo chatter c-h-a-t-t-r plus i to make it immutable minecraft Enter so now we have two folders one is called minecraft and it’s immutable it’s ready to be a mount point and we’ve got one called minecraft dash old if i look in the minecraft folder it’s actually empty if i look in minecraft old it has all my files so Now because we’ve already added it to fstab right remember we did that so now if i type sudo mount dash a this is the moment of truth is it mounted so now if i do ls minecraft there should be a folder called lost and found all of a Sudden because we now have our external drive that kingston drive is now mounted on minecraft so we need to prepare that a little bit if i do an ls now you’re going to see something interesting here minecraft is owned by who root well ubuntu is the actual user that We need our minecraft server to be running as so i need to change the ownership of that folder recursively so ch sorry sudo ch own dash r ubuntu colon ubuntu minecraft now i can see minecraft is owned by ubuntu and it’s ready to go so now i need to Transfer my minecraft dash old into the minecraft folder i’m going to use rsync for that so i’m going to type rsync dash av so that’s an archive and verbose output so that we can see it happening and we’re going to go minecraft dash old slash keeping in mind that the trailing Slash is required on the source folder otherwise we’re going to sync the folder rather than its contents and then minecraft which is the destination and now that it’s complete do an ls-lah minecraft and we’ll see our minecraft files are now on that mounted drive in the minecraft folder so we’re going to Go sudo reboot and after a few moments time reconnect and we’re going to type screen dash r minecraft with a capital p and we can see that our server is running so we’re done that’s all there is to it and we can close out of that exit and you can Enjoy the improved performance i should note that while i do trust that you’re keeping a good backup of your world files now if your micro sd card fails which they’re prone to do you’re not going to lose your world files because they’re on this other media it doesn’t replace the need to Back up your world but at least it’s a lot more reliable i’ve had enough micro sd cards fail to know to keep a good backup of my world files listen i want to just thank you for watching and thanks everyone for your great questions you can turn a raspberry pi 4 into a High performance multiplayer minecraft server using the free minecraft installer program and you get that in the video description below that’s all the time that i’ve got folks don’t forget to like and Bye Video Information
This video, titled ‘Raspberry Pi Minecraft Server Pinecraft FAQ | Edit server.properties | Move world | Add plugins’, was uploaded by Category5 Technology TV on 2022-02-24 00:30:10. It has garnered 10073 views and 276 likes. The duration of the video is 00:28:24 or 1704 seconds.
Pinecraft Raspberry Pi Minecraft Server FAQ: Edit server.properties | move world files | add plugins | use external USB drive.
Episode: S15E01
Behind The Scenes Commentary: https://www.youtube.com/watch?v=PVFNBhCo7QM
🔗 Pinecraft Installer: https://github.com/Cat5TV/Pinecraft
❤️ Support This Project: https://patreon.com/Pinecraft
🛒 Kingston Data Traveller Max: https://amzn.to/3LqFAw4 🛒 USB-C to USB-A Adapter, 10 Gb/s: https://amzn.to/3oF48I3
🔗 FileZilla Client for Windows/macOS/Linux: https://filezilla-project.org/
🔗 Minecraft World “Kingdom 2015” by datrealg00se: https://www.planetminecraft.com/project/kingdom-2015/
🔗 Spigot / Paper plugins: https://www.spigotmc.org/resources/
🔗 Find Minecraft Plugin: https://www.spigotmc.org/resources/gsit-modern-sit-seat-and-chair-lay-and-crawl-plugin-1-14-x-1-18-x.62325/
🔗 Dynmap Minecraft Plugin: https://www.spigotmc.org/resources/dynmap%C2%AE.274/
🔗 RedProtect Minecraft Plugin: https://www.spigotmc.org/resources/redprotect-anti-grief-server-protection-region-management-1-7-1-18.15841/
🔗 DiscordSRV Minecraft Plugin: https://www.spigotmc.org/resources/discordsrv.18494/
⭐⭐⭐⭐⭐⭐⭐⭐⭐⭐⭐⭐⭐⭐ New to Pinecraft Installer and want to set up a NEW Minecraft Java Server? Check out this tutorial to get started: https://www.youtube.com/watch?v=1A4FtaiNkrg ⭐⭐⭐⭐⭐⭐⭐⭐⭐⭐⭐⭐⭐⭐
🛒 Get Your Raspberry Pi 4 and other cool gear: https://ameridroid.com/
❤️ Join us on Patreon: https://patreon.com/Category5 💻 Visit Our Web Site: https://Category5.TV 💬 Discord: https://discord.gg/dKz5RYc 📌 Subreddit: https://reddit.com/r/Cat5TV/ 🐦 Twitter: https://twitter.com/Category5TV 👍 Facebook: https://facebook.com/cat5tv/ 📸 Instagram: https://instagram.com/category5tv
Category5 Technology TV is created and produced by Robbie Ferguson for Category5 TV Network. To learn more about how we produce this show, visit our sister channel https://YouTube.com/TheShowShow
0:00 Introduction 1:21 About Pinecraft Installer 1:58 Editing Minecraft server.properties File on Pinecraft Server 6:16 Rebooting Pinecraft Server Safely 6:50 ameriDroid.com for Raspberry Pi and More Maker Tech 7:21 Moving Minecraft World to Pinecraft Server 12:03 Adding Minecraft Plugins to Paper / Spigot on Pinecraft Server 15:15 Pinecraft Patron-Exclusive Minecraft Survival Server 16:06 Generating a New Minecraft World on a Pinecraft Server 19:38 Moving Minecraft Server to External Storage on a Pinecraft Server 27:43 Final Thoughts 28:04 Closing Credits
#Minecraft #RaspberryPi #Tutorial