
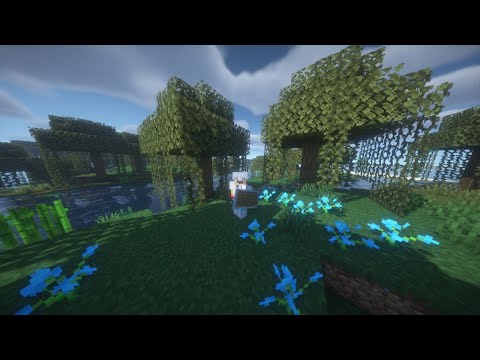
Hello everyone my name is Pixar IFS and welcome back to the Minecraft Survival Guide I hope you guys are having a good day today we’re over here starting off the episode at Old Town because I want to show you something we managed to do on a live stream a little while ago this Little island over here seems kind of innocuous and eventually we will have ourselves a little house along here roughly in the same sort of style as we’ve been working with elsewhere in this area but I wanted to show you something a little special that we Cooked up on the way because while I was filling this whole area in whilst the island was taking shape underneath here I came across an area that I’d sort of unintentionally built into a cave mouth and so what I decided to do is actually dry out the area underneath here and Turn it into a kind of secret base we’ve got a conduit set up in here which for the grand scheme of things means that we can do a little bit of underwater work in the swamp around here and as you can see on the live streams we’ve been kind Of terraforming some of the area underneath the swamp here with mossy cobblestone and a little bit of regular Kabul in slabs and so forth I’m really looking forward to mossy cobble slabs by the way but the sea grass and the sea pickles to give the place a little bit Of ambience and we’ll light it up and the whole area is feeling a little bit more put together still going to work on this as a shipwreck at some point that the kelp farm is definitely performing pretty well it’s got up to the third chest there I’ll be able to start Smelting some of that and converting it into kelp blocks soon but today I decided I want to work a little bit on this and I want to turn it into this kind of underground secret potions lab the idea now is that the folks in the swamp here while their houses on the Surface may be kind of run down and ramshackle and yes I still need to fix the roof of that thing it is looking a real wonky down here below the surface they might actually have some stuff that they are sitting on that they kind of Want to keep a secret some stuff that is buried here below the surface and so yeah what I want to do is turn this whole thing into an underground potions lab and then we are going to do a comprehensive guide to all of the potions in Minecraft how to brew them Have some of the extra stuff like gunpowder and dragon’s breath will turn it into splash and lingering potions some of the potions that you may not necessarily want to brew and our end goal for all of this is going to be to achieve the advancement here in the Nether tab for having every potion effect applied at the same time we are going to make ourselves a furious cocktail today folks and I’m probably not gonna like it I expect a little bit of a hangover after today’s episode but enough talking for now I am gonna go away and transform This entire place into a bit of a potions lab I’m gonna get all the ingredients together that we all need to make these potions and then I’ll be right back welcome back folks so I’ve done a little bit of work underneath here and while we could swim in through the cave entrance We used before I kind of want to take this this is a very obvious but we’re ill it will eventually be hidden trap door that’s going to be inside the house that ends up on top of this little island this artificial island that I’ve built and as you can see down there we Have some cool stuff going on so all you need to do really is stand on here flip the trapdoor and we can hold space to bounce on the slime blocks close that trap door behind us and we have entered our secret potions lab here we go we’ve Got all of the stuff that we need down here and this little cave underneath here has converted really nicely I tried to keep it a little bit natural looking but we’ve got an eclectic range of stuff down here a nice little kind of interesting space for us to do some Potion brewing and some of the resources that we require for potion brewing are even available to us down here I’ve got a little melon patch for us to make melons for glistering melons which are some of the supplies we will need for this and we’ve got a whole bunch of Stuff over here we’ve got nether wart growing I’ve got my ender chest here in case I need to grab a few things we’ve got a few cauldrons of water and I like the fact that the water in the swamps kind of has this like off greens sort of Color that I thought made it look kind of nice next to all of the slime and I figured the slime is kind of like congealed algae fide swamp water that’s crept in from outside also I’ve reconfigured the conduit kind of rig over here that so the conduit actually Kind of looks like it’s inside of a giant it feels like a Space Marine helmet a little bit kind of looks like a helmet of sorts but be conduit power because this amount of prismarine around it is still pretty much the same should still be the same full effect that we Get from of the standard setup with the three rings of prism ER so without further ado we’re going to dip our hands into the potion brewing setup and this chest here contains pretty much all of the ingredients we will need I’ve got a spare brewing stand In here as well we can probably do a little bit of fun stuff with this because there are ways you can automate brewing I’m not gonna go heavily into that stuff today because making a full automatic potion Brewer is probably deserving of an entire episode separate To this one so today I’m gonna go over a lot of the potion brewing recipes how it different potions can be brewed and then modified and then in the future we’ll probably come up with an automatic a redstone a fight potion Brewer that’s going to do all of this stuff in an Automated way for now we’ll need to cover the basics of potion brewing and I brought these hoppers around so that I can show you a little bit of the automation stuff a little bit later on so you’ll start off by needing a brewing standard these are made with one blaze Rod and three cobblestone in a crafting table and once you get that there are a few things you will need you’ll need some glass bottles and you’ll need a water source now cauldrons are a popular water source they can be filled up with a bucket of Water and then they can be used three times to get three water bottles before they drain completely and have to be refilled with a bucket of water the thing about that is that if you’re just working from one cauldron and you don’t have water really close by it can be a Bit of a pain to do that so a lot of people forgo the cauldron entirely and fill up their bottles of water from the nearest flowing or full water source and you can actually do that infinitely without draining the water away at all as you can see my inventory is Absolutely full of water bottles now and I can start filling these ups so generally speaking I tend to avoid using a cauldron on the bedrock addition cauldrons have a little bit of extra functionality but today I’m going to mainly be covering the stuff that works in Java Edition because I’m not exactly Sure I’m pretty sure you can fill a cauldron with potions and then use that to craft tipped arrows now in order for the brewing stands to function once they’ve got water bottles in here they will not be able to brew anything unless you fill up this spot here with blaze Powder so I’m gonna grab a little bit of that out of this chest as well blaze powder of course comes from blaze rods each blaze rod will come up with to blaze powder if you break it down in your crafting interface and just one blaze powder will start to fill up this Gauge here and I think that does a maximum of twenty brewing operations before it can see another blaze powder so that should be good for 4/20 brewing operations now a brewing operation is just one ingredient going into one two three water bottles down here so you can either do them one At a time or you can do them two at a time or three at a time it still consumes the same amount of ingredients regardless of how many bottles you use so obviously if you want to create a bunch of potions you can create a batch of three at a time and That’s usually the most efficient way of using the ingredients so I’m going to place some blaze powder in each of these so they are ready to go and they will cover a little bit of the basics of potion making the basic ingredients you will start pretty much every potion you Make with is nether wart nether wart can be added to these water bottles in a brewing stand that’s powered with blaze powder add one in there and you will start to see this bubble up and it will take a few seconds to process in much the same way that smelting something in A furnace takes a little while for it to cook fully and once this all bubbles down you’ll be left with three awkward potions so here we go we have three awkward potions waiting for us here in the brewing stand and the awkward potion despite it not having any effects right Now is the basic ingredients of basically any potion you need to make after this point there are a couple of small exceptions to this which I will go over now before we go any further to start off with we’re going to take some sugar a spider eye and a brown mushroom We’re going to combine these ingredients in our crafting interface like so and we get a fermented spider eye fermented spider eyes can produce it the only potion which does not need nether wart to start it off it does need blaze powder and water bottles but if we place A fermented spider eye in here we will actually end up with three potions of weakness potions of weakness are also something we’ve covered in a previous episode and I’ll give you a moment to remember which one it’s the episode where we cured a zombie villagers making a splash potion of weakness and Splashing a zombie villager with it then feeding it to Golden Apple is how you turn a zombie villager back into a villager so even if you don’t have nether wart as long as you have a brewing stand which it’s actually possible to get in one location in the Overworld without having to go to the nether at all it is possible for you to cure a zombie villager and transform him back into a villager the location you will find a brewing stand out in the overworld is an igloo which is occasionally found in ice planes occasionally they’ll generate With the ice planes terrain and every so often one of them will have a basement that kind of acts as a research station and it will have a villager and a zombie villager in cells down there and a brewing stand nearby with the ingredients you need to turn these Amba Villager back into a regular villager I would love to find an example for this but the igloos are actually somewhat rare and finding one with a basement is even rarer so it will be something we’ll have to cover in a future episode but for now just know that there is actually A way of finding brewing stands outside of going to the nether not only that but if you’re lucky enough to find an end ship somewhere in the end near an end city then you’ll find yourself a brewing stand already in there loaded up with two potions of healing which you can Take that’s something that you can have for free but obviously that requires going past the nether in order to get to the end so not exactly your primary source of brewing stands anyway we’re going to take the potions of weakness out of this brewing stand I’m going to Pop them up here in this chest we might need those later but for now we’re just going to pop them in there now if we fill this back up with another three water bottles we can actually go into what happens if you place a different ingredients in the brewing stand before You put in a nether wart because something does happen for the various ingredients that you can have for a start let’s put a blaze powder in this one let’s put some gunpowder in this next one along here and finally let’s put some glowstone in this one here because there are different types of Potion that you can get that aren’t necessarily ones with effects much like the awkward potion these ones don’t really have any kind of purpose they used to be part of a more complex brewing system back in the day that was simplified and these are kind of like Holdovers from those days so here we have a mundane potion which is what you get if you put in any ingredient that isn’t a nether wart glowstone or gunpowder gunpowder turns any potion into a splash potion and that includes basic water bottles so what we have here Is a splash potion of water basically and you can throw it like that it doesn’t even produce any water it just produces kind of water particles and that I believe is capable of damaging mobs which are hurt by water like blazes and so in a pinch if you have a a splash Water bottle on you you can use that I’m pretty sure it will also put you out if you’re on fire I have a flint and steel on me as it happens so let’s try this out if I throw a splash bottle of water on there there we go it puts the fire Out so presumably that will put out a player if they’re on fire as well we might as well give it a try I’m resistant enough to fire here we go I set myself on fire for a little while and splash oh no I’m not out okay luckily there’s some water nearby so Maybe that only works on the fire itself no worries but that is a splash bottle of water for you the last one we have here is thick potion and no it doesn’t make you thick it just has no purpose whatsoever and it isn’t even possible to Combine this with a nether wart now and turn it into some other kind of potion that is just a dead bottle of water with a different name so I’m gonna take the mundane potions and thick potions and everything out of each of these brewing stands I’m going to refill the bottles Of water from our water source out here and then we’ll get to brewing the actual potions that we’re looking for today we’ve already got awkward potions set up in this brewing stand over here I’ve added a nether warts to each of the other brewing stands so that we all have Awkward potions in each of those and now we can get into the recipes let’s start with the positive effects first starting I guess with sugar and blaze powder as our reagents the stuff that we are adding to this potion in order to turn it into one with effects let’s start by Popping some sugar in there combined with awkward potion sugar we’ll make a potion of swiftness the basic potion will last for three minutes and it can be upgraded using glowstone or redstone to either enhance the effect or extend the duration so drinking one of these potions of swiftness will give you a Three minute burst of speed that makes you 20% faster now I’m going to add the blaze powder to this one and notice when I shift click that it ended up in the potion ingredients slots rather than in the blaze powder fuel slot over here it Kind of figures that what you want to do is brew up a potion using the blaze powder and blaze powder itself is the ingredient for potions of strength which will give you a little bit of an increase in your fighting ability one of these will last for 3 minutes and will Apply an extra 3 attack damage and once again this can be combined with glowstone or redstone to enhance or extend the effect but attack damage is actually a considerable amount when you consider that my sword with sharpness 5 deals 10 attack damage on its own right so we’ve got a fair Amount of increase there and with some glowstone applied to that the strength to effect makes it even more damaging next up let’s take a look at phantom membrane pufferfish and magma cream now phantom membrane of course you get from attacking and killing phantoms pufferfish you will get from either Fishing or killing pufferfish that you’ll find in warm oceans and magma cream can be found by either killing magma cubes or alternatively combining a slime and a blaze powder a slime ball and blaze powder in a crafting interface that will get you another magma cream That you can use in a pinch if you’re having trouble finding magma cubes in the nether let’s add the phantom membrane to this brewing stand let’s add the pufferfish to that one and finally we’ll add the magma cream to this one and that right there is going to get us A fire resistance potion this one here is going to get us a potion of water breathing and this one is going to get us a potion of slow falling allowing us to fall slower and resist full damage the slow falling potion here has a shorter duration than some of the other Potions we’ve looked at it’s only got a one minute 30 duration and it cannot be enhanced you cannot have a potion of slow falling – it doesn’t make you fall even slower it can only be extended using red stones so that the duration is a little bit longer likewise the potion of water Breathing cannot be enhanced using glowstone either because what’s it going to do make you breathe water for a little bit better all it can do is increase the duration because potions of water breathing prevent you from needing to resurface for oxygen for the duration of the potions so whatever breath meter You have whatever like bubbles that you see in your breath meter will be sustained there until the potion wears off even if you’re about to drown if you drink a potion of water breathing you’re going to be a hundred percent fine likewise over here with the fire resistance potion You can drink that anytime even before you get set on fire or during you being set on fire or drowning in lava and the fire resistance potion immediately takes effect and it cancels out any damage that you’re currently taking note once again that fire resistance cannot be enhanced that there is no fire Resistance to with glowstone there is only an increased duration of fire resistance now this one and the water breathing potion can be extended to eight minutes I believe the limit on slow falling is four minutes so once again we’re gonna take all of these out of the brewing stands and pop them in The chest up there because we’re going to need to drink all of them at some point maybe not every single bottle we’re brewing up here but one of each is going to be required to get that advancement at the end of the episode now let’s take a look at the remaining Positive potions starting with the rabbit’s foot and the ghast here as our reagents I’ve added some more awkward potions in here brewed those up with nether warts and we can add the rabbit’s foot and gas tear to these first two the rabbit’s foot will get you a potion of Leaping which applies the jump boost effect which if you’ve been able to play around with a beacon you might already be familiar with from the beacon list of effects there we go three jump boost potions their potions of leaping with three-minute duration which can be ups to eight minute duration with redstone And enhanced to a potion of leaping to with a one minute and a half duration and a little bit of extra jump booster the jump boost one potion will get you over a block and a half the jump boost to effect whether it’s from a potion or From the beacon will allow you to jump over two blocks so it is actually possible to jump super high you can jump over fences and stuff like that if you have the jump boost effect enabled I personally find it kind of disorienting so I don’t use this one all that much Not to mention that rabbit’s feet are actually really tricky to find I was hunting rabbits in the desert just to get the five rabbit’s feet I have on me for about half an hour and I managed to acquire probably about a stack and a half of uncooked rabbit and rabbit hi to The other two things that they drop I only got five rabbit’s feet out of that and that was where the looting three sword and switching from my bow to my looting sword so that I could get drops if I had to shoot them from a distance so yeah rabbit’s feet a little bit Difficult to find but like I said you can get that effect from a beacon if you don’t want to go around hunting rabbits the entire time gasps two tears on the other hand you have to hunt down from gusts and they will get you a potion of regeneration which applies a healing Effect basically the entire time the potion lasts so as you can see the duration of this one is a little bit lower and if you increase it to you regeneration – I think it only lasts for about 22 seconds but the healing effect is enhanced and you’ll be able to heal Up even faster than you would which can save your bacon in cases like the weather or the Enderdragon fight when you are really hurting for health obviously this requires you to kill a bunch of gas but as we’ve seen with a bow and arrow and switching to a looting Sword you can acquire a fair amount of gas tears this isn’t even half the gas tears I currently have but I’ve been spending a fair amount of time in the nether so your mileage may vary now for the remaining three positive effects we actually have to look into items that The player needs to craft because these next few are not found really in the wild I think it might be possible to get one or two of them as treasure rewards in loot chests but I could be wrong about that anyway let’s dig into the chest here Let’s grab a melon slice some gold nuggets and a carrot and this spare turtle shell I have to be careful not to cook my main turtle shell that I enchanted on the most recent livestream because wow we got some great enchantments on that one the first three came straight out of the enchantment Table it was very cool I applied many an ATCO affinity afterwards but in the meantime I managed to get myself a a completely unenchanted turtle shell thanks to my little colony of turtles and that one is something you have to craft out of five scoots go back and Check out the episode about turtle hatching if you want to know a bit more about that but these other two here are actually quite special if you put a melon slice in a crafting table and surround it with gold nuggets you get yourself a glistering melon slice do the Same thing with a carrot and you’ll get yourself a gold carrot and these two form the basis of two other potions we’re going to put one of them in each of here we’ll put the glistering melon in there we’ll put the golden carrot in there and we will put our unenchanted Turtle shell in the final brewing stand over here make sure that these all have awkward potions yes they do by the way if you take an ingredient out of the brewing stand at any point you can still take it away it hasn’t consumed the item in there yet and it completely cancels The brewing process allowing you to pop it back in anytime you like so you don’t need to worry too much about that if you panic and realize that you haven’t put any nether water in these yet there’s still time for you to yank it out of the Brewing stand with no ill effects and thanks to the carrots what we have here is a potion of night vision which once again can be extended using redstone but cannot be enhanced it is not possible to see even better in the dark it’s basically a one-and-done kind of Thing the potion of the turtle master is one we covered in the previous episode it naturally gives you slowness for but resistance 3 and if you enhance it with the glowstone it will key you slowness 6 and resistance 4 that will slow down your speed by 90% making You possibly the slowest thing in Minecraft so you might need to keep an eye on that a little bit if you plan on using it at all last of all the glistering melon is pretty much the most basic potion it gives you a potion of healing instant health basically if you Drink that while your hearts are low it will just instantly heal up that amount of Hearts it’s not like a regeneration effect where it applies it over time instant health means what it says on the tin so at this point we can go in a couple of different directions we can Either look at enhancing these potions or we can look at the negative potion effects I’m going to look at enhancing stuff first because otherwise I would be left with a bunch of negative effects and be able to demonstrate the enhancement of those negative effects and then I’d probably drink a potion That might end up killing me so how about we don’t do that instead I’m going to pull out some gunpowder some glowstone dust some redstone dust and some dragon’s breath which if you’ll remember we get from taking a bunch of empty bottles to the dragon fight and Then right clicking with the bottles in our hand anytime there is one of those pools of purple particles on the ground that the dragon has been breathing out when it attacks you I’m gonna add some gunpowder to the potion of leaping I’m going to add some glowstone dust to the Regeneration potion I can’t add the redstone dust to a potion of healing because the health effect is instant so we’re going to skip over that one and apply the redstone dust to the night vision so over here with the one we added the Gunpowder to we now have a Splash potion of leaping remember when we added the gunpowder to that potion and it changed it into a splash or water bottle the Gunpowder will change basically any potion into a splash potion this means that instead of picking it up and drinking it in much the same way that you would drink like This from a water bottle right clicking with it in your hand if it’s a splash potion we’ll throw it to like the splash potion of water that we saw earlier and the effect will appear in a radius around that splash now occasionally if you’re throwing a splash potion it might Be that you get caught on the outside of that radius and sometimes that doesn’t apply the full length of the effect to you so it’s often worth making sure that if you’re using a splash potion you look straight down at your feet to throw it Or look straight up into the air so that you can throw it above you and it lands directly on top of you now I’m going to add some gunpowder to the turtle master potion and then we’re going to add some dragon’s breath dragon’s breath will create a lingering Potion which creates that cloud of potion effect that I think I’ve shown off in a previous episode but it will only do that if you start with a splash potion first so we’re using the Gunpowder to turn these turtle master potions into splash turtle master potions add in the dragon’s breath and They will become lingering potions of the turtle master which is possibly the longest potion name in the game there we go and that has now reduced this to a 5 second duration but basically any time you walk within the cloud produced by lingering potions the effect will renew Itself almost like you’ve walked into the area of effect of a beacon the cloud will not last particularly long but as you can see when we throw it over here like so we walk through it oh oh now we slow folks now we are slow and you can see Those effects linger for a little bit longer than 5 seconds and then we’re out of it again so yeah that’s and that’s how lingering potions work that cloud there is going to affect anything that walks through it for the entire duration the cloud remains there side note any lingering potion with eight arrows Around it can tip those arrows with the potion effect in this case producing arrows of the turtle master but you can similarly have arrows of regeneration arrows of swiftness arrows of healing arrows of poison everything like that in fact arrows of slowness are the ones we’ve already encountered being shot at Us by strays in snowy biomes so once again we are going to stick these potions in the chest here with the exception of these instant health potions because of course the instant health thing is instant the effect isn’t required for the advancement that means we have to have a ton of potion effects At once because it’s not really part of that whole group it doesn’t apply itself over time but now we’ve got a couple of splash jump boost potions in there we got our regeneration potions and that chest is pretty much full up so we’re going to need to find some more Inventory maybe I’ll grab another shelcha box out of here there we go we will use this as a little bit of extra inventory so now it’s time to take a look at the negative status effects that can be brewed up using potions we’ve already seen the potions of weakness in Here that actually remove more attack damage than the potions of strength provides so with a potion of weakness and a potion of strength the weakness will actually reduce your attack damage more than the strength will bar fit now let’s take a look at what you get if you just apply One spider eye to a brewing stand with an awkward potion in it that right there is going to get you a potion of poison now poison potions obviously have a relatively short duration but they are just like getting poisoned from a cave spider the effects basically damages you Over time and will leave you with only half a heart left but will not kill you poison is not even capable of killing you on hardmode there is an effect like poison that is capable of actually killing you and that is wither but whether is not available as a potion It’s only something that you get from being attacked by wither skeletons or the wither boss itself although in 1.14 there might be a way to do that but don’t don’t worry about that right now now in order to get hold of some of the other negative effects we actually have To craft up a few fermented spider ice again because the effect a fermented spider eye has on an existing potion is often to reverse the effect of it which can lead to some interesting results I’m gonna brew up another night vision potion using these awkward potions here and a golden carrots We’re also going to blow up another swiftness potion in here and I think we will grab one of the spare healing potions wherever those went I’m going to put just one of these in here remember you can brew these up one at a time and I don’t really want more than one of Them right now and we’re going to put a fermented spider eye in with that one there now we’ve got these night vision potions we aren’t you put fermented spider eye in that one as well and the speed potions add a fermented spider eye to that one too Now what we get from the potion of healing when we flipped it on its head with the fermented spider eye is a potion of harming which instead of doing instant health deals instant damage if I drink this right now BAM two hearts of damage and I get hit And I get a little bit of a damage bump like I’ve just been shot by a skeleton or something like that so that is not exactly a desirable effect and you’ll find that witches throw splash potions of harming on you when they want to attack you since they don’t have any Kind of physical attack they are usually the ones to hurl potions at you by flipping the potion of swiftness on its head we get a potion of slowness which actually doesn’t debuff your speed as much as the speed potion buffs it so it will actually end up if you drink both Of them you’ll still get five percent increase in speed and the slowness potion doesn’t last as long but still an interesting effect there and the most interesting of all I think is the night vision potion being flipped on its head by the spider I guess you’re a potion of invisibility which isn’t Necessarily a negative effect invisibility can have its advantages but it’s still something that can be switched around by the effects of adding a fermented spider I once again potions of slowness can be enhanced using glowstone to get you a potion that makes you even slower or the length can be Extended using redstone the same goes for invisibility although there isn’t anything that can make you even more invisible using glow stones so in that case the duration is the only thing that can be extended it’s also worth noting that if you want to apply the effects of An ingredients to a bunch of potions at once you can mix and match them in the brewing stand so in this case we’re gonna add in a splash potion of leaping the potion of invisibility and the potion of strength here and using some redstone dust Nasim glowstone we’re Going to increase the duration of each of them gonna pop some redstone dust in here and now each of these will have its duration increased to the maximum possible for that type of potion there we go those are all brewed up now we have an eight minute potion of strength An eight minute potion of invisibility and an eight minute splash potion of leapin note now that if I tried to put glowstone dust in here as well it doesn’t enhance it you can’t have both at the same time you cannot have an enhancement and an extension of the Duration it’s got to be one or the other we are almost done with our little demonstration here and it’s almost time to drink all of these potions and see quite how bizarre the resulting effect is but next I want to show you a little bit like I said about the automation of Brewing Stanton in fact I might need a one more hopper for this demonstration so when you have a brewing stand on top of a hopper note that that’s obviously going to get the output from the brewing stand but the problem with that is as soon as you put any water bottles in There let’s grab some yay let’s grab these three awkward potions here as an example as soon as you put the water bottles in the brewing stand they are going to be dragged out into the hopper because the hopper is always searching for an inventory above it and trying to Pull the contents out so what you want to do in this case let’s grab the redstone box out of here and grab ourselves a redstone power source how about this leave that will do we’ll just put that on the Block next to that that should power the Hopper and that should lock the hopper in place so now I should be able to put my awkward potions in there and because the hopper is being powered by redstone it’s not able to take any items into its inventory meaning that the brewing stand can actually keep those potions in there Now obviously to put ingredients into a brewing stand you need a hopper facing down into the top to add water bottles and blaze powder you can actually have a hopper facing in from the side now there is something to note here and that’s that obviously with water bottles you’re Gonna fill up a hopper quite quickly meaning that if you fill the entire thing up with water bottles let’s use glass bottles here as an example and you have a chest up here that has the blaze powder in it as well you’re not gonna be able to get any blaze powder to this Through that hopper because the glass bottles are already filling this up and bottles of water cannot stack the way glass bottles cans so if we had five bottles of water in this hopper like so say the first five items in a chest were bottles of water right now no blaze Powder can get to this brewing stance so it might be worth your time if you want to automate this process to add a second hopper to the side like so and fill that with your blaze powder because if you do that the blaze patter will be able to Get into this slot here and you won’t have any trouble with that gumming up the works obviously that’s going to complicate your auto brewing setup somewhat but it does mean that you don’t get backlogged with water bottles in here alternatively though a blaze powder is going to last for twenty brewing Operations you can probably just put a stack of blaze powder in the brewing stand and forget about it entirely now of course we just pop something in the top hopper and I’ve already got a phantom membrane in there that’s going to brew up into a potion of slow falling And once that has brewed up successfully all we need to do is pull this lever down here on the right hand side and all of those will drain out into the chest and that way you can actually set this up so that it’s automated using redstone signals there we go Potions have slowed falling just pull the lever and oh it’s it’s actually pulled through all of the water bottles from this chest because it was filling up at the first slot there at a time so you might you might need to set up a system that locks this hopper when this One unlocks that’s that’s probably going to be a better idea but now you can probably see why I’m not making an automatic potion Brewer in this episode we’re definitely gonna have to do a little bit of work on that and save that for a future episode but for Now I need to assemble all the potions it’s necessary for me to drink to get ourselves this furious cocktail advancement okay folks here are the 12 potions I need to take there are 13 potion effects that we need to have on us in order to get this advancement invisibility and night vision strength Jump boost fire resistance water breathing slow falling speed poison weakness regeneration slowness and resistance those are basically all of the potion effects that we need for the advancement now obviously with these being a variety of lengths this is all going to be a little bit difficult and It would be a better thing to basically turn all of these into splash potions therefore I can just splash them all on myself really quickly instead of having to drink them one by one however I am confident that we can do this there’s only this one at the end The turtle master potion which is going to be the final thing that we add and that’s the only one that has a duration that is like five seconds so we have a little bit of time to act with the rest of these if I wanted to we could extend The duration a little bit we could go with a regeneration one potion that has a little bit of a longer duration don’t worry folks I think we can handle it so let’s start moving these into the hot bar using my number hotkeys and try and arrange them in roughly the order that They are going to work best so we start off with the 8 minute duration ones we’ll move down to the 3 minute duration ones the one minute 30s the 45 the 22 and then the 5 splashed on us at the end and that should be the advancement Claimed are you ready for this this is gonna be quite a trip let’s see what we can do here first of all invisibility then night vision oh boy this is going to really look strange after a while look at the potions hard going there we go potion of leaping splashed on us fire Resistance there we go water breathing these are the 3-minute ones so these on guns are going to last quite as long as the others add a potion of weakness a potion of slow falling as well hull boy this is looking a little bit strange and if you can’t even see me in the Inventory now the last three are here we need to drink the potion of poison we’re going to start taking damage the potion of regeneration will heal us and then turtle master there we go oh he got ourselves a furious cocktail and oh boy that was a lot of potion effects and the turtle Master has worn off if we run out into the water right now we could have conduit power and it’s about as whole hell that is absolutely crazy well folks I hope you have enjoyed this episode of the Minecraft Survival Guide and this little look at potion brewing and a Little bit of automation if you want to know more about potion brewing the Minecraft Wiki has an excellent article on brewing oh boy I wish that poison would stop I need to eat some chicken the Minecraft Wiki has an excellent article about brewing which has an excellent cheat sheet that I have to Follow a lot of the time because I sometimes get completely lost in which potions provide which affect but look at this if I take all of this stuff off you can’t see me I’m completely invisible but folks remember you can always cure any potion effect no matter what it is With a bucket of milk and I really wish I’d brought a bucket of milk over here to demonstrate that to you but that’s gonna be it for this episode of the Minecraft Survival Guide I hope you folks enjoyed don’t forget to leave a like on the episode if you did subscribe If you want to see more and I’ll see you guys soon take care bye for now You Video Information
This video, titled ‘Complete Potion Brewing Guide! ▫ The Minecraft Survival Guide (Tutorial Lets Play) [Part 108]’, was uploaded by Pixlriffs on 2019-04-01 10:00:09. It has garnered 782249 views and 14551 likes. The duration of the video is 00:35:00 or 2100 seconds.
The Minecraft Survival Guide continues! This tutorial will show you how to brew every potion effect in Minecraft, extend or enhance the potion effects, create splash and lingering potions, and obtain the ‘A Furious Cocktail’ advancement in Java Edition!
The series will teach you how to master Survival Mode, and will also be my Single Player Let’s Play series!
Watch the full Minecraft Survival Guide playlist here: https://www.youtube.com/playlist?list=PLgENJ0iY3XBiJ0jZ53HT8v9Qa3cch7YEV
World Seed (Java Edition only): 7574084833700264939 —- Support me on Patreon for access to my private vanilla Minecraft server, plus other awesome rewards! https://www.patreon.com/Pixlriffs
Follow Pix on Twitter for video updates, screenshots, and other fun stuff! http://www.twitter.com/pixlriffs
#Minecraft #Tutorial #SurvivalGuide #Survival #Brewing


![Escape Shift - Semi-Vanilla [1.20.4]](https://newsminecraft.com/wp-content/uploads/2024/05/Escape-Shift-Semi-Vanilla-1204.gif)
![Complete Potion Brewing Guide! ▫ The Minecraft Survival Guide (Tutorial Lets Play) [Part 108]](https://newsminecraft.com/wp-content/uploads/news/minecraft-news-latest-6893.jpg)