Oh Oh caroline caroline caroline caroline you are in terrible danger Hello everyone my name is missy mitty and after a long hiatus i am back with another building tutorial inspired by one of my favorite books coraline by neil gaiman some of you may be a bit more familiar with henry selleck’s super creepy stop-motion film rendition of the story Made in 2009 which is set in the 150 year old pink palace apartments i just love the presentation of the building in both the film and book so much that i decided to bring it to life in minecraft and i really hope you guys enjoy it if You do please make sure to like and subscribe and without further ado let’s get into the tutorial Hi everyone so this is probably going to be quite a long tutorial so let’s just get straight into it we have a lot to do um the first thing we’re going to want to do is count up at least at very least three blocks from ground level so Once we’ve counted three up we’re going to count one two three four five six seven eight nine ten eleven twelve thirteen and then including this block here we’re going to count one two three four five six seven eight nine including this block here we’re going to count another thirteen so one two three Four five six seven eight nine ten eleven twelve thirteen including this block here we’re going to count another thirteen one two three four five six seven eight nine ten eleven twelve thirteen we’ve got um our longest wall which is the back of the build and we’re going to Count 25 including this block so 1 2 3 4 5 6 7 8 9 10 11 12 13 14 15 16 17 18 19 20 21 22 23 24 25 And then if you’ve done this correctly um you should be able to count 21 to connect these two walls so 1 2 3 4 5 6 7 8 9 10 11 12 13 14 15 16 17 18 19 20 21 there we go so you should have a shape that looks like this Sort of like a a short chode l i don’t know if i should be saying charred on this oh sorry that’s probably not pro it’s probably not appropriate so this represents um the baseline of our detailing so now we’re going to want to fill in our posts So from this baseline we count up eight one two three four five six seven eight and then you’re going to want to count across three so one two three and make another um eight high post so one two three four five six seven eight and now I should just add that when you count um the eight uh you count it from the top of this block not including this block so from the top one two uh so this would be one two three four five six seven eight so it’s eight sitting on top not seven Sitting on top i hope that makes sense and then you just follow the whole perimeter around making these eight high posts and i’m just going to do this off camera at the same time so um once you’ve got your weird floating posts in you’re just going to connect all of them Via this top block of oak planks and you just connect them all up super simple all the way around once we’ve finished connecting up all the posts we’re going to start with our actual detailing and for that you’re just going to grab some oak stairs and Place um two oak stairs in each um three by eight gap well it would be a three by seven gap actually um a three by seven get and you just place two upside down stairs in the corners just like this it’s fairly intuitive um and you just follow the Same thing around the whole field so we will now have the um basic outline of the build done and i think now would probably be a good time to add in the floor um and you can use either cobblestone or just stone or wood i think i’m just Gonna go in with you know oak planks um but the floor is going to sit one block down from the bottom of the frame just like that and yeah just just fill it fill it all in yeah so you should end up with something that looks like that with the floor down one For anyone interested i am using world edit and the command for that would be slash slash seat five um the next step is we’re going to build up our walls i’m going to use natural terracotta for this just because in the texture pack that i’m using which is mizuno’s 16 craft it Has a really nice um dusky sort of pink color um it’s not the like bright pink of like actually dyed pink terracotta um it just looks a little less intense which i like it sort of makes it a little make it look a little bit older and more decrepit so yeah um I also like the terracotta in this texture pack because it’s sort of um you’ll see this a little better with the windows but um if you any shape you create with it it borders it with this beautiful sort of like spruce toned um frame and that adds just like a huge Amount of um dimension uh just without any effort so um i really like it for that reason um with these walls it’s really simple you’re just going to build them so that they run um around the whole perimeter of the framing outline that we’ve made only one block Inwards facing inwards towards the belt so once we’ve got our walls in it’s time to cut in our windows and to do that we’re going to create a one by one by five shape i think so we count up one block and go one two three four five Just like that in the center of these three by seven spaces one two three four five um this process is fairly intuitive where to place the windows certainly for the um ground floor um and you just want to do that around the entire belt the only difference is um When we get to this part of the build we’re just going to cut in a little door frame instead um yeah cut in a little door just like that um and we’re going to cut in two blocks with one two three four above it so it’ll be a hole with um Two by four instead just like that one two three four five and that’s that’s the only exception okey dokey so i finished with the windows and the detailing for the ground floor i’ve also put a little door in as you can see i’m just going to quickly talk a bit more about The foundation of our belt and how that works so my recommendation is to build this on a hill and make your foundation um sort of as tall as possible um and sort of running into the hill quite organically so don’t destroy the terrain just keep it natural obviously i’m just Doing this on super flat so it’s kind of hard to see what i mean but um the taller you make it the more regal the castle or the image is gonna look um and basically once we’ve added in our floor there should be a one block indentation from The each of our framing and the floor and you’re going to want to um basically place cobblestone or whatever stone you’re using directly under the floor you can make this solid you can make this hollow um if you make it hollow there’s space for like a basement Or like a dungeon or something creepy like that so i mean it could be fun to leave it hollow also you don’t have to collect heaps of resources um so basically again just follow the perimeter you created when you added in the floor um and the only exception is You’ll also need some stairs so whichever block you use make sure it’s got a steer a matching stair component as well and you’re going to place in some upside down stairs right underneath the outline and it sort of bevels it in nicely like a foundation should be the corners Yeah i think add in a corner if you want you can also add in a um log i think that would look quite cool for these corners so it would look something like that actually yeah i’m going to make that a rule add in an oak log i think that Looks really cool you could even add in oak logs with every post that you get to i think that’ll be cool so um when you come to one of the oak posts that you make add in a oak block underneath and so just again follow the same pattern right around So when it is done the detailing of the foundation should look a little something like this um as i said earlier i just i really want to stress the fact that um you need to run the foundation into the natural uh the natural terrain to make this look Really good um because it’s on super flat it’s kind of hard to see but um yeah don’t bother flattening anything out it’ll look way better if you just sort of have it running in naturally i think we’ll move on to the next floor just to prevent things getting confusing so fly up And to start this um the first floor of this build is offset outwards by one block so you’re going to want to count out one so that if you’re looking at it diagonally it’s about by one and you’re going to basically create a perimeter of oak planks around the entire build Really similar to what we did for the ground floor once you’ve done that we’re going to go in with um almost the exact same detailing um so we’re going to start by creating our posts you’re going to start on this um corner here you’re going to Go one two three four five six seven eight just like that um where it becomes different and a little bit unsymmetrical because we’ve offset the first floor by one block outwards we now have a larger surface area to deal with so um to accommodate that we’re going to count one two three Four instead of um our normal three we’re going to count one two three four five six seven eight still and you’ll notice that um by counting four instead of three the post excuse me um the post lines up with the ground for floor post which is what we Want you essentially if you get stuck just make sure they line up with the ground floor post so one two three four five six seven eight i’m just going to go ahead and add those on the only time when you don’t want to uh line up the posts with the ground Floor is when you’re dealing with an outer corner um like this one here or this one here otherwise just line it up if you get stuck so once you have all your posts in again we’re just going to connect all of the posts um with oak planks um Moving along the top block of the post just like this just like we did on the ground floor so once you’ve added in your perimeter uh we’re going to get into the detailing of the stairs which you might imagine is um as you might imagine as slightly Different to what we did on the ground floor um because we’ve got that increased uh surface area to deal with so um basically what you do anytime you’re dealing with a three by seven gap like this middle one here you just do the same detailing as the ground floor which Includes two upside down stairs just like that um but if you’re dealing with a four by seven space like this it is a little bit different you’re going to want to place um an upside down stair in that corner here but when you’re dealing with the sort of um i guess left corner Or furthest from the center i don’t know you can see what i’m doing i i don’t have enough words you’re going to want to place um a full oak plank with um two upside down stairs just like that to sort of bevel it in and it looks really Ugly at the moment i understand that not just trust the process just trust it because once you look at it from a wee while back a wee way back sorry um it looks more natural and symmetrical when it’s beveled and more at the edges like that so that’s why we’re doing it Just to keep it looking more natural again this bit is a little iffy so we’re going to do the same little bevel thing that we were doing before um and we’re just going to go in with two upside down ones for this corner piece and i think that’s sort of the best way Around it it’s not there’s just no way to make this spit look symmetrical the good thing is when you’re looking at it from front on you don’t really notice so yeah we’ve got that going for us and then just the same thing you’re going to want to copy that pattern around the whole Build once you’ve done all your stair detailing you should have something that looks like this naturally we’re going to add in our terracotta walls and windows so cutting in the windows again um actually before that so now would be quite a good time to add in your floors And the flooring pattern is exactly the same as the ground floor so it sits one underneath the um bottom block of our perimeter sorry the bottom block of our framing which means you’re going to want to cut into the first top block of your terracotta walls just like that So now that we have our framing done and our floor in we’re going to go in and create our terracotta walls and also um cutting in our windows again the windows are um going to stay one by five shape um the only difference is that They sort of have to get a little bit offset on the places where you’ve created that um awkward 4×7 um area to fill and i’ll show you what i mean by that um the key again is to just line it up with the bottom floor the ground floor if you if you’re Matching the ground floor you’ll be fine it’s more about consistency than um symmetricality i don’t know that’s a word but if it is great so what i mean by that is you’re going to cut in your normal one two three four five one by five window like that and on These pieces here we have a slight problem where we’ve got one two three four so there’s no center point to place the window that’s why we sort of had to create this bevel at the edge here and so when we line it up with the window on the ground Floor we count one two three four five we’re going to count one two blocks there and one flock on that side but it looks sort of more consistent and more symmetrical than it would if you were to just like try and do um a two by five window there It would just look too awkward so that’s what we’re doing and again just filling that in with brown glass panes but you can use whatever color or just the transparent one depending on your preference so again just go around the whole um build and do that okey-dokey so now that we’ve got our Walls detailing and windows cut in for our first floor we’re just going to start work on a little bit of detailing so to do this we’re going to need to pick an accent wood color um i’m going to go with a spruce for an accent would and this is just to add a Little bit more dimension um the first thing that we’re going to do is we’re going to create a fence border so you’re going to want to count up one two and on the second block here you’re just going to run um spruce fence all around the perimeter of the build This is pretty brainless just all the way around and the same thing on the ground floor um count up on um sorry i’ll count up and place it on the second block and don’t worry about cutting over the windows um that’s sort of the point I don’t know um and if you’ve done it right the fence should sort of sit just directly above the door so at this stage in the build what i think we’re going to do is we’re going to add in our oak logs um sort of exit logs on the foundation And the way you do this is you’re just going to want to place um some vertical logs i think um three vertical logs sort of coming out of the top and so that they sort of stick up from the build by one just like this and again this will look Like way better if you’ve built a like a taller foundation um and then to finish that off we’re going to run some horizontal ones in between so on that middle block just like that and that really brings the foundation to life makes it look a little bit more sturdy as you might Imagine you’re just going to copy that same sort of idea around the entirety of the build so one two three delete that middle block at the external corners like this you just sort of place them so that they’re diagonal to each other one two three delete that block one two three The only exception to that is in this area here because what we’re going to do is we’re actually going to create a little balcony type thing um so i think we will run it out so that it um sorry You’re going to want to from this uh from the framing you’re going to count onto three blocks um so that would be four blocks um counting outwards from the terracotta walls and three counting outwards from the uh um framing it looks something like that and Then we’re just going to go in with the same sort of wood pattern that we’ve been doing with the lobs so we’re going to go one two three up one two three up just like that and they’re going to want to stick out by one so one two three one two three One two three one two three four and um hold on i think i’ve got this um yeah i have done this wrong it should be lining up with the two posts at the door like that um the only thing with that is it means that uh You’ll sort of be missing a post here um and i think we might just add a post in like that i don’t think you’d notice the lack of symmetricalness too much but each to their own and we’re just gonna fill those in with um the horizontal oak logs just like that um And then we’re going to go in and fill in these gaps with um spruce feeds i’m really sorry about those bats by the way i don’t know what to do about them um and for this external corner again just add in your three just as normal So yeah you don’t even really notice the missing block but now we’ve got a nice little balcony and a nice place to add some stairs for the stairs um i’m just going to go in and add some really basic oak stairs um just make it a little a little bit longer And this will be entirely dependent on how tall your foundation is um but for this example uh i’ve just made it um so that it has a gap of three and then i’m just gonna go in with some posts to finish things off nicely um just like that The next thing we’re going to start on is the roof which i am drilling so um the first thing that we’re going to need is we’re going to start um doing the first part of the roof on this entrance section of our l shape it’s really important that we get this right so To do that we’re going to want to find this top full block of planks and place another block on top of it just for now and then on this block we’re going to place um a spruce slab on the bottom half of the block and you can get rid of that Once you’re done with that and basically you’re just going to create a perimeter around the belt like so so it looks like a top hat at the moment but um i’m then going to talk you through picking out your roofing um i would suggest going for something dark with a matching stair And a sight would work polished andersite would work just anything sort of black dark tiled with this particular texture pack mizuno 16 craft the best option is actually the dark oak texture um i really like that for uh roofing it looks like black shingles so that’s why i like it And then the pattern for the roofing um starts uh sort of one block in behind the half slab that you’ve just placed and the pattern that we follow for the entire roof there’s one stair two full blocks one sphere two full blocks just like that so to start off with We’re going to continue up with that pattern until we meet the center point of this first shape which will be somewhere roughly here there’s not really any way for me to realistically explain this um basically you’re going to just um we’ll just cut off this section for now And just focus on the roof um in this 13 by 13 square to start so we’re gonna go in like this and then we’re going to follow our pattern of steer two full blocks stair two full blocks until we reach this center point and then we’ll do the same on the other side So once you’ve reached this middle point um you’re going to just finish it by placing two uh two full planks of whatever block you’ve decided to use for the ceiling and then you’re going to switch to the other side and do the exact same thing over again so if you Follow that pattern correctly you’ll be left with some really tall gothic looking roof just like that um and we’re going to do the same thing on this side um the only difference is we will be placing um the roof facing this way so the slant is on this side And the i guess i don’t really know what it’s called but the steep part of the roof is here and the sloped part of the roof is here facing into the roof we’ve just built the pattern stays exactly the same we start off with um one stair two blocks one step two blocks And we’re going to meet in the middle once more um yeah i’ll meet you back when i’ve finished that so once again once you’ve reached that center point of the build you’re going to start on the other side now i just wanted to say um this pattern of roof is not Necessarily hard but it is extremely tedious so allot yourself um quite a bit of time if you’re going to do it and um get yourself a coffee or a cup of tea or something to eat maybe some noodles or something i don’t know just make yourself comfortable because you’re Gonna be there for a while um i was using a little bit of world edit to help speed up the process and i’ve still been here long enough that my butt is sore so yeah it’s going to take a while okie dokie so once you’ve got your basic Roof shape in we’re going to do a little bit of roof framing and for that you’re going to need um just a basic spruce wood pellet so i’ve got stairs slabs and planks um and basically what we’re going to do is um match the uh match the outside of the the steer pattern With spruce so fairly easy you’re just sort of wrapping it in spruce exactly the same pattern of um two full blocks and one stair just go all the way up um yeah this is pretty mindless because you’ve already done the hard work of measuring things out and yeah Um also when we get to the top here we’re going to uh add two more um two full blocks so that it creates a four by one pillar adds a little bit of height and a little bit of spike and so um the other thing you’re going To need to do to finish off this framing if you like is we’re just going to thicken it up a little bit um and to do that uh we’re basically wherever you see um a gap like uh um where the corners are just touching diagonally you’re gonna place some upside down sticks Just to make it look a little bit more supported a little bit less um minecraft gravity and then for this little section here uh we’re going to replace this slab with a full block so it looks like it’s connecting into the slab perimeter that we made earlier And you’ll end up with something that looks like this and you just want to do that on all the raw edges that we have left over from the roof like this one here so i’m just going to go ahead and do that to save some time we’re now going To get onto another really important part of the build which is creating a sort of dormer tower if you like so for that we are going to start off by grabbing some oak planks and also some oak stairs and we’re gonna fly over to this section of our belt And we’re basically going to use these two um pillars here as a guide we’re going to count up one two three four five six seven you’re gonna smash seven just like that and then i guess count one two one two three it’s kind of hard to see with the darker blocks Just like that and then you’re going to count up i think we’re gonna go one two three four five six seven eight nine ten eleven twelve no we’re not going to go twelve we’re gonna go higher we’re gonna 16 so we’ve gone 12 13 14 15 16. so you should be about One or two blocks higher than your roof it doesn’t really matter too much but you want it to be higher than your roof you’re gonna go 16 again just like that and then we’re going to repeat the same thing on the other side um so you use these two pillars and you Count up seven so we’re gonna go one two three four five six just like that count over one two three smash like being on a saturday joking not me on a saturday unfortunately oh i’m gonna stop talking okay a slight change of plan um i realized that i actually need to make it A lot taller so instead of um 16 high we’re gonna go 24 blocks high so we’ve done 16 we’re gonna go 17 18 19 20 21 22. yeah it needs to be quite a bit higher than the roof i’ve realized sorry but once you have your four posts in if You form this like sort of rectangle you’re just going to want to run uh connect the posts with an oak plank perimeter just like this and then we’re going to revert back to the detailing that we did on our very first floor ground floor weight ages back in the tutorial And we’re just going to place upside down stairs in the corners and then you’re going to want to fly into the middle and create one more post right here and if you’ve done it correctly the center post should fall onto the roof that it intersects and it should leave um Two uh sort of three spaces it should leave two uh three wide gaps in between just like that and you want to repeat your detailing with the upside down stairs just like that and the sides as well super simple so once you have your odd looking tower Just like that you’re going to fly over to the top and you are going to create um another oak plank perimeter just like this in line with the roof and we’re going to do the exact same thing with the detailing once again using our upside down stairs super easy You guys will be experts at this by now um and these were sort of um intersect start intersecting with the roof and that’s that’s completely fine that’s supposed to happen so we’ll have something that looks like this um we’re then going to want to fly to The bottom and you’re going to want to take some dark oak stairs um or whatever you’ve used for the roofing tiles and you’re basically going to bring this up by two and i think we will go like a little window so bring it up by two and then on that Second block just wrap um the stairs around so it sort of looks like a balcony window just like that looks like a weird shelf sticking out of the build and do that on the other side as well so we’ve got the detailing for our main pillar done the next thing we’re going To do as you might imagine is we’re going to add in our terracotta walls this room is not functional it was never designed to be functional it is purely decorative um and it is tiny it is tiny it’s um like three by um like a three two record blocks wide like There is no use for it at all um but it does look cool and it allows lights to flow into the attic should you choose to use your attic space for something um that’s an important point i’m not going to show you guys how to do the interiors Because i just think this video would be way too long if i did that and also um i know everyone likes different things in their built interiors i feel are very personal so um i think it’d be more fun to let you guys do your own interiors but if you if you Do want a video on how i did the videos and the like the tour video um the videos the interiors in the tool video can’t speak today um just please let me know that’s if anyone’s even building this oh my goodness where we get like 3d views So for the windows in this big tower that we’ve built um it sort of uses choice really you can um do whatever you fancy you could cut a door in here um so i’m going to cut a little door in there and i’m going to take some spruce fence And run a line of spruce mix directly above that door i’m then going to count up one two three four five six seven eight nine but it’s this is like the one part of the build where it’s not hugely important um what you do with your window here it’s Completely up to you we’re gonna count up one and then on the second block so now that we’ve done that we’re just going to fill in these big gaps on our um main roof so as you might imagine we’re going to use um the same again the same detailing that we used um Earlier so we’re just going to follow the posts that are directly underneath and we’re going to bring that up so there should be three blocks in between and bring those posts up so that they reach the top just as high as they can go really ugh as high as they can go Just like that cool beans so once you’ve added in your two posts the next thing you’re going to do is pretty much follow the same pattern as the spruce is going and only um it’s sort of offset inwards by one so what i mean by that is You see two spruce blocks placed there you’re gonna place two oak blocks behind it um and indented by one so it’ll look like that yeah and so yeah just just indent it and follow the pattern and you should be fine um once you get to the top and you Can’t sort of do anything symmetrically anymore you’re going to place an upside down steel like that and then just run two bricks up um flanks into the top and voila your detailing for that bit is done and that’s kind of hard detailing i’m not gonna lie um because it is a little bit Iffy at the top so yeah then you’re basically just going to i think we’ll run a perimeter of planks along there just to match what we’ve done on the earlier levels and then we’re going to build in our terracotta walls and behind just filling in this big space with terracotta Okey dokey so we’ve got something that looks like this and for the windows or window i should say we’re going to count one two three blocks up and then we’re going to smash the fourth block up and pretty much bring that window all the way up to Yeah i think i think um so that there are two blocks before yeah just like that and then you’re going to take some stress fits and you’re going to find um so in these three blocks that we’ve left here you’re going to find the second Block and you’re going to run a line of spruce vents all throughout that i’ll just add in the stained ground window panes and voila okay i’ve changed my mind i think we’ll bring it up so that it is one more higher yeah there we go sorry about that um so That’s what it looks like you’re gonna want to do that on the back and also the side so we’ve done a lot we’ve done a lot of detailing we’ve done a lot of work we’ve just got some finishing touches to do and for that we’ll be needing some chains some lanterns Spruce fence and an endocyte well i’m going to use andesite but um any sort of dark black-ish tile wall texture will be just fine so whatever you can find um so we’re going to go um we’re going to fly up here and okay we’re going to start without our Roof detailing so you’re going to place one block of wall followed by one two three fence posts and then from that point on you’re going to go one and um place a block of wall on every second we’re actually going to make a little pillow on this center point as well so What we’re going to do is we’re going to bring it up by one two three four so that’s two blocks higher than what we’ve got on the outside we’re gonna go one one two three so this is going to be like the highest point of our main roof just like that Nice and spiky you know um and then we’re going to skip every second um thing with a bit of just like that um and in the center of these uh walls we’re actually gonna need some gates so we’re gonna grab some spruce gates as well and we’re gonna place spruce vents on Top of all of those and we’re going to fill in the in between spaces with spruce gates just like that so the detailing should look roughly like this um i forgot to do this one of course uh i think we will make this the same one two three Add in our rules every single one just like that place our fence on top with our gates in between so there we’ve got it we’ve got our roof detailing in i think it looks really cool with the roof detailing again for the roof you’re going to place a Perimeter of slabs on the bottom half of one of the first block above the oak framing all the way around and then you’re going to have the slope of your roof facing sideways and the steeple facing frontwards so we’re going to get some more dark oaks And again it’s a pattern of one stair two full blocks this is a much nicer roof so once you’ve got your roof shingles in if you like you’re then going to do the same thing where you sort of copy the pattern using spruce along the outside and we’re going to make this um Too tall like that i really feel like some chips it’s been going on forever just like so um so for the front you’ll end up with something like this um it looks a little bit odd so what we’re going to do is we’re going to smash out the perimeter And place two upside down um staircases one upside down at the top and fill the wrist in with um oak planks so i’ll show you how that looks looks like that um what i might also do is add in some spruce So we are pretty much done there’s only one thing left to do and of course that is at our chimney so um you’re going to want to fly towards the back of the build just around here and you’re going to want to um i think we’ll count out one two And you’re going to want to make a 2×2 square into the uh roof like this um and that’ll sit three stairs out from the terracotta tower wall and two squares out from the oak framing and so we just build that up nice and high completely straight for now And once it’s reached a point where it is one block above the betterments here we’re going to add in stair we’re going to place steel there actually we’re going to add in two full cobblestone blocks just like this and then from that point we’re just going to build up So that it’s sort of maybe one two three more blocks high yeah i think that’ll do and place some uh stairs underneath you want to make sure it still looks thick so like that um the stairs should be um sort of adjacent to each other with a full block in between So just so it looks sort of crooked and then um once you’re on the top you’re going to place one more block so you can form a perimeter set of um cobblestone stairs facing upside down just like this break that block and insert four campfires to create that cool smoke animation And voila you have your chimney and your pink palace complete well everyone i hope you enjoyed my building tutorial of the pink palace apartments from coraline if you did don’t forget to like and subscribe and i’ll see you in the next video bye You Video Information
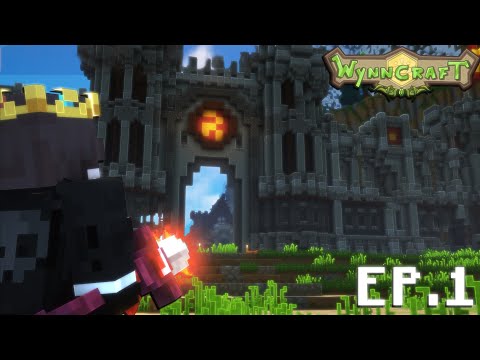
This video, titled ‘CORALINE INSPIRED – Gothic Mansion Minecraft Tutorial’, was uploaded by missy-maddie on 2022-04-17 05:00:18. It has garnered 65832 views and 2739 likes. The duration of the video is 00:53:24 or 3204 seconds.
Hello everyone! ♡♡♡
In today’s Minecraft tutorial, I teach you how to build this creepy gothic mansion, inspired by the Pink Palace Apartments from Neil Gaiman’s novella, Coraline.
I hope you enjoy the video and thank you for your continued support. It means so much to me!
The texture pack is Mizuno’s 16 Craft and the shader pack is BSL Shaders
I hope you have a wonderful day,
missy-maddie :3