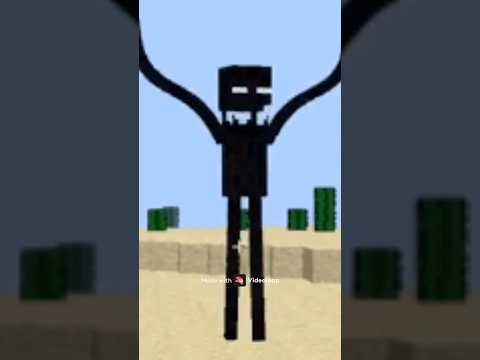
Hey guys welcome back to another video today i’ll be showing from start to finish how to make a simple character in blender so we’ll start with creating a mesh then adding an armature and in the end we’ll add an animation and i’ll show you how to export it Properly for use in our engine 4. let’s get right into blend alright so the first thing you’re going to want to do is open up a clean blender file and what i also did was import the ue4 mannequin into my scene just as a scaling reference you can see More about this in my previous video now one more thing before we get started i always like to use these moving arrows which are called the move gizmos and to enable them you go to this top right menu click on the drop down arrow and check this move box now we can Easily move this guy to the side and get started on our actual model alright so we’ll first start with the head by using this default cube going into edit mode by pressing tab and on the top left of your screen go to face select mode which is a bit easier To use for this character scale down and this is going to be the head drag it up a bit next we’re going to add his torso by pressing shift a also add a new cube scale this down then i go to forward facing view drag this under the head And make it a bit slimmer than his head like so and drag his torso down so it’s a bit longer and i also want to make it a bit slimmer so i just hover my mouse over this object press l i select everything and i’m Going to scale it in the y direction by pressing s and y make him a bit slimmer all right next onto his arms so press shift a once you’re in object mode again and to make sure you’re in object mode or edit mode look at the top left you can see object mode Once i am in object mode simply press shift a add a new mesh a cube and a neat little trick in order to duplicate the arms on both the left side and the right side at the same time just add a modifier so go to the right panel Go to modify properties add modifier and add a mirror modifier so now once we go back into edit mode by pressing tab and selecting everything by pressing a i’m going to scale this down by pressing s and scaling go to the front view and if you press g you’ll get the free Moving tool so press g drag it out and now we immediately have two blocks which are mirrored on both the left and the right side so scale this down a bit these are going to be his arms a bit lower the same level as the shoulders look underneath it and drag this down So that looks about right press tab to go back to object mode and we’re going to duplicate these arms to be his legs so press shift d as you can see i have a hold of these now press escape so they’re in the same position go back into edit mode by pressing tab Then press a to select everything go to the front facing view and then press g and now drag them underneath his body maybe scale them down a bit make them a little slimmer so they fit nicely next to his body then from the underneath just make them a little longer And i’m going to drag these up just a tiny bit all right so now we have a pretty nice looking character it looks very much like the minecraft steve character what we’re going to want to do now is apply the mirror modifiers because we don’t need them anymore just simply select the arms Go to the right panel and apply do the same for the legs select them right panel apply now he’s floating a bit and all his arms and stuff are like they’re disconnected so we’re going to want to connect them by selecting everything holding shift and selecting them And then press ctrl j now he’s just one simple object as you can see there’s just one object in the scene collection i’m going to call him cube guy and he’s also floating so we want to bring him down so go select the character press tab to go into edit mode Select everything with a and then from the front view by either pressing this button or number one on your numpad if you have that on your keyboard drag him down until he’s right on the red line great so with the mesh done it is now Time to move on to adding bones to our character we do this by adding what is called an armature this allows mesh objects to have flexible joints and is what ural uses for the skeleton since i’m making a very simple blocky character with no bending arms or legs The skeleton is also going to be very simple of course when creating your own character you can be as creative as you want which will also result in different looking skeletons this is all fine since in umural engine you can easily import and use custom skeletons If you want to know how to set up your own custom character in your engine from importing to actually making it walk then check out our newest video in which wim will take you through all the steps now let’s get started on ending our first bone so i’m gonna go back to the Forward facing view in object mode press shift a then go to armature we get this bone and it’s quite big i’m gonna go into tab edit mode again select everything and scale it down and now as you can see it’s pretty hard to see it through the mesh so Go back into object mode and with the bone selected go to the right and go to this panel the object data go to the viewport display and select in front so now we can see the bone through the mesh and it’s easier to work with alright select the bone again go to edit Mode skill put pull this up then i want to make this as big as this torso and then by pressing e i’m going to extend another bone out of this bone and pressing c we’re going to restrict it to the z axis so it’s just going to go up make it About as big as it had and now we want to make some arms and leg bones so press this press e drag it out now we’re going to detach this bone by selecting the bone in the middle then pressing alt p and clearing the parent so now it’s Separated from these two bones and if i want to drag this out i can simply drag it out all right like this and pull this down or press g so you can freely move it make this a bit straight select the bone and duplicate it by pressing shift d Drag it to its lag and we’re simply going to select this one this one and duplicate it to the other side and just place them on top of the mesh i want to make sure that the arm bones and leg bones are connected to the main root bone Because you’ll see later on that they have to be connected in order for the character to work properly so select the bone select the top of this bone press ctrl p to parent it and make sure you press keep offset see a little line coming on And that’s what we need so we can see that everything is connected do the same for the leg bones now everything is parented to the root bone and we’re ready to move on to naming the bones just select each and every bone go to the right panel go to this bone icon And here you can set the name for the bone so this is going to be the head that’s going to be his root this is the arm dot r or actually this is the left arm because we’re looking at the front of the character and from the back it’s the left arm name It the same on the other side r dot r which is the right arm and then also lag dot l lag dot l so now that everything has been named correctly it’s time to actually connect the bones to the mesh or to the body so we can move the body with the bones So go back to object mode by pressing tab first select the mesh then select the armature which is pretty important because we want to parent the mesh to the armature not the other way around and then once you’ve got both selected press ctrl b and select arbitrary deform with automatic weights Click that and now nothing it seems as if nothing happened but if we click the armature go on the top left go to pose mode click one of these and rotate this for example we can see that the mesh now successfully deforms with the way the bones move So just check everything you can see everything is connected and because i connected the arms and the legs to the root bone they move with the root bone so when i move the root bone everything just goes along with it just check if everything works and everything was successful if we want To reset this pose just press a to select everything and using alt r we can reset the rotation all right now that we have successfully added a skeleton or an armature we can actually start making animations so in order to do that we go back into object mode just deselect everything And on the top panel of blender you can see animation this is where we make animations so what i like to use is on the bottom left of this screen go to action editor and here we can add multiple actions which would be for example walking or an idle animation Or maybe a running animation but i’m just gonna add a simple walking and idle animation for now so you have to think about the amount of frames you’re gonna use for an animation and to keep things simple i’m just gonna tell you that for the running animation Or the walk animation we’re going to use 16 frames as you can see it’s been set to 16 frames this has been highlighted and now we can just move the bones and it’s gonna record everything by pressing this button at the bottom auto keying set this one to one And the first pose we’re going to want to make is the actual running pose so select the bone and make sure you are in post mode in the top left by pressing r we can rotate this leg and we want to constrain it to the x axis so let’s make sure everything Is straight move this backward do the opposite for this leg and then make sure his arms are also in the correct position and this is his first pose as you can see you get a little couple of dots here and we select everything by pressing a you see it has automatically added all The keyframes because we selected the record mode now go to the last frame or actually select these by just dragging them ctrl copy go to the last frame which is frame 16 for this animation paste it and now we have the start frame and the end free And in the middle frame we’re gonna just make this same position but in the opposite way so select this legs again press r x just to move it along this x-axis and like this it’s just gonna be the same precision pretty much but the opposite way And make sure this is in the middle of the of the frame so we have 16 frames put this at 8. now when we play it we have the walking animation so it’s simple as that just the first frame and the last frame have to be the same animation and the middle frame Has to be the opposite or of either the first or the last frame next we’re going to also make a simple idle animation by making a new action with this button a new action button naming that idle this is going to be 120 frames because we want it to be a bit slower And we can simply select all the bones delete the keyframes by pressing x delete keyframes and then the first position we want is the head a bit turned actually the first position we want is him back to normal so select everything press alt r to reset all the rotations And then automatically set a couple of keyframes because we have the record button on now we just want the head to move a tiny bit to the left on the first frame so press r and then c and you can move it on the z axis So just a tiny bit to the left then select these frames ctrl copy move to the last frame ctrl v and the same as before go to the middle frame which is a 60 of 120 and move the head a bit to the right So now when we play it we also have very slow idle animation alright so so far we have successfully made the mesh we’ve created the armature we have actually attached the armature to the mesh and now we were able to make animations with them we have two animations we have an idle animation With a very simple head movement from left to right and if we select the armature go to the running animation set this to 16 frames we also have the running animation before we export the character i just want to add a very simple material to add a bit more color to him I’m back in layout mode and i select the mesh go to the material tab and here you can see there is no material test currently so press new it adds a new material and we can change the color here to whatever we want so let’s say blue And now we don’t see anything happening that’s because if you press z you can see we are in solid mode and you need to go to either material preview mode or rendered but since we have no lights you will not see the correct color so go to material preview and you can Easily preview the color you select here on the right so i want to make him a bit less blue at least a bit less dark blue maybe something like this alright so now we’ve also added a simple material this will transfer over to unreal and let me show you the correct export Settings one of the first things and most important things you want to check before exporting your character and armature to unreal is if the armature name has been changed to something else because by default if you click on the armature and look in the top right in the scene Collection you can see that blender names the armature armature however if you export it like this then unreal will not recognize the armature correctly and the skill will be completely wrong so the only thing you have to do is change this name just double click it to something else can be anything except Armature so for example skeleton now we are ready to finally export our character so all we want to do from this point is select the mesh and select the armature or the skeleton go to file export fbx save it to where you want with the name you want it to be Called click selected objects we only want the armature and the mesh apply the units the rest is okay under geometry go to smoothing and select face and armature make sure to deselect add leaf bones and set it to only deform bones we only want the deformation bones and Finally we want to make sure that bake animations is checked and the rest is okay so just simply press export fbx and that’s it we’ve exported the fbx file and just as a last check to make sure we did everything correctly import the fbx file we just exported drag it into the explorer You see all the settings are correct just make sure that import animations is also selected press import all and as you can see it has successfully imported the character without any errors we get both animations and if we drag this into the viewer it works so guys hope you enjoyed this Tutorial now you know how to make a character from scratch in blender and use the correct export settings for using error engine 4 and if you want to know how to replace the standard range for mannequin with the character you just made then be sure to check out our other Video linked down below where we show you how you can replace the mannequin with your own custom character oh by the way guys you can also download the filemake in this video the download link is in the description down below anyways thanks for watching see you guys in the next video You Video Information
This video, titled ‘Creating a custom character in Blender for UE4 (MINECRAFT Character!) | Mini tutorial | Blender 2.9’, was uploaded by Kekdot on 2021-01-30 23:43:53. It has garnered 76877 views and 2356 likes. The duration of the video is 00:16:25 or 985 seconds.
In this video you will learn how to make a full fledged character in Blender from start to finish.
This includes creating the mesh, rigging the mesh by adding an armature, creating a walking and an idle animation, and in the end I’ll show you the correct export settings so you can import and use your character in Unreal Engine 4.
#Blender #character #modeling
You can download the character I made in this video here: https://drive.google.com/file/d/1n3TCEwYOo2dHiXEGycgjDw9ibyPAzgeR/view?usp=sharing
Checkout the other videos we mentioned:
Custom Unreal Engine 4 Character – Replacing the mannequin! | Mini tutorial | UE 4.26 https://youtu.be/5yG4sGhz4RE
CORRECT Blender to Unreal scale | Mini tutorial | Blender 2.9 https://youtu.be/B6Ax5qF2J4M
This video’s timestamps:
0:00 – Intro 0:18 – Character modeling 4:20 – Character rigging intro 5:03 – Character rigging 7:49 – Parenting rig to mesh 8:53 – Animating – Walking 11:20 – Animating – Idle 12:26 – Progress so far 12:56 – Adding a material 13:51 – Export settings for UE4 15:07 – Importing into UE4 15:35 – Outro
🤗We enjoy: Multiplayer, sandboxes, mmo’s, freeroaming, social-hubs! (and 🤝firm handsakes)
😄Join our Discord 👾 community server 👇: https://discord.gg/KfVEGKtrkG
Ask us anything game dev related! Or just say hi lelmao😄💬
🧑🏻🚀If you want to support us then checkout our 💲Patreon for awesome benefits: https://www.patreon.com/kekdot
🌐Checkout https://www.kekdot.com/ for awesome content
📰 Follow us on: Instragram: @kekdotyoutube Twitter: @kekdot Reddit: @kekdot
📆 Our upload schedule: We upload weekly video’s of our game development journey!