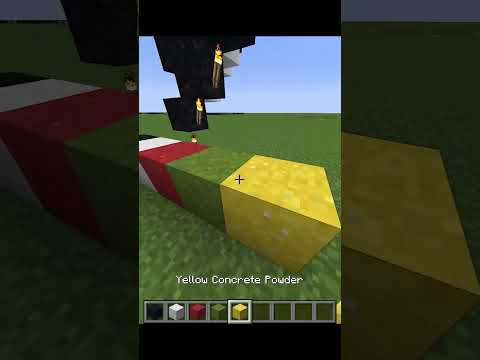
Oh hi there i’m meg gray no time to dilly-dally let’s get straight into this tutorial So this first Street was inspired by one I did in my survival world and here’s just the basic palette we’re just gonna use dark oak with spruce and oak Pence’s and then a glass pane of your choice I’m going to be using brown to fit with this Brown theme and then just any leaf block so with all of those let’s go ahead and create the first tree again this was inspired by a tree I did in my survival world it’s nice to try to get a twisty look in your trunk we don’t want to look Too straight and we want to look interesting I’m mostly using stairs and slabs just because it’s easier to get a twisty shape although you could mix in some full blocks and you’re just gonna go around mess around with it until it looks good just make it look interesting Like I said so what we’re gonna do is just use the fences for most of the branches starting with the dark oak we’re not gonna worry about the other ones just yet and just wrap it around and figure out how wide or how big you Want your tree to be and once you do one of those you can do multiples of them and we can branch off of those too the reason I’m using the fences here is because I like how thin they look they don’t really connect in the best way but It doesn’t really matter as much for these trees and you don’t really have much of a choice for this size this is the best block you can use for small twig like branches unfortunately slabs are just a little too thick for my taste and spread them out you’ll notice that So far all of my branches are about the same level so we should probably range up a little bit and have some more vertical branches we just need to add some height to it and they do curve a little bit just not as much as the lower ones And don’t forget to branch off a lot because the more branches you have the more realistic it will look so I’m just gonna keep branching off and I’m kind of making them angled down a little bit I’m not liking them this one here it’s kind of sticking out too much so I’m gonna Make an angle down one make it curve like that it’ll just keep going until I think I have enough sometimes it helps to look at them from the top to see how this one here doesn’t have anything branching from it so we can branch a Couple from that one once I have all the branches laid out where I want them to go as long as I am satisfied with this and I want these branches to stay pretty high up because on the end of each one we’re gonna do a spruce fence then an Oak and then our glass pane and I’m doing Brown just because it blends in with a tree we’re gonna get crazy with colors later but this one’s gonna look almost like a normal tree so then we’ll just repeat that all around the tree everywhere you see a dark oak fence Hanging down so there’s a few here but if you feel like you need more you can always branch off and add more starting with the dark oak don’t forget and then branch off and make some more of them make as many as you want make it very beautiful once You’re satisfied with all of your little hanging things you got them all then we could just take our oak leaves and start spreading them around now there really is any rhyme or reason for how I’m placing these but I am making sure not to go down too far I want to leave all Of these branches exposed basically I’m only placing them wherever the dark oak fences are I’m trying not to make the leaves go too low although you do want to have some underneath as well as some on top and you want to leave gaps in your leaves you don’t want them all to Be in big clusters so try to spread them out don’t put them all together in one block because that will not look very nice and always be sure to double check it once you get all your leaves in place make sure they all look proper make sure it Doesn’t look like it’s very very one spot and not another also make sure you have a good nice round shape this one looks pretty good so if you do feel like it’s to fly on top you could always add an extra branch on top and then round it Off but this one looks pretty good and you can even make the leaves go out a little bit farther from the branch but not too far because well make sure there’s branches next to the leaves wherever we place them but sometimes they’ll branch them out maybe a couple Blocks away but there we have our fantasy of oak tree I think it turned out fantastic This next rework we make is going to be great big weeping willow which is kind of fantasy like so we’re going to be doing it and we’re just using spruce wood I’m actually using stripped spruce logs just because it matches the color of spruce planks a lot Better and then of course just a regular oakley for whatever leaf of your choice and then vines I can’t really show the vines down here but I will be using vines for this too we’re going to start doing the same thing like we did for the other is Except I’m using these spruce stripped spruce for this I’m gonna make this one a little bit bigger a little bit more elegant I have these larger root systems I’m gonna make I’m actually gonna make the trunk standing up a little bit away from the ground that way we can make the Roots almost like the thing that’s holding it up it might be a little unrealistic but these are fantasy trees anything goes and once we get this trunk started or to a point where we like it of course make sure to have lots of curves and twists we don’t want to look Completely straight this looks like a pretty good start and then we can start mixing in some stairs and slabs to smooth it off especially with the roots down here we want the roots to look a lot smaller and get smaller as they go out and of course the larger the tree The larger your roots need to be the need to be able to support it we can even mix into some stairs to smooth off some of these corners now for the branches on this one I will be using fences but I’m gonna start off with just spruce stairs and you could go either Way with this I’m just using the stairs because it’s a little bit different and see how this will look with us but you can just start placing the stairs at different angles and you can curve them around too like you would anything else just start branching off a few big Branches like this and you don’t have to do all of your branches like this just the big major ones but I’m just gonna keep going around this might be harder to do and survival I actually haven’t tested this but I think it looks nice something like that and maybe we’ll do One other big branch using these depends on how crazy wants us to get but we could even branch off of this with slabs or with fences I’m just gonna use fences because it’s a little bit easier and make them curve down and create these nice curve shapes and the Branches for willow trees which is basically what this is they go way way down to the ground so the closer you get to the ground with these the better we will have the leaves reach all the way to the ground but it’s nice to get the branches almost touching the ground but You also want to make sure they’re not all going to the same length you want to have a variety of lengths so try to vary it up a little bit here’s something that else to look out for try to avoid really right angles like this and try to smooth Them off if you’re using fences to extend your branches make them go lower try to smooth them off a little bit like this and round off those corners because trees do not have right angles like that they’re very organic very flowy so just keep that in mind as you’re building and Don’t worry if they don’t connect like this it’s not a big deal especially when it’s already unrealistic as it is using the fences and you’re not gonna see the difference especially once you get the leaves in place but I do try to connect them as much as I can make sure it Curves down and around i disappoint i’m just trying to fill in some gaps because right now we don’t have tons of branches so I’m just gonna keep filling in some of these gaps that I want more branches to be and don’t forget to check it from the top make Sure it’s looking fairly rounded it looks like on this side is a little bit flat so I might want to add an additional one of course trees don’t necessarily have to be round on all sides I know but I want it to look nice and round for this one just depends on What you want that’s a nice thing about trees you can’t really mess them up too badly so now we have our branches in place this actually looks really good by itself but we’re gonna start adding the leaves around the top and just like we did before we’re just making sure to Keep some spaces in between them and not cluster them too much don’t fill in every single block but leave a lot of air blocks and just spread them out and try not to leave any flat edges you don’t want to leave any giant flat edges Such as this you don’t want to leave out there so you could always break it up a little bit and just keep thinking about things like that I’m going to do some experimenting with leaves on these hanging branches and we’re just gonna make them go just a Little bit down but not all the way to the end because we’re gonna be using some vines on this and see how that looks too so just make sure you’re going down these branches and putting just a few leaves on the sides because when you Think about it the trees have a lot of thicker leaves at the top there’s going to be a lot more leaves at the top and it’ll just gonna get thinner and thinner as it goes down so you don’t want to have too many leaves down here but Definitely a few and then it’ll get thicker and thicker as it goes up okay once you have your leaves looking about like this I think this looks pretty good I didn’t connect all of the leaves on these hanging branches and now we can try filling it in with some vines and I Think I’m just going to start placing them on these leaves maybe put an extra one here just start placing them on these leaves that are on these hanging branches we don’t really need them anywhere else you just want to put them in places where you can kind of see Where they’re gonna fall cuz you want to have as much of these covered as you can so as long as they’re not obstructed by anything you just want to keep placing them all around and then we’ll wait for them to grow in so if you’re really Unsure about how many you need just put them everywhere that’s what I’m gonna try we’re just gonna put them everywhere on all sides of these blocks just to be safe we’re not putting them in anything else other than these hanging branches though we don’t want to put any too Close to the center we want them to look like they’re coming from these branches with all your vines in place then you just need to wait for them to grow in this third fantasy tree does not have a name because it is completely made-up but let’s just throw it out there and Call it the shroom tree it kind of looks like one we’re gonna be using oak wood for this and I’m going to be using dark prismarine and cyan glazed terracotta just because as blocks look kind of cool together although this does have a creeper face on it which is kind of Creepy so if you didn’t want to use that you don’t have to but we’re going to start with just a basic trunk and this one I’m actually going to just be thinking about making it twisty I know I’ve been making all of the others twisty but this one is going to be like A pattern so you’re gonna do a stair upside down stair stair and it’s just gonna go on a square basically and just twist around and I know we didn’t really do that exactly with the others but I thought it would be cool to try it so Let’s just make this go up and twist around something like that and you get a really cool twisty trunk of course you do need to fix the roots little so it actually looks like it can be supported we don’t want it to look like it’s about To fall over so make sure you add your root system or whatever you need to down here something basic like this will do just fine now for the branches again we’re going to be just using fences because they’re nice and thin but instead of what we did for the other Tree we’re going to make these branches kind of go higher but not droop down so they’re going to go higher up and flatter just like this that’s probably about as low as I want to go let’s try doing another one this time we’ll make it go a little bit straighter up just Picture it like you’re doing the bottom half of a mushroom you just want to have very high branches like this you don’t want them to be drooping way down like the other ones we do want the branches to go at different levels we don’t want them all in the same level maybe even Try having some go straight up we might want to curve it out just a little bit but not too much so once I have these bigger branches in place I’m just going to branch off and make a bunch of small ones just think about wherever you want leaves to filling That’s where you’re gonna put a branch make sure all these big gaps are filled in I think I’ve mentioned all this before but for this tree in particular we’re just making sure the branches are angled upward and not downward as much and there is our basic trunk with our Branches now we’re just going to take the dark prismarine or the darker block of your choice I would recommend having a dark block and a light block whatever colors you choose to use for your leaves take the darker block and start building around the branches towards the bottom Because what we’re gonna do is we’re just going to build out the darker parts or the underside of the leaves with these dark blocks and then we’ll take the lighter one mine is the creeper face the creeper blocks and we’re going to spam those around the top cuz we’re Thinking about the shadow levels of the tree we want it to look like it’s darker on the bottom lighter on top so this might not be the best color combination you can always come up with your own and maybe even add more maybe have three or Four colors but that’s the basic idea to put the darker blocks on the bottom at any lighter ones on top and since these are solid blocks and you can’t see through them like you can leaves you might want to space them out a little bit more it’s a little bit harder to Work with trees when the blocks are solid and not transparent so just be careful how you place them make sure you can actually still see the branches through the leaves it’s a little bit trickier when you’re using the solid blocks to do that you could even for Example just cover the tops of a branch and then not so much on underneath but maybe a little bit on the sides and then a little bit on top you still see the branches there but it won’t necessarily cover it all up so your face tree might Look something like this and like I said before it’s nice to leave a lot of the bottom parts of the branch is exposed and then when you look underneath it almost gives the impression that it looks like a mushroom or you can see all the different ridges underneath And if you wanted to round it off even more and make the top of it completely rounded like a mushroom you could do that but I kind of like keeping it looking almost like a natural tree – but that totally would be another option if you went to fill in these gaps and Connect it more and smooth it off and actually make it look like a mushroom but there is our shroom tree this last tree is probably the most fantasy-like of all of them it’s going to be almost like an icicle tree just a very pretty light blue and white tree and we’re Going to be using diorite for the wood since it’s cheaper than quartz although you could use quartz and then packed ice like blue glass and rods and glass panes so those are the blocks I’ll be using for this just because they’re very light and they do go kind of all together We’re using diorite for the trunk and it’s just like we did for all of the others and I’m just using the walls because it’s a lot easier thinner it looks a little more elegant and just like all the others we’re gonna curve it around and make some interesting shapes You probably could mix in a few slabs and stuff especially for the roots if you wanted to but for the most part I am just gonna be using the walls we can throw in a couple here and there that look nice all the branches though are Just going to be using the walls because it’s the best thing you can use here you can make it as big as you want as small as you want just make sure that the roots and the trunk can support whatever size you make it next I’m going to take The packed ice and this is going to be our main block for the tree it’s kind of similar to what we did with the last tree with a shroom tree where I’m just going to go around with a pack of dice all around the bottom and then on top of This we will scatter in some glass you might want to have packed ice under the glass though because I don’t know how nice it would look to put it on top of the die right directly I think it looks a little bit better to actually have some packed ice around everything first So we’ll just start with the packed ice and then we can sprinkle in the glass box just like so just again try to avoid everything looking extremely square because that’s when you lose the illusion that this is an organic tree once you have your tree filled out how you like it You can create whatever shape you want it is your tree after all do what you do best and make it your own we’re going to use the end rod and use these glass panes to create this beautiful hey mean sheets of ice basically it was supposed To be like and we’re gonna start in the same pattern for all of them actually I might want to cover more of these branches underneath I kinda do want to have more ice showing down here but again that’s just personal preference now I’m going to do all of these the Same way so we’re going to start with the end rods because mainly because they don’t connect with any blocks when they’re next to them so it’s nice to start with these and you can do one two or three however many you want but we’re gonna start with those and then right After those we’ll do a white glass pane and then a blue glass pane and I’m not even doing any particular number of any of them I’m just making sure I’m placing them in that order so that it goes from a solid white to more transparent white To a very light blue so it looks like it’s fading down into the blue so once again it doesn’t matter how many of each block you place as long as you’re placing them in that same pattern you can make them hang as high or as low as You want and the more of a new place the more magical list tree will appear so just keep going around and repeating that same process and rod however you want however many want of these and so on and there is our beautiful icicle tree I suppose that is the official name Of it if you did want to add extra detail you could even go around the outside edges with some glass panes honestly with this tree you could just keep adding on to it and it really wouldn’t make a difference it’s just a fantasy tree anything goes pretty much With this kind of tree but if you wanted add a little bit of extra detail you could go around the edges with some panes and I think I look nice actually just doing that around a little bit and there you have it you’re beautiful icicle tree well this video ended up a Lot longer than I anticipated but I hope you enjoyed this fantasy tree designs and hopefully they were able to inspire you in some way well that’s all I have for you for this tutorial maybe you’ll have to do more like this we’ll see but for now let me say goodbye and I’ll see you later you Video Information
This video, titled ‘Custom Fantasy Tree Designs | Minecraft Tutorial’, was uploaded by MegRae on 2020-02-20 22:00:11. It has garnered 805398 views and 34582 likes. The duration of the video is 00:21:11 or 1271 seconds.
I hope you enjoy building these fantasy tree designs. This being my first custom tree tutorial, I think they turned out quite nice!
00:00 Intro 00:10 Fantasy Oak 04:53 Weeping Willow 11:33 Shroom Tree 16:17 Icicle Tree
Quote of the day: “Four score and seven minutes ago our MegRae brought forth on these trees, a new tree, conceived in Liber-tree, and dedicated to the proposition that all leaves are created equal.” -Wright
►Twitter – https://twitter.com/MegRae_MC ►Instagram – https://www.instagram.com/megrae_mc/
►Music from: http://www.epidemicsound.com
#Minecraft #customtrees