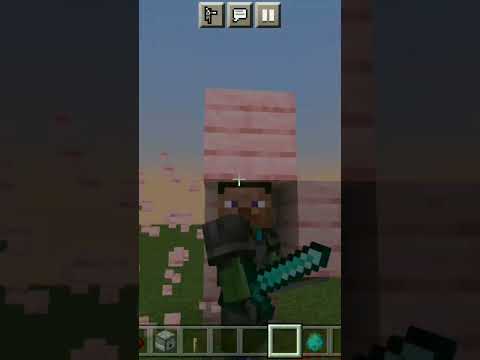
Hey there my name is gardner your friendly neighborhood developer advocate with lenode with over 100 million players across the globe minecraft is one of the most popular multiplayer games of all time and while there is a first party solution and a few other hosted solutions for running your own minecraft server None of them offer the same flexibility as running your own minecraft server on the node so let’s go ahead and review how to actually get minecraft setup on all the node it’s a really simple process and all you need to do is follow along with this video And you’ll be up and running in no time Before we get started though make sure you hit that like button it really helps us out here on the channel i mean if you like what we’re doing here if you are enjoying this kind of content share this video with your friends and make sure you hit that like Button all right let’s get into it so the first thing that you’re going to need is actually a lenode account if you don’t have one look in the description you’ll find a link to get some free credit for leno to get you started so once you have your lenode account set up Let’s go to cloud.lenode.com and once we’re here we’re going to go over to marketplace here on the left and then we’re going to select minecraft java edition right here once we’ve selected that we can scroll down now this actually has more settings than any other uh one-click app than Than we’ve reviewed before but that’s okay most of them are optional and have same defaults so we’re going to go over all of them and if you see an option here that you actually want to enable then you or disable for that matter you can just follow along and find the one when You’re setting up your end so the first thing is going to be the name of our world let’s just say gardener’s world this can be anything you’d like next thing is going to be message of the day this field is going to be displayed to everyone who logs into your server And powered by the node i think is pretty awesome so we’ll keep it now flight enabled won’t affect your creative mode flight this is going to affect uh mods that have flight ability i’m going to say false that’s fine netherworld enabled we’ll say true the netherworld is an Interesting area but if you don’t want another we can hit false so with player achievements enabled it’s actually going to show any achievement that any player earns to everyone who’s logged into the server i find those kind of annoying so i’m going to hit false maximum players now 25 players is Actually going to be a little much for the specifications we’re going to be running at so i’m going to say 15 and we’ll talk about the specifications you need a little bit later player idle timeout is the number of minutes before a player is kicked for being idle We’ll just choose uh let’s choose 15 minutes difficulty level easy medium hard peaceful peaceful is going to not spawn mobs and you know easy medium and hard is pretty self-explanatory hardcore mode uh is actually gonna set the entire difficulty to hard and then once a player dies they’re actually only allowed to rejoin The server as a spectator i’m gonna leave that false pvp means that players can attack each other i’ll leave that to true force game mode enabled will force the the player to join the server uh at the default game mode so if the server’s default game mode is Creative then all players will spawn in as creative mode and you know survival will be survival regardless of how they last signed out uh world type default uh flat and legacy these are the types of world that get generated i’m just going to go with default you Can add a world seed here if you want to have if you want to use a specific seed for the procedural generation of minecraft spawn animals spawn monsters and spot npcs are all pretty self-explanatory it’s going to enable those types of monsters default game mode survival is going to Be you need to eat to survive creative is more like a first person lego adventure means you can’t destroy blocks and just have to like go through the world and find your way through the world without destroying blocks or anything like that and spectator is uh not being able to Interact with anything really we’ll just stick with survival structure generation will leave to true that’s going to create the the kind of procedurally generated structures that you find throughout most of the game in minecraft maximum build height is pretty self-explanatory it’s how high the player can actually build maximum world size We’ll leave that to the default now view distance is going to show how many uh how much of the world the player can actually see uh when they connect to the server command block enabled um let’s go with true command blocks are a useful item Uh that allow you to add like logic to certain blocks i’m going to let that be true querying enabled means that you can use gamespy 4 queries to get information about your server let’s leave that to true enable rcon is a remote console access we’ll set that to true archon password We’re going to choose a unique password here maximum tick time is the maximum number of milliseconds that can elapse between two ticks not even frames but ticks uh so logic updates basically network compression threshold is the number of bytes before a packet is compressed uh op permission level is going to be The default permission level given to players when you use the slash op command to assign operators the port number is going to be the port number that you use to connect to the game snooper enabled allows telemetry to be sent to the minecraft home server i’m going to set that to false And use native transport enabled i’ll set that to true that just basically optimizes the server well you know uh it took a little bit but we got through that it was that was relatively painless right now like i said i didn’t adjust many of those options Most of those are going to be pretty sane defaults you might want to adjust one or two things here depending on the kind of game you want to run but now that we’re done with the with the minecraft specific options let’s go down a little bit further down the page and Set up some of the more linode oriented items uh region here so region is going to be where your server is actually running i’m going to choose newark new jersey because i’m in the northeast united states and you really want to have your lenode location as near to your players as possible That’s just to reduce network latency and such let’s scroll down a little bit more we’re going to go to our lenode plan now let’s talk about the kind of plan that you need in order to run minecraft optimally the node documentation specifies that you should actually have Two gigabytes for every 15 players that you anticipate having in your server so if you’re going to have 15 players you would need a 2 gigabyte node if you’re going to have 30 players you would want a four gigabyte node and so forth now you’ll remember earlier i specified 15 players maximum And so that’s because i anticipated using a two gigabyte node okay let’s scroll down here let’s let’s give arlen node a name um gardner’s minecraft server and this name has to be unique for your lenode account so if you have if i already had a lenode server that was called gardner’s minecraft server This wouldn’t work but it’ll work for now let’s go ahead and select a tag these are optional and finally let’s go ahead and just select a password now this is going to be the root password for the node that you’re creating finally there’s options here for adding ssh keys or Enabling backups or anything like that we don’t need to do any of that we’ll just go ahead and hit create now it’ll take a while for yearly node to provision while we wait you can also head over here to grab your ip address we’re going to copy that ip address to our clipboard And if you’re using the lenode domain manager you can head over to domains and you’ll want to click on the domain name that you want to use here so let’s do that i’m going to use lynodians.net you can see there’s a few other configurations here that i don’t actually need anymore I’m just going to clean these up real fast now i could set my a record for lyndonians.net to be the ip address of this account but i’m actually going to use a subdomain so we’re going to say minecraft and then so this will be minecraft.linodians.net and then we’re going to add our Ip address here and time to live we can leave as default and hit save now this will will allow us to actually type in minecraft.linodians.net right into the minecraft client and be able to connect to our server without having to type in our ip address because who’s going to remember an ip address Okay so it looks like our lenode actually has finished provisioning so we’re going to go ahead and sign in all right so we’re logged in here and uh looks like we’ve got the latest version now i’m on linux of course um that’s who that’s who i am that’s how i be So we’re actually booting up minecraft here and we’re gonna go to multiplayer and we’re actually going to add a direct connection and let’s go ahead and here we’re going to uh say minecraft.linodians.net and yeah it’s really that simple now i’m all logged in here uh we have a Minecraft setup running on our remote server and we’ve connected to it and i’m already logged in i think that this is super nifty now if you actually want to make yourself a mod you’re actually going to have to go and log into the lenode so let’s do that real fast we’ll Leave minecraft open in the background but we’re going to go back here we’re going to go to the lish console we’re going to type in our username which is root and the password that we specified which is the last field that we filled out before we hit create now we’re logged in Alright so what we’re going to want to do is actually cd to home mc server and then server files and then we’re going to want to nano ops.json and we’re just going to add our minecraft username in quotes like this and if you want to specify other people you just add a Comma and then add another username between quotes but um that should suffice all right well i hope you enjoyed that video i had a lot of fun i’m really interested to hear what you guys think about running your own server on lenode let me know down in the comments we Really appreciate we read every comment you guys send us so thank you so much for uh being here for watching this video for taking the time to spend some time with me today uh and i’ll see you guys in the next one You Video Information
This video, titled ‘Easy Minecraft Custom Server Setup 2021’, was uploaded by Akamai Developer on 2021-03-01 20:41:10. It has garnered 120361 views and 753 likes. The duration of the video is 00:11:13 or 673 seconds.
Customize your gaming experience by hosting Minecraft on Linode. You decide the rules when hosting your own Minecraft server. Enjoy playing with your friends in this highly addictive game.
Chapters: 0:00 – Intro 0:46 – Getting Started 1:11 – Configuring Your World 6:00 – Configuring Your Server 8:48 – Connecting To The Server 10:38 – Outro
New to Cloud Computing? Get started here with a $100 credit → https://www.linode.com/lp/youtube-viewers/?ifso=linodetube&utm_source=youtube&utm_medium=DIYCloud Read the doc for more information on deploying a Minecraft server → https://www.linode.com/docs/guides/deploying-minecraft-with-marketplace-apps/ Learn more about the Minecraft One-Click app → https://www.linode.com/marketplace/apps/linode/minecraft-game-server/ Subscribe to get notified of new episodes as they come out → https://www.youtube.com/linode?sub_confirmation=1
#Minecraft #Linode #Linux #OneClickApps Product: Linode, Minecraft, One-Click; Gardiner Bryant;