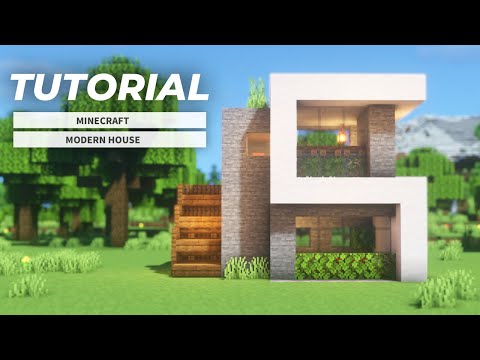
Hello everybody my name is Marlo and today I’m going to show you how to build a mountainous in Minecraft this is another episode of my tutorial Series where I’m building a house for all of the main biomes in the game make sure you subscribe to catch all of the new Builds that we do and you can also check out the playlist Linked In the description down below to find all of the other biome houses that I’ve already done alongside that you can also find a full list of materials that we’re going to need to make this build so this build Roughly takes an 11×13 area and once you got a good spot to build it in the first thing we’re going to do is start work on the base of the build which is mostly going to be made out of stone bricks but we’re also going to mix in some and Theight stone and crack stone bricks as well but we’re going to start on the front side for now and we’re going to do it all out of stone brick blocks and then add in the other three afterwards just for Simplicity so we’ll Place one down Skipper block this is where the Front door is going to go we’re going to then skip two more and place two more blocks like that all of these can be brought up by two more blocks like so and then we’re going to have one here and two over here so facing the front We’re going to come around to the right hand side and we’re going to add a line of three then we’re going to add one at the top one at the bottom then another line of three and another line of three two at the bottom two at the top another Line of three and then one more line of three so this is the right hand side now coming over to the opposite the side the left hand side of the build we’re going to start with six more stone brick blocks just like that with one at the Top and one at the bottom then three more and essentially we just want to bring it over to the same length as the other side so we should have 1 2 3 4 and fivex3 solid area with just a single window and as for round the back of the Build all we want to do is add three here on both of the sides three at the bottom three at the top leaving a central three by one window in the Middle with the doorway and windows laid out we can now go ahead and add an additional line of stone bricks on top Of the ones that we already have placed down so it’s now four blocks high and then you can go ahead and mix in all of your other blocks to get some texture the anders sight Stone and crack stone bricks you can do this however you would like but if you’re struggling and would Rather just copy it here is the front here is the left here is the back and here is the right now we’re going to move on upper level and start work on the wooden section starting with some dark oak logs in each of the corners so Just on top of the stone brick blocks or stone and aide correct stone bricks whatever it is the corner blocks we just want four dark oak logs like that then we’re going to grab some chiseled bookshelves and we’re going to start at the front of the build here we’re going To just step inside you might need some scaffolding for this or something but starting on the left here we’re going to place one chisel bookshelf skip a block this is where a second Doorway to the balcony is going to go and then Place three more and essentially for the rest Of the way around we just want to fill in all of these gaps with a chiseled bookshelf the only thing is you want to make sure all of them are facing towards you on the inside so you should be seeing this texture on the inside of the Build and of course this texture on the outside of the build so coming back around to the front here we’re going to go ahead and place three strip Spruce logs on either side next to those dark oak pillars and then we’re going to go ahead and place four in the center one We’re going to have an upside down Spruce stair right here on the left hand side and then one block lower over here we’re going to have another one so doorway and then window then we just want to add two more strip Spruce logs above that stair and one more above that Stair now coming round to the left hand side we’re going to do the same thing again with three strip Spruce logs next to the dark oak logs and then we’re going to add three more in the middle here just like like that then we’re going to grab some Spruce stairs and We’re actually going to step inside to do this and in the middle of these logs we’re just going to have two upside down ones for each of those gaps and then go ahead and stick a spruce log on top of them as for over here on the right hand Side starting in the same way once again with three of those logs next to the corner blocks we’re going to then have five upside down Spruce stairs facing outwards this time for a great big long window and then we’re just going to have some more logs on top of those and for Round the back we’ll have three each side once again then with an upside down stair next to the top block four in the middle and then one either side it is looking a little bit funky right now I’ll be honest but it does get better so Do not worry we’re going to come to one of the two longer sides here so either the left or the right and we’re going to start by placing a stone brick wall on the corner block like that then we’re going to have two Spruce fences like so And then we’re going to have to pillar up if you’re in survival and place a barrel on top of it now we don’t want an upside down Barrel like that because we want to see the bottom texture and then we can go ahead and place an upside down Barrel this time on top of that Barrel so we see the same texture once again and we can go ahead and place two more Spruce fences on top of the top Barrel then in line with the bottom Barrel here we’re going to add a line of upside down Stairs going all the way across with some Spruce trap doors on top of them we can do essentially the same thing over here on the right hand side of the build except we don’t want these five trap doors where we have the windows just break the blocks in front of it instead In the middle three we’re going to have some coarse dirt that will become a flower bed so go ahead and plant some flowers on there and then either side we’re going to have a spruce there face facing away from it like that with some Spruce trap doors to cover up the front All we need to do around the back is just from this bottom Barrel starting on the stone blocks we’re just going to have a line of spruce trap doors folded shut against the blocks the front of the build is where we’re going to be building our balcony which is actually What we’re going to construct now so what we’re going to do is just come to the left hand side here so from these blocks and we’re going to count out 1 2 3 and then go across by one to the left so to the outside of the build and place Down a barrel we can do the same over here but opposite side of course so 1 2 three and across with the barrel then we can grab some strip dark Coke logs and we’re just going to add six more on top of these barrels as our supporting Pillars so 1 2 3 4 5 and six for both of them then you want to go ahead and grab some dark oak planks and we’re just going to add seven of them across the top line of these Stone blocks with an additional one coming forward on both of The sides then we’re going to go ahead and place two stairs here and here facing into each other with two more stairs here and here facing outwards we’re going to have three dark oak slabs across the middle with five dark oak trap doors the other block out so it Should look like this from underneath we just need to add in two more stairs on either side so starting over here we’re to add one that’s against the pillar so it should have the back of the stair against the log and then this one can face forward so it kind of Curves around A little bit just make sure it isn’t something like that we want a little bit of curvature not too facing into each other and then of course the same over here on our two pillars here for these two sides of the log that aren’t already covered by the stairs we want to go Ahead and cover them with a dark o trap door then just underneath that we want to go ahead and place a dark oak sign on all four sides on both of the pillars just like that and then we want to come all the way up to the top here and do The same on this top log however we only want it on the front the back and this side but this side facing out of the build we want to leave that blank it’s going to be preoccupied by a dark hook trapdoor a little bit later on when we Do the roof so we can’t actually fit it in looks a little bit weird right now you’re probably very temp to put one there but it’ll look strange later if we do so just leave that outer block blank with the sign as for the railing of our Balcony we’re actually going to be using LEC turns a little bit different I know but I absolutely love how these look so we’re going to go ahead and place two and these want to be facing inward so from the outside we can actually see the bookshelf part of it we’re going to be Covering that up in just a bit and then in the front we just want to have a line of seven going all the way long and I think that is such a cool looking railing design a bit expensive I know but definitely worth it if you ask me Then we’re just going to go ahead and break these two Darko plank blocks temporarily in our balcony and we’re just going to pop down Crouch and go ahead and place two upside down Barrels in those spots next to the lecturn so we should see that which we can then go Ahead and cover up with a dark oak Plank and if we just pop back up to the top here this is what you should see now we going to grab some Spruce trap doors and we’re just going to cover the front face of all of the remaining lect up with one Of them and you can go ahead and cover the tops of them up too going all the way around for the front the left and the right over here I think now we’re going to start work on the roof so what we’re going to do to begin with here is Just grab some temporary blocks and we’re going to place them on top of the pillars here and then come outwards by one so they’re coming forwards and then we can break break this and then against the temporary block we’re going to have a horizontal line of strip dark oak logs Coming all the way over to this point right here in line with this dark oak log and extend it out by two more so it should come out by two on this side on the back of the build and then technically three on the front but obviously conjoining up with the pillows We can go ahead and do the same over here too so the temporary blocks and then a big old line coming all the way across with an additional one two round the back of the build we’re also going to be covering the front of these logs Up with some Darko trap doors I just think it looks a little bit nicer than the front face of the log and essentially there is a symmetry pattern to the roof here so I’m just going to do one half and copy it afterwards so I’m Going to be doing it on the left hand side of the build not that it really matters though so come to the outside here and on the bottom half of this log we’re going to have a line of slabs going all the way over just just up Until where the logs go you don’t need to go any further at all and then we’ll have a line of dark oak trap doors underneath them and now you can see why we don’t have the sign here because they’re both occupying the same block we can’t fit them both in now we’re going To grab some more dark oak slabs once again and starting at our balcony side we’re going to have three in line with the logs like that and over on the back we’ll have two of them then on top of these slabs we just want to have a line Of those same slabs coming all the way over so it kind of looks like a full block from the front but really it’s just double slabs and then we can go ahead and place a temporary block here and then here coming outwards again and you can probably see where we’re going With this we’re once again having the same length strip dark oak log coming all the way over which of course the front of them is covered up by that dark oak trapdoor now we’re going to do the same with the slabs once again so three At the front and then two at the back and then another line of slabs on top of those coming all the way over the same distance as everything else has been and now you can go ahead and copy what we’ve just done there over to the other side As well of course we’re now left with a line in the center but I’m sure you can figure out what we’re going to do here we just need another dark oak line going all the way across to the same level as the rest of them before and not Forgetting to cover up the front of them with the Darko trapo and essentially that is the roof done we’re just going to add in some extra supports here with some fence gates so what we’re going to do in the very center here facing forwards we just want two of them like That and then over here underneath these logs we want one here and one here same again on the other side and making sure they’re facing sideways and then look at them and open them on up so they go into the slabs and it kind of just looks like extra supports holding everything Together we can do a similar thing round the back too we just don’t have quite the area to work with so at the center in the front here we’ll just have one and then we’re going to have two either side once again opened up into the slabs One more addition to make to the roof is a chimney so what we’re going to do is grab some brick blocks and essentially come to the back right corner of the roof so this one over here and where we have these line of slabs so from the Back we’re going to count in 1 2 3 4 and break the fifth and sixth block and replace it with a brick block like that then we’re going to have four more on top of them like so then four more once again then four brick walls four more Brick blocks and then on top of those we’re going to have four campfires and just simply surround them with some Spruce trap doors so we have a nice animated smoking chimney for that extra cozy cabin fa so that’s the general basis of the build all we have left to Do now aside from the interior is to just go around and fill in the windows and add in the details so we’re going to start around the front of the build at the bottom here on the stone level so we’re going to begin by grabbing some More of these stone brick walls and just placing them in the corner just like we did here with two Spruce fences on top of them like that then we can go ahead and place our Spruce doorway in the doorway spot over on the left hand side and it’s something I forgot to do Earlier not a big deal but maybe switch this block out for an upside down stair just looks a tiny bit better in my opinion underneath this block we’re just going to have a hanging sign maybe as a welcome or if you’ve got a name for your House that could go there feel free to dye it of course or glow it up with some Glo ink and then in this Gap right here we’re going to add two light gray sting glass panes on the top two blocks and these two blocks are actually going to Be related to the inside they’re most likely going to be some variant of a furnace but we’ll just leave it blank and come to that when we actually get inside the build so for now leave those two and in front just place in two Spruce stairs facing outwards with a spruce trap door On either side as a nice little seating area bench sort of thing to sit and watch the world go by and then lastly just above this second window here on the right hand side we’re going to hang a lantern up on the top deck with our balcony the first thing we’re going to Do is just place down two white sing glass panes in our window and then we actually want to go ahead and switch this block out for a dark oak plank as we’re going to be placing an oak door on the back of the block so of course we Want that to match with the rest of the balcony then up here in the center in the middle we’re going to have a chain and a lantern and over on the right hand Barrel we’re just going to crouch place a flower pot with something inside of it Now in front of this window we’re going to make a very simple little chair design like that but I do actually have something that’s a little bit better so if you want just a normal chair this is absolutely fine but if you want a little bit of a fancy chair that you can Actually sit in just go ahead and break that stair and I’ll show you how to build it so essentially we’re going to be sitting in a mine cart so we need to place a rail to begin with with a mine cart on top now yours might be kind of a Bit wider it depends on the direction your house is built in it works just as well either way so if it looks slightly different don’t be alarmed that’s normal but then we just want to kind of reach over into that bottom corner there and break the rail as you can see mine’s Done a bit of a twisty thing and rotated yours may or may not do that it depends as I said we’re also going to go ahead and get an oak slab on the bottom half of this window and place that down right there doesn’t have to be an oak slab This is essentially going to be the cushion so maybe like a quartz slab or a red nether brick might look a little bit better it’s up to you of course but Oak slab is just fine we’re going to have a piston upside down half a block above it And then go ahead and power it and as you can see it pushes it down into the slab maybe doesn’t look great you kind of can see it’s a mine cart but the bonus is you can sit in it and you can look out of the balcony I don’t have That great A View but I can watch the clouds go by which I could imagine will be very relaxing and you can’t really nudge it around so you’re not going to damage it now swinging around to the right hand side over here the one with the long window which we can actually go Ahead and fill in with some Whit stained glass panes all five of those blocks and we can just hang a lantern in the center that’s what we need to do up here because we of course built the flower bed earlier on in the tutorial so we can Come back down to the bottom level here and just fill in our windows with our light gray stained glass panes and now in this spot we’re going to make a bit of a log stack using some oak logs and also some extinguished campfires so starting off on this block here we’re Going to have it facing towards us horizontally then upright then this one is going to be upright once again and this one to the right hand side is going to be to the side doesn’t need to be exactly like this I’m just showing you how in case you’re not sure how to go About something like this but we’re going to have a campfire on top of this log on top of this log on the floor here and on the floor here you can change the rotation a bit if you would like but the main thing is you go ahead and Extinguish them and it kind of looks like smaller versions of the oak logs then just to the side of the log pile we’re going to have a very small storage stack with a barrel here a chest to the side and an oak trapo on top over here For the back of the build we’re going to start down the bottom with our light grating glass windows and very simply we’re just going to make a bit of a flower bed once again three blocks long with the corer and just cover the sides up with darker trap doors this time and Plant whatever you’d like on top of them I’m going to go for berries just as something a little bit different to the flower bed that we already have around here so that’s it for the bottom level we can now come up to the top starting with our white stained glass panes then In the center here in front of this chiseled bookshelf we’re going to have an upside down Oak stair with two Oak slabs either side of it over on the right hand side we’re going to add two Oak trap doors that will be folded shut down like that so it should be just on The right side of this window here and we should be able to crouch and place two Oak signs on the back just for a bit of a shutter design as you can see and so we don’t do complete symmetry here and do something a little bit different The shutters on the left hand window are just going to be folded shut against the spruce log and then on top of this slab the left hand side one we can just have a flower pot and up here in the center we’ll have a chain and a lantern and for The final side Round Here the left hand side of the build we’ll start once again with our white windows and then on the left hand side here we’re very simply just going to place them on the top of the windows here and fold them shut they Do as you can kind of see connect to the trap doors but it’s not noticeable from the inside nor the outside and it once again allows us do a little bit of variation with the shutters here which is kind of what we’re doing so over on The right hand side just to change it up we’ll add them on the bottom of the slabs or stairs sorry this time and underneath that we’ll have some Oak fence gates opened on up just like so and then in the center here same as around the other side we’ll have a Lantern just for a little bit of lighting now down here we’ll start with our light gray window and then what we’re going to do is grab some Oak trap doors and what we want to do is just come in from this wall and we’re going To face to the side and we’re just going to place down two Oak trap doors like that then we’re going to leave two blocks and do the same over here and then add two more at the top and just for now we can add in two armor stands Here but we’ll come back to this in a second for right now what we’re going to do is place a composter here just to the side of the window with an oak trap door on top of it open it on up and then a chest just to the side so this looks a Little bit strange right now and it probably needs some explaining essentially this is meant to be your ski storage so these are going to be your skis and this is going to be the helmet Barrel or something I don’t know I don’t ski so I’m pretty inexperienced with Building stuff like this but we’re going to start with our ski closet over here so first thing we need to do is just cover up the base of the armor stands so we’re going to grab two Spruce trap doors and just place them down on the The floor like that then two Pistons or one at a time it’s up to you we’re just going to go ahead and push them into the armor standand so you can’t see the base of them and it looks just a bit more stick like and you could mistake it for Skis you could even fit in a central armor stand in the middle here if you do some fishing rod trickery but I’m not going to bother with that right now you can do that on your own time if you would like to it’s way too fagly to be Doing in a video that’s already probably pretty long so now we just need need to cover up with some doors on the front so as you can see they’re both facing to the side right now and open up like this not great we just want to break the one That’s got the handle on the outside and replace it back down and there we go we have our ski closet now for our bucket of helmets which this is meant to be the bucket you’re just going to have to pretend it’s full of helmets but to Insinuate that what we can do is just kind of have one out on display over here so go ahead and break this block grab some snow layers four to be specific and place them down 1 2 3 and four then we can place our armor stand On a bit of an angle like that on top of the snow layers with our helmet on top you can D cap iron armor anything it’s up to you and then we just want to go ahead and break these two blocks above it place a piston down with a crafting Table underneath it and go ahead and push it once and then we’ll just need to have a temporary block and push it once more again into the armor stand fully go ahead and break everything up and replace it as it was and as you can see We’ll just do a little clear up it looks like the helmet is out on display there ready to go into the bucket so that everybody is the exterior of the build all done we are now ready to pop inside here and start work on the interior so First things first we’re going to build the staircase going up to the second level which is actually two blocks in front of the doorway here here so on this third block just in front of the window we’ll have an oak stair then an upside down one and essentially just Repeat that pattern a few more times over until we get to the other side of the wall here then to the right of it we’re going to have a horizontal line of strip tooke logs then at the same level we’ll have a line of Oak slabs going all The way over then some more strip tooke logs and then some more slabs so it should look like this from underneath and you can also go ahead and stick one in this corner over here just above the doorway up here on the top level we can Go ahead and place seven more dark oak slabs underneath the ones that we already have there on both of the sides for the ceiling that’s that all done and lastly whilst we’re up here we’re just going to go ahead and make a railing for our staircase so we don’t fall on down When we’re not trying to you may not actually want to do this it’s probably quicker to do this when you’re in survival but I think it looks a little bit better so next to this stair here on these strip tooke logs we’re just going to have five Oak trap doors going all The way over and fold them up like that then we’ll just add a temporary block here in front of the slab place an oak trap door on top of it fold it shut and then get rid of the temporary block and there we go we have a nice little Railing for our stairway now we will return up there shortly but for right now we’re going to sort the downstairs level here to begin with so what we’re going to do is on this three Wide Window we’re just going to break these three blocks at the back too deep and then We’re going to do the same for these three and these three again then we can go ahead and replace these six blocks here with some bookshelves so go ahead and break all of them replace them with six bookshelves same again over on the other side here so that’s 12 in total And then technically you would only need these three more but that looks weird and it just kind of works better if you have the extra three so you definitely have enough for 30 levels and of course go ahead and place your enchanting table in the center there now we do need a Staircase leading down to it so go ahead and break these three blocks these three and then these three again then we’ll have two stairs in the middle and the two on the side we actually want to face outwards and place down so they curve around a little bit as opposed to that So just make sure they’re curved round then to cover up these two blocks we’re just going to go ahead and place a dark oak trapdoor on the front face of them and then all of these blocks around the enchanting table I always like to go for something a little bit glitzy and glamor With the blocks of amyst plus they just sound delightful and I think it looks nice and colorful too A lot of these snow blocks will have something on top of them so to save you on a few resources I’m only going to break these eight blocks right here as well as this One just behind the trapo and we’re just going to place one on the Block that the doorway is on then we’re going to place it on on the side then on the snow block and just repeat that pattern and then do the same here so place it on the side on The side and then facing this way just for a little bit of a checkable pattern and then this one technically I think it should be placed this way but you can barely see it it’s not a big deal now on top of these snow blocks we’re going to Have some furnaces on these four we’re just going to have regular furnaces with a lantern here just in front of the window and then we’re going to have one two and three more cuz I don’t think you can really ever have enough furnaces unless you want to build a super smelter Then we’ll have a spruce trap door just on top of all of the tops of the furnaces and here where we have the gaps under our window finally we can place something down I’m going to do a blast furnace and a smoker but that may not be To your liking just replace them with normal furnaces but they do come in kind of handy so I like to have them there just in case over here on top of the bookshelves themselves we’re just going going to hop down and we’re going to place three barrels here either side Facing into each other so we want to see the fronts of the barrels not the side texture so basically uh not like that we want to see the front face going this way then over on the left hand side just under our staircase here we’ll have a Crafting table with a chest on top and a chest to the side and then over here on the right hand side we’ll just have three double chests like that now we do need an anvil and a grindstone so we’re going to go ahead and place a slab right There just in front of the window with two Spruce trap doors for a little bit of detail on the two sides some extra supports to hold up the big heavy furnace that’s going on top of it and then we’re going to have a grindstone here and also here mainly for symmetry You don’t need to but it looks kind of weird just having the one so I’m sticking to there just because and lastly the final thing to do down here on the bottom level before we head upstairs this wall looks a little blank right now but you can easily fit a Painting in without getting kind of too close to this window so what I thought looked best with an item frame and a clock inside but of course you’re welcome to change out the item if you want something else up on the top level here the first thing we’re going to do Is grab two looms and just come over to this back right corner here and face inwards and we’re just going to crouch and place them like that so we don’t get this front texture and instead we get the side which I always think looks like some drawers or other storage that way You’ve got decorative plus utility cuz you can still access it we’ll have a cartography table just to the side of it and a bed of any color just to the side of those a chest here beside the cartography table with a flower pot on top of the cartography table a oak trap Door on top of the Looms and then we’re just going to crouch and place an oak sign at the foot of the bed here just to make the bed look that little bit more interesting of course if you don’t like the look of that like anything in this House go ahead and get rid of it just to the left of the doorway here we have a smithing table with a stone cutter to the side of it and an Ender Chest on top then over on the opposite side beside our railing we have another crafting Table I’m putting one up here too cuz they’re always helpful to have on hand with a brewing stand on top of it then a spruce trap door on the top part of that block with another brewing stand on top of that one just in case you need to Lastly we’re just going to stick a chain with a lantern underneath right in the center of the room to nicely light everything up and then we’re just going to go around and add a little bit more storage in the form of barrels and chests on top of spruce trap doors so to Begin with here we want one on top of this block so right at the top part we’ll have two of them like that with a double chest on top of it then over where we have our bed one block inwards we’ll place two more can’t have chests Here because we won’t be able to open them up with the four blocks above it so instead we’ll have two barrels and then we’ll also have two more Spruce trap doors here and here with two more barrels and then very lastly but not by least we’re going to have a 2×1 painting Right here next to our windows so there we go everybody that is going to do it for the tutorial I really hope this helped you out and that you enjoyed watching thank you ever so much for doing that and I will see you in the next video bye for now Video Information
This video, titled ‘Minecraft – Mountain House Tutorial (How to Build)’, was uploaded by ItsMarloe on 2023-11-25 15:00:09. It has garnered 3127 views and 329 likes. The duration of the video is 00:31:43 or 1903 seconds.
How to build a mountain biome survival house in Minecraft! Welcome back to another episode of my build series where I’m going to be building a house in all of the major biomes. Check out the other biome houses in the playlist below!
Biome Houses Playlist – https://youtube.com/playlist?list=PLEIKo1ue4fgF-l-y9kwgJCaG1ECSQa0gX
↓ Materials List ↓
• 1 stack + 55 dark oak slabs • 1 stack + 27 stripped dark oak logs • 54 dark oak trapdoors • 16 dark oak logs • 14 dark oak signs • 14 dark oak stairs • 11 dark oak fences gates • 10 dark oak planks
• 61 spruce trapdoors • 49 stripped spruce logs • 31 spruce stairs • 20 spruce fences • 3 spruce doors • 1 spruce hanging sign • 1 spruce slab
• 25 oak trapdoors • 18 oak slabs • 14 stripped oak logs • 9 oak stairs • 4 oak logs • 3 oak signs • 2 oak fence gates • 1 oak door
• 1 stack + 32 stone bricks • 32 andesite • 32 cracked stone bricks • 32 stone • 6 stone brick walls • 1 stone brick stair
• 23 barrels • 23 chiselled bookshelves • 15 white stained glass panes • 14 bricks • 11 lecterns • 9 light gray stained glass panes • 9 flowers • 8 blocks of amethyst • 8 campfires • 7 lanterns • 6 coarse dirt • 4 brick walls • 4 snow layers • 3 armour stands • 3 chains • 3 flower pots • 1 composter • 1 item frame • 1 helmet • 1 painting • 1 piston + button
• 18 bookshelves • 13 chests • 7 furnaces • 3 crafting tables • 2 brewing stands • 2 grindstones • 2 looms • 1 anvil • 1 bed • 1 blast furnace • 1 cartography table • 1 enchanting table • 1 ender chest • 1 minecart • 1 rail • 1 smithing table • 1 smoker • 1 stonecutter
🔵Twitter – https://twitter.com/itsmarloe
🟠Instagram – https://www.instagram.com/itsmarloe/
🟡Discord – https://discord.gg/TpJAe2K
🔴Second Channel – https://www.youtube.com/itsmarloe2
⚫TikTok – https://www.tiktok.com/@itsmarloe
🟣Twitch – https://www.twitch.tv/marloe_
🌟Shaders – https://bitslablab.com/
🎨Resource Pack – https://vanillatweaks.net/ & My own custom pack (available to download for my YouTube members and Twitch subscribers)
Timestamps: 00:00 – Intro 00:28 – Exterior 23:50 – Interior 31:18 – Outro