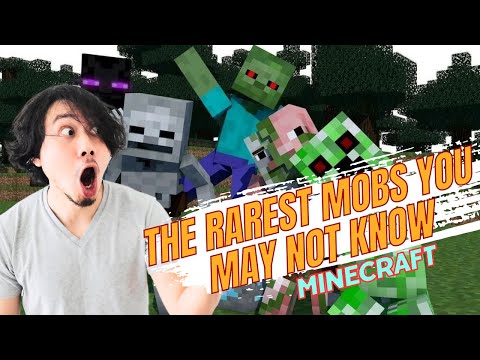
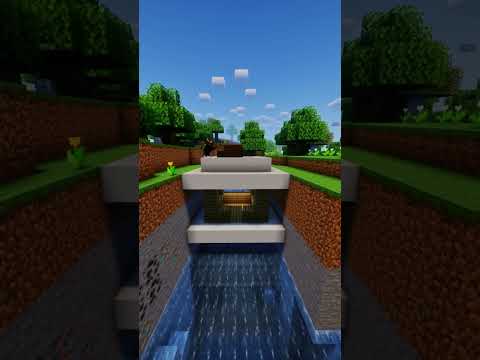
Hello everyone and welcome to another video today I’m going to be doing something slightly different to my usual streams I am going to be giving you guys a tutorial and block bench I noticed suddenly that lots of people have been asking me for people have been DMing me over discord About different ways that I can help them and I’m always happy to help you guys but making your videos probably a much easier way for me to kind of communicate with you guys and help you guys out so I hope this tutorial series can actually teach you something so of That let’s just get into it so this first episode I’m just basically gonna give you a explanation about the block bench layout or the different tools you have and we will go from there so to start off with we have the file panel at the top here now the setting Project this will allow you to name your file and your mob geometry so I’m gonna make a dog so I’m gonna call the file named dog the same goes with the mob geometry name you don’t have to worry about this ambient occlusion yet because this is going just to be a basic Tutorial I’m not going to go into anything in too much detail right now or too advanced this is just to give you guys a basis to start learning the program and start modeling hopefully now your texture size here which you can edit depending on if you want a higher resolution than normal Minecraft lower whatever you want and here you can obviously confirm or you can turn your model into a block model basically what I have at the moment is the setup for an entity model which is used for bedrock based minecraft so anything like Pocket Edition Windows 10 Edition those are all block bench based whereas Java is just the original minecraft Java edition so block models are things that you have the use for Java Edition and entity models is what you have to use for bedrock edition and since I work on the marketplace which is only on bedrock Edition II’s entity models so I will not be covering block models in this series although lots of the skills you can probably transfer across so now what I can do is create a new entity model not bottle as that’s Java Edition entity model is what I want I’m gonna call it Dog same with the mob geometry name and I’ve got a confirm and now we have set up our file so other options that you have under this file is recent so recently I’ve been doing some dinosaur stuff so I’ve got my recent dinosaur files here which I could open open model Will just allow you into your file explorer import if you already have a model open you can add another model or an extruded texture export always remember to export your models guides if it’s a bedrock entity obviously export it as a bed full entity if it’s a Java Entity obviously export it as a Java and team these two of things you won’t necessarily have to worry about if you’re trying to implement your model into Minecraft they’re kind of some more advanced settings which I’m not going to go through right now and also obviously your save you have your settings here Obviously this is there’s a lot of personalization here so I’m not going to go over all but very simply I use a small grid and a large grid that’s what you’ll be seeing on my layout here and the default UI colors so all of this is all customizable just obviously Something you guys can look into more and find what suits you best the about page is just about the program which is obviously blocked bench created by Janice lovely chap very helpful very good at what he does so obviously visit his website if you want to download the Program the bug tracker if you have fine any bugs which do happen unfortunately as they do with every program so definitely go and check that out especially his discord this is how I first learnt to model was through asking questions on his discord very very helpful and I Would have definitely advise it all the links will be below just for reference then we obviously have our updates panel and our donates to option here so there’s obviously self-explanatory edit panel has undo and redo add a group where it will be down here which I’ll go Into a little bit more in a bit select invert select this move relatives is just to do with how your plots move they move along the actual axis or if they move parallel or perpendicular to where your cube is if that makes sense but again I’ll go over that later transform Is just about scaling or cute or tasting them flipping them centering them and properties so if I wanted to rotate a cube this is an easy way to rotate it 90 degrees if I wanted to flip it so I wanted the leg on both the left and the Right side I could flip the left leg onto the right side so we have two legs which are in the right position without having to you know fiddly flip it over ourselves Center will just allow you to Center a cube along one of the axis so If I said X it would send her along this x-axis here I’ll cover this in more detail later filter so under filter you can add in plugins so these are all the ones which are available to you currently I don’t have many installed I don’t really use Plugins an awful lot but the ones which I always install is plaster by darkness which basically fixes texture bleeding which isn’t you might come across and texture editor by Janus as well which you can manipulate images change the huge contrast the saturation it’s basically a really good tool if your Coloring slightly off and you want to touch it up a bit without having to open Photoshop or another image editing software you can just do it through this as well as shape generated by dragon master which is also a very helpful tool if you have trouble creating circles out Of cubes which funnily enough isn’t as easy as it may sound so next we have the view and this is basically whatever you want you to be you can zoom in and out here or you can also use the scroll wheel on your mouse your full screen Took a wireframe talking courts view all of this stuff is things that you guys can explore and find out what you like the best generally I just like plain old simple I don’t like to use you know quad view because it doesn’t work for me but that basically gives you and overhead View an isometric view a I believe this is side and this is front or the other way around but basically it lets you look at all different views at once and move them all in individually so that’s pretty cool if that’s what you’re into but personally I just like this and I Like the freedom being to move around something I guess I should cover is you can left-click to change the direction in which you’re looking and right click to move it left to right and such but here you have your actual tools so we have the move tool which I will just Show you how it works by creating a new folder and a new cube within that folder so the move tool just lets you move it along this axis here or this axe one at a time so you can position it wherever you want you can press shift in Order to move it by 0.25 of a pixel if you want to be more specific control can move at 0.1 of a pixel and if you hold them both down at the same times you can control it by moving at 0.05 of a pixel so you can get very accurate and little Details by doing this that’s very simply that move tool which you can also use these coordinates here to move your things around if that’s what you prefer if you’d rather not drag it next you have the resize tool so you can make this as big or as small as you Want you can change the sizes in all three directions which you can also use this tool for if you want to increase it or decrease it this way instead of pulling it that’s completely up to you and you have an inflate tool here so something to watch out for is using Decimal points when you’re coming to making your cubes this can cause problems when you’re auto-generating textures later on so generally it’s best to avoid any decimal points in your sizes especially for federal penalties because of how it then generates the texture it can be very buggy it can Cause all sorts of problems I generally try and stick to whole numbers but if you do want to have those smaller decimal points again you can use shift and control to have some more accuracy there but if you do really need the cube just 0.1 or whatever of a pixel smaller You can use the inflate tool here and if you just type in for example minus 0.1 it will take 0.1 off all sides of the cube so that in a way you can kind of cheat the system get a slightly smaller cube but generally if you can help it don’t use Decimals it can get messy next we have the rotate tool now certain to know about this is you can only use it on folders or subfolders also called groups or bones however you like to cool it so if I wanted to move this cube here I’d Have to go on the actual group is in and then I could rotate it if I then wanted to add another cube into it which is over here and I just wanted to rotate this cube here I’d have to put it into a new group and then I could rotate this Independently but because this group is a subgroup of the main group up here if I clicked on this big cube for example it would select the entirety of that group and move it all together so you have to be careful about the way that your bones and your groups are laid out Otherwise you can cause yourself problems I’m trying to rotate but a good rule to have is just anything that you want rotate it has to be in a group next you have the pivot tool very simply this just moves the origin of where your cube Will rotate from so if I move this out further here away from this cube it would then have to rotate around this point here like so or if I moved it close inside the cube more like the middle it would rotate around that point instead so this can just give you more Accurate turnings and it can be a lot easier when it comes to animating further down the line now vertex nap is a very cool and very useful tool if I wants to just be moving this by myself I may not be able to perfectly line this up with this cube I Might be having troubles I have to really zoom in or do some calculations to make sure it all lines up with the vertex nap tool all you have to do is click in the corner you want lined up click on the other cube and click on whatever corner you want this line up There so this corner here to line up with this corner here so I would just click this and boom perfectly aligned which is a lot more difficult if you are just trying to do it by eye or trying to work out yourself very easily for now I Can move on to this texture box down here so when creating a texture you can just press this great texture tool you want to give it a name and then name it dog even though it doesn’t look like a dog right now by selecting this template Tool it will basically look at the cubes you have and generate a template for your texture based around that super helpful really easy no more fiddling about this compressed template is really important at the end of your texture making should always compress your templates or your textures to make sure That your file size are as small as possible from obvious reasons I usually wait till the end so I have a little more freedom of the space I have for you know if I want to add in a cube or something later down the line if I Compress the template I won’t have any space for that I would splaying that in more detail later if that doesn’t make sense so let’s just confirm that and here you have your texture if I click on this cube and see it up here so it’s generated this large cube in this area here In this little cube down here now I can paint either directly on to the CV or I can paint there actually on to here it depends how you prefer to work generally I find it’s easier to paint straight on to these cubes and with that we’ll move On to the paint tab at the top see we have three pages here not one not two but three so if we go in the paint page we have the paintbrush this has two brush modes it has both round and noise and you can choose the color here on This little color palette so left to right is obviously about saturation so on the right you’re going to have your brightest most colorful colors and on the left you have you know your whites all your very dim colors up and down is about light so the very top is obviously Gonna be the lightest and the bottom the darkest it’s just all gonna be black down here on this right area here you can change the hue so if you want a red you got this red area select whatever color you want and then you can paint With it right onto your cube now you also have the option to increase the size increase the opacity which is basically how transparent it is say if I put it down it’d be very see-through it wouldn’t have much of a strong effect the softness is just wherever or not It’s a hard kind of three by three square here or if it’s like kind of a softer so soft around the edges and it’s nice for shading and for trying to create gradients it just depends on what you need from your texture your paint bucket comes in multiple options as well Face which will just fill in the entirety of a face color which you’ll fill in this entire color instead of the whole face and cubes you’ll fill in the entirety of the cube like so the eraser you can just raise textures entirely so like here you can see it’s Going to be turning a see-through which is kind of crazy and it’s something which is actually possible in Minecraft now with some clever Devyn again you can change the opacity and the softness next you have the color picker so if I for instance wanted to work with this color Green I will just click on the color picker and in the green and I’ve picked off that color exactly you can also use three bindings so for this usually I press alt and then I click a color to get that color that’s easiest for me rather than having to go up here every Time that you can find what works for you right now when it comes to saving your texture you’re gonna want to save it as a PNG file which is what minecraft uses to apply the texture to their models in game and that’s very simply it the textures I will obviously go into More depth in a later video of how to actually you know make your texture and make it beautiful so the third and final page is your animate page now this is probably the most complicated part of block bench especially for those who are very new to it I mean I’m new to it Myself so I’m not an expert but later on in the series I will explain how you can create kind of simple animations very simply you have keyframes along the second so generally what I have this setting on at the moment is thirty key frames per second I’ll explain all of This later on but along here is your time and then you have to set where your positions are where your rotations are you can change the playback speed if you want to look at your animation slower which can make you kind of catch little details you may not miss if it’s full Speed except for etc I’ll come back to this later on don’t worry and with that that’s basically this video I hope you guys enjoyed make sure to LIKE and subscribe if you want to see the rest of the series next so we’re actually gonna start getting to modeling I’m actually gonna show you Guys how to create your first model go through the processes I do in order to make it so make sure to subscribe to keep up to date that make sure to follow our twitter at ever bloom en links are down below as well as my twitter at Ninja master MC thank you guys for watching and I hope do see you next time You Video Information
This video, titled ‘Minecraft Modeling Basics – Blockbench tutorial #1’, was uploaded by Everbloom Games on 2019-04-08 17:00:03. It has garnered 384216 views and 6777 likes. The duration of the video is 00:17:41 or 1061 seconds.
In this video you will learn the basics of modelling in Blockbench to create custom models for Minecraft bedrock that you can put in Minecraft maps and worlds. We’ll show you around blockbench and all the options and tools available.
Download blockbench here – https://blockbench.net/
Follow Ninja on twitter here – https://twitter.com/NinjaMasterMC =============================
– Twitter: https://twitter.com/everbloomgames
– Website: https://everbloomgames.com/
– Instagram: https://www.instagram.com/everbloomgames/
– Facebook: https://www.facebook.com/Everbloomgames/
=============================
#minecraftmapmaking #minecraftbedrock #minecraftaddon