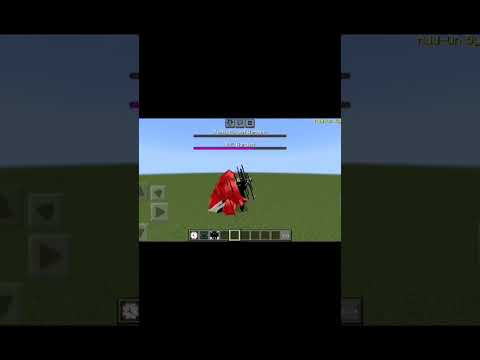
Hello everyone fed here welcome back to another command block video in today’s video i’ll be showing you guys how to build a working drawbridge that makes sounds as well so i’m gonna be quiet and i’m gonna click down this lever and we’re gonna see how this thing works And there it is opening up and of course we can go inside of our drawbridge and then when we flip up the lever it will go back up and there is the entire working drawbridge now i’m not the best person to go for with command blocks there’s a lot better people at this Than i am i have not made a command block video in like two years but how this thing is working is just using the cloning and fill command so over here i just have a bunch of different iterations of my drawbridge and that’s how everything’s working we’re just cloning each one In at separate times until the bridge opens up and then we just go the other way until the bridge closes so it’s pretty simple to build so let’s go ahead and get started up on this tutorial all right so i already have my spacings where i want to put This thing and if you’re going to be building this in a world that isn’t a flatlands world i highly recommend putting your drawbridge like little sections underground so no one can see them but if you’re doing on flat lands you know just put a building around it like an empty building That no one can get into and just hide up your drawbridge so i’m going to just be building mine right over here already have the area i want to build it in so first things first just go to your settings go over to your game go down and turn on Show coordinates you’re going to need them next up we’re going to give ourselves a command block so just press right on your d-pad and then go ahead and just put a forward slash and then type in give and then at p prep player and then type out command underscore Block and that will give you a command block and then i highly recommend just placing down one in case you accidentally delete it so you know if you accidentally delete it like that you can go ahead and just give yourself another command block so first things First you just want to find out an area where you want your drawbridge to go like on the side of a castle wall something like that that you know a drawbridge would fit into so i want my drawbridge to go right here so let’s say my wall is right here And right here is where i want my drawbridge to go so i’m just going to build up a little wall right here just like this with some stone there we go so once you find the wall you want your drawer bridge to go on you’re just gonna have to break out at least Three blocks so one two three just like that and this is where my drawbridge is going to be opening and closing up and let me just make it even or i’m gonna go insane there we go so we’re gonna come back to that later because once you find out where your Drawbridge is going like i said i highly recommend if you’re not doing this on a flatlands world to build it underground so no one can see all your different drawbridges so i’m just going to be building the drawbridge that i built over there once you get understanding How the command blocks work you know like i said you can make it a lot taller if you would like to but mine is just going to be five blocks long and seven blocks high now for this build we’re going to need spruce logs spruce wood planks barrels spruce slabs and spruce stairs So on the sides we’re gonna come up six blocks with our logs one two three four five six and same thing on this side one two three four five six and then right in the middle we’re just going to fill it in with our spruce planks Then right at the top we’re going to place a slab here here and then another plank right in the middle and then on this side we’re going to break out this block and place a barrel this block placing in a barrel and then what i did was i took out some stairs And i went like this and just made some little kind of like inside areas i guess just when the door is closed so it gives it like some sort of definition so that looks fine you know that looks fine just like that so there is going to be our drawbridge Closed up you can make it look however you would like but that’s going to be mine now for the rest of them we’re not going to do everything right now we’ll wait till the end once we get our drawbridge working to then clean up our entire you know all Our different drawbridges over there so basically after you get your first line in with your drawbridge we’re going to go ahead and come up three blocks now from here one two three with our logs one two three fill in the middle with your planks then we’re gonna come out one and come Up four logs one two three four just like that do the same thing on this side block here come up four blocks one two three four and then go ahead and fill this all in the only reason i wanted to build the first door in because this one will get In the way of that one so we wanted to just get the first drawbridge door in so that’s going to be the second half when it starts to open up now for the third one make sure you do not overlap them if they overlap then the door will look Wompy when it starts to open up so make sure you just come right off the side of this one and we’re going to start off with our spruce logs once again so we’re going to come up two then come out one come up two come out one and then come up three one Two three just like that i’m gonna do the same thing on this side so two two and then three there we go and then we’re gonna fill in the middle with our spruce wood planks now for this part we’re gonna be able to start seeing the side of the logs and we Don’t want that so we’re gonna go over here and we’re gonna go to our you know full wood block so you can’t see like that inside stump area and we’re gonna take out our spruce from here where is it there it is so we’re going to take out This spruce block now we’re still going to need the other one but just take out this full one right here because once it starts coming down to this area you’re going to be able to see the insides of the logs and we don’t want that so we’re going to come right here again Come down starting with our spruce log like that then we’re gonna come up a block we’re just gonna make a staircase going up with six blocks so one two three four five and then six right here and then on the last one we’re going to place in our regular spruce log facing forward Because we want to see it at the front and we’re gonna do the same thing on this side so you know let’s just connect it over and do it like this so one two three one two three one two three just bringing it over there we go and then just go ahead and Add them all in right here so one two oh you know what it’s making that weird yeah we gotta go like this anyway we have to go like this anyway because we want it all facing the same direction there we go like that all the way to the top And then on the last one we’re just gonna use our log again for the next part of the door we’re gonna be doing a two two and then three so we’re gonna come right here again come down and go two one two come up one come out two one two and then three One two and then three like that make sure you break those and actually the front one is supposed to be our spruce log and then you know same thing on this side two i want one too far two two there and then three here one two and then the last one It’s just a log like that break this and then go ahead and fill in the insides the next one is going to be three and then four so come right here and go out three one two three come up and then do four so one Two three and then put your log at the front for four same thing on this side one two three and then you know one two three place this here and then place your log on the front hand side and then go ahead and fill in the middle There we go and then the last one is just going to be a full line of seven so starting from here one two three four five six seven same thing on this side one two three four five six seven and then go ahead and fill in the middle And there we go and next up what we’re going to do is place in our chains as well we’re not going to be doing the staircase right now i highly recommend just taking out a full block and then like i said once the whole entire door is done we can add in Everything at the end so actually first things first let’s put in our barrels just so we remember where our barrels have to go so it should be down on the third block for each one so a barrel is going to go right here on this one And right here on this one it should always line up with that barrel so there we go we’ll line up right here with this barrel and then we come right over here next one goes here and now for this one just make sure like i said it’s always going to be on the Third block so come over three and place your barrel here place your barrel here come over three one two three barrel here and barrel here and then over here it’s just in three one two three barrel here and barrel right here now we can go Ahead and add in our chain so coming out of each barrel we’re just gonna place in just take out a smooth stone or something that’s very like you know vibrant and you can see it easily so we’re gonna put smooth stone right off this barrel to here and this barrel to here And then we’re going to bring over two smooth stone over here two smooth stone over here and then we’re gonna bring smooth stone going all the way down to this barrel like that and like that the first three are pretty simple it’s just straightforward going right down and then make sure you Are always lined up with that barrel so now next up we’re going to come down a block right here make sure you break these blocks you don’t want anything overlapping with each other and we’ll do the same thing on this side we’re just going to come down one It should always line up with all the other ones and we’re just going to bring this down to over here so first things first we’re going to come out a block with two over two and then one more so it’s just gonna be two and three So two there and then three right here and now for the next one again make sure it’s always lined up with these ones right here so we’re gonna come out with any random block it really doesn’t matter so right here where this one starts i’m gonna place in our first block here That’s gonna start our chain and one right here that’s going to start our chain should always be lined up with those ones so for this one it’s just going to be two two and one so one two up one one two and one do the same thing on this side one two One two and one and now for the last one again make sure it is lined up with this top one we’re gonna bring it over until right when this bridge starts right here place in our block here place in another one there and now this one’s going to be very easy We’re going to come out two and then up one the whole way like that and same thing on this side two and then up one the whole way and like i said at the end once everything is finished and everything is working we’ll come back to this And we’ll edit our entire bridge making it look a lot better next up i recommend opening up notepad on your computer or i recommend getting out a piece you know a piece of paper and a pen because now we have to write down some coordinates and i highly recommend Writing these as neatly as possible because you don’t want any of your coordinates getting messed up with any other ones i have a list of my all my coordinates i already have them written down and everything this is what mine looks like i just see they’re the first coordinate for the first door Right here it says first and then has my two coordinates that’s the door closed and then this one’s going to be the second one third one fourth one fifth sixth seventh all the way down to there and then i also have my wall coordinates and things like that But we’re not gonna worry about that right now now to get your coordinates all you have to do is come to the bottom right hand side of your drawbridge break out these two blocks and stand right here so as you can see in the top left-hand corner My coordinates is 278 42 negative 351. if i look at my coordinates on my notepad it says my first one first 278 42 negative 351. so i already have my coordinates down place that back and now to get your second one all you have to do is come to The top portion of your door so mine’s right here and then go right here in the corner and my second coordinates 282 49 negative 351. if you look over to my first coordinate the second one has those coordinates so just get those two coordinates on your drawbridge and we’re going to be Doing that for every single one of these so you know i’ll do it one more time for this one and then i have to talk about the ones down there so you know break out these two blocks is where my second part of my drawbridge starts to open up So if i come right here as you can see my position is 278 42 negative 350 it’s over there on my coordinates already and then for the second part i just come up to this side of the log stand here and if you look over at my if I look over at my notepad again it’s the same exact coordinates now i’m not going to keep going through like that but you have to maintain this height right here this the second coordinate you always put in always maintain this height because when your your Door is opening up you have to take into consideration your chains as well if you forget about the chains then when your door is opening up your chains will be missing so like this right here it’s it’s at height 49 and then when we get to I believe it’s the fourth one yeah when we get to the fourth one stay at this height as you see right here i stay at 49 do not go down to 48 because then you’re going to lose part of your chain later on so stay at this height always On the second coordinate it should always be at this height limit your yours might not be 49 it might be something else but just always maintain the height limit of the first section of your door throughout the entire process so like if i got over here to this one It wouldn’t be all the way down here it would be 282 49 negative 318. it would not be 282 43 negative 318 because then none of our chains would show up when the door opened up so just giving a heads up with that so once you’ve gathered up all the coordinates For each section of your drawbridge for when it’s opening up you’re going to come over here and get the coordinates for your wall so right here is where i want my drawbridge to go so our drawbridge is going to be starting off right here from this corner so take that into Consideration the the middle part of the door is the part that’s going to open up and let us walk in so that means if i have my three wide wall i have to get the coordinate next to it so right here is going to be my coordinate for my drawbridge Mine’s 299 42 negative 351. if you look down at my it says at the bottom after my uh drawbridge coordinates it says wall coordinates 299 42 negative 351. you only need the first one right now you do not need the second one until later on but then My second one’s right next to it as well so once you have all your coordinates for all your drawbridges and your wall coordinates we can now get started on the command block so to get started on your command blocks it’s pretty easy all i did was just put It right behind where my drawbridge is but just to give a heads up now make sure you put it one block away from your drawbridge because we have to put our lever here to activate it and we don’t want our lever getting in the way of our Command blocks so if you’re gonna put it anywhere like i said you can put it anywhere back here really doesn’t matter just make sure it’s always one block away from your lever so i already kind of dug out the area but i’m just gonna open it up now so as you Can see i just dug it one block away from where my lever is so nothing touches anything and now just go ahead and just open up the area a little bit like this we go because we are going to be using a total of seven command blocks now i also put two Repeaters in between each command block so that can make our draw bridge open up a little bit slower i mean if you don’t want you could just put one repeater if you know what you’re doing with command blocks and go right ahead if you don’t know what you’re doing with Command blocks i just highly recommend following along exactly what i’m doing so i’m just going to open up this whole area like there this go make sure you dig down at least two blocks and make sure you’re at least one block away from your wall because right underneath right here Where our lever is going is where the power is going to be going to turn on and off our drawbridge so you know let me go ahead and just put a couple blocks here for now and i wouldn’t recommend putting the lever outside i think the lever on the Inside makes sense with a drawbridge like you know usually when you see a drawbridge you have to pull down a lever and it activates the drawbridge so right here is the block that’s going to be activating all of our command blocks i’m just going to go like this real quick And put a torch to the side of it as well because we are going to need a torch there later on so like i said just make sure your command blocks are always one block away we don’t want the redstone hitting any of our command blocks And ruining them so we’re going to come over here uh like i said once you’ve dug out a good air we’re going to need at least a line big enough for seven command blocks so what i like to do is go over here and come out from my wall two blocks And we’re gonna be placing two command blocks like this but we’re only gonna be worrying about this one right now and then we’ll worry about the second one later on and then next up you know just take out some repeaters and then right between this command block place two repeaters And then place another command block and do that seven times like i said the reason why i have two repeaters is just so we can slow down the drawbridge so it opens up a little bit slower because if it opens up too fast it kind of looks weird so that’s one two Three we have to do it seven times four you know i’m just gonna skip two every block four five six and number seven so you need you’re going to need a spacing of at least one two three four five six seven eight nine 10 11 12 13 14 15 16 17 18 19 20 21 22. you need at least 22 blocks like i said if you just put it right behind your door it’s really not gonna get in the way of anything and then what we’re gonna do after putting in all the seven of our blocks We can go ahead and put in our input over there so put a repeater here and then we’re going to need a sticky piston and a observer block so sticky piston and a oh i took out the observer block first i’m like wait a second what so we’re Going to need a sticky piston and an observer block so next up just bring this redstone right down over to here place your sticky piston off the redstone and then place in your observer block and we’re gonna worry about the uh closing sequence later on once we have everything in place and Let’s go ahead and remove this block right now we don’t need it so now it’s time to get started up on our drawbridge so like i said i’m just going to be using the cloning and fill command guys very very simple there’s nothing to it so if you have your list of everything You wrote down for all your coordinates first off we’re going to do is go inside of the first command block right here and we’re going to put down our first coordinate this is when the door is closed so all you have to do is just type out forward slash Clone then type out your first coordinate inside of it so mine’s going to be 278 42 negative 351 and then we’re going to press space and then we’re going to do our second coordinate of our first door so 282 49 negative 351 and then after we got Both of those coordinates in for our first door we’re gonna press space and now we’re gonna put in our wall coordinate for where our door is gonna be going so mine is going to be 299 42 and negative 351 so our wall coordinate is the one that’s right next to our stone wall Right here so now we can go ahead and test it out to make sure the door is working so put this down click the button and boom as you can see my drawbridge is now in the right spot so if yours didn’t do that then you must have messed up Somewhere in your coordinates and just go back and recheck them i’m going to be doing this for every single one because you don’t want to do it all in the do it and then the door looks all wompy also another thing if you’re having a bunch of things pop up on your screen Now with text saying like you know cloning and all that stuff if you want to get rid of that and i highly recommend doing it because it’s super annoying all you have to do is just do forward slash game rule space command block output all one word output Space and then put in false so game rule command block output false press enter and that will get rid of everything that’s popping up on your screen right now so now we’re just going to do the second one so i already know what mine is because it’s over in my notepad It says second on it i made it nice and simple and clean so i know where everything is so i’m just going to go inside the command block and do the same exact thing i did on the first one forward slash clone then i put in my second coordinate 278 42 negative 350 space 282 49 negative 349 space and then i just put in my wall coordinate once again so 299 42 negative 351 and there we go so now when i put my button down here and i click it my second part of my drawbridge should open up so click the button And you see the second part is now in there and then i’ll do it one more time for you guys and then just go through all the rest of your command blocks and fill them in and once again forward slash clone put in your third coordinate mine’s going to be 278 42 negative 348 space then it’s going to be 282 49 and negative 346 and then space and then i’m just going to put in my wall coordinate 299 42 negative 351. so now my third part of my door should be ready to go so let’s go ahead and test it out click The button and there is the third section of my door so i’m gonna go ahead and fill in the rest and then i’ll show you that everything is working just do it one at a time guys make sure you get your coordinates in right and everything should go nice and smoothly All right guys and i’m back and i went ahead and did the rest of them so if i come over here and actually clone this one right now the door isn’t gonna work opening up as you can see the bridge is still there but there’s the first one done Here is the second one don’t worry about that we’re gonna get rid of that later on here is the third one here is the fourth one then there’s the fifth one then there’s the sixth one and last but not least number seven and that’s the door fully Opened up so now we’re gonna go ahead and place the rest of our repeaters between our command blocks we’ll get rid of those buttons later and then set each repeater the first one to two ticks and then the second one to four ticks and do that for all of them There we go so now we go ahead and test it out and watch the whole thing in action so if i actually flip down this lever there we go so that’s the entire thing opening up so now we have to make it close so to make it close we have to put Air blocks in between them while it’s closing or else it’s going to look really really bad so the closing sequence is going to go back the opposite direction so i’ll just show you what it looks like with the closing sequence so first place some command blocks Right next to your other ones all the way down to the end and then we’re going to do the same thing with our repeaters start off here with a repeater then four ticks and two ticks well two ticks then four ticks two four two four all the way down Going back the opposite way there we go so now when i click it on this side it’ll do the closing sequence but it’s going to look like that and we do not want that so that’s where these command blocks right here come into place so this is very simple now It’s time to get our second coordinate for our wall right here so what i want you to do is go back to the beginning and just activate this and let the bridge lower down real quick there we go we’re going to let our bridge blow all the way down so we Already have the first coordinate which is right here this is our wall coordinates our two mines 299 42 negative 351 i don’t know what yours is but it’s right there and then next up we’ve got to go up to the height of our bridge our bridge is going to be seven twelfths so One two three four five six and then like i said seven is going to be the height of our bridge so what you wanna do now is from the seventh block up here come all the way right here and get the coordinate for the block right above your bridge in this corner So over there is our first coordinate which we already got and now we’re going to get the coordinate for right here now you can see on my list right there for my wall coordinates that’s my second one 303 49 negative 345. make sure you get yours it has to Be at the height of the bridge because you saw when it closed before how ugly it looked so now you should have your first and second wall coordinate down and now what we’re going to do is take those coordinates come over here into our second command block right next to this one That has nothing in it and now we’re going to use the fill command here and this is going to be the same command throughout every single one of these command blocks so we’re gonna be doing the same thing seven times over so we’re all gonna do is forward slash Fill and now we’re gonna put in our wall coordinate so mine’s gonna be 299 42 negative 351 and now we’re going to put in that second one we just got mine’s going to be 303 49 negative 345 and then we’re going to put space and type out air and that’s what that’s Going to do is fill it up with an air block after it goes by so then it’ll get rid of the other parts of the bridge when it’s closing up so now what i want you to do is do this command right here it’s going to be different with your Coordinates and you’re going to do the same command in the rest of these command blocks all the way down here so i’ll do it one more time i’ll go in here forward slash fill put in mine well i’m gonna put in your wall coordinate mine’s gonna be 299 42 negative Negative 3 51 and then 303 49 negative 345 and then space air so i’m gonna go ahead and fill in the rest all right guys and i’m back and i just like i said i went quickly through all my command blocks putting in that same input so now if we come over here And we activate the closing sequence there you have it we no longer have any of those you know blocks that are in the way now the problem now that arises is now when we open it up that happens so to fix that from happening All you need to do is go back into your drawbridge command blocks go down to the bottom and where it says delay and ticks you’re just gonna change that zero to a one and that’s it so just go through every single one of these command blocks for your drawbridge Do not do it to the air ones or it won’t do anything it will just make it do the same thing it just did there just go through the drawbridge ones so it should be the first line you did go all the way down go to delaying ticks Change it to a one and just do that for every single command block for your drawbridge one and there we go once you changed all these ones right here on this line to one it should now work so let’s go ahead and just close it up real quick Like that the bridge closes and now let’s go ahead and open it up and you see that one tick let’s it work there we go so now we’re going to hook up our closing sequence to our lever right here so what you’re going to need is some redstone we Already have our redstone torch right there if you did not place the torch off the side of block make sure you do so but we’re gonna need some redstone we’re going to need our sticky piston once again and we’re also going to need an observer block once again so once you have your Redstone torch there just bring down a line of redstone down to here like that let’s go to that button place in your sticky piston with your observer block facing towards that repeater so now our closing sequence is hooked up as well so first things first we’re going to Turn down the lever and it’s going to go ahead and open it up and now when we flip up the lever the closing sequence goes off and there you guys go so if you don’t want the sounds if you don’t want the sounds for this thing When you open let me just do it one more time so you can remember what the sounds are if you don’t want this if you don’t want those sounds then and you also don’t care about me showing you how to you know do all the iterations of each one of these Drawbridges you’re completely done that is it you’re completely done you can go ahead and just clean this area up make sure you do not cut off any of this redstone right here and you know just put you know just go like this and clean up the whole area You’re absolutely done now if you want to stick around for the sounds next we’re doing the sounds and then after the sounds if you want to know leave and then do your own bridge go right ahead and then after that i’m gonna do of course the whole bridge and make it look Good but right now we’re gonna start up on the sound effects so to get started up on our sounds what i want you to do is come right over here and where our command blocks are we’re gonna go ahead and dig down a block right next to all our command Blocks make sure you don’t accidentally break any of them and then you know let’s stick out one more just so we can get a better look next up what i want you to do is we’re not going to do the first one we’re actually going to skip the first One this is when the doors close because our sound effect is going to be for when it closes not opens up so we’re going to skip this one for now and we’re going to go ahead and dig two underneath every single command block be very careful that you do not break Any of your command blocks and for the last one you just have to dig down one now for the first five right here is going to be the same sound and then the last one is going to be different sound and the first one is going to be Different sound so we’re only worrying about these middle command blocks right here so what we’re going to need now is some redstone go underneath and place a piece of redstone on the back one and then a command block right here and i almost forgot before we go in this Command block we have to get the coordinate for our drawbridge because we want our sounds coming from the bridge itself and not coming from like over there or over there we want it to be coming from the door itself so come right here to the middle and Just you know stand anywhere here in the middle it doesn’t matter just i usually like just standing right here in the middle itself and then getting this coordinate right here now my play sound coordinates are going to be 301 45 negative 352. so i guess i went like up here yeah I went right to the middle of my drawbridge and got the sounds from here so as if you if you look over at my coordinates sorry i got to keep showing this it says the play sound coordinates all the way at the bottom minus 301 45 and negative 352. Now there’s two coordinates there the second one is for when the door opens up and hits the ground at the end we’ll get that one later but for right now we’re just going to get this coordinate and then we’re going to use that for our sounds so once you got your coordinate we’re Going to come down here now go into this command block so this is the command you’re going to want to type out so it’s going to be forward slash play sound all one word space block period lantern period and then place and then you’re going to hit space Type out at player space and then you’re gonna put in that coordinate we just got from our door so mine’s gonna be 301 45 negative 352. so that means the sound will play over where our door is so i’m going to go ahead and exit this And we’re going to test it out to make sure that it’s working so let’s go ahead and just take out a button i’m just going to take out a stone button place it right next to your command block and i’m going to be quiet and as you can hear it’s making that Lantern play sound over by our door so now that we got our first one in place we’re gonna come over here place a piece of redstone command block go inside of it and now this one’s just going to be a little bit different from the other one everything’s the same except for one Word so forward slash play sound all one word space block period lantern period and instead of place we’re gonna put hit because we want two sounds going off we don’t want to be just place place place we’re gonna put hit for this one space and then just do at player space And then put in your coordinate for your door 301 45 negative 352. and now we go ahead and test out to make sure it’s working and that’s the sound it makes when you hit the lantern and now we’re gonna go place hit and place again so place here hit on this one And place on that one so redstone command block i’ll do it one more time go inside your command block forward slash play sound block period lantern period this one’s going to be place space at player and then putting your coordinate for your door mine’s 301 45 negative 352. There we go and then the second one’s going to be hit and then this one’s going to be place again so i’m going to do mine quickly but i’m going to go ahead and just speed up the video just remember this one’s hit and that one’s placed All right so i got all my sounds in place now so we can go ahead and listen to it while it’s opening up so and there we go so now we want the sound effect for when it hits the ground right here so let’s go ahead and close it up once Again and we’re going to go ahead and come down here at our last command block place one right underneath it go inside of it and again forward slash play sound space type out firework period large underscore blast and then you’re gonna do at player and oh you know actually i Didn’t get the uh coordinate for that so but we go ahead and test it out so there is the sound effect perfect so let’s go ahead and open it up one more time i completely forgot we had to get the coordinate for that so let’s open up our door we’re on a drawer Bridge so i’m going to come right here and then what i like to do is just stand right in the middle of my door and get that coordinate right there as you can see i already have it written down it’s 301 43 negative 344. i guess i went like this and put it Wait 344. oh i put it right here at the front of it okay so i put mine i guess right at the front i guess anywhere it’s right here where it hits the ground it will be fine it will be absolutely fine so get that coordinate for yourself And now we’re going to go back over here same thing like we did with the other play sounds we’re going to go inside of here and we’re going to put that coordinate down on this one so that’s the only time we’re ever using this is the only time We’re ever using this coordinate so 301 43 negative 344. so there we go so now if i look at my large one there it is 301 43 negative 344. so now let’s go ahead and test it out when it opens up again so let’s go ahead and close it real Quick and we’ll add in the sound for this one later there we go and this is it opening up and there we go hit the ground boom so that’s all it sounds for it opening up now we have to do the sound for when it closes So which is going to be right off this command block right here so all we’re going to do is just dig right underneath placing our command block right underneath here and then in this command block all we’re going to do is again forward slash play sound then we’re going to do item period Shield period block item shield block and then space at player and then use the coordinate for your door not for when it hits the ground so i’m going to do my first sound coordinate which is 301 45 negative 352. so now it should make the sound When it hits the wall so let’s go ahead and flip this up there we go and as you heard the shield block went off and it hit the wall so there you guys have it that’s all of the sounds so if you want to leave after this you are free to do so But now what i’m going to do is clean up all my different bridges and then we’ll be completely done so to get things started off with cleaning up our bridges our first one is already in place so for a second what we’re going to do is break these two logs right here Break these two blocks and place in slabs and then also if you want to you can change out a couple of blocks like this for staircases like that and let’s put one down here the more it changes up while it’s moving the better it looks and then what i also like to do Underneath here where you know it has that kind of arch looking away i like to add in sometimes a couple of stairs so it just gives it a little bit more depth while it’s opening up so again we’re going to come up here break these two logs Break these two place in our slabs you can go ahead and add in some stairs if you want to so let’s put one here and one here it’s completely up to you and then you can add some stairs underneath here as well and like i said just change it up i’ll Put one in the middle here maybe and two down here like that there we go and now we’re gonna do the same thing up over here we’re gonna break actually for this one this is where it starts changing this is where i start changing it to slabs So we can walk across the bridge nicely so right here all you’re gonna do is just change out these blocks to slabs like this and like this just change these ones out to slabs so it should look something like this and then what you’re also going to do now Is break back a block like this and we’re going to place our log in right there at the back you want your slabs coming out the front a little bit i’m gonna do the same thing on this side place your log in like that and then again go underneath add some stairs in Just to give it a little bit more depth so let’s go with let’s go with one one maybe three here two here and one like that just go crazy really doesn’t matter because it’s not gonna be closing in this position for a very long time it’s gonna go through It pretty quickly now over here we’re going to change out these ones to slabs again i think i broke something back there i didn’t want to break so we’re going to change out these guys the slabs let’s place that back in there and i think i broke this One right here yes i did okay put that back there and then right at the front we’re gonna go ahead and break back two blocks break back two blocks and place in our logs back here because we want these slabs to stick out just a tiny bit From when the door is opening up and of course we can go underneath and we can even add some stairs down here as well so let me get a better look let’s do let’s do do a full three down here and then do one like that perfect and then for this one you You don’t really have to do the stairs but i mean if you want to get crazy and creative with it go right ahead so again we’re going to go ahead and now break all of these blocks and we’re going to place in slabs here instead so let’s take out our slabs oh You know before we place on our slabs let’s go ahead and put in just a staircase like that there we go so go ahead and place in your slabs now there we go break these two logs place one facing forward place one facing forward there and then On the last one we’re gonna make them all slabs down here the only reason i’m doing this is because then you you don’t have to jump onto the drawbridge you can just walk right across it so there we go break back these two blocks break back these two blocks place in our Logs and then we’ll do our chains afterwards but that should be all of that completely done so now let’s go ahead and check it out on our door so now when i open up my door yeah look at that see how much more depth you get when you just add a couple Of stairs underneath it look at the stairs while it’s going it looks so good look wow that just looks uh you just add a couple of stairs on the bottom and it looks amazing i love this thing so that’s that so now we’re going to add in all our different chains Like i did over there so i just used some i believe it was black polished yeah polished black stone bricks so we’re gonna go ahead and use our stairs so let’s go to the first one which is the easiest one just place in your stair like that same thing here Place in your stair and then on this one we’re just going to place in a stair like this and then a stair upside down like that place a stair here and place one in upside down right off of that one so it kind of looks like chains And then these these ones are the easiest ones these ones are the easiest ones so there we go one upside down one regular one upside down same thing over here one regular one upside down no not up there one upside down regular upside down like that so it kind of looks like chains And now for this one right here where it gets a little bit different we’re gonna have a slab here so we have to take out some slabs so go here and just take out your polished black stone slabs for so for the first one since we have All our blocks in place already we just place the staircase next to it we’re just gonna have our regular stair once again and then you’re gonna have a slab here like that and then you’re gonna have a slab upside down with a staircase upside down backwards and then you’re gonna have another slab Right here like that and we’re gonna do the same thing on this side so stair there we go slab then we’re gonna do slab upside down staircase upside down and then slab right here and now for this one you’re just going to have one staircase and then the rest Are going to be slabs going all the way down so we’re going to have a staircase like this then we’re gonna have a slab upside down and we’re gonna have a slab right side up a slab upside down and then a slab right side up all the way at the bottom and we’re Gonna do that one more time so stare here slab upside down slab right side up slab upside down and slab right side up and now for the last one we’re just gonna have three stairs going down an upside down stair and then a slab so right here we’re just going to go stair Another oh why’d i break that i needed that another stair going down right here another stair going down right here then we’re gonna have an upside down stair and then a slab like that and do the same thing on this side so slab well actually i can’t do it the Other way so i’m just gonna start from up here so staircase then we’re gonna have another staircase right here another staircase right here and then we’re gonna need an upside down staircase so let me get rid of that slab real quick first and then upside down staircase right Here with our slab like that and that’s going to be all our chains completely done so now let’s go ahead and check it out with the chains flip up the lever perfect click it again and there it is everything now guys is completely done you’re completely Finished all that’s left to do is just clean this up and hide everything up so i’m gonna go ahead and just put a cap make sure you don’t accidentally break any of your command blocks but you are completely finished and then also If you like i said i i made it so it’s a lever because usually when you see draw bridges it’s usually a lever that activates them do not place redstone here or you’re going to break it just giving that remember do not place redstone like that Or you’re going to break it so and i think i just reopened it so let’s go ahead and just place the rest of these blocks in right here and the rest of the blocks in over here so let’s just go ahead and do it one more time so flip down the lever Drawbridge opens up boom it blows up and then it closes up but there you guys have that’s how you build a working realistic drawbridge inside of minecraft if you enjoyed this video make sure you like subscribe and stay tuned with my newest videos alright guys peace you Video Information
This video, titled ‘WORKING Realistic Drawbridge in Minecraft Bedrock! (Command Block)’, was uploaded by Fed X Gaming on 2020-08-20 16:05:11. It has garnered 265268 views and 6110 likes. The duration of the video is 00:45:18 or 2718 seconds.
Works on (Xbox/PS4/Mobile/Switch/Windows 10) In this video, I show how to build a Drawbridge with command blocks in Minecraft Bedrock
-Twitter:https://twitter.com/FedEx2692
0:00 Drawbridge Showcase 1:02 Tutorial 29:17 Sound Effects 37:00 Bridge Clean Up
♬ Music Used ♬
-Nowhere Land Kevin MacLeod (incompetech.com) Licensed under Creative Commons: By Attribution 3.0 http://creativecommons.org/licenses/by/3.0/