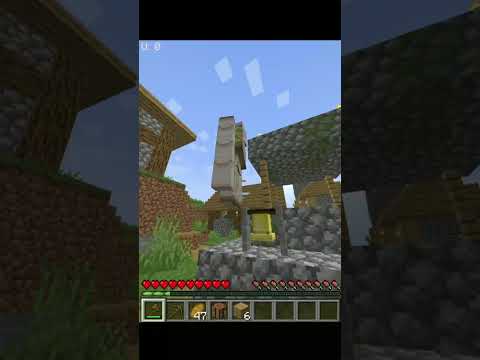
In this course daniel bark will teach you how to code a fully functional minecraft clone using react javascript and 3js daniel is a senior software engineer from sweden you will create a game that supports 5 minecraft block types it will include moving jumping switching and placing blocks saving and more you will Learn about mini react concepts such as ustay use effect use ref and custom hooks for state management and you’ll be able to apply the principles to create other 3d games in javascript alright so let’s get on with the tutorial and to begin with let’s have an overview of the Steps we’re going to take in this tutorial to build a minecraft clone so first we’ll look through the code that we’re starting out with and the packages that we’re going to use then we’ll add our first 3d element which is a skybox that will wrap the entire world We need some images that will be used as textures on the ground and on the cubes and next up we’ll use a plane as the ground and our player is going to interact with that ground and so the player is going to get a first person view will Mount a camera to a sphere and that will feel like a first person game then we need to have some gravity we need to make sure that the player cannot fall through the ground and when you jump you should fall back to the ground and so on We need some movement to go back and forward and to the sides and then we need some state management because we need to keep track of all the cubes in the world so you need to be able to add and remove cubes in a global state So we need to keep track of that and then we also need to keep track of what type of cube the player want to add to the world so we also need some type of ui that indicates what cube texture is active it would also be nice if we can save our World so we don’t have to start from scratch every time we come to the app so we’ll implement a button to store the world in the local storage and also to reset the world if we want to start over we’ll have a reset button for that and in the end We should build ourselves something fun like a house or we’ll see what we come up with all right so let’s look through the code that we’re starting with so we have a package.json so we have react3 fiber the the main package and then we’re going to use some Nice functions from canon and dry we have react we have three we have a way to generate ids and we have the state manager zoo stand now let’s jump to the components folder is empty right now but we will populate it inside images we have small images like this we have dirt Glass grass logs and wood and i already created a javascript file that just imports these images and then exports them in an object like this let’s go to the index so here not much is going on quite standard we have an index.css file with not much in it i just added some Helper classes and we’ll probably add some more later on and inside the app here we have just a div that says outside canvas and then we have canvas from reactory fiber and we have nothing inside the canvas right now so we see a text here that is Outside the canvas and the rest of the screen is covered by the canvas alright so we are done with looking through the boilerplate so onwards towards the sky so the sky we will import from let’s see if we get some help here sky from react 3 dry and let’s see if something happened Yes we got a sky so for now we can remove this div that says outside canvas what i wanted to show with that is that you can add normal html as long as it’s outside of the canvas because if i move this into the canvas we get some errors because React3 fiber doesn’t know what to do with the div it has all kinds of other primitives it can render like meshes and geometries and so on but it cannot handle divs but we can place them outside and then we can mix the 3d stuff and the normal html stuff So i’ll remove outside canvas for now so we get a full view of the 3d content here for on the sky we can set sun position and that takes an array of xyz so i’ll do 120 or something it doesn’t matter too much but now we See that the sky got a bit brighter and i cannot really look at the any other part of the sky because the camera is now static and so we can adjust the sun position later if we’re not happy with it but at least now we have a Sky in the day and not an evening sky like it was before so i think we’ll leave the sky like this for now and jump onwards to the next step alright so let’s prepare our images and turn them into 3js textures so first i’m going to change actually this images file So that we can destructure them when we import them directly so i will clean it up like this let’s create a new file and call it textures so then we can import from images so what we need to do here is create textures so let’s start with the dirt texture So we need to import from 3js the texture loader so we say new texture loader and we give it the dirt image so we just repeat this there we go and we create a separate texture also for the ground even though we’re going to use the same Image so we’ll call that ground texture and uses the grass image so now we want to export these there we go so now we have a file that exports the textures so i think we can cross off textures and images so our next step in the list is to work with the ground So let’s before we create the ground let’s add a few things in here let’s add an ambient light so that is a light that will light up every 3d surface and that one takes a prop intensity so let’s do one 0.5 and before we include the ground We need to add a physics container because we’re going to use a hook from canon to create our plane that will be the ground and that needs to be within a physics boundary so the physics from canon and inside here is where we can create the ground so let’s create that component now Ground okay so here to create our ground plane we’re going to use a hook from canon called use plane so this plane will give us an array where the reference comes first and that is a reference that we will place on the mesh that we let canon control so use plane So it takes a callback function that returns an object so here we can set some properties of this plane like rotation and position and so on so we’ll do rotation and here we have an array of three and position also an array of three so now we’re going to return some elements here So we will take a mesh first we will reference this mesh so we’ll set ref is ref and then we have the geometry so we’ll have a plane buffer geometry and we’ll attach this as a geometry and here we can set the size of the plane with the args prop So since it since it is a plane it has two dimensions so we’ll set it 100 by 100 and we also need to add a material here so we’ll do a mesh standard material and this should attach as a material and here is where we want to add a texture But first we can just set a color let’s do hot pink all right so if we look at the browser now we have something hot pink that is covering the entire screen so we don’t want to have color hot pink here we want to attach the ground texture so let’s import the ground Texture so we just say map is ground texture okay so we got an error because we forgot one step in the texture loader we need to call it and then call the load function okay so we instantiate a texture loader and on that we call the load function For each image that’s important to remember so now we can continue debugging this okay so now we have a new texture here so we as we can see it doesn’t really look like the the grass image which has these small pixels on it so what i suspect is happening now is That the image is being stretched out so we want this texture to be repeating we want this small image to repeat over and over so we can do ground texture dot wrap s and we’ll do repeat wrapping and import that from three and the same for t And then we’ll do repeat dot set and we’ll set this to the same as our size hundred hundred there we go so now we have it repeating but as we can see the it looks very blurry and that has to do with how the texture is being stretched and how Essentially how the rendering engine figures out how to display these colors so with this setting it’s like smearing them and we can change that if we do ground texture dot mag filter nearest filter instead so let’s see what happens now that looks much better now it looks pixelated as it should So our next step would be to flatten or lay down the ground because right now the ground is standing up so we can play with this rotation here so i will rotate the x-axis and we want to rotate it 90 degrees but in radians so 2 pi would be 360 degrees Which means that 1 pi is 180 degrees and half of a pi is 90 degrees so i will do math dot pi divided by 2 to rotate it 90 degrees and it might be that we’re seeing it from behind now so i will flip it 180 degrees so It folded over maybe so that we can no longer see it with the camera so let’s do it a little bit less okay there we go so now we can see that it lays down but not completely 90 degrees but for now we can keep it like this for A while we can see that it’s almost correct because once we can move the camera around it’s going to be easier for us to to flip it back then because then we will add gravity and we will fall down onto the ground but let’s keep it like This just that we at least at least can see that we have the ground there alright so we have the ground let’s start to work on the player so our player needs to have a camera so we can the structure camera from a hook called use three So that hook is from reactory fiber so we also need some type of geometry to represent the player the geometry that can collide with other geometries and so on so for that we can use a sphere so this will be similar to what we did to the plane for the ground So we’ll do use sphere and we call we call use sphere and it takes a function that returns back an object so here we can set mass we’ll set that to one we’ll set type to be dynamic and we’ll return a mesh and attach the ref and then let’s add our player All right so we we should have a player now so the next thing so we won’t see that anything change yet so we need somewhere to store the position of our player so let’s create a variable called position and we’ll do a reference and it has x y z coordinates so we’ll do Zero zero zero to begin with now we will call the use frame hook so this hook will run on every frame so what we want to do now is attach the camera to this position that we’re going to connect to our player so what we can do is that we can take The camera which is from use three and we take the position and we copy and we pass in a new vector 3 and this vector we give position dot current and we give it the x and then we do the same for y and set position.current.1 which is y and position dot current Two so now we should have a camera that follows this reference to a position here okay we can set the console log here just to see that our frame is running okay so we see that we no longer see the ground and we have frame console login here so we can see That it runs on every frame so let’s remove this so we did something to the camera at least that is good so if we uncomment this line we should see the ground again and we do so that’s good so we were able to move the camera we copy it to this position Every frame so our next step is to have this position follow the position of this sphere because this sphere will be affected by physics and gravity so we can do a use effect and this use effect will need to re-run every time the sphere changes position so we can Take out element number two here from u sphere which is the api an api towards the sphere so we’ll say that rerun this effect every time the sphere api position changes and what we want to do when the position changes we want api dot position dot subscribe and subscribe takes a call back Where we get call it p and we’ll say position dot current is equal to p so p is a triplet so it will look like this so now we have a sphere that is connected to this reference or let’s say this reference follows the sphere and We can get the camera to follow this reference so our goal is to get this camera to follow the sphere okay so now i added back the camera so we can see that something happens we get ejected i don’t know if we may be colliding with the ground And then to handle that collision we just get ejected if i change the set value here so if i do 10 and i reload i land on the ground but because remember what what technical depth we had from the ground we didn’t flatten it to 90 degrees properly So now would be a good time to fix that so like i said to to rotate 90 degrees that is half of a pie so now we flatten the ground out so we fly up and then we land on the ground we have taken the camera we glue the camera to our position Reference and then we subscribe to api position changes of the sphere so we have a rift that tracks the sphere and then we glue the camera to a reference hopefully that makes sense so we need to do similar things to the velocity so let’s copy this position code here i will call it Call this vel and here we track api dot velocity api dot velocity so here we get v and we’ll set vel dot current to v so now we have a reference of the velocity that subscribes to the velocity of the sphere okay so let’s fix this catapult effect thing So what i suspect happens is that when the sphere is inside of the ground plane they that state cannot exist so we just get flung out so that there’s no collision anymore so we need to lift up the sphere a bit so let’s try five so now we start from above The plane and then we fall down to it so let’s see how close we can get so if we put one we seem to be standing on the ground as we start so that’s great let’s see if we can actually trigger some movement on the sphere so we have the api So we can do api dot velocity dot set so here we can give it the x y and z velocities so we can do 0 1 0 then we should be constantly lifted upwards so we’ll do something similar to this when we implement jumping because then We want to set velocity upwards but just for a short while so it so you fall back down so it’s a normal jump all right so i think before we can move with before we can move forward pun intended with the player we should make a hook for the keyboard Inputs so that we can register different key presses that we’re going to use to control this sphere that is the player so let’s add this to our to-do list keyboard inputs so the player is not yet done we’ll move to the keyboard inputs first so the keyboard input is actually a hook So let’s do a hooks folder and we’ll call it use keyboard export const use keyboard so we’ll need to have some state here to keep track of what keys are pressed so we’ll do we call it movement set movement use state so let’s set up this initial state Right so we need to map out all the keys and call them things that we understand so one action is move forward move backward we also have move left and move right we have jump and then we have texture one Two three four five i think that should be all the now that we have textures we should maybe call it actions so now we need to have a use effect and inside here we do document dot add event listener listen for key down then we need to create some functions to handle this Key up and since we’re adding event listeners we also need to return a function that removes them otherwise we will add endless event listeners handle key down we wrap this in the use callback so inside here we get the key down event so let’s create some helper function to determine What key maps to what so we’ll do function action by key so here we get a key key map key action map so here we say key here we need to type it as they as they are called in the key event so key w like this We’ll call it move forward and we have space for jump and then we have digit one and now we can say what texture it corresponds to we’ll say it’s dirt and the last one is log so now we mapped out what keys belongs to what actions and then we just return Key action map with key of course we need to check so that only we only react to the keys that we are listening for action by key e dot code so now we can do set movement and of course we need to preserve the previous state so we Spread the previous date and then we set we can do action equals action by key e dot code now we can just say if action action is true and this is now called set action actions okay so it will be very similar for a handle key up Just that we set this to false so here we need to handle key down and handle key up and then we just return the actions let’s try this hook from the player component i’ll do like this so we’ll just see those that are true key and value and we return Those that have true all right so now we should be able to see in the console log when we press these different keys that we are looking for okay so we have no actions when we start that’s good so now i press w because i’m not getting anything so let’s debug Let’s see if we are here yes we get the keyboard event action by key action by key is a function not a map so this should fix that and same thing here so i’m pressing w s a d jump spacebar and the digits one two three four five Okay so we have everything working so now we can react to these actions and control the movement of the sphere by looking at what key process we’re doing so we can cross off the keyboard inputs alright so let’s control the player using the keyboard inputs and i Think an easy one to start with is the jumping because this requires some vector math so it will be a little bit tricky but i think we’ll manage it so first we can look at if actions dot jump that means that we are jumping we can reuse this code Here we can for the x we just keep the value and for said we’ll just keep the value and here this is a constant that will use for the jumping so let’s store it jump jump force let’s try 10. jump jump force okay let’s try it out spacebar Alright so we achieved the jump it felt a little bit too high and also we can jump indefinitely which is wrong so first let’s fix the jump height let’s try three yeah that’s better i’ll try four for now so we need to do another if check here If we can jump again and one easy way of eliminating all these extra jumps is that we make sure that our y velocity is zero make sure that we’re not moving up and down because whenever we are moving up and down it means that we are falling through the sky or Already jumped and we are on our way up so we need to make sure that the velocity in the y direction is really close to zero so let’s do since we we care about positive and negative we can do absolute value and we have it on velocity dot current it’s vel right Current one should be smaller than zero dot let’s do zero dot zero five maybe okay so let’s try good we can still jump i’m pressing it continuously but we we’re only allowed to jump once we’ve landed there’s one bug that we should fix and that is that we can We can jump if we hit right in the moment when we’re actually slowing down from going up to going down again so it’s uh the the velocity there becomes almost zero at a certain frame so if i can time that frame you can see that i can jump two times in a row But we’ll leave it like that for now so we can start to think about how we move in a direction and the tricky part about it is that later on we will be able to turn around so w will always take us in the camera direction So we need one vector to represent what direction we are facing another vector for the forwards and backwards speed and the other one for this side speed so let’s create those vectors one direction vector vector three and Call it front vector also a vector 3 and a side vector so the front vector it’s this said axis here that will determine us going forwards and backwards so both the move forward and move backwards should affect this force here so one way of doing it is we check actions dot move backwards And we set it to one if we’re moving backwards or zero and then we subtract the same thing but for moving forward so if we press them at the same time they cancel out we could actually destructure here move four backwards move forward move right move left jump Then we can clean this up like this and like this all right so we have this one one or zero and this one one or zero and if they are both one they cancel out which is a good thing because if you go forward and then you start to hold backwards also Then you should stop right that’s what we see in games so then we’ve taken care of the front vector so let’s do something similar for the side vector so we’ll copy this so now we’re not moving in the set direction anymore i think this should be the x direction and here it’s moved Left and here it’s move right so we get the same behavior there if you’re holding both at the same time you should go nowhere there we go so now we’re going to do some calculations and we’ll we will originate from the direction vector so the direction dot subtract vectors and those Vectors are the front vector and the side vector and then we’ll chain on some more operations we normalize and then we multiply scalar and here we need to determine how fast we want to go so let’s also make a variable for that or as constant we’ll try 4 for speed as well So we’ll multiply the speed and then finally we apply euler and this is where we get the correct facing direction from the camera so we have a reference to the camera and its rotation so this is where we make sure that the front and side vectors are correct in relation to the camera So now we can take this direction vector and apply it to the sphere so api dot velocity dot set and then we do the direction dot x direction dot y and direction. but that’s not completely true because the y axis is not controlled by these front and side vectors this is just for Moving backwards and forwards and to the sides so the y should actually stay the same so the vel dot current one so that should be enough in the best of worlds we would be able to move at this point see if we need to refresh all right i think we’re missing the new Keyword here for the vectors there we go all right so we have a typo here okay so let’s try i’m pressing forward all right so forward is working backward is working now we’ll try backwards and forwards at the same time and it stops that’s great let’s try left And right at the same time and i let go of left alright so that seems to be working so we cannot yet test that it will be still correct when we turn the camera that we will do once we once we build out the the pointer lock controls Where we can control the camera with the mouse alright so i think we are done with the player for now let’s move forwards with the first person view so we’ll create a component fpv this one is actually quite simple because we get a lot of help from react 3 fiber here Ok so we need of course to connect this to the camera so we need use three where we can get the camera okay so we return pointer lock controls args is camera destruction gl here passing that as gl dom element fpv from fpv and just render it All right so when i click here now it should lock the camera to how i move the mouse so now i can look around so now we can see that if i’m facing left i can move straight ahead and if i turn a bit i can still move straight ahead so our Player movement seemed to work fine and the pointer lock controls seem to work as well there’s one thing we should do with the first person view is that we should add a small cursor to the middle of the screen so outside of the canvas let’s add a div class name cursor And let’s put just a plus there and let’s position it absolute and we’re going to center this on the screen so let’s make a class called centered so this is position absolute so we do top fifty percent left fifty percent we need to add a transform translate minus fifty and minus 50 So that is just because if we if we center it 50 50 without doing this transform translate then it will not actually be in the middle because i think i can show you this background hot pink if we make this bigger we see that it is in fact centered but If we don’t have this translate this is what will happen the top left corner of the square will be in the center so what we’re adjusting for with 50 is 50 of the width and height of the square so then it would move to the middle But this one doesn’t need to be big at all so we’ll remove these two that looks good and then remove the background so move the the color styling to cursor there we go now we have a marker to indicate the center of where we are watching great i think we are done with The player for now so we will cross out first person view we’re also done with gravity and we are done with the movement our next item on the agenda is to add a state manager we can add a hook called use store that keeps track of the game state let’s create our hook Use store so we’ll need create from sue stand use store we can wrap this in create and we get a setter method here as an input parameter so we will return an object so we call create we pass it a function that returns an object so in this object we can declare our State so we need to keep track of a texture and we can default the texture to dirt we need to keep track of the cubes that the player is going to be able to place so we can just default that to an array and now we’re going to declare our Methods that you can use to interact with the state so we’ll of course have add cube remove cube you need to be able to set the texture and for later we want to be able to save the world reset world these are all the operations that we need to support in our Store so when we add a cube all we need to know is where to place it because the texture we already know since we are in the store so when when someone calls add cube we need to call set and in set we pass it a callback function and we get back The previous state so here we can return an object so here we just want to affect the cubes which is an array so we spread in the previous cubes and then at the end we add a new cube and every cube needs to have a key And then we can use nano id for that we have a position that we get from xyz that’s being passed in and then we have the texture which we can get from priv so that should be all it takes for us to add a cube but before we Do that we need a way to render cubes so i suggest that we leave the store like this for now with just a method of adding cubes and then we create the component to render a cube and then we can start to render them out we can actually initialize the state With one cube just for debugging let’s do one one one so now we always have one cube initially that we can quickly see if when we start to rendering the cubes if they come out so i suggest i suggest that we leave the store like this before we finish the Rest of the store functions and then start to working on rendering our first cube so let’s add a new component before we create the cube we should have a component that is taking care of rendering all the cubes essentially consuming the store and mapping out the cubes So we’ll make a component called cubes so we need definitely to have used the use store from hooks so our use door hook we can we get the state back and then we can return an array where we can place different things from the state in whatever order we want So we want state dot cubes so then the first element here will be the cubes so if we do console log cubes we can return nothing here let’s add cubes cubes so since the player needs to be able to stand on the cubes the cubes need to be within the physics Slide it like that okay so we consoled out the cubes and this is our debugging cube that we added a dirt cube on position one one one so now we can start working on mapping out those cubes so we return here we’re going to use the cube component So let’s create that one first since we’re doing a mapping we need to use the key which is something that we have on the cube already we have key we have x y zed texture so here we can use the key this is actually position so we receive position and texture So to create the cube we’re going to use the the canon use box hook so we’ll set type is static and we have the position from the incoming prop so here we return a mesh and to the mesh we connect the ref here we need a box buffer geometry and we also need A mesh standard material attach as geometry color is hot pink do we have a cube anywhere okay so i see we called it position in the store and here we’re destruction position so we need to call it puss here oh okay so the reason i couldn’t find the cube Was because i was standing on it i feel very stupid now that’s good so let’s play around with these values see if we can get get it up in the air all right so there we have our first cube right so we have the cube standing on the ground so now let’s fix The texture of the cube so let’s pass in the texture in the store we just call it dirt and in textures we call it dirt texture so let’s do texture plus texture so we import all the textures as textures and then we map it by the texture in the store plus texture And then we get our active texture then we can do map active texture and remove the color there we go we get the dirt texture on the cube let’s move it a bit closer to us so as we can see it doesn’t look so good so we need to do the same Treatment we did to the grass to every cube texture so we’ll test it with dirt dirt texture mag filter nearest filter let’s see if that helped yeah now it looks good and pixelated and not smooshed let’s do it to ground texture in here as well since we are already here and then We don’t have to do it in here let’s move these out as well there we go so now we fixed it for all the textures inside of the texture file instead to keep our components more clean i was thinking to maybe keep this in ground because it correlates to the size of it So we’ll keep it here so now we should be able to add a second cube with another texture i will pick another position texture would all right so now we can render cubes with different textures and this one looks nice as well since it’s been fixed Alright so now we have a way of rendering cubes once they are added to the store all right so we have the basics of the state management and we have the cube’s basics as well something that is missing in this list is adding cubes So one way of adding a cube is to click the ground so let’s open the ground so we need to get the add cube method from use store add cube and return an array with state dot add cube all right so we had have the add cube method Uh but we need to figure out the x y and z coordinates to uh to pass to this function so let’s add an on click to this mesh let’s do e dot stop propagation so that the click cannot be passed through the ground so on the event we Have something called e dot point so we want to get x y and z we can do object dot values from e dot point so let’s stop here to check out what happens when we click the ground so we have e let’s look at point so we have a vector 3. So we just want to get the values of this vector we don’t want to pass the whole object so if we do object.values we just get these three values and we destructure them out here so if we hover the xy and said we see that we do in Fact get the values here as you saw there are a lot of decimals here we want the cubes to end up on fixed location according to this grid that we can see here in full numbers so we need to round this so we need to do a mapping of these values And return math math.c of the value and then we should be able to call addcube with x y and zed right so let’s try this out let’s reload and we click the ground and we do get a cube so as we can see the seal function made it Round up so let’s try with floor instead so as we can see i think we should try moving the ground down by half a unit and see if that will make the cubes lay flat on the ground so let’s try that so now that we fix the ground We can go back to seal here math.seal and when i click the ground we actually get cubes added pretty cool so now let’s lower these default cubes or we can actually remove these default cubes now that we have a way of adding cues for real okay so we handle the case Where you click the ground and you want to add a cube but what about when you click the surface of a cube to add a cube next to it okay so let’s handle the clicking of cubes so we can copy this state call here because we want to do the same Inside of cube but we also want to have remove cube later on so let’s add that straight away so my plan is that if you hold in the modifier key and click then you can remove cubes as well so let’s add an on click we stop propagation So here we need to handle a few things a cube has six sides and the side that you actually click needs to get another cube next to it so we’ll create a variable clicked face and a face of a cube actually has two triangular shapes that covers the Face so it’s not a full square it’s two triangles that together cover the square face so instead of six faces it has 12 faces but that is pretty easy to fix so we can just take take e dot phase index and divide this by two And then we will be in the range between 0 and 5 instead of 0 and 11. and we will of course need to math dot floor it because there’s no 0.5 phase index so now clicked face should be between 0 and 5. so let’s console log face click face So let’s add a cube here phase four phase one phase five phase zero top is phase two and the bottom should be phase three then so now we just need to write if statements to cover all these clicked faces so if it’s zero and cube so we have a ref to the box That has a position so we can do x y set from ref current position so we can pass in x y set and then we need to on one of them maybe subtract one to the x and for another face we need to do x plus one but it’s a little bit of Guesswork to figure out what phase is what direction if you understand what i mean one two three four five six so something like that this will most likely be wrong all right so we add a cube we click one face so here we see that it was the opposite All right so now we have logging as well so if i click this face we see that it was four and the cube was added on the other side so clicked phase four just needs to flip and then let’s flip this one if i click this face that was Phase one and that was also flipped so this should probably minus one and maybe plus one here let’s try the top so phase two nothing happened so i’m suspecting that there’s a cube underneath so this should probably be plus one and this should be minus one So let’s try again to click the top yeah now that was correct so i think we might have it nice now we can click a cube to add another cube next to it so now now it starts to become fun so we can return if we are done with the operation So now we can handle the removal of cubes if e dot alt key remove cube x y set and return and of course we haven’t implemented the remove cube function yet so what we can do just to try it quickly is to just console.log here x y zed x y said remove All right so i’m holding down the alt key and i’m clicking it and we get a call to remove cube with x y said so that’s great so now we can implement the remove cube function so we can borrow some code from ad cube we’ll still call set but instead of Adding to this array we can take pre-dot cubes dot filter cube or we keep all the cubes where x y and z are not equal to the xyz being passed in so with the structure x y and z from the cube then we return x not equal to x Y not equal to y and said not equal to set so let’s see if we can filter out the cube that we’re clicking on let’s add a few so here we need to say cube cube dot pulse all right let’s try again so add a few cubes and then alt key And they were all removed i think the issue is that this should be or because if any coordinate is not correct it’s not the the right box to filter out so let’s try again there we go one cube being removed at a time great now we can remove cubes great progress Alright so we are done with adding cubes and removing cubes so let’s continue with the cube type selector so we should create some ui that indicates what selections there are and what is currently active so let’s create a component texture selector and this one will not be a three Component this will just be html and this one should just be visible when we’re actually changing the texture so we need some state here let’s determine if it’s visible right now or not we’ll default it to false we need to get the texture from from the store active texture state and we get An array back where we take state dot we just call it texture texture so let’s call create a use effect that runs whenever the active texture changes active texture so if the active texture changes we want to have this texture selector visible for like two seconds and then we want it to disappear So we need a visibility timeout that is set timeout for two seconds so after two seconds we want to set visible false and immediately we want to set visible true and then we need to clear the timeout clear timeout visibility like this so we only want to show something is if Visible is true so let’s do class name absolute and centered so now we we also need to handle so that the texture is actually changed when we press the digits actions from use keyboard so in the store we have a set texture method so let’s finish that we take a texture We call set we don’t care about the previous we just want to set texture based on the incoming texture so let’s look at use keyboard we have texture one to five this is what we want to dig out here so let’s do a use effect again that will run for texture 1 texture 2. if texture won so now we need the set texture from the store set texture dirt okay we’ll call this dirt grass glass wood and log so the actions will now contain props that are the actual names of the textures so we’ll call it pressed texture So if any of these textures are true then that texture will be the pressed texture and then we can do if pressed texture set texture to pressed texture let’s see pressed pressed texture so let’s see if it works if i press one all right let’s debug So if i press one there to be true so that’s great so it works correctly in use keyboard and in the texture selector let’s console log dirt let’s see if we can get there to be one so one thing what we must do is add the texture selector to our app before we Started looking for console logs in it so let’s add it here texture all right so we get dirt falls we saw it there and as i press one we got dirt true and texture selector appears for two seconds and then gets removed so it looks very promising after texture All right so here we have our textures as booleans so let’s create a mapping that will set the prop which is the name of the texture that will map from the name to the booleans so then we can do object dot entries find key value so we want to find A texture where the value is true if we have such a pressed texture we’ll take the value from that all right so we get five booleans here and we put them in a mapping so we’ll get dirt falls grass falls maybe glass true and if glass is true we will find the True texture store that in press texture so if we found a pressed texture we get the key of that by taking the first element in that tuple so let’s see if it actually worked gr pressed grass pressed dirt pressed wood and press log so now i press glass So this is the glass cube pressing dirt and i get a dirt cube so cool we have a way of selecting different textures just using the keyboard i know what happened with this cube but let’s continue building the ui to show the actual selections so we already have a list of images With these so let’s import those images okay so let’s create a mapping here images so we keep the name that they are called in the store to the actual image so we need to loop this in a map here images i will do object dot entries images so here we get key and Source image so we can return an image image tag source is source key is okay and now we need to check which one is the active one and that we can do by adding a class name so here we can do k equals active texture if that is true if that Is true we add active otherwise nothing and let’s have an alt prop put the the name of the texture all right so let’s see if anything happened so when i change the texture now here we have an error this should be an array so now let’s see oh we got it So when i change texture the texture selector appears so we should just make it bigger let’s add a class texture select so we can do transform scale 10 it should be select door there we go that’s bigger let’s do maybe five and then let’s handle the active also So if we have an image.active there let’s do a border of two pixels solid red so let’s see if we can see which one is active yes we can okay so we between the four and the five we have the wrong digits so that is probably because i typed them In the wrong order here all right now they work correctly all right let’s see all our cues we have wood or log we have wood we have glass we have grass and we have dirt really nice let’s remove this console log all right so our cube type selector is done The next thing on the agenda would be to save the world in local storage so that is something that we can do inside of our store so let’s create some helper functions to talk to the local storage so what we want to store in the local storage is an array So we need to do json parse and json stringify to talk to the local storage so let’s call create a helper function get local storage so we take in a key and we return json.parse window local storage get item of key so all we’re doing is json parsing what We get from local storage and let’s do a similar function with set local storage we take in a key and of course the value that we want to set and then we do json stringify set item and then we set we pass the key actually this json string if i should be Just wrapping the value value right so now we have our helper functions so when we first create this date we want to do get local storage and we can just make up a key here we’ll call it cubes so we’ll either get something or it will be empty So we’ll fall back to the empty array so now we can implement these two functions let’s start with just resetting the world that would just be set and then we just set the cubes to be empty ray like that that should reset the world and then we have say world so we call Set just to get the current state and inside here we just call set local storage the key was cubes and we store red dot cubes so we don’t need a load world function because that happens when we just reload the page but we we also need to create some Buttons on the ui for this let’s create a component called menu so we want to access save world and reset world from use store so state reset world all right so let’s create some ui last name of menu and absolute we need save and we need reset on click save world Reset world all right let’s import menu so let’s see where we have our menu we have it but it’s down there so we need to style it so it becomes in the top so we’ll do top 10 pixels left 10 pixels there we have them all right so let’s try them out We’ll place a few cubes of different types all right we have a nice line here let’s save it so now it should be in local storage we can verify that application local storage we have cubes and there we have the cubes so now when i reload the page We have any cubes oh here they are really cool so now we can persist it of course we can also reset but they are still in local storage so if i just reload the cubes will be there alright we are done with saving the world in local storage but we Have one more thing that would be nice to have hover state on cubes i think it would be nice if when the cursor hovers the cube that they become a bit darker so that you indicate what cube you’re actually hovering on right let’s keep track if a cube is hovered set is hovered We use state from react false we can add some pointer events here on pointer move and we take the event stop propagation set is hovered true and then we just do the same for on pointer out and now we need to adjust the appearance based on the hover so let’s add color here Is hovered let’s make it gray if they’re hovered we make them gray otherwise we keep them white but one thing that would be nice is if the glass cube would actually be a bit transparent so we add transparent true to all the cubes and then we do opacity active texture equals Glass then we do 0.5 otherwise we do one and this should be just texture all right so there we have transparent glass and maybe it’s a bit too transparent let’s do 0.6 really nice very cool all right so we’re getting close to being able to build that house and of Course transparent glass is a must for building houses so you can watch outside all right i will quickly finish this house just to check it off the list should probably have a door all right we’re inside the house i think we can check it off the list All right we can say actually right now that we have fixed everything on our to-do list and even some more things that we had to add as we went on for those of you that got this far kudos to you it’s quite a long project if you Want to submit pull requests to this project feel free i will look at them and probably pull in many of them so thank you so much everyone that watched i hope you learned a thing or two about building 3d things on the web and i hope You got inspired to try out to build something on your own so please keep watching free code camp continue to learn and also you can check out my channel if you should want to bye now thanks a lot for watching Video Information
This video, titled ‘Code a Minecraft Clone with JavaScript, React, Three.js – Tutorial’, was uploaded by freeCodeCamp.org on 2022-09-20 13:36:01. It has garnered 314440 views and 10762 likes. The duration of the video is 01:31:16 or 5476 seconds.
Learn how to code a playable Minecraft clone using React, JavaScript, and Three.js. You will learn about many React concepts such as useState, useEffect, useRef, custom Hooks for State management, and more. And you will be able to apply the principles to create other 3d games in JavaScirpt.
✏️ Course created by Daniel Bark. Check out his channel: https://www.youtube.com/c/barelycoding
💻 Finished Code: https://github.com/danba340/minecraft-freecodecamp 💻 Starting Code: https://github.com/danba340/minecraft-freecodecamp/tree/start 💻 Demo: https://minecraft-freecodecamp.vercel.app
⭐️ Contents ⭐️ ⌨️ (0:00:00) Boilerplate ⌨️ (0:03:56) Sky ⌨️ (0:05:46) Textures ⌨️ (0:07:48) Ground ⌨️ (0:15:11) Player ⌨️ (0:25:43) Keyboard input ⌨️ (0:32:03) Movement ⌨️ (0:41:26) First person camera ⌨️ (0:46:25) State management ⌨️ (0:49:55) Cube component ⌨️ (0:58:02) Add/Remove Cubes ⌨️ (1:09:34) Texture Selector ⌨️ (1:21:34) Save world ⌨️ (1:27:31) Hover cubes ⌨️ (1:30:28) Outro
—
🎉 Thanks to our Champion and Sponsor supporters: 👾 Raymond Odero 👾 Agustín Kussrow 👾 aldo ferretti 👾 Otis Morgan 👾 DeezMaster
—
Learn to code for free and get a developer job: https://www.freecodecamp.org
Read hundreds of articles on programming: https://freecodecamp.org/news