So i finished learning how to make an fps controller but if i want to make a more polished looking game i will need to work on my environment and since i’m more of a coder than an artist i think there’s no better way than with procedural generation So let’s begin by starting a new project next it’s time to go on my usual youtube grind and figure out how to do mesh generation thankfully brackis has three videos on this topic three days later after watching bracki’s videos i’m now able to generate meshes of any size that I need and all it took is the code you see on the left now to make this look like terrain use something called purlin noise which is an algorithm created by ken perlin to help make more natural looking textures and terrain on the movie tron what i’m using here is the 2d Version which generates values between 0 and 1. to represent this i map the numbers closer to 0 as black and numbers closer to 1 is white the power of this algorithm comes and you multiply that prelim value by a number for instance i can use parallel noise multiplied by an Amplitude to procedurally generate the height of my terrain this is all fine and dandy but i wanted a little bit more control over my environment thankfully i found this tutorial series by sebastian lake and it covered everything i wanted to know and more it seriously was so good that i Gave it a watch a few times over the problem is it goes into so much depth that is too comprehensive for my puny brain to handle so i took two of the simpler concepts to add to my generator one was the ability to finally tune the noise and two was this concept of Multiplying the purlin noise with the falloff map to create islands i actually wrote my own version of sebastian’s fallout map so that i could set where the falloff begins and ends here’s a preview of that code for those of you who are interested i also fixed sebastian’s noise generator because i Think he broke it around episode 6 and then never fixed it when you change the scale you’re supposed to be able to zoom in and out of the berlin map but right now it almost seems like you’re generating a new map i narrowed down the problem to these lines here Changing this also fixed the parallax effect sebastian had when changing the offset now that we have more control over our environment it’s time to move on to my favorite topic from elementary school and that is coloring so for coloring i spent about a week or two trying to recreate the style Sebastian had for his intro he shows that he’s generating a texture with these nicely rounded edges but in the tutorials he only teaches us how to make a pixelated texture one solution i had was to increase the number of sample points we use in the texture but if you Zoom in we still have the problem of seeing each individual pixel then i remembered watching a video by sebastian where he used marching cubes and i was almost certain this is the approach he used for generating his texture so i watched this video by the coding train and converted his marching squares Algorithm from javascript into c sharp i got pretty close to the results i wanted but when you view this on the terrain you could still see each individual pixel so i gave up on using a texture approach i really tried to avoid this as much as I could but i was left with no other choice but to dive into shaders after messing with shader graph for a few hours i came up with this decent shader here i surprisingly had a lot of fun making this and it turns out shaders aren’t too hard after all with my new Love for shaders i looked up a bunch of more tutorials on youtube i found this tutorial for creating a gradient skybox with stars but i noticed there’s a little bit of distortion near the edges so i found this article that taught me how to do proper uv sphere projection And yay no more distortion but i wasn’t quite satisfied yet i also found this awesome cloud shader that i needed to use as well and now our skies are looking not too bad then to top it all off i use these two videos to make a stylized water Alright let’s finish off this last bit here so to finish off this project let’s add some vegetation i hopped in the blender and made this very beginner friendly tree but i don’t want to manually place hundreds of trees on the terrain because that would take forever and we are going for a complete Procedural generation thankfully i remember watching this video from jonas tyroller a while back where he talked about creating random levels for his game islander basically if you shoot a raycast onto a random point on the island you can check if it’s a valid spawn point for a tree if so spawn the Tree then you can do this for as many times as you want trees or whatever object you want to randomly place so i created this simple prefab spawner script where i can select a prefab to spawn then to determine if a spot is valid to place a prefab i just check if The hit location is above the sea level i also have the script randomly change the scale and rotation of the prefab we are spawning so that we have a bit of variation lastly let’s add some grass i found this video to create a quick grass texture then i put together a bunch of Planes in blender to display it back in unity i just reused my prefabs manuscript to spawn my grass around the island although to really bring this grass to life i watched this video from bradku’s and now we have sway in our grass So i brought over my fps controller from the last video so that we can explore the island and after working on this for so long it’s super cool to see this from the first person view with what we have here it’s really starting to feel like a Really polished game the sky the water with fps movements everything ties nicely together to really bring that to be honest i could keep on going and continue to add things to my procedure generator but then this video will never end i definitely will be working on this Tool in future videos and i am just so pleased with how much i was able to figure out this is definitely going to help me out in any future game that i make and even just this island already feels like a cool spot to do 1v1 death Matches on i can imagine doing some sick multiplayer battles on here finding good angles to pick off people on the island but anyways if you stuck around this long thank you so much for watching and i hope to see you in the next one peace Video Information
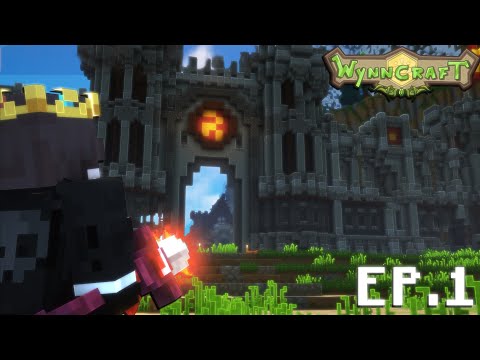
This video, titled ‘How I Learned Procedural Generation’, was uploaded by Lejynn on 2022-02-22 04:45:57. It has garnered 194183 views and 8421 likes. The duration of the video is 00:05:36 or 336 seconds.
In this video, I build a complete procedural low poly terrain generator from scratch. I also dive into shader graph to create a skybox, terrain, and stylized water shader. This is the second installment of my game dev journey.
—– ⭐ Use this Playlist for the tutorials I used in this video ⭐ —– https://www.youtube.com/playlist?list=PLrMEhC9sAD1zprGu_lphl3cQSS3uFIXA9
—– Tutorials I referenced in this video —– – MESH GENERATION in Unity – Basics – PROCEDURAL TERRAIN in Unity! – Mesh Generation – MESH COLOR in Unity – Terrain Generation – Procedural Terrain Generation – Sebastion Lague – Basics of Shader Graph – Unity Tutorial – How to make a Gradient Skybox with Stars in Unity | Shader Graph Unity – Procedural Skybox Shader with Clouds in Unity With URP Shader Graph! ✔️ 2020.3 | Game Dev Tutorial – SIMPLE CARTOON WATER in Unity – 3D Stylized Water with Refraction and Foam Shader Graph – Unity Tutorial – How to make a low poly tree in Blender 2.8 – How to Randomly Generate Levels (and Islands) – “STYLIZED” GRASS – GIMP TO UNITY IN 7 MINUTES – Game Asset Creation – GRASS SWAY in Unity – SHADER GRAPH
—– Articles —– Sphere UV Article – Creating a procedural skybox in Unity’s Shader Graph https://medium.com/@jannik_boysen/procedural-skybox-shader-137f6b0cb77c
—– Previous Episode —– Building a Satisfying FPS Controller in Unity | Devlog https://www.youtube.com/watch?v=W7H1JvcCo6k
VIDEO CHAPTERS 00:00 Intro 00:27 Terrain Generation 02:01 Coloring the Terrain 02:48 Diving into Shaders 03:26 Creating Vegetation 04:44 Exploring the Island