
Hello everyone and welcome back to another minecraft video i thought i would join in the spooky theme for this october for halloween and build myself a haunted mansion this build is pretty small it’s not too large so you could definitely build this with materials that is required if you do like the Video and you do like the build make sure you go down hit that like button subscribe if you have enjoyed and with that let’s get building so i’m going to start things off by taking a note of the dimensions if you want to pause the video then now’s your chance to do so Now we have the dimensions the main box in the middle will be the house itself this front area will be the porch and then we have a little side door entrance over here with the blue and white concrete so on top of the green and yellow we want to place a polished Underside block on all four corners then on all the blocks in between just use regular andesite blocks for the porch area we’re going to do a polished anise block on the corners and the little side sections here we’re going to do upside down and the side Stills then we’re going to turn to the front we’re going to do two more upside down and the sight styles with a polished and the sight block again do the same on the other side then the five in the middle one two three four five can be regular on the Site with a and the site stair in front of those five for the small side entrance we do polished underside blocks on the corners with an upside down and the six stills on the two sides then regular underside joining those up with three undecide stairs at the front like so Then at the front of the porch section we’re going to do three other site walls on top of each one of the polished anteced blocks and that includes these ones at the back corner here on top of those we’re going to do a polished on the side block again Then in between those we’re going to do an underside stairs upside down connecting those up and for the mother we’re just going to understand stairs upside down and then join in the gap we have left with a andesite slab then come up and do a regular andesite block on top of all of This that we just built and head round to the back of your build now and place a anderson ball on top of the two corners here this time want to go four high so one two three four i’m going to do a regular anderson block on Top of that same again one two three four regular underside block then we want to just join these underside blocks all the way along and all the way along again on all four sides then on top of those blocks in line with the walls we already have do another Four walls on top one two three four with another and the side block on top of that we’re going to repeat this again so for example we do one two three four and this eight block and then join them up like so and then doing that all the way around Once more for the porch section we want to fill this all in with on the side blocks then from the top left corner here count five and so one two three four five on this fifth one bring that block out one and then this is going to be five along So one two three four five then we want to come underneath and bring our underside wall down until it meets the ground on the corners and then going up top we want to do four more underside walls on top and and the site block on top of those And for this top section it’s just going to be a five by five so that’s five there one two three four five and then join them up like so and we can start to see the shape coming together as we have the main frame in place now for all of the andesite blocks And things that we need now it’s time to start filling in the walls and adding some more of the details so coming to the left hand side now we want to come to exactly where our wall is here and go left one block and this middle section And do an upside down and this eight still then alternate every second block doing an upside down and this eight still in between those do an undecided slab coming into the back as you turn on this block here we want to do a slab leaving out the corner once again alternating Every second block with the anthocy upside down underside still and andesite slabs in between that’s one more time on the other side remembering to stop when we get to one before the wall moving up a little is a little bit different as we’re going to place an upside down stair in the very Center right here and then alternating again leaving a gap this time we’re going to place one upside down in the corner and one there do the same on the other side corner and miss a block once more we’re going to do slabs in between all of those gaps And turn and this time we’re going to go all the way around the same pattern using alternating between upside down stairs and slabs we’re going to do this one last time on the top lay up with an upside down stairs in the middle and on the edges And once again leaving out every second block like so and filling in those gaps with a slab leaving out the corners now we need to fill in the walls so bring your green terracotta and fill in all of the walls here now if you’re building this in survival it’s worth Pointing out that we will be removing a lot of these blocks to make windows and doorways so you may not need all of these green terracotta blocks to fill in the walls here but if you want to build it up as you go then this is easiest way For me to show you but i’m going to fill in all of these spaces here with green terracotta so the wall should look something like that we’re going to do the same on the back side here the side over there and of course the front the front’s a little bit different as you When you get to this section for the tower we’re going to do a green terracotta behind this wall here like so and then we’re going to just extend that out by one block as we want it to be out at the same level as the walls and the same above Like that so let’s fill on the rest of the walls and move on to the roof so if you manage to put in all the walls your build should be looking something like this a green box with a and the sight drum at the top here i haven’t done the Back as this will be covered by the rest of the roof so you just want to do a couple of blocks on either side and make sure you have the front of course so for the roof we’re going to use deep slate tile blocks and on top of the Second block and right here so on top of your slabs or stills you want to do on top of the film blocks you want to bring out your deep sleep block all the way around then you want to do a deep sleep step on top of all of those as well The next layer will be the same again so one block above the stairs like so of deep sleep tiles once again going all the way around with another deep sleep tile stair on top of that the next layer now we want to take our deep slate tile blocks and behind those Steels we just placed we’re going to fill in the entire floor using these deep slate tile blocks and your roof should be looking something like this now then we want to take a deep slate tile wall and on that block that we just placed make sure you bring your wall out And all the way around but you meet here with the upside down stair or slab that you’re going to have you can break that away and place in a wall block that connects it to this part of the roof as well moving up to the Roof of our main tower in the center so taking your deep sleep tile blocks again bringing them along on top of the fill blocks of underside place one block in the center of each side and then we want to do a deep slit tail stair either side of that block Then a temporary block so you can place a full ring of deep slate tile blocks going around with one in the center of each of those as well with a deep slit tie wall on the corners then bring that up once more and on top of the full blocks to join them together And that gives us a nice riff shape for that main tower in the middle now we’re going to add a little trim here around our balcony using some deep slate to tie in with the roof above so come to the left-hand side again where you stopped off with your underside still we’re Going to place in a deep slate tail slab we’re going to place in two stairs and another slab again come to the other side and do the exact same thing slab two upside down stairs another slab turn and on the front side we’re going to do a slab then upside down still slab Stair slab alternating the same way that we done with the andesite earlier on then on top of each one of the slabs that you placed you’re going to do a deep slate tile wall so only on top of the slabs so they alternate again and then on top of the upside down stairs We’re going to use iron bars and that can connect all the way along for all the corners we can just place a little iron bar here and here finally placing some string on top of the walls here in the center just so that they get this little spike and it Matches in with the rest of the build before we add the windows and doors and things we’re going to come around to this little side entrance and what you want to do is take your green terracotta once more on top of these inside blocks here we’re going to bring those all the Way up to meet with this little rim and then going to replace those upside down stairs with a full block of undecite bring that out until you meet up with the block underneath of polished underside and all the way around again underneath that we’re going to do a Polished underside block and connect it up with three walls on both sides then a underside stair going upside down and in towards the house and then we’re going to copy the trim once more we’re going to do upside down and the seat still a slab on the corners and underside stairs alternating there Slab on the corners and another stair under here we’re going to do a upside down underside stay up there and there with a slab joining those up then we’re going to copy this riff here on top of this little section so again on top of the full blocks Around the site blink your deep slate tile blocks along like so then a deep sleep tile still on top of those then a full block above the stairs like so and then a finishing touch with a deep slate tile wall going around the top and to finish off these porch areas We’re going to add the deep slate tie walls again to the bottom and just placing some string on top to give that little effect and once more again joining those up here and over this side as well then coming on the inside of this porch we’re going to add in some stripped Spruce logs these don’t need to be in any sort of pattern or configuration the messier the better as this is supposed to be a haunted house now before we walk on the doorway we’re going to add in a little bit more of the andesite trim here so in line with this End stair we’re going to do three wall swing up with a polished underside block on top and on the same on the other side we’re going to line up with stair three and the six walls with a polish on the side block on top of that and say stairs Upside down either side with a slab in the middle joining those up and that’s going to be the entrance way into our mansion well the door we’re going to clear away a 3×3 area of this green terracotta we’re gonna actually use the dark oak planks and fill it all the way around Leaving a two block gap for our door you wanna take another spruce log place that in there and place your dark oak door on the inside like so then going all the way around we’re gonna do dark oak trap doors like so moving up to the doorway for our balcony We’re going to come in and actually destroy all of these green terracotta blocks and replace them with dark oak plaques one spot leaving a two block gap for our door on the inside place our door like so then place dark oak trap doors along the top and finally our little side door Over here we’re gonna use the strapped spruce logs again on the floor then we’re gonna do a three by three of dark coke leaving the two right there for our door you can break away the green terracotta on the inside of these just to give us a little bit more space Place your door on the inside come out and then we’re gonna cover this whole entire place with our dark oak trap doors placing in some green terracotta above to cover that gap then some more other site at the top acting as our roof all right so we’re going to start off with This very top window here as it’s slightly different than the rest so we’re going to come in and place a warp nylon block right in the center with a darkhawk trapdoor in front two upside down dark oak stairs then two trapdoors going up on either side it with the two middle blocks and Replace with black stained glass at the top we’re going to do a deep slate tile slab on the two sides and a deep slight tail stair in the middle then on top of that watt million block we’re going to place in some warp roots and that is the main window at the very Top done we’re going to come down now to the left hand side and do another window right here so similar to what we’ve done before punch out these two blocks here and place in the black stained glass pane two dark oak stairs either side this time though we’re just going to do a Dark oak trap door in the middle spruce trap doors either side with deep slit tail slabs either side with a deep slate tile stair on top this window design is going to be used on all of the other windows going around the build so i’m going to show you where those windows Will be and then you can copy this design on each one so of course we’re going to have one at the very opposite side right here coming down and underneath we’re going to have one to the left and one to the right coming to the left-hand side of the Build count in by two blocks on the third one you can punch out the two other ones and the same on the other side count in by two on the third one punch out those two and then straight in line with those underneath we’re going to have two Unknowns directly there and there as well on the back side we’re going to do the exact same thing counting two blocks on the third one punch with the two other ones count in two blocks on the third one punch away and then copy that underneath like so Finally on the side with our little entrance weight at the side we’re just going to have a window at the top so two blocks in on the third one punch those away we’re going to leave out a window down here and just add in a little bit Of barrels and things as detailed down here so you want to copy this window design right here on all of the windows that we just punched out so i’ll leave it pause there for a second and you can copy those and let’s jump back in all right so hopefully you managed to Put in all of the windows going around so i’ll just fly around and this is how it should look all the windows the exactly the same but don’t worry it won’t look that uniform once we add in all the details and things later on but For now we’re going to add in a couple more windows but on the roof section as little dormers so coming in on the very center block here we’re going to find this there come up and either side of that we’ll do upside down stills and a Trap door just like we’ve done for the windows there on top of those we’re going to break away these stairs i’m going to bring two spruce blocks going up with spruce trap doors in front then we’re going to do a black stained glass and the middle punching away the Block directly behind it and directly behind these spruce blocks as well deep slight tile styles on top of those spruce blocks on top of those we’re going to break away the stairs behind and place on full blocks of deep sleep with deep sleep slabs on top of that and That adds a nice little dormer section to the right we’re going to copy this exactly the same on this side as well then moving around to the front one more little rough section you need to add is above this door here we’re just going to do a regular stair upside down stair and A regular stair of the deep slate tiles and then we’re going to finalize the last pieces of this roof here by adding in dark oak fences and chains so on the corners we’re going to do a dark oak fences and in the middle we’re going to do a chain pointing up On this section of the roof again dark oak fence and alternating every second block of wall we’re going to do a dark oak fence and then in between those we’re going to do a vertical chain like so and that adds a nice bit of detail and Feature to the roof there making it look a lot more of that gothic style so the build itself the structure is pretty much complete at this point but we’re going to add in some more details to make it look a little bit more run down and haunted so we’re going to first of All take some spruce planks and on the green terracotta to break up some of the texture we’re going to actually replace some of this with the spruce planks like so and we’re also going to add in some spruce signs here and there this makes it look like it has been bolted up over Time and maybe the paint’s chipped away and some of the bricks have fallen so people have bolted it up using this wood and we just want to do this around quite randomly but not overdo it just here in there where we have big areas of the green terracotta like over here in this Section we want to keep these spruce elements quite clustered together making it look like boards holding the place together like so and we’re just going to do that all the way around finding out places we can add and then using the spruce signs and the spruce planks so The texturing now complete with the bottled up spruce wood it’s time to add in some more of the detail so if you look at my hot bar i have a flower pot with very spooky looking flowers and plants that we can plant around we’ll have cobwebs some brain dead coral fans Some candles and some weather skeleton skills if you have a farm or things and survival but if not then you don’t need to add that one of course but i’m just going to go around and add these flower pots to places like these wonder cells With a plant and like so we can add in a cobweb or two here maybe up on the roof areas we can add this brain dead coral fan on the antacid blocks as it looks a little bit like a weathered run-down piece of brick or something some cobwebs Underneath of this roof area as well with candles around here and maybe on the balcony replacing the string here and there in places and of course the weather skeleton skull if you’re rich enough to afford to use it as decoration and one more thing i forgot is to place A polish blackstone button on these polished underside blocks on the top sections going all the way around like so giving a nice little effect on there leave at the bottom as we’re gonna want to add leaves and things down there but just on the top blocks here then in this Corner we can add in some barrels so just some barrels going up like this and that nothing needs to be perfect and we can add in a few chests on these as well and of course as always one of the last details we can always add as some leaves This instance i’m going to use spruce leaves as it is the darkest leaf texture we have to go with the spooky vibe so i’m just going to add them in places i think would look good so these ones i think i’m going to have them dripping over this balcony area here Something like that and then a place and some leaves here and there all around probably along this back area as there’s not as many details around here so i have actually went through and put in an interior there was too many small details to include in the tutorial but We can walk through and take a look so when we come inside you’ll notice that the walls are different as i’ve went for the two thick walls here just so we can have different on the inside for the outside so we have a little plant over here with A painting i went for this crimson wood as as a lot more of that spooky halloween themed color entrance way to a little sitting area here some paintings some seating areas with the stairs and trap doors electrons and bookshelves for a little reading area over here then As we turn and come out we see a nice red carpet transitioning to the kitchen we have some calcite and some polished deep sleep blocks there on the floor we have a smoker as a cooker with an extraction fan some storage a little sink over here and some barrels covering Up that wall as i had to push that one back a little bit we have our fridge freezer of course a little dining or seating area for one and then we can head up the stairs as you come to stay as you can see i’ve continued with the two thick walls this Time though i’ve opted for the kelp block as i wanted to be a lot more darker up here and spookier up the stairs we’ll go at the loft in a moment but we turn and go through here we get to a kid’s bedroom so we can take a walk In we have a raised bed as it has quite a small area in here and their toy boxes and things like that down here a little chair reading area and some curtains above the windows and more storage up there as well walking down the hall to The right we have the master bedroom we see the bed some more storage some paintings and things on the walls a little desk to sit and read that and things some more cobwebs around to give that old and run down look outside we have access to the Balcony come back in and through the door to the right we have a little bathroom here with our toilet our sink and a little lightning rod as a plunger or toilet brush i saw the idea from this is them link will be in the description So pretty cool idea for that and then we walk down the hall up the ladders into the loft space and a dark and gloomy room full of storage and cobwebs and things as this place is very rarely visited as most loft and attic spaces are And with it all done the build is now complete and as you can see on the outside i’ve planted a bunch of trees made some custom trees a little path outside even added some pumpkins just to sell that halloween spooky theme i do hope that you enjoyed the build and if You did go down and leave a like on the video consider subscribing if you would like more like this in the future thank you very much for watching and until the next one bye You Video Information
This video, titled ‘How To Build a Haunted Mansion in Minecraft Easy [Tutorial]’, was uploaded by BrokenPixelSK on 2021-10-17 15:53:40. It has garnered 138099 views and 4089 likes. The duration of the video is 00:21:26 or 1286 seconds.
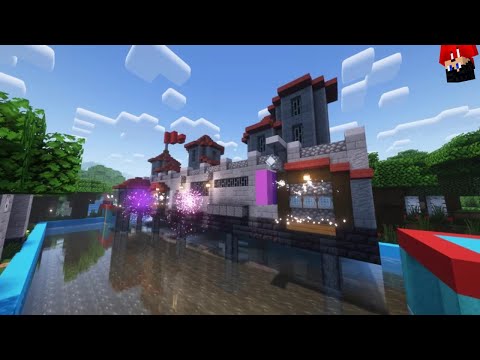
For this tutorial we are building a spooky haunted house perfect for your Halloween themed areas and builds this October.
Thank you for watching. Please leave a like, comment and consider subscribing if you enjoyed.
Minecraft 1.17.1 [2021]
0:00 – Intro 0:10 – Material list & Dimensions 0:44 – Frame 5:00 – Walls & Roof 8:49 – Side entrance 10:29 – Doors & Windows 15:49 – Texture & details 18:29 – Interior walkthrough 20:49 – Build Complete
————————————————————————————————————————————————————– Follow me below for more!! – Twitter – https://twitter.com/BrokenPixelSK – Instagram – https://www.instagram.com/brokenpixelsk/
————————————————————————————————————————————————————– Credits:
ThisIsDoom – https://www.youtube.com/c/ThisIsDoomGaming
Material List Generator – https://www.block-lists.com/
Music: – Fake Fan by Harris Heller – https://www.streambeats.com/ – Happy Haunts by Aaron Kenny – https://www.youtube.com/channel/UCVAggfwI4hnkA2WO6-xC06Q – Psychic Magic by Unicorn Heads – https://www.youtube.com/channel/UCbDplVvtIq05AdyYKjVSUIw – Skeleton Dance by Myuu – https://www.youtube.com/channel/UCiSKnkKCKAQVxMUWpZQobuQ
#Minecraft #gaming #minecraftbuilds #tutorial #howtobuild #minecrafttutorial #Minecrafteasy #minecraftmansion #spooky


![How To Build a Haunted Mansion in Minecraft Easy [Tutorial]](https://newsminecraft.com/wp-content/uploads/news/minecraft-news-best-12.jpg)