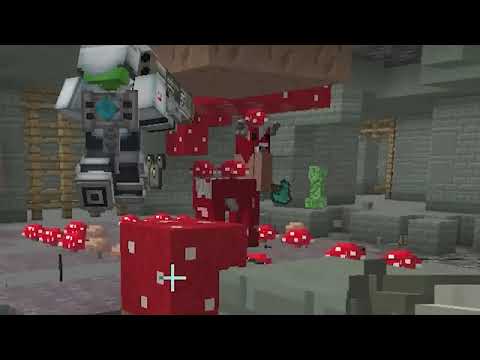
Hello everyone welcome back to another minecraft video this is mr matt ranger and today we’re going to be working on a fantasy enchanting cave first dig a tunnel 10 blocks high seven blocks wide and about 10 blocks long this could be connected to an existing cave that you’ve already built or you Could do it in the side of a hill like i’m doing here Now we’re going to dig out a room that is roughly 19 blocks in diameter [Applause] Now we have a nice domed room that we’re going to continue working on none of these shapes are completed we’re going to do a lot more forbing then now we’re going to put our enchanting table on a pyramid of crying obsidian find the center and go out two blocks on either side And then we fill in everything else to make this circle then next layer go five across make a cross and then put one in each corner and then on the top we make a smaller cross and place the enchanting table in the middle next we’re going to place the bookshelves So looking towards the front place four bookshelves high and break the bottom one and then on the right hand side we go five bookshelves high and break the bottom two next on the left hand side we’re going to go up four and then we’re going to put one on Either side one block up now in the back we are going to go up five blocks on the left hand side and four blocks on the right hand side break off one underneath that one and break off two underneath that one then on the right hand side we’re going to go up three And then go over one and break that one right there and now we have a fully set up level 30 enchanting area now we’re going to dig out the area around this enchanting table and go down by 15 block Now that the hole is done it’s time to do some reforming here um what i like to do here at the bottom is because we’re going to do some glass layers i like to make it so the glass goes behind here so it sort of looks a little bit better so We’ll just go through here and dig this out a little bit this can all be random um and i’ll be right back once we have that done now that we have the walls cut out here at the bottom a little bit i want to do the same thing with the pillar And make it a little bit narrower at the bottom than at the top the next thing we’re going to be talking about is how to light up your fogged glass area so if you don’t know how fog glass work i’m going to be explaining it here a little Bit or at least how i like to do it so at the bottom of your fall glass you want to have a light source so that the light shines up through and me personally i like putting a carpet on top of that light source so that when you look down you don’t see Any of the light sources and you see the color of the carpet that also matches the glass so if you’re using purple glass you want to use purple carpet green glass green carpet and so on personally i like to use the glowstone over the torches just so particles and Nothing else shines through the carpet and it’s a little bit easier to place so what we’re going to do is we’re going to lay glowstone on the entire bottom here and then cover it with purple carpet now that we have all our glowstone laid down with the Carpet on top i’m going to be talking about how to actually add the fogged glass so how it works is you want to leave a space in between each layer of glass because if you don’t you can just see through the whole layer so how you do that is you put one layer Down and then you break a block in between each layer until you have the right amount of layers and we’re going to be doing five layers here today i find that five layers is most times enough so now when we go back and look up at the top You can’t see it all because there’s an air gap in between each space um so we’re gonna be putting five layers of glass in this entire thing but before we do that we are going to be getting some deep slate out here and we’re going to be Covering all the walls with deep slate both cobble um and regular deep slate here so we’re going to cover the the walls just to add a little bit of a darker effect down here at the bottom Regular obsidian some black stone some cobble deep slate and some regular deep sight along with some purple stained glass panes and some end rods uh to start out with we’re just going to be adding some obsidian here just to add a little bit of a darker effect here in some areas And we might even go down a little bit lower as well and then we’re also going to be putting some black stone in here all right so that looks pretty good there uh and now we’re going to be adding some purple stained glass panes just to add a little bit of a magical Effect to everything some floating over top as well and we’re going to put some end rods just to add a little bit of light here too also trying to make this whole thing spawn proof so you don’t have any mobs spawning in here all right so now our center enchanting area is completed Now comes the fun part of roughly shaping out the room here this is where you can use your creativity you could go a little bit higher just to give it a little bit more of a grand effect i also don’t want it to look completely symmetrical so we’re Going to be changing up the corners we’re going to be digging into the walls some of the areas and we’re going to be adding a gradient on the wall using deep slate and tuft acacia wood dead fire coral block some cobblestone some andesite and also some mossy cobblestone along with the moss blocks For some green areas we’re just going to rough it out here and then we’ll be back with some more detailing So now the room is coming together a little bit more here and we are going to be adding a geode into the side of this a little bit of area here and what we’re going to be using is smooth basalt a large amethyst bud and an amethyst Cluster as well as a block of amethyst and some calcite to start out with i like to just place some amethyst down here some blocks first of all sort of making it into a little bit of a circle trying to make it so that the geode would be poking through this area here So i like to put the amethyst down first then i like to put some calcite around it and then some smooth salts so that really makes it feel like the geode is just poking through the corner of this enchanting room And then last of all i’ll take some clusters and buds and i will just put them around randomly not all facing the same direction some of them facing down some of them facing out and different sizes i don’t completely cover it i do leave some blank spaces as well And then when the light hits it it looks really sparkly All right so that amethyst geode is now done now we’re going to start on the ceiling using some moss blocks some oak leaves some bone meal and some glow berries i want some glow berries up there just to bite everything up so that we don’t Have to use any torches i will be adding some lanterns in as well but it’s just going to help light it up and then the oak leaves to make it look a little bit more green and some more moss blocks as well As you can see we added a lot of different greenery here including some dirt as well as some drip stone and drip stone blocks you can kind of go crazy and be creative here and sort of do whatever you want we haven’t added any stairs or slabs yet to smooth anything off So we’re now going to be doing some stairs some slabs and some walls for some more rocks hanging down and just to smooth out the bottom here as well and then we’re almost finished so the enchanting room is now complete except for one last thing we need to Make a stepping stone to get across from there to there so we’re gonna come down here and break a little bit of glass and have this sticking out here come up here add a couple little things off of it There we go our stepping stone is now done you could add a little bit of a stair in here just to give it a little bit more shape there and now you should be able to jump across here to your enchanting table if you made it this far in the video Thank you so much for watching i hope that you learned something from this enchanting room tutorial today please give it a like and also think about subscribing thank you so much and i’ll catch you in the next video Video Information
This video, titled ‘How to Build a Lush Cave Enchanting Room in Minecraft’, was uploaded by MrMattRanger on 2021-10-31 21:44:54. It has garnered 141294 views and 5342 likes. The duration of the video is 00:17:01 or 1021 seconds.
How to Build a Fantasy Cave Enchanting Room in Minecraft
World Downloads of all my builds https://www.patreon.com/mrmattranger
Timestamps 0:00 Intro 0:16 Digging Out 9:30 Interior Decorating 16:30 Finished Build
Find me on Twitch | https://www.twitch.tv/mrmattranger Find me on Twitter | https://twitter.com/themrmattranger Find me on TikTok | https://vm.tiktok.com/ZMeM7DKjk/ Join My Discord | https://discord.gg/6usKvHZ8g9