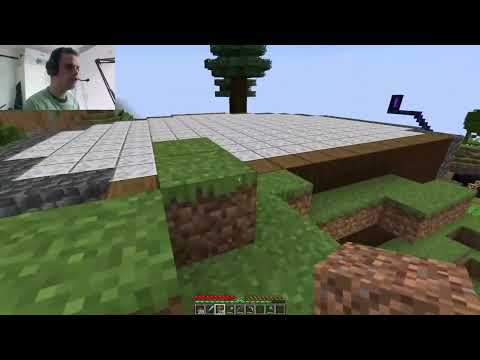
[Applause] What’s up guys it’s your buddy mog swamp back again with another terraforming tutorial today we’re building a river and just a quick heads up i did lose my recorded audio from about the first half of the tutorial and then i just went back in and did a Voiceover so if that part feels a little bit disjointed my apologies but i did get my mic working for the second half so with that being said let’s uh hop on in enjoy the tutorial so back here again in our terraforming world and i went ahead and laid out the path that i Want this river to take and i sort of used our cliff tutorial to build up this little uh ledge here and i think i want to do a waterfall tutorial down the line so i think it’ll fit really nicely in this little nook here but to begin we’re just going to start Carving out the river and sort of using the same techniques that i showed you in the pond tutorial putting sand and coarse dirt and gravel at the bottom and then stone on sort of the banks of the river so i’m gonna go ahead and throw it to a quick time lapse And we can sort of map out this river bottom and get that all set up So as you can see i’ve gone ahead and gotten all the sand and gravel coarse dirt etc laid down on the riverbed and built up the banks a little bit but something i forgot to mention in the pond tutorial is uh mossy cobblestone i totally forgot to add it in And it’s such a great addition to your pond or river or really anything with water and you can actually use these mossy cobblestone walls to make little stones sticking out of the water uh sort of like this maybe that’s not the best place for one but something like this where it just Sort of sticks out of the water and looks a little bit like a stone peeking out especially when you look at it from above i think that looks really cool so let’s just go along the bottom of our riverbed here and add in some mossy cobblestone slabs as well They’re just another great way to add a little bit of variation to the blocks on your riverbed and it sort of looks like stones at the bottom of the river with algae growing on them i think it works really well so with all that done i’m just gonna go Ahead and knock down this wall to our pond here and the water is gonna come rushing in that’s okay i just want to sort of blend this transition from the river into the pond a little bit so we’ll just go replace all the blocks around here and sort of make it as Smooth as we can so with this riverbed totally set up i think the next thing to do would just be to fill the river with water so i showed you guys how to do it in survival in the pawn tutorial so for the sake of this tutorial i’m just going to go ahead And do it in creative mode but the same rule still applies where we want to go from the lowest point up to the highest point of the river and start filling in that way as you can see we’ve got the first two layers of the river All filled up so now we get to the part where the water is actually going to be left sort of flowing uh where we have these elevation shifts so sort of like you’re seeing there we want to have the effect that the water’s uh like running down hill uh which gives a Really cool effect to your river it’s just it’s just a lot less boring than having a flat river and uh you can just sort of keep extending this and i think right about there looks pretty good and sometimes when you’re doing this you’ll notice that you just sort of Accidentally end up spreading the water a little further than you want it to go so what you can do is just get any sort of solid blocks and uh just start almost like erasing the water on that level and if you get rid of enough of these source blocks um You’ll be able to sort of push the water back a bit let’s see if i can pull that off here so we’ve covered up all those source blocks and now when we get rid of these stone blocks uh the water is pushed back a bit and i think that looks a lot Better so you may just have to do that once or twice if you accidentally spread the source blocks a little too far so again we’re just going through and sort of placing the water down and trying to experiment i guess you’d say until we find something That looks nice a good pattern for the water to be flowing in to where it looks like a very natural flowing river so believe it or not that’s pretty much the main river done but since this process was very very similar to our pawn tutorial that we did i Figured i would sprinkle in some of the tips and tricks that i missed in that video because there were a few and the first one i want to show you guys is these cat tails or bulrushes whatever you want to call them it’s a lime stained glass pane and a brown candle And these things just look so so cool you’re going to want to make sure to place them in a spot where they’re not going to connect to anything so they can’t connect to that stair block there so this is a perfect spot and you can just build it up a couple Blocks and put that brown candle on top it looks like such a natural water plant and you can tell what it is right away and god i just i cannot tell you enough how much i love these things i think they really add so much to your terraform ah just look at that It’s so so cool and don’t forget to start sprinkling in some of these mossy cobblestone walls into here as well and they just kind of look like little stones popping up and uh well that’s not connected to the bottom but we can sprinkle them here and there like here is a perfect spot And it doesn’t actually matter with these if they are connecting with the block next to them because you’ll notice that the part that connects is actually under water a little bit so you don’t see it from above so they still look great and you can even have them sticking up a block like That maybe a few blocks um and maybe along the sides of your river down where it gets a little bit more cliffy as well i just think that looks really really cool so we’re going to want to go ahead and get the pods all rooted dirt and coarse dirt around the banks of The river just like we did with the pond but something that a viewer commented on that i missed is you can use a shovel to create these path blocks which also look really nice and add a lot of variation especially because they actually sink into the ground like a pixel there Which just adds that little bit more extra bit of depth to your uh to your build so i would just go ahead and sprinkle in some of the path blocks around it gives it a really muddy earthy look and i just love how that looks so thank you for commenting on that now There were also some plants i missed in the pond video including the ferns and all of the tall flowers i just sometimes forget about them because i do not have access to the tall flowers on my flat world so i never get to build with them so It’s kind of just like out of my mind but these can look really nice it’s a great way to add little pops of color to your cliffs so i would definitely go through and sprinkle those around they look very beautiful and it’s the same thing with these ferns they they Really just spruce up your ground uh add a little bit of variation to the grass that you have here and there and yeah i definitely recommend mixing those into your foliage as well another thing that i overlooked are these flowering azalea leaves which are new which is why i just Didn’t think of it these are great to mix in with your existing bushes to just add a little bit of a pop of color here and there in your bushes like they’re sort of flowering so you might want to go through uh whatever you’ve built and pop these in Once in a while as well i just think it’s a really really nice effect so kind of like we did the dock with the pond i really think a good way to spice up your rivers is to add bridges going over them and i really want to put one Here but the only issue is that there’s no way to get up to this second level of the cliff currently so why don’t we just go ahead and punch a hole in the wall and we can start building up a way for us to climb up onto this next level of the cliffs So we’re just gonna go through with some mossy stone bricks regular stone bricks and some mossy cobble and try and make the most natural shaped staircase we can we sort of want it to look uh like carved into the cliff side here so maybe it curves around a little bit and We can sort of do a gentle slope we want to be able to walk up it but at the same time we don’t want to cut in too far to our beautifully terraformed cliffs here so we’ll try to strike a balance and get a nice slope going This is looking pretty good here so let’s just pop down and give it a walk yeah it feels nice to walk up you don’t have to jump at all at any point and we get to this nice second level here so i’m pretty happy with that so let’s move On and uh now that we have that we can build our little bridge all right let’s go ahead and get this bridge in i’ve already put down the supports here and this is a design i think i saw on instagram once and apologies i don’t really remember Who i saw the the design from uh it’s just kind of something that i kept inside my brain but uh we’re gonna go ahead and come across with these fireplaces and put those out and then this is a really cool trick i don’t know if you guys know about this But when you put fence gates onto cobblestone walls they actually go lower than they normally would be so you can do a third one in the middle and it sort of makes like a nice little arch shape so we’ll go ahead and do this on all four sides And then we can go ahead and build up the uh bridge a little bit and we’re gonna put a roof over the top of it which i think looks really nice so i’m just doing a fence and then a fence gate oops and then another fence and then i think It’s nice to just hang some lanterns on each side so that you get a little bit of light as you’re going across your bridge here and then we can go ahead and put some campfires all along the top just like this and same thing on the side and then Let’s just go ahead and get a stair block on each side And we’ll connect those stairs in the middle with some upside down half slabs just going across the top like that and that’s pretty much our bridge i think that looks pretty nice and the more i look at this the more i think we might just want to knock out these middle supports I usually put them but it’s a little too tall for them i think in this uh part of the river so it looked a little awkward to me and this looks like it would be supported just fine i think and just to decorate the entrance to our Bridge a little bit i’m going to try out a little trick i saw recently on reddit that i’ve been meaning to try so we’re gonna do some terracotta we’ll build up with the flowering azalea leaves and then knock out that one put down a item frame And a bush and it just sort of looks like a larger flower pot so this is sort of coming out of the flower pot i really like oops i really like the way that looks just to match it let’s put a little smaller flower pot next to it with the azalea bush Yeah that’s really cool it’s like you have the the mama and the little plant i like that i just realized we haven’t looked at the river at night yet so real quick let me set the time tonight and we’re just gonna want to sprinkle in A sea pickle here and there to make sure the bottom of our river is nice and lit up just like we did for the pond great now this is looking sweet even at night all right guys before we wrap up this video i want to try one last little Thing in this area here i want to go for a more jungly overgrown vibe and a good way to do that is just by mixing in granite and polish granite and jungle planks all together and just it gives it like this really warm earthy sort of tone and i think If we pull it off just right it’s going to be a really cool effect so let’s just start sprinkling this stuff in here a little bit even put jungle trap doors every so often and just really get kind of crazy with it i know it seems really weird when you First start doing it but i do think it comes out pretty well another block that sort of mixes in well here is uh actually brown concrete powder it’s sort of like a brown sand and it’s just sort of another one of those muddy textures to start mixing in And i actually think it can be pretty cool looking if you pull it off just right great so i’ve built up a little pile of these blocks and i know it looks kind of super weird but i’ve begun to border it with moss here and we’re just gonna go in and start going Kind of crazy with uh all of our uh leaf blocks here and just sort of sprinkling all of these in and around it and i think it’s just gonna kind of give it like a almost like a termite mound effect where you’ve just got like a crazy amount Of greenery and uh and dirt piled up into this like cacophony and we’re definitely gonna be sprinkling in uh the occasional oak leave i don’t think the spruce leaves work for this so i’m not gonna really bother with those yeah guys i think this is actually looking pretty freaking cool here and Maybe we can go in and add like one or two uh taller little bushes here just with our fences and uh just sort of cover them with leaves like i’ve shown you in the cliffs tutorial and uh just make some organic shapes with it and get a little weird with it basically What i’m trying to the point i’m trying to make with this little part is just that you can use blocks that you don’t normally use for this stuff and a lot of times it just kind of works out like in the end it’s just more about like the color than it is about The individual blocks themselves so this ends up just sort of blending in to be more of a jungly little bush heavy area that i think really complements our river so that’s sort of what i was trying to show you with that part maybe it got a little abstract there in the end But i think that came out really cool and i think if you put a big cliff behind this it would look even better but guys i’m pretty happy with this river um i’m very excited to do a waterfall to go with it in a future tutorial but i think That’s all i have time for today so uh if you enjoyed this tutorial please feel free to leave a like on it leave a comment down below i love hearing your suggestions and ideas for other things to add to this and subscribe if you’re interested in seeing the rest of the series I’m definitely not done with it yet that’s it for me let’s turn on shaders and play this baby out see you guys Uh Video Information
This video, titled ‘How to Build a River in Minecraft’, was uploaded by Mogswamp on 2021-07-13 19:30:02. It has garnered 31015 views and 744 likes. The duration of the video is 00:16:06 or 966 seconds.
Minecraft tutorial: Step by step landscaping tips for terraforming a beautiful tiered cliff
0:00 – Intro 1:18 – Timelapse of Riverbed 2:08 – Using Mossy Cobblestone 3:14 – Filling the River with Water 5:20 – Adding Cat Tails/Bullrushes 6:39 – Using Path Blocks 7:15 – Ferns & Tall Flowers 7:55 – Flowering Azalea Leaves 8:21 – Stone Staircase 9:31 – Covered Bridge 11:22 – Large Flower Pots 11:59 – Sea Pickles 12:26 – Granite, Jungle Wood 15:06 – Outro
=============
Intro Song: “Tiny Tunes” – FantomenK Used with permission.
All other music by me 🙂
=============
PLAY WITH ME ON THE MOGSWAMP SUPERFLAT SERVER: Server IP: flatnet.gg Bedrock IP: 45.59.171.40 Bedrock port: 25565
OFFICIAL MOGSWAMP DISCORD: https://discord.com/invite/ZTpBxRU
Twitter: https://twitter.com/#!/Mogswamp Twitch: http://www.twitch.tv/mogswamp
Support me on Patreon: https://www.patreon.com/Mogswamp
#minecraft #terraforming #tutorial