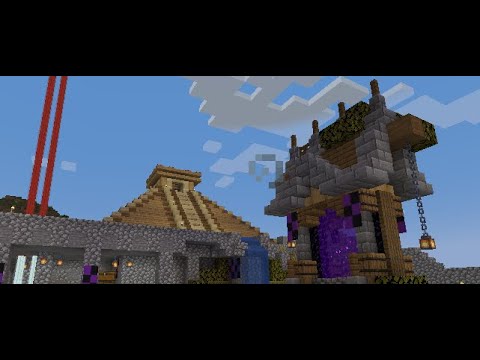
Welcome back to building 101 your step-by-step journey through everything you need to become a minecraft master builder with each episode covering a different element of the design and build process you can improve your building skills today we’re going to be looking at build composition and detailing before we go any further hit That like button and subscribe for an instant boost to your building prowess first let’s cover off a little bit of theory a focal point is the area of any composition that’s created to draw in the viewer it’s wearing the image that your eyes will land before traveling Through the rest of the composition look at this picture i bet the first thing that you noticed was the red apple now that’s a very obvious example but how about this painting by monet you were drawn to the boat right less blatant but equally effective one final painting you might know Were you drawn to the center of the chest before moving up to the face each of these images has been deliberately designed to make you notice one particular element first it adds interest to the image and makes the viewer feel more of an emotional connection to it it’s done by creating Difference or contrast in the composition let’s have another look at the three images in the first one the difference is created by color although they’re all apples by varying the color of one it immediately draws your eye to it in the second this one uses darkness to create The contrast at the bottom of the boat which is almost irresistible finally the third image uses light this spot in the center of the chest is the brightest part of the image it’s also in the dead center of the painting however with this one it’s a little bit more Subtle as your eye lands on the light and there’s little there to hold it it searches for the next thing to look at and that brings it directly to the most famous smile in the world but why does this matter for minecraft aren’t build three-dimensional yes they are but as a Builder you can decide where you want people to see the things from like you can put in paths or which directions you want your windows to point at the builds from alongside this the buildings themselves can use colour and contrast which were covered in episode 2 of this Series to put the viewers eyes where you want them other ways you can do this are by using lines or light to draw people into your builds you can also use areas of detail to achieve this one important element to consider on focal points is when there’s too much going on builds Are difficult to take in as the eyes have too many things to focus on all at once many people think the more detail the better this isn’t true this can make builds seem cluttered and too busy it’s normally better to pick a couple of major details that become the focal Points of your build the mind will naturally fill in the details in the other areas around this within the peripheral vision alongside deciding focal points the other thing you need to think about is how far away you want people to be when looking at the build this is known as The viewing distance and can be defined as far medium or close at far distances the person looking at the build will be able to see the full build with the general sizes and shapes included but they won’t be able to see the smaller details at this distance Entities such as signs and banners won’t be visible this distance also works especially well with gradients as it unlocks a large variety of blocks that you can use if the build is designed to be viewed at this range then the details and shapes will need to be large to have An effect colours and contrasts will need to be obvious to create a visual impact at medium distance you can still see the overall size and shape of the full build but you’ll also start to see some of the details coming into view entities will also come back into view At this distance and then can be used for decoration depending on the size of the build you might not be able to see it all at once using gradients will also be largely effective however you need to use a more limited block palette as large transitions will be quite obvious When building for this distance you can focus on smaller scale shapes and subtle color changes but avoid using details that are too small or too many of them as these will look busy and will be difficult to see finally at close range you’ll lose sight of the whole build and It will become abstract with the details becoming more important to understand the purpose of the building blocks and details barely visible from other distances will have extra impact but all but the most subtle gradients will look out of place at this range the player will be able to get different views of The build just by changing the direction that they’re looking which means more focal points can be utilized close viewing distance will include interiors on all but the biggest builds for most builds you’ll need to consider a combination of these three distances so look at the build and see which parts Will be visible from the three different ranges and plan your decoration accordingly there’s no point adding intricate details where they’ll hardly be visible and will just make the build look too busy likewise if the player is up close and personal to the build then large blank areas will look too empty And out of place that is unless you’re going for a style that embraces that like minimalist or futuristic one of the terms that gets used a lot is adding depth to a build but what does this really mean adding depth is the process of making the build look less flat and In a game of 1×1 meter cubes this is particularly important as it can be easy to create overly smooth looking areas however the fact that the game is one by one meter cubes also means that it’s easy to go overboard and make things look too unrealistic many builders Overly exaggerate details and depth to the point of them being caricatures of actual buildings and more cartoony walls aren’t six metres thick in reality if this is what you’re going for then it can add to the look but in many cases people wonder why their builds don’t Look quite right and this is often the cause adding depth can be done in a variety of ways that don’t require making the walls thick with two c’s one good way to do this is to use lighter and darker colors to create false shadows and dab light colors and blocks Naturally look like they’re further away and you can use this visual illusion to create the effect you want by using subtle or deliberate color changes you can make it look like there’s more depth than actually exists this works best at medium and far viewing distances when it Comes to blocks and their uses in decoration there’s too many to go through in one video but i’ll cover off some of the major groups stairs can either be placed the regular way up or upside down that gives you some great options they can also be linked together This is both the regular direction and upside down as well and they can also be curved round so you can get some really nice patterns from those and they give you two layers of depth with stepping back through the stair itself you can also use them to link up and create some Nice loops and patterns so this has got a single block size through the middle of this the slabs these are great because you can utilize the space in different ways you can place these either the top or the bottom of a block and by stepping them up and stepping Them down you can use those to create some additional depth and some interesting spaces you can also use them to create these half slab platforms that have got a full block in between by alternating with you put them on the top or the bottom next walls they can be placed Individually or in lines once you get above a line of two you will have this flat section on top of a wall unless it is connected to something and then once you place another thing on top of that it will fill in the little gap that you Have here so as soon as you do that you will move the gap upwards if you don’t have anything behind the wall you will continue to have this flat section or you don’t have a full block so by using something like stairs that we’ve got Here you can add a flat area that looks like it’s attached to the wall and the best thing about walls is they can be used in a recess in a full block to add a significant amount of depth without costing you an additional block width here Fences on the whole are very similar to walls because you can place them individually or you can place them against a full block and when you do they’ll connect up to that full block the one weird fence that we have is the nether brick fence which won’t connect To any other fences and this can be used for some really nice decorative patterns because you can put different types of fences and yeah they won’t connect up and you can also put fences within recesses like you can for walls and you can get a nice element of depth to your Build by doing this without costing an extra block walls and fences will not connect together naturally however if you use a fence gate you can get these to connect up and also between the regular and the nether brick fences as well in that way however you get this Transition when it moves from a fence to a wall as it drops the fence gate down for some reason but this can also be used for some really nice decorations next glass panes and iron bars these work very similar to each other that’s why i’ve used them together they will Connect up individually and once you’ve gone beyond two panes you get a full pane in the middle with a half pane each side or a half section of the iron bars now these can be connected some nice effects to a full block but again as Soon as you connect them to a full block you do get these struts that come in the middle which for me spoils the look a little bit uh but you can get around that they are great for putting into recesses and using the depths of builds And they will connect up to walls so you can get this triple depth effect for a single block so you’ve got a full block but then the wall then the glass pane and you get these three obvious different transitions now they won’t connect up to fence gates Or fences however they will connect up to each other so you can use some really really nice patterns one other thing for the fence gates is that when you’ve placed them you can actually open them in different directions and get a different look from a decorative standpoint In my view trapdoors are the best decorative block in the game they can be placed on any side of a block so you might place them like this and then you can flip them up or flip them down so you can have lots and lots of variation on how you can physically Place them some of them are see-through so you can actually get a nice view of the block underneath as well but some of them aren’t so you can actually create full walls out of these things themselves as well so utilizing those two factors they’re brilliant for putting either onto blocks like this Or in a recess so you can create either a big gap or a small amount of depth again for not much extra width the iron trap door is the one different block which you can place on its side but as soon as you put a redstone power Through it it will stand up and that can’t be changed unless you use something like a lever or a button so that will be locked there are some other blocks as well that you can place on any surface and these are really really useful for decoration Because it gives you far more options so for these you have got the end rod you’ve got the chain you’ve got the new well i say new the lightning rod here and you can also there’s something that people forget about levers can go on any Side buttons can go on each side of a full block and you could also place the grindstones and the amethyst shards or amethyst buds rather on any side of a block so these are really really useful and give you lots of decoration options now we have signs and banners these are also really Really useful for decoration so signs and banners can both be placed independently and at different angles you can also then place them against a surface and with signs you can place a sign against another side and create these quite interesting bits that can stick out and you can then Carry on by shift clicking into that create these weird and wonderful little patterns and decoration bits now with the banners they will overlap they also move slightly in the wind and because the only the top half of the block is the hip box you will place them Like this and they can go into other blocks as well so that also gives quite a nice touch with the other blocks that you can place on walls you have ladders you have vines you have these the glow icon you have paintings and item frames and then also You have mob heads now mob heads can also be placed on blocks can have the blocks removed and be floating and be placed directionally a lot of these however are entities so if you get a certain distance away from these like for example the banners and also the Signs they will disappear so again consider the viewing distance when you’re using these there are so many other blocks that can be used for decorations such as sea pickles that can be placed on any surface candles that can be placed on the surface and have that surface Removed and the flower pots that can be used independently as decoration or with flowers in and then you’ve got things like you’ve got the armor stand you’ve got anvils all sorts of blocks all the ones that people know about like leaves these which are of course the campfires And the campfires can be put out by using either a water bottle or a splash water bottle or a shovel and then you’ve got other things that you can use such as the pointed drip stone and bells that can also be attached to blocks or hair all sit independently Really the only thing that limits you with the blocks is to have a look at what is available and then just use your imagination because even things like these stone cutters because you can place them in different directions can be used for some really really interesting decorations Then it comes to things like lanterns as well these give off light and they can also be used independently as a decoration on their own factoring in everything that we’ve covered hopefully that has given you lots of ideas of how you can better decorate your builds this Is one of my favorite patterns that i use for a fantasy style where using the trapdoors and using the stairs you can actually create these nice porthole like circles in minecraft and that looks really really effective and when you look at the other side as well given That this is only just over two blocks deep you’ve got a really really nice interior surface to your builds too so that’s another idea for you but i hope you’ve enjoyed this video i hope it’s been helpful hit that like button hit that subscribe button and let me know in The comments what you’d like to see on future episodes and i will see you all next time on 80 craft Video Information
This video, titled ‘How to Detail your build & Build Composition – How to build better in Minecraft – Building 101 Ep.4’, was uploaded by AdieCraft on 2022-06-25 18:00:04. It has garnered 50344 views and 2037 likes. The duration of the video is 00:13:55 or 835 seconds.
Welcome to Minecraft Building 101. A new and highly requested series on the channel looking at how to level up your building skills in Minecraft. With something for everyone, this step by step series will help you understand the fundamentals of Building in Minecraft and how you can improve with any size or style of building.
Episode 4 will be looking at building composition and detailing your builds. Looking at the theory of focal points and viewing distances and covering adding depth to builds. I aim to give you everything you need to be able to plan and detail your builds perfectly!
0:00 An introduction to Building 101 0:26 Focal Points 2:35 Viewing Distances 4:38 Adding Depth 5:40 Blocks & Uses 13:42 Goodbye
Check out previous episodes in the series: Building 101 Ep. 1: Build Planning, Size & Shape – https://youtu.be/klMIzddhKaI Building 101 Ep. 2: Colour, Gradients & Block – https://youtu.be/HLYQXfx7pJE Building 101 Ep. 3 – Angles, Curves & Organic Builds – https://youtu.be/vVzO3OF8p34
Make sure you leave a like, a comment and subscribe to the channel and don’t forget to hit the notification bell.
Want to support the channel? https://www.patreon.com/AdieCraft (World Downloads available to all Patrons)
Follow on Twitter: @AdieCraft Follow me on Twitch: https://twitch.tv/adiecraft Join the AdieCraft Discord: https://discord.gg/nyMCvqk
Texture Pack: N/A Shader: BSL
Cinematics provided using: https://replaymod.com
Alternative titles: How do I build better in Minecraft? Build better in Minecraft How do I become a better building in Minecraft How to build better in Minecraft Minecraft Build Composition How to Detail your build in Minecraft How do I add Details to my Builds Adding Details to Builds Best Minecraft Blocks for Detailing How do I detail my build Building Composition Minecraft Build planning Minecraft Minecraft Build Planning Build Detailing Ideas Noob to Pro building Building Tips Minecraft Minecraft Build Tips Minecraft Planning tips Improve Minecraft Building How do I plan in Minecraft Minecraft Building Tips Minecraft Build Hacks Minecraft Build Planning
#minecraft #building #education