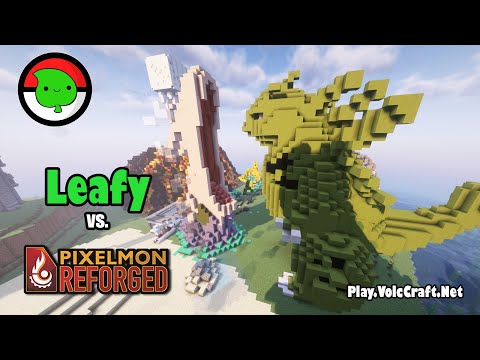
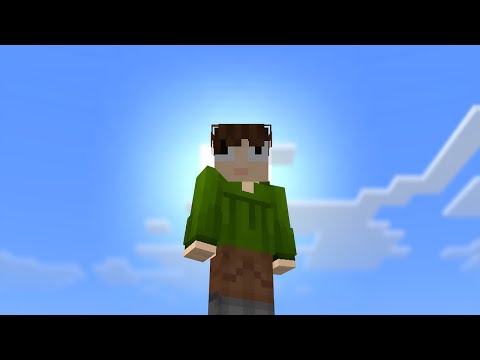
Hello Are we recording hi so today we are going to look at how to install vivecraft for your computer so vivecraft if anyone doesn’t know is Minecraft VR and um the process has changed since the last video that I put out so we’re going to be looking at how it is done in 2023 And we’re going to be a little bit more clearer on the steps because there’s a lot of comments that are a bit confused on how it’s done so stay tuned and very soon we’ll be playing some Minecraft VR oh what the hell it spawned me in a tree oh that’s not good Ow okay let’s get some wood before we start any of this I just like to say it would help a lot if you started with a fresh installation of Minecraft Java and you did not have any mods because they are likely to mess around with this installation process so start fresh So let’s head over to the guide shall we now the first thing you’re going to want to do is head over to fivecraft.org and then you’re going to want to go to the download section make sure you pay attention to the requirements so first and foremost you’re going to need Steam and you’re Going to need Java yeah you can click the latest Java install so if I were to click this right now it would take me to the Java website and I can download a job obviously Java is required to run the Java version of Minecraft you also will require Steam And you’re going to need steam VR installed so click this button head over to steam but I’m sure that if you guys have a VR headset and a PC it’s very likely you’ve already got Steam and steamvr installed but regardless make sure these two processors are taken care Of and just to show you guys who might be confused if you look at your steam store Page this is what you’re looking for it’s free and this is what will connect your headset to steam and to Steam games now you’ve installed Java and you’ve installed Steam and you’ve Installed steamvr we’re going to go back to vivecraft and we’re gonna actually download five craft itself scroll down the page and you will see the versions that you can download I would recommend that you download the latest version that’s 19.2 so click on 19.2 and scroll All the way down and you will see the downloads now make sure you do not download the top one you want the VR version the top one is non-vr now you need to run the file so if at this moment you are having problems running it and it says something along The lines of this is not the right program to run this file what you need to do is actually right click the vivecraft installer and set properties and under properties set run as Java this is a Java file and Java will run it as an installer sometimes Photoshop or Other programs can pick up a Json file and think that it’s a native file but it’s not so make sure that this file is being run under Java alright so now you have the file running check the directory path to make sure that that is where your Minecraft is and I would Recommend that you install vivecraft with Forge because that’ll allow you to have greater modern capabilities later and then we will increase our Ram allocation so I’ve got 32GB so eight gigabytes is more than enough for me and I’ve set a custom profile name for VR so That I can play it in non-vr and in VR mode if I want and we have to make sure that our Minecraft launcher is shut during this process so I’ve just double checked yes it is shut and it’s going to give you a whole lot of Windows we just push yes yes yes And it’s going to take us to the installation of Forge now make sure again that the directory is correct we select client not server because we’re not running a server we’re running at the actual client servers are for people who want to run servers that multiple people can join this is more of A single player thing and it’s gonna run so it’s going to install Forge and it’s also going to install a VR Minecraft profile so we just let that run for the moment foreign and that is it installed it will tell you to restart your Minecraft and to select vivecraft Forge 1.19.2 VR which is the profile which we set up and that’s pretty much it guys the rest of it is very very simple we are going to turn on our Oculus and we are going to connect to Oculus link which is going to connect the PC to the Oculus now whether you do it wirelessly or whether you do it using Oculus air link that’s up to you but I use Oculus air link we’re also going to start our Minecraft launcher and we’re going to go into installations here you can see Forge 5 craft and the latest release now the Latest release will just play normal Minecraft on your desktop but the vivecraft forge VR version profile as you can see there is the one that we have just installed so once you are connected to adlink and you are in that white screen uh push launch and it will start to load up It’s going to give you a little notice saying it doesn’t recognize this software but that’s fine just keep going and there we are guys we are now playing Minecraft VR so you can actually uh have a look at some of your uh old games if you want But uh I’m gonna create a new one and uh Jump Right In so that’s it everything is there I hope you guys enjoyed it if you have any questions please ask in the comment section I will try my very best to respond what I ask is have a look at Some of the other comments because there are a lot of people who do troubleshooting make sure you have Java installed because that seems to be the biggest issue and uh above all else have fun guys if you found this guide interesting entertaining helpful any of that please drop us a subscription it Helps the channel out it helps me out and it helps you stay tuned to more content that’ll be similar to this I plan on dropping some VR mod guides shortly and uh yeah just uh have a good day guys Video Information
This video, titled ‘How To Install Minecraft In VR (Vivecraft) In 2023 For The Oculus Quest, Vive, Rift, Valve Index’, was uploaded by Dead Pixel Gaming on 2023-04-03 16:00:39. It has garnered 11329 views and 249 likes. The duration of the video is 00:07:13 or 433 seconds.
In 2022 I made a guide on how to install Vivecraft which was popular however I have a lot of questions asked and a lot of it is due to changes in the process but also on not being as clear as I could be. Over the year I have developed as a content creator and I hope that this guide will be clear and helpful to everyone!
I will have chapters in this video to help with navigation… Enjoy 🙂
0:00 – Intro 0:52 – Quick Disclaimer 1:12 – Get Java & Steam 2:22 – Download Vivecraft 2:45 – JSON File Set To Java 3:29 – Install Vivecraft With Forge 5:00 – Turn On Oculus Link & Play 6:43 – Outro
Minecraft VR: http://www.vivecraft.org/
Steam: https://store.steampowered.com/
#minecraft #minecraftvr #vr