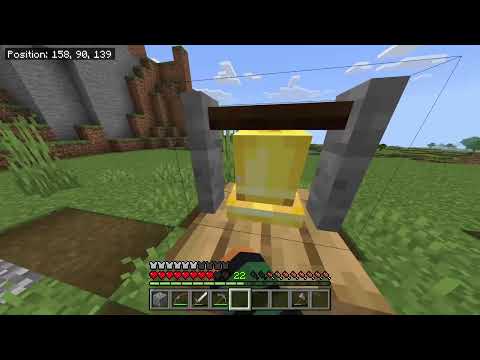
The ability to add full custom dimensions through data packs has finally been added to minecraft in the 1.16 update this has dramatically increased the power of data packs as we are now able to create things such as portals to fantastical dimensions like the Twilight forest or they either or Even rockets that go to the Moon or Mars previously data pack creators had to use the roof of the nether like in the asphodel Meadows today I will show you a system for implementing custom portals to custom dimensions that activate when a block is placed inside of a portal Frame similar to the aether mod or the nether today I’m gonna be showing you how you could implement your own custom portals into Minecraft by using only data packs in Minecraft 1.16 I’m currently using minecraft 1.16 pre-release tube it should work for any version so as you can see here I Basically recreated the aether portal so I have a glowstone portal the size of a normal nether portal and now if I place a water bucket inside it will summon the water looking aether portal and if I step inside of it another dimension and If I hit the f3 menu here you can see in the top left corner it says that the dimension is test dimensions a their test and as you can see it’s obviously a custom dimension because it has a bunch of pink wool to replace all of the stone And it’s a bunch of floating islands and not the normal world so I’ll show you how you can create this kind of custom dimension in the end of the video but today I’ll mostly be focusing on how this pack works to create your own custom portals so normally for tutorial I would go through everything and create it with you guys just to show how how everything works in the whole process but since this has so many commands in it compared to my normal tutorial I’m just gonna be going through what I already created and show you how to Basically customize it for yourself but the first thing I’m going to do is go through a very detailed explanation of how the entire thing works by going through all of the function files but I have a feeling a lot of you are going to want to skip that part so make sure to Go to this time stamp if you just want to be able to download and customize it for yourself I’ll show you how to tweak the data pack to use your own portal frame blocks and portal blocks how to of course use your own custom dimension and how to change up the sounds and Particles that display and finally I’m going to go over how to create your very own dimensions with the online generator but keep in mind that the way to create custom dimensions has a very high chance of changing in the future so there are a few main parts for how this works the First part is Ray casting to detect where I place the water block every time I place down a bucket of water and then there is detecting based on that water block if there is a frame around that that water block position and then there is the part of marking the portal and Then there’s detecting if an entity that can be teleported walks into the portal and then actually teleporting it to the dimension so now I’ll go through all of the actual MC function files that I created so to start off we have the load function of course if you don’t know how To create your basic data pack then make sure you go check out my how to create a data pack video but there just a couple tell all commands to show that they get that the data pack is loaded and then I simply add one scoreboard objective for Minecraft used minecraft water bucket Just to detect when I place down a water bucket then in the looping MC function what I have is the raycast which will run if the water has been placed so if it detects that the score for portal 1 which is the name of the scoreboard for detecting the water if That increases by 1 then it will go to the player’s exact position and rotation positioned at the their eye level and then it will run the function of casting so its TF portals which is my data pack namespace then portal 1 which is the folder with all the files for my first Portal and then cast so in cast this is running at the position of the player at their eye line at the rotation so first I summon the area effect cloud at their eye level and then I match the area effect clouds rotation to the player’s rotation so that it is basically looking Exactly where the player is looking as they place the water so that when it teleports forward it will intersect with the water block that was placed and this area effect cloud is basically just being used as a marker and so it has a duration of 120 so that I don’t have to Manually kill it off it will kill itself and then it has the tag of p1 cloud so that I could detect it later and of course it resets the scoreboard so that it doesn’t keep summoning like an infinite amount of area effect clouds and it also ensures that I’ll be able to detect Future blocks of water that are placed so now that the area effect cloud with the tag of p1 cloud has been summoned in the loop MC function then I run the cloud function on the area effect cloud so I’m executing as the area effect cloud and it’s position and I’m running The cloud function now here it looks like a lot but really all you have to focus on is just one section because it’s a bunch of repeating stuff so just focus on this section here so every tick this this section is going to be running ten times so execute at the position of The area of fat cloud as long as I haven’t cancelled the detection yet I’ll show you what that means later then it will teleport by a tenth of a block forwards and then each time that it teleports forward it’s trying to detect if it intersects with that water block That you just placed because the whole purpose of ray casting is to get the position of the water block that you just placed so if it does detect that there’s water then it runs three checks it runs if either there’s glowstone directly below it so let’s say you place The water at the low level of what would be a portal then it wants to detect if those glows in directly below it or it’ll run checks for if it’s at the center then it’ll run two blocks below it and then if you place it at the top Then it has to be able to detect if those glowstone three blocks below it and I just split it into three sections for the bottom the middle and the top just to reduce the amount of checks I have to do so you don’t have to run an unnecessary amount of checks and the Reason that I did a tenth of a block instead of just using one block for words is because it increases the accuracy so instead of doing one block forward every tick I do a tenth of a block forward ten times during the tick and the reason I can’t just do one Section of this is because it would move too slowly if I just did one section of moving a tenth of a block per tick so I just duplicated it because it’s able to run the calculations multiple times per tick and then after the cloud reaches the water with the potential frame Around it then it’s going to run the full detection commands which are low check mid check and top check so I’ll just go through low check right now just because they’re basically all the same it just the same commands except for different positions so the first thing that it Starts with is it runs out the position of the area effect cloud when it detects that there is a water block with a potential frame around it by detecting that the piece of glowstone was underneath that water block so it executes unless there’s already an item frame there and summons an item frame Which is invisible with the tag of portal aligned and the only reason I have to summon the item frame is to make sure that it’s centered on the block because when I summon an area of effect cloud depending on where I was looking on the block it’ll still detect the Piece of water but the area effect cloud will be in a different spot each time so if I place it while the water is here or I place it while my rotation is on this side it’ll be in a different spot so I just use the item frame to make sure That I have a consistent center point on the block to reference when I want to summon the armorstand that will mark the position of the portal and speaking of marking the position of the portal I have to detect the structure of the portal frame and as I write here I’m Trying to detect those four positions it could be after I know that it’s in the bottom of the portal for example I know it could either be on the left side z-axis right side z-axis left side x-axis or right side or right side or left side x-axis this is just a Detection command which is trying to detect the shape of a frame around the portal block and there’s four possible positions which is why I have to have four separate execute commands and it might look complicated but it’s just a bunch of repeating if block statements suggest to check if there are blocks in The shape of the portal and so if there are blocks in that specific shape then it will run at the position of the item frame that was used to align and make a consistent position and then it will position itself to wherever it has to be So for example if it’s a left-side Z then it’s going to go okay I’m positioned here so what I have to do is move half a block to the right on the z axis and then one block up on the z axis and summon the marker armed stand in the Center and the reason I want to summon it in the center is so from now on all I have to do is run on the position of the marking armorstand instead of having to run the detection again to see which type of armor stand it is and of course if you Have more questions just go into the description and ask like which part you want more clarification on because I can’t go into detail for every single command but I’m trying to get like an overview of how it works so know I’m summoning the armor stand here and this Armor stand is invisible because I don’t want to see the actual armor stand and it has the custom item another brick on top of it which has the custom model data if you don’t know how to do custom model data then go check out my video on That I show you how to make custom items in custom models for any item in the game and then I make sure it’s small just because it’s easier to run commands and it’s more it makes more visual sense when it’s a small armor stand and I also Give it the tags of portal Zee portal 1 and cloud active so I’ll show you what those do later portal 1 is basically just marking okay there’s a portal here and make sure you run your commands for the portal on this armor stand so there are two commands for portal Zee for the Two positions that could be existing on the z axis or the two positions for the x axis and the reason for that is when I go but over here what I’m doing is I’m trying to make sure that the that no matter what even if it’s an x-axis Portal or a z-axis portal I want the armor stand to be facing perpendicular to the portal so that I know for my future commands that the portals position the portal frame position relative to the position and rotation of the marking Center arm stand is consistent so this stuff here is just to Remove the water this is just removing the alignment frame because I don’t need it anymore I already used it and then this is just tagging the detection cloud to make sure that I cancel I cancel any more detections that haven’t finished inside of the rest of this chain of Commands and then it also makes sure that once the tick is over it does kill the cloud and then after this it removes the cloud active tag because cloud active is basically signaling that the portal detection has succeeded but the cloud is still running its detection So I want to finish everything such as the play sound and the particle commands and removing the water I want to run all of that just once as soon as the detection is completed and succeeds and then I don’t want to keep spamming play sound and particle so then at the end I Remove cloud active so all of these commands so all of these only run once as soon as it’s detected so now that it has detected the marker armorstand in the center exists so I could actually show you that here okay so what I went ahead and did is I removed my resource Pack which shows the water for the portal so now you can see the invisible armor stand in the center with another break on top and ignore the other armor stands for now I’ll show you what they are later but as you can see that Center armor stand is marking the position of The portal and if I move back you can see that that armor stand with another brick on top stays there but the other ones disappear I’ll show you why so now that it has spawned we have something to mark the position of the portal so let’s Go back to loop and if you remember that marker arm stand in the center of the portal had the tag of portal 1 and so I want to run out the position of all portal ones I want to run this function which is just called portal 1 but now We’re in the portal 1 function so what this is is it’s a command that runs at all armor stands which are signaling that there is a portal at their position so first of all to run the detection for if these the frame is destroyed because I want to make sure oh because I want to make sure that if the frame was destroyed then it destroys the armor stand so the way I do that is at the beginning of the tick I remove the tag called stable and then after that I run A detection command which the text for the exact frame position around it and that’s the reason I wanted to make sure that the armor stand was perpendicular and perfectly centered inside of the portal because now all I have to do is run the single detection command from The position of the armor stand to ensure that the frame is still intact and then if the frame is stolen then it runs and then it runs the tagging command which adds a tag stable back to it and if it doesn’t add the tag of stable back to it then it will run The function for destroy and inside of destroy it basically just kills the armorstands it tags it as dead so that it doesn’t run anything else inside of the portal one function and it kills all of the extra armor sins which I’ll show you later and then it also plays the Sound for breaking it so now I’ll show you what those extra armor stands were so what this is doing is it’s running if the center marking armor stand has not been marked as unstable or dead yet and it is trying to detect any entity that walks nearby that is of the type which Is in the entity tag of TF portals a p1 can teleport and so what that is is basically inside of the data pack itself if you haven’t messed with this before it’s an entity tag which basically puts entities into a group so if I go here And I go to tags and entity types you’ll see p1 can TP and so these are all types that are allowed to teleport right now I just have players because when I was trying to do items it was kind of buggy but if you’re able to get items working all you Have to do you don’t have to change anything else in the code other than adding other types so let’s say you want to add items you just do minecraft item or something like that but anyway I’m not gonna mess with that I’m just gonna keep it players for now because I wasn’t Able to get items working perfectly if it detects one of those teleport able entities that are in that list and it’s in a three-block radius unless the extra armorstand has already been summoned then it will summon the extra armor stand in a two by three grid and the Reason for that is it’ll increase the accuracy of the detection so if I create a portal and then I go into spectator mode you’ll see those extra armor stands so notice that armor stand in the top right see that one if I back away it’ll disappear and those armor stands only Appear when you get near because I increase the accuracy of detecting what I could do is say oh if a player walks into a three block radius of that center armor stand then tell part them away and that would work if I like move closer but if that would also Mean that I would teleport if I moved at it from the side so in order to increase the accuracy of detecting the player within a rectangular area instead of a spherical area I just basically made a grid of smaller a 2×3 grid of smaller spheres to detect The player so now that we get to the teleport command what this is basically doing is it’s detecting if a teleportal entity is within a 0.8 blocks of those extra armor stands that are creating the detection system then it will teleport them into the opposite dimensions so if They’re in the overworld it detects with the predicate and it teleports them to the custom world and if they’re in the custom world it teleports them to the overworld and the way it does that is just by running the command either in the overworld or in my custom dimension Either test and then if there’s nothing nearby so if there’s no teleport able entity within a three-block radius then what it does is it just kills those extra armor stands because armor stands cause lag so I’m trying to kill everything that doesn’t have to exist and then also this last thing here is When the when the player is teleported through they’re given the tag of teleported because I don’t want them to teleport through and then oh you’re in the portal now teleport back out now you’re in the other portal teleport back and they’re just ping pong between both Of them so what I do is I give them a tag of teleport which means they’re not allowed to tell apart until they leave the portal and their tag is removed with this command and then they reenter it so here’s the actual teleport command so what happens here is first it teleports The player to the same coordinates and the way that this works is it’s running the teleport command in the opposite dimension but at the same coordinates so if you’re at zero zero in the overworld then it runs a teleport command at zero zero in the other dimension so Teleporting you to the same spot will teleport you to the same coordinate so two zero zero but in the corresponding or opposite dimension and then it’ll add that tag that I was talking about to prevent ping pong in between the dimensions and then now this is running A command which executes at any portal with a 20-block radius of where you appeared in the corresponding dimension and it will try to teleport you to anything that already exists but if a portal does not exist it has to create its own portal so it just runs to fill commands One for the glowstone and one to hollow it out to fill it with air and then it summons the armorstand manually back into the center of that portal so these two commands here are just to ensure that the rotation of the new portal that was forced into existent in existence Matches the rotation of the portal that was in wherever you came from and then this just teleports a player back to that portal that was just created and then it just plays some sounds so that’s basically everything about how it works I know it was a lot but if you have any Other questions make sure you go into the comment section below and ask whatever questions you want I’ll try to answer every single question because I know this is a lot but I really want you guys to be able to use this so here’s how to use this data pack to add your Own custom portals to your own custom dimension so I’m just going to go through everything that you would have to change in order to fully customize it so first go to the data pack that will be in the description below so it’s just gonna be a folder like this and you have To go in here and there are two things that you have to change so first go into data minecraft dimension and test dimensions and then drag your own custom dimension into here I’ll show you how to make that at the very end of this video But after you get the JSON file for that you want to drag it into you test dimensions then after that the second thing you want to change is the predicate segoe instead of minecraft go to TF underscore portals and then go over to predicates and then in overworld You could keep it exactly how it is but for in either test change it to whatever your dimension is going to be so let’s say you’re calling your dimension my custom dimension then you do in my custom dimension die Jason then open it up and then the only thing You have to change in here is test dimensions and change this to whatever your jason file for the custom dimension file is that you just added in so if you called it my custom dimension die jason change this to my custom dimension okay so now let’s get to the function so in Order to change the portal block that you want to use so I used a water bucket as the portal block what you have to do is take this scoreboard in Lodi MC function change the water bucket to whatever block you want to use for the portal so If you’re going to be using andesite or something then change water bucket to Endocyte because you’re detecting they used and you want to rake ass only when you happen to use your portal block then you also have to detect for the actual block being placed and that is inside of The cloud function so all you have to do is do ctrl F or command F and then just search for water and replace it with whatever you want it to be so if you doing andesite then just replace all and that’s all you have to do I’m just gonna Keep it how it was and now if you want to change the portal frame block so I used glowstone if you want to change it the first thing the first place you have to change it is in cloud it’s basically the same thing you’re detecting water and then you’re detecting glowstone so You want to do the same thing detect for the glowstone and replace the glowstone with whatever you want it to be so if you want your frame to be made out of bedrock or something for some reason then you just want to replace all of the glowstone with bedrock and so you have To do that in the cloud MC function and you also have to do that inside of low check mid check and top check so it says glowstone here then just replace all the glowstone with bedrock so make sure you use control F don’t do it manually That’s a pain in the butt and another thing you have to change is in the teleport grande where it automatically creates a portal if there isn’t one already then you have to change this glowstone that’s the only one that should be in existence in this file so You have to change that to bedrock or whatever you want for your frame block and then you also want to change it in portal 1 because you’re detecting the integrity of the portal and if it gets destroyed you have to be able to detect it so do the same glowstone replacement In this portal 1 MC function file and that should be it for changing the portal frame but if you want to change the shape of the portal you don’t want to use a default portal then you’ll have to change the detection and the shape for everything and that will have to be Changed inside of cloud because you might not be detecting directly underneath and you also would have to change in low top and mid check you would you might not even use low top and mid check you would have to create your own checks the only thing you would have to change Is this execute if like this huge execute if block about all the other commands so everything above and below those execute ifs should be the same you should be able to keep the same summon command if you’re changing the shape of the frame and the only other thing you Would probably have to change if you’re changing the shape of the frame is inside of portal one where you summon all of these extra armor stands for better detection then you’d probably have to change the shape that they summon into and of course to change the actual dimension which you’re being sent To you want to make sure to go to portal one and go over to the teleport section and where it’s over weld to custom and custom to overworld what you want to do is replace in test dimensions a Thor test you want to change either test to The name of your adjacent file so it would be like my custom dimension and then also the predicate remember you change the name of the predicate file earlier so instead of in either test it would be in my custom dimension or whatever you named it and now in order To set the model so for example I used a portal looking flowy water portal thing you have to change the item on the armor stands head and so that would be inside of low tech mid check and top check where you summon the center portal one Armor stand you would have to change the armor item that is on its head so I use another brick with custom model data and you would have to change this to whatever your custom model is if you don’t know how to create that make sure you check out my block bench video and You would also have to change the summon command that exists in teleport that forces a portal into existence if there isn’t already one it’s basically the same command in teleport and low-mid top check but you just have to make sure that you replace it with your own model And finally custom sounds and particles the places to change that is inside of low mid and top check there are some particle and place on commands right here you just replace these place on commands and these particle commands with whatever particles and sounds that you want you would want to keep Everything here like the execute at command and you would also change the particles in the destroy MC function block so I just have some sounds here but you can also add more particles and more sounds if you want in the last place where you would customize the sounds and stuff like that Is in the teleport MC function you could change the sounds that are played during the teleport function so that is everything about how to customize this data pack to make it work for your own custom portal now let’s get into how to create your own custom dimension so Before I get into this make sure you keep in mind that the way that you create custom dimensions has a high chance of changing in the future and look at the pinned comment down below just to check if there have been any important changes that you should know About so this is the current way to do it in 1.16 pre-release 2 and pre-release 3 which just came out today and I just had to fix a bunch of stuff but I’ll show you how to actually create it so go to this link which will be in the Description Missa github I Oh slash world Jen so now you’ll see it comes with a default world it’s the overworld another and the end and this is for generating a world but we want to generate just a custom dimension so what you want to do is hit remove dimension For all of these and then just add some random dimension so call it whatever you want cuz it doesn’t matter and then just hit add dimension so now you’ll notice there are a few settings here and it does get a lot more complicated but you could choose how in-depth you want to go So first of all choose your world default or super flat don’t do debug world I don’t really know what it’s for so just hit default and because that’s probably what you’re gonna do and then defaults you just hit whatever you want yeah and then so the biomes source so There’s a few different ones here multi noise is my favorite one or the one that I would use but I’ll show you all of them so there’s fixed which sets it to just one biome for the entire place which is kind of lame and then you have checkerboard where you could put Whatever biomes you want here but you can’t really configure them so it’ll just lay out all of these bottoms into a checkerboard pattern and then there’s the end which I wouldn’t use and then vanilla layered is basically just the vanilla biome layout and the large biomes you could change but other than That is not much so then you go to multi noise and you have more control over what you want to do so just set the seat or whatever then the biomes preset you just add more by so let’s say I’m gonna do a shattered Savannah plateaux and then you could Change the altitude weirdness offset temperature and humidity and as it says here you’re just trying to set it to some random combination or it doesn’t have to be random but it’s going to pair similar biomes together so for example if you have hot biomes then you want to Put the temperature close to each other as opposed to the cold biomes so that you don’t have a bunch of hot and cold mixed together where it doesn’t make sense but if you want that then you could just make the temperatures like all the same just keep it how it is and Then after that we have generator settings here which you could choose preset ones which is a lot simpler than changing the actual generator settings but so there’s over world nother and then those are pretty obvious and then amplified is the amplified tall terrain and then caves means that it generates Kind of similar to how the nether generates with the roof on top except it generates your biome so it’s not the actual nether and then we have floating islands where there’s no better on top and nobody rock bottom and the islands are like a bit separated but if you want To make it have custom generator settings what you want to do is click on generator settings here and then there’s a few more stuff you could change you could set the bedrock roof and floor position and if you want it to not exist you could set it out of bounds so set it Outside of the range from 0 to 255 so if I set it to negative 10 for both then it will have no top no bottom and then sea level 63 you could set the sea level to whatever you want default block you could replace all the stone like I did With the pink wool you could replace all stone with something or all water with something and then it gets even more complicated here noise options and I don’t even know what all this does if you want to know more in-depth for what people know so far you could go to Minecraft game p.com slash custom and it’s about the world generation but not all of its actually filled in yet but I’ll go through what I know so density factors set this to 0 if you want Islands that’s what I did for mine and then amplify that’s self-explanatory And then size horizontal and vertical is about the smoothness of the terrain and like the size of the terrain so for example vertical if you set this to 4 then what you’d what happens is you get like cliffs instead of like islands like so even if you set floating island You set this to four you’re gonna have more cliffs than actual like balls of islands kind of and then height basically sets the height of the terrain if you set it to 256 it’s gonna go like all the way to the top and just be like This flat thing I don’t know it’s kind of weird so set it and lower and then X Z and Y scale this is for like the amount of horizontal and vertical detail according to the gamepedia so you want to set the Y to like a higher number I Think if you want more like vertical detail or something like that I wasn’t able to notice it too much but that’s like the only one I messed with and I don’t know any of these do and then structures you could add it through here but so far there isn’t a drop-down menu Like there is with the biome so I don’t do it through here I’ll show you what to do for that and then dimension options for some reason the default doesn’t work and like it doesn’t the world doesn’t load when I customize these so just set It to overworld for now so now what you want to do is go up to the top and hit copy and go into the data packets arm in the world so data packs into my data pack data minecraft dimension and then go into test dimensions if you want and then Just duplicate this so what we did was we created a world not a dimension so we have to delete everything for the world and just leave the dimension so go to Line six and line to delete everything there in between generator and the first bracket and then go to the very end and Delete the two second to last practice so the two before the last bracket just delete that and then you’ll have to get the structures so I have a different file here inside of the dimension folder there’s downloaded world settings this is I think one of the game devs tweeted It out so go into the structures area here so you’ll notice structures and then there is a single bracket so highlight everything after that single bracket so line 67 minecraft jungle pyramid and get all of the structures all the way to the ocean ruin and then Go to the last bracket that’s from ocean ruin and then copy that and paste it into structures and to make sure that you have the proper amount of brackets just to ctrl or command F and search for left brackets say it’s 32 and then right bracket it’s also 30 As you can see down in the bottom you just want to make sure that the amount of brackets you have is equal just to make sure you copy/paste it everything correctly so now save that and let me rename it to world two so once you’re in The game D slash execute in and then if it worked properly your dimension will show up in the autofill so just click on it and then do run TP at s and then to your coordinates and it will teleport you to the matching coordinates in your Custom world so I just had a shattered Savannah plateaux yep and here we go so as you notice let’s just fly around here so I didn’t actually set any like custom custom things really at all I decided to Savannah plateaux but if you want to configure your world after you created It already like you dragged it into your world and you don’t want to have to copy/paste and edit everything over and over again just leave so open up your dimension dimension file and then you could just change it from here so for example in density factor let me set this to 0 to Get floating islands unless replace with water with air and stone with bedrock so now that I set that what you want to do is go into the world folder and delete the dimension that already generated so test dimensions and then it was called world 2 so now if we go back into the Game you should see that it generates into a different world a different terrain so let’s see and now as you can see I have floating islands and they’re made of bedrock with no water everywhere so that’s how you create your own custom dimensions in Minecraft 1.16 and how to create your Own custom portals for those dimensions stay tuned for future videos I might release other videos relating to custom dimensions but not sure yet exactly what but the next video that’s coming out is going to be the custom mobs video so stay tuned for that and I’ll see you guys later you Video Information
This video, titled ‘How to Make CUSTOM PORTALS and DIMENSIONS in 1.16 || NO MODS!’, was uploaded by Timber Forge on 2020-06-13 18:44:17. It has garnered 65488 views and 1639 likes. The duration of the video is 00:33:51 or 2031 seconds.
We can now add CUSTOM DIMENSIONS and CUSTOM PORTALS through data packs in 1.16! This amazing addition to the already amazing update will allow data packs to add a wholeeee lot more than they used to. Today i’ll show you how to create or use this data pack in order to add your own portals into Minecraft which use your own portal frames, portal blocks, dimensions, and particles and sounds.
Check out my new website! https://tinyurl.com/timberforge
TABLE OF CONTENTS: 0:33 – Overview 2:18 – In Depth Explanation/Tutorial 18:42 – Customize and Personalize Your Own Portal 24:48 – Make a Custom Dimension
Dimension Generator: https://misode.github.io/worldgen/
Data Pack Download: (Dimension no longer works in 1.16.2, but this should still work for 1.16.2 dimensions) https://drive.google.com/file/d/1V_xO1Xg_iejYg-_qzoLxpF22ibEnXacd/view?usp=sharing
Resource Pack Download: https://drive.google.com/file/d/1o1e0kJP3kpb0y44xKllCffm7nxVTPtdA/view?usp=sharing
#datapacks #minecraftmods #minecraftdatapacks