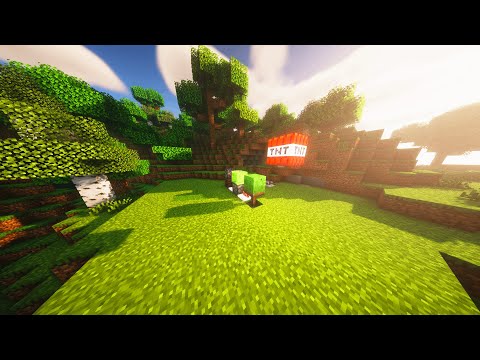
All right welcome to this tutorial where we set up forge for minecraft modding in 1 16 5. there is also a written version of this tutorial if you don’t have the time or you just want to quickly go through this it is linked down below the first link in the description So there’s four things that we need in order to start modding in minecraft forge the first thing is going to be a java jdk personally i recommend the openjdk from adopt openjdk right here link is in the description below make sure to choose open jdk8 and jvm hotspot and then you can just Take the latest release and download that and install that onto your computer if you want to use another jdk that is fine but make sure that it is jdk8 other jdks might run into some issues with forge the second thing you’re going to need is an ide or integrated development environment i Personally use intellij idea and i would recommend you do the same there is a community version which is free and open source so you can just simply download it once again link is in the description below the third thing you need for minecraft modding is not something that you can Download and that would be a java knowledge yes this is not optional you cannot start to make minecraft mods without at least knowing some java i would recommend at least getting to know the basics of object oriented programming maybe some knowledge of lamdas doesn’t hurt either but you need to have a foundation Otherwise you will be lost in the complexity of making mods with forge please please please first take a look at java if you don’t know it you cannot properly mod minecraft it is simply not possible it doesn’t matter it doesn’t matter what tutorial or course or guide you follow It doesn’t work if you don’t have a foundation in java and the fourth thing of course is forge itself i’ve of course also linked to this in the description below this is the download for micro forge for version 116.5 take a look at the right side here this is always the Recommended version and you want to download the mdk so simply click on mdk it’s going to take us to the add focus here so we’re just going to wait a couple of seconds and then at the top right corner a skip button appears and if we click that then the file will Actually download this is a zip file that you will need to unpack later if you don’t have a program to unpack this you can either use vinrar or 7zip to basically do that right so upon downloading it you choose a nice folder that you can put this into so i’ve already prepared a Folder and you’re simply going to put that in there and then you’re going to extract it so you’re going to right click and simply say extract here then we can actually take this zip file and delete it and now we have actually set up our forge structure right here And we can now proceed and yeah right after you have installed the java jdk intellij is an ide and of course download it for it and put it into your desired folder we can now start intellij idea this is a similar view that you should be greeted with If you have maybe previously worked with intellij then you can have previous projects on the left side here otherwise you will only see this you can either choose a new project open over import or get from version control we want to choose open or import and Then we can do a very smart thing we can take this directory just copy it with ctrl c and go back here ctrl v and then make sure that you actually choose the this actual directory not the source or the gradle folder but this directory where all of this is Inside and then click ok and it will then open this big screen right here this big window and it’s going to build and download a bunch of stuff so this can take uh quite a while and um we can just wait until this is done depending on how fast your Computer is this might take a few minutes that’s extended to which this can take this warning here can be ignored don’t worry about it we will talk about this and after this is done all right and we are finally done after actual four minutes and 46 seconds So this actually did take quite a long time but not to worry this is what i say even with a good computer and good internet connection this can take a while so please be patient and wait a couple of minutes and at the end even if there’s some red That comes in here most of this are infos or warnings as long as you have a build successful here at the end everything is fine even this deprecated gradle features warning that you are gonna get don’t worry about this as long as you have built successful Everything is fine but if you got build failed then there’s actually a few things that you can try before just uh quitting outright first of all you can delete this gradle.gradle folder right here not the gradle folder itself but the dot gradle folder uh just hit delete and then delete and Then once you hit that then you can basically rebuild the radal with the following command so navigate to the terminal and then put in gradle w gen intellij runs and then you hit enter and then it should rerun the build again if you then get a build successful that would be great if You still don’t get that put it in again and let it run again this sometimes might happen because there’s some issue with the download just restart it again and then you should get a build successful if you still don’t get that you can navigate to another directory and that would be To see users your username dot gradle and then inside of the caches folder just delete everything inside of here you might get a few errors then but then you can also rerun the actual command that we’ve just seen inside of the terminal and then it might work As well if it still doesn’t work can help you but if you leave a comment down below and in in the coming weeks i should also have an faq site up on my website so that you can basically check each of these steps that you might want To take there right from here on out i would assume that you had a build successful and will continue with the actual setup the first thing that we want to open is the build.gradle files we’re just going to double click this and the first thing that we want to change here is these Three lines so we have the version 1.0 we have the group which currently has com yourname.mod id and we have archive’s base name which is also equal to mod id we’re going to go through them one by one the first thing a version simply refers to the version Of your mod this is not the minecraft version however it is sort of a convention to put the minecraft version in front here and then basically make a dash and then put whatever your version of your mod is afterwards so that the user can actually immediately see okay this Is for this minecraft version and the version of the mod is this the group basically refers to the name of your package which contains your mod you can also think of this as a reverse domain so in this case it’s com your name mod id and i would actually Advise you to do this so basically just take your name and literally put in your name either your first name or your online name or your last name whatever you want to do so if this would be for example a mod made by google then this would be com.google and then The mod id which is we’re going to get to next for myself i’m going to keep this at tutorials by account and joe and i’m personally also going to change this comm to net now don’t just strictly copy this i would advise you to not do that because then maybe if Someone else looks at your code and it sees that it’s by tutorials by countingdraw.net then you might say well you haven’t wrote this code it’s from carmenjo so do choose your own name i would really advise this right and now on to the mod id so we have the mod id here twice And the mod id is actually a fairly important thing and it is a unique id that refers to your mod and how you can identify your mod for demonstration purposes in this case we’re going to call this the tutorial mod this is something that is you’ve probably seen Before in other tutorials as well but i think that in this case this is a fine thing to change the mod id to so this is in this case how i would do it and it’s very important that the mod id is written like this no space we’re Gonna get to that in a little while when we actually talk about the mod id in a little bit more detail right now we’ll just make a mental note of it and then we’re gonna see why the mod id has to be written like this for the next step we’re gonna press ctrl R or command or if you’re on mac this will bring up the replacement menu at the top and right here we will write in example mod and then here we’re going to write a tutorial mod so if you’ve chosen a different mod id then this is where you would put it Example mod will always stay the same because basically when we download forge then it starts with a mod where the mod id is example mod and this is what we want to replace now we basically want example mods to be put in the first thing here and then the Tutorial mod or your mod id you want to put into the second text field then we will simply hit replace all save this by hitting ctrl s and then we can close the replacement menu there’s one more thing that’s very important and that is the mappings those should be located somewhere on Line 34 maybe a little bit above maybe a little bit below depending on what version you’re using sometimes this can change and as you can see they are currently set to the mappings channel of official with version 116.5 this is one of the warnings that we have gotten and the idea is that This uses the official mappings provided by mojang so this is basically means that all of the names of the fields and the methods is basically the same as what mojang uses when they are developing minecraft now you can use them however i personally and once again this Is a personal thing that i would advise is to actually change to the snapshot that is provided by the forge and the mcp team i personally think they are more intuitive going forward with the both the video tutorial and some tutorials that i have on my website we’re going to be using The mappings there however i will always mention what mappings i’m using for each tutorial so that you can follow through without an issue so i will just copy them over the mappings are of course in the description below and we will simply switch it to this instead of the Official we have the snapshot and the version looks also a little bit different here but we’re not going to do anything with this yet however we will have to change one thing after we are going to rebuild the gradle file first of all let’s change the packages Remember that the group that we have chosen was net dot tutorials by carbon joe or rather that i have chosen and this should be reflected in the packages so moving to the project window on the left we can expand this java folder right here and then we can see the packages the Packages are calm.example.examplemode this might look a little bit different to you because i’ve already switched this you can go here to the show options menu and make sure that both flattened packages and compact middle packages are turned off then you will have the same view here as me right let’s open the example Mod and then we will actually see one thing that will immediately stand out actually there’s quite a few things that will probably stand out the first thing that we want to do is navigate up here to this package and we want to change this to be net dot Tutorials by copenhagen at least for me please note that this should be exactly what you have put in here you can also just take this and copy it over basically to make sure that you haven’t done anything wrong and then example mod of course we will also do Tutorial mod so we’ll replace that with tutorial mode now this is has an red underline that is not an issue we’re going to right click do show context actions and then move to package net tutorials by control tutorial mode what you will see is that the class that we’ve just opened has now Moved outside of the com example example mod to net tutorials per carton draw tutorial mode so that’s exactly what we want if you have chosen the com here then it’s probably going to be not in net but still in com in my case i can now select the com package here and Simply delete it by hitting the delete key and then delete if your custom package starts with com do not delete the com package but rather the example package that was contained in there now you should have something that looks similar to this basically the structure of your package being exactly the same As here another last thing that we need to do is we want to rename this class right here we’re going to right click on it refactor rename and then we’re going to call this the tutorial mod and we’re going to refactor this this will also change the name Inside of the class as well as well as the actual call of the constructor name basically i also want you to be cognizant of the java naming conventions also linked down below you should not name this class the same as your mod id so this should not be All uh lowercase tutorial mode do not do this that’s not the way that you name java classes like i said i’ve linked them down below so you can check them out as well but then we’re almost done with the setup there’s one more thing to do And that is to go a little bit in more in depth with the mod id that we have so as you can see this class this is sort of your mod class your main class has this add mod at the top here and this says currently as a string example mod now This is what we’ve seen this was the mod id that was sort of provided by default we’re of course going to change this we’re actually going to make our lives a hell of a lot easier uh down the line we’re going to navigate our cursor to the end of this curly bracket here And then we’re going to put in the following public static final string and then everything in in uppercase mod underscore id equals tutorial mod or your mod id in this case this shouldn’t surprise you this is simply a static string that we have now created and we can now replace this With the actual static string so we’re going to say tutorial mod we can actually see as well we can press tab to basically replace so if i press tab then the order generated suggestions is actually going to simply put this in and then dot mod id once again tab and now we have Our mod id in there as a static call to this field the reason why we do this is simply because having strings be everywhere inside of your project because the smart id we’re actually going to use a lot throughout making a minecraft mod having to write the string Every time might lead to some errors therefore it makes sense to have it be able to be called by tutorial mode dot mod id right one thing that i’ve already mentioned about the mod id is that it must be written in all lower cases with no spaces or special characters except for The underscore or dashes i would personally advise to simply put it like this so tutorial mod or lowercase or fine you might be able to separate them with an underscore here but that is like to the extent that i would go don’t be too fancy with it don’t put anything Crazy in there this is more than you need this is not something that is actually like important for the users necessarily so you could put anything in there just make sure to stick with the restrictions it will not work otherwise and now if we actually look at this comment here the Value here should match an entry in the meta inf mods tommle file this is the last file where we actually need to put our mod id into this is under resources meta in mods.tumble so we’ll open this and then here at line 18 you can see mod id Equals example mod this here we actually need to put in tutorial mod this is the basically the last line where we actually need to put it in without being able to reference the class because this is a resource it doesn’t know anything about the class this is why we actually need to put This in written like this we can also change the display name to tutorial mod just so that we have this save everything with control s and then we are actually good to go right and now what we’re gonna do is we’re gonna put in the gradle w gen intellij Runs command into the terminal and hit enter this will download some more resources that we might need for and some assets and as you can see build successful if you get a build fail simply put it in again and let it run again this sometimes might happen because There’s some issue with the download just restart it again and then you should get a build successful after this is done we can now hit this little elephant at the top right corner so this might have been bugging some of you for a little while this will basically load the changes That we’ve made for the build.gradle file so we will hit this and then inside of the build window here we can see that it’s going to update a few things for our actual project and there we go we get a build successful as well and we should get one error inside of Our tutorial mod class which is exactly this line 53 the logger info dot options here does not exist we can simply delete this line press ctrl s to save it and everything should be fine no more errors because this line is actually unimportant for us it simply outputs some of things You might get another error right in this process imc method right here this is simply a way of communicating between different mods but this is a way more advanced topic than we’re like ever gonna get to in a little while this is why we don’t actually need it and Everything inside of here we can actually also safely delete and then no more errors should be found and now finally we can start minecraft and see whether or not it works we will navigate to the gradle the top right here and then we will expand tasks and we will expand fg runs and There is the run client task that we can run we will double click this and then we will make this small again and then we will also see minecraft modding run client should appear at the top right here gonna do a few things run client and there might be a few errors here Or rather a few warnings those are warnings we will see that minecraft is starting and if everything works fine then we will actually get to the main menu let me just quickly turn off the music here and make this a little bit quieter and now we can actually go to mods And we can see tutorial mod is actually in there there you can see that the tutorial mod has been successfully added to the game there’s no functionality yet however the tutorial mode does appear here and everything works from here on out so first of all congratulations you have actually successfully modded minecraft Of course there’s a bit more to it than this however these were great first steps by congratulations on setting everything up i hope everything worked for you as it was intended to and you can now basically start your journey on making your own minecraft mod like i have already mentioned All links to all the downloads are in the description below you will also find a written version on my blog for the entire video here as well as a github repository for basically this state that we are now in for this particular project if you found this useful and you learned Something new i would of course really appreciate a like and subscribe for more videos on minecraft modding game development in general and a whole bunch of other things if anything is unclear please feel free to leave me a comment down below and i will help you best i can And i will see you in the next video so yeah you Video Information
This video, titled ‘How to Start Minecraft Modding 1.16.5 with Forge | Forge 1.16.5 Modding #1’, was uploaded by Modding by Kaupenjoe on 2021-06-07 19:30:00. It has garnered 133818 views and 2496 likes. The duration of the video is 00:18:47 or 1127 seconds.
In this Minecraft Modding Tutorial we’ll carefully go through step by step on how to setup the Minecraft Modding API Forge for Minecraft Modding in Minecraft Version 1.16.5
== WRITTEN TUTORIAL == 📃 Blogpost: https://url.kaupenjoe.net/yt4/blogpost
== MINECRAFT COURSES == ▶️ Learn Forge Modding with Minecraft 1.18: https://url.kaupenjoe.net/CourseForge118 * ▶️ Learn Fabric Modding with Minecraft 1.18: https://url.kaupenjoe.net/CourseFabric118 *
== MAPPINGS USED THIS TUTORIAL == mappings channel: ‘snapshot’, version: ‘20210309-1.16.5’
== MINECRAFT FORGE 1.16.5 PLAYLIST & SUBSCRIBE == 📃 The Minecraft Forge 1.16.5 Playlist easily accessible here: https://url.kaupenjoe.net/playlist/116forge 🔴 Don’t forget to SUBSCRIBE for more awesome tutorials: https://url.kaupenjoe.net/tutorials/sub
== ASSETS & DOWNLOAD LINKS == GitHub Repo: https://github.com/Tutorials-By-Kaupenjoe/Minecraft-1.16.5 AdoptJDK: https://adoptium.net/index.html?variant=openjdk8&jvmVariant=hotspot IntelliJ: https://www.jetbrains.com/idea/download/ Forge: https://files.minecraftforge.net/net/minecraftforge/forge/ Java Naming Conventions: https://www.oracle.com/java/technologies/javase/codeconventions-namingconventions.html
== TIMESTAMPS == 0:00 Intro 0:18 4 Things we need to start Modding 2:16 Setting up Forge 2:34 Starting the IntelliJ project 4:19 Some quick Fixes for BUILD FAILED 5:41 Changes to the build.gradle file 8:35 Mappings 9:54 Changing the packages 12:14 The Mod ID 15:03 gradlew genIntellijRuns & Load Gradle changes 15:55 Fixing the error that should appear 16:42 Finally starting Minecraft 17:55 Outro
== TAKE A LOOK AT MY COURSES WITH COUPON CODES == ▶️ NEW Forge Modding with Minecraft 1.20.X: https://url.kaupenjoe.net/CourseForge120X ▶️ Learn Forge Modding with Minecraft 1.18: https://url.kaupenjoe.net/CourseForge118 * ▶️ Learn Fabric Modding with Minecraft 1.18: https://url.kaupenjoe.net/CourseFabric118 * ▶️ Complete and Roblox Lua Game Development: https://url.kaupenjoe.net/RobloxCoupon *
== SUPPORT ME ON PATREON == ▶️ https://www.patreon.com/Kaupenjoe
== SOCIALS == Discord: https://discord.com/invite/yqxykanpWf Personal Twitter: https://twitter.com/Kaupenjoe
Instagram: https://url.kaupenjoe.net/tutorials/instagram Facebook: https://url.kaupenjoe.net/tutorials/facebook Twitter: https://url.kaupenjoe.net/tutorials/twitter TikTok: https://url.kaupenjoe.net/tutorials/tiktok Written Tutorials: https://url.kaupenjoe.net/tutorials/blog == LICENSE == Source Code is distributed under the MIT License.
== ADDITIONAL CREDITS == Thumbnail “Download” Icon made by Pixel perfect (https://www.flaticon.com/authors/pixel-perfect) from www.flaticon.com
Outro Musik by Kevin MacLeod: “That’s a Wrap” Kevin MacLeod (incompetech.com) Licensed under Creative Commons: By Attribution 3.0 http://creativecommons.org/licenses/by/3.0
== AFFILIATE DISCLAIMER == * Some of the links and other products that appear in the video description are from companies which I will earn an affiliate commission or referral bonus from or are my own products. This means that if you click on one of the product links, I’ll receive a small commission or additional kickback without any additional cost for you. This helps support the channel and allows me to continue to make videos. Thank you for the support!
== HASHTAGS == #MinecraftModding #Minecraft #MinecraftForge #Kaupenjoe