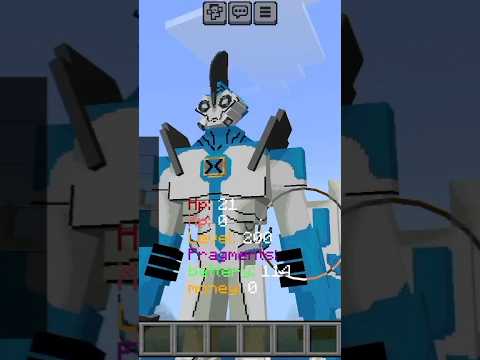
In my last video we took a look at the first five nights at Freddy’s game location and recreated a night of gameplay using command blocks everything from the doors and lights and even the camera system were functional and on top of it the minigame even included animatronic jump scares so continuing on With this series we are now going to be moving on to the second five nights game and see how we can build the location and then add all the gameplay mechanics all in vanilla Minecraft this game is undoubtedly bigger than five nights at Freddy’s 1 so let’s take a look at Everything we need to know before we get started building the FNAF 2 Pizzeria is much bigger than the first games which comes with even more animatronics to defend from a total of 11 animatronics are present meaning there are a lot more features to add to the build with each One of these characters comes multiple new gameplay mechanics as well such as the Freddy mask the flashlight and the music box at the price counter now just because there is a lot more features to add it does not mean that this will be more challenging than the FNAF one Builds gameplay as unlike the first game each animatronic has one set path movement towards the office meaning there is no required randomizer needed for each character on top of this now that I have experience with making the first FNAF game we can repurpose some of the command blocks from the first map Such as the jump scare commands as well as the timer mechanic to wind up the music box however before we get started on all the commands we first need to build the location itself so as always I’ve outlined the entire Pizzeria to know where everything is going to be set Just like the FNAF 1 Pizzeria I’ve also added in some custom areas that aren’t sure enough in the FNAF 2 cameras such as the two bathrooms just above the main hallway here I’ve also added in a custom kitchen just next to the main stage and finally is this hallway here next to the Main party room that serves as the entrance to the pizzeria you’ll also notice these three giant patterns on the ground here and that is because once again we will be using map art to add all the checkered patterns all around the pizzeria we’re also going to be using custom player heads however we’ll Get more into that later on however with all pre-build preparations now all finished there is only one final thing left to do and get started on the build foreign Foreign Foreign Foreign And with about an hour and a half worth of building out of the way with we now have an almost completed FNAF 2 Pizzeria this build is a lot different compared to FNAF ones as instead of the darker walls this build is mostly made up of white colored blocks alongside some Really colorful decorations the build itself is really bright at the moment however that is because of the night vision effect that I have on right now just so that we’re able to see all the details a bit more clearly before we add in some proper lighting using light Blocks and now with all those features added in as well as some extra changes we now now have a fully completed FNAF 2 Pizza rail with some light blocks for natural lighting and also some custom player heads to make this place feel a lot more immersive you can see all the Party hats that put along the tables we also have some plushies by the price counter some smaller colored blocks for the balloons and finally other security cameras hung along the ceiling I really do enjoy using this building technique and I do think it is severely underused So if you do want to try this out for yourself then I will leave the link in the description down below to the website that I use so you can add in some custom player heads to your own Minecraft worlds as I really do think that they can change your build to make It feel a lot more alive but now that we have a completed build it is now time to make a night of working gameplay starting by adding in each one of the animatronics and for that there is another building technique that we’ll be using that I think a lot of you might Find really interesting so for each one of the animatronics we’re going to be using armor stands so for this we are using this website here which I will once again leave the link to in the description in case you want to try this out for yourself where we can customize Our armor stand to our liking and we’re doing this because each one of the FNAF 2 animatronics has different poses when they try to get to the off office you can see on the side here all the different types of customization that this website lets us use and this is Still all in vanilla Minecraft as what we are doing is making the armor stand to our liking which then this website is going to turn into a command that we can then summon in Minecraft I’ll use toy Bonnie as an example for this as his post changes progressively as he gets Towards the office he starts out in a default pose and then once he gets to the air then he crawls along the floor and this website lets us do that using all of these features here so the first thing that we want to do is to remove The base plate so that way we don’t have that slab at the bottom we also want to turn on no gravity so that way we can teleport that armor stand wherever we want without having to worry about falling to the ground and finally we want to show arms so that way our Animatronics actually have arms next up is the rotations of each one of these features so you can see here that we can rotate the armor stand to our liking with this Stone button at the front here showing us where the armor stand is facing forward so right now it’s facing Towards us and now we can customize this to our liking so you can see that we can change the head rotation just like this if we want it to look left or right right we can also go ahead and change each one of the legs even up to the arms And both sides now that we have the pose that we want for toy Bonnie on the main stage we can now go ahead and move on to the next step where we want to enable equipment so that way we’re able to put custom armor and a custom player head on Bonnie to actually make the armor stand look like Bonnie himself we’re going to skip all of this we’re going to be adding in all of those features in Minecraft so next we’re going to move on to custom name and this is really important as this is going to determine What we want the entity to be named so that way the command block Knows What entity to teleport at what time so for this we’re just going to name our toy Bonnie T Bonnie stage so that way that we know what entity gets teleported whereas when we’ve changed poses we’re Going to have to make a completely different entity so we want to name each one of the stages of Bonnie in a different way so that way we know which entity needs to get teleported where so now that we have the armor stand to our liking with all the customizations you Can now see that we have the summon command down here at the bottom which we can go ahead and click to copy and now we can go ahead and put this in a command block in Minecraft so now that we’re back in game we can now go ahead And summon in the armor stand we just made so we’ll go ahead and stand on the Block where we want toy Bonnie to be placed and if we go ahead and paste in the command you can see that we get the armor stand that we just made at that Website now unfortunately it’s not facing in our Direction so what we’re going to have to do is face it towards us so if we go ahead and teleport it so we’re going to do slash TP at e for all entities and name equals T Bonnie stage Because that is the name of the entity that we made and now we want to put it at that exact block it is standing on and we want it facing towards us so I’ll just go ahead and do that and you can see that it is now facing towards the Mains party room and now we can go ahead and put all the items we want equipped on him and now we have the toy Bonnie when he’s going to be up on stage and this is just part one as like I mentioned each one of the animatronics changes poses as they progressively get Towards the office so what we’re going to need now is another Idol animation when he’s just about to crawl an event and the second one when he’s actually in the vent staring at the player in the office so here are all four of the toy Bonnie poses that we’re going to be Using for this map keep in mind that this is just for toy Bonnie and we’re going to be needing to do this exact same thing for each one of the animatronics for this map so I’ve already shown off the first pose the second one here is when he’s just about To crawl into the air vent the third one is when he is in the air vent and is about to start getting inside the office and the fourth one here that I added in is when he is in the office and that’s when you put on your Freddy mask and Then he stands in front of you and then disappears before restarting his cycle again so what we’re going to do since this took a little bit of time is I’m now going to go ahead and add in poses for every single one of the animatronics And then we’ll come back to where I show each one of them off and now we have all 33 of the different poses for all 11 animatronics you can see at the very end here we have all of the toys starting with toy Freddy and moving our way all The way up to mangle here which you can see I’ve done my best with a single armor stand without making it overly complicated and as we move on to the second row we start to see some of the Wizards including the puppet and balloon boy here which I used a smaller armor Stand model for as balloon boy isn’t as tall as some of the other animatronics and then finally on this last row we have the remaining Wizards now for the time being I can’t actually do anything with these armor stand animatronics as we haven’t actually added in any of the Gameplay to be able to make them functional so what we’re going to do next is we’re going to go over to the office and we’re going to start by adding in some functional gameplay so that way we can actually make these guys work so for the office scenario this is What the point of view is going to look like you can see that each one of the entrances has been blocked off by using black concrete and that’s so that we don’t actually need to add in any light and the light is already stored behind The block so you can see on the desk that we have three different buttons and each one of these buttons correlates to each one of the entrances to the office itself so once we hit this button here it would remove this black concrete block right here and you can see that The light gets revealed and then we can get to see if there’s an animatronic in the event or not and then after a second it will close back off so that way we cannot see back in the vent the same thing is going to work for the other Side and then finally here we have the main entrance to the office which you can see has been blocked off once again except this time instead of just removing one block when we hit the button it’s going to remove this entire sheet of black concrete here and would Allow us to see through the rest of the hallway so with all the commands now added in here is what the full feature looks like so if we click this button on the side of the desk that black concrete block gets removed for a split second And then we get to see what’s going on inside the vent and the same works on the left side where if we hit the button we get to see what’s going on in the left vent and then finally is the hallway button where if we click this Button that sheet of black concrete gets removed for a second and we get to see what’s going on in the hallway and see if we need to flash foxy at the end of it now you’ll also notice that I’ve added in some extra black concrete blocks in the side of the different Doorways here and that’s just so that we get to limit even more visibility while also keeping the place focused on what’s going on inside the hallway and not in each one of the different rooms and if you’re interested in what the commands look like behind it this is it each one Of those buttons is linked to three different command blocks was the first one being this one right here which is a repeating command block which detects once the stone button has been pressed once it is done that it will then send an output to this comparator here which Will turn off this redstone torch which is powering this command block right here which is the block that sets the block to Black concrete so when the button is turned off it will send this output right here which will set the vent to be black concrete now when we go Ahead and power that stone button it will then send an output to this command block right here which is going to set the area to an AIR block letting us see what’s going on inside the vent or the hallway now we need to make it so that The player only has a certain amount of uses before the flashlight itself runs out of power so what we’re going to do next to it is we’re going to make a smaller setup and you should recognize this if you’ve watched the FNAF 1 building video as we are going to be Building pretty much the exact same build as what we used for the power now that we have the system working we now want to make the indication that will display how much power is actually remaining for the flashlight so for this we are going to be using the Boss Bar Command I’ve never used this command before however messing around with it in a test world has led me to do some really cool things with it so what we’re going to do is we’re going to add a Boss Bar we’re going to call it first and Then we’re going to name it Flash light so there we go just like that so now if we go ahead and hit enter we have created the custom Boss Bar Named flashlight now we actually want to make it visible so what we’re going to do is We’re going to set that bus bar to visible so we’re going to do that and now you can see at the top of the screen we now have the flashlight bar that will indicate how much power of the flashlight is remaining now if I set the Boss Bar’s value to 100 you can see that the bar on top of the screen changes and fills up completely and this is how we’re going to indicate how much power is remaining so say I dropped the value down to 75 power you can see that it Goes down by a quarter and if we go down to another 25 you can see that the Boss Bar is now halfway filled up and those are the exact commands that we’re going to be inputting into these command blocks another flashlight power circuit is now all completed these three command Blocks serve as the input so every time the button on the desks are being pressed they’re going to send an output into this block unpowering this redstone torch which will unpower the sticky piston removing the Redstone Block which will unpower this Redstone line which will then start this circuit right here Where the items get funneled down into the chest which will activate these command blocks eventually now these three command blocks here are just the command blocks that are going to remove these three comparators here stopping us from being able to use the flashlight once it’s run out of power so now the Next mechanic we’re going to be working on is the Freddy mask mechanic so right next to the desk is a box with a button on it and once we click this button it would put the Freddy mask on our head stopping any of the animatronics that have wandered into the office from jump Scaring us we would also need to disable all of the cameras and the flashlights while that is happening and then once we want to take the Freddy mask off we go ahead and click the button again and then we would go back to our normal view This mechanic is going to work by using a t flip flop so every time we hit the button it would send an output from this command block into this T flip-flop which is going to rotate this item around either activating this command block or this command block now what we Want in each one of these command blocks is to apply a pumpkin to our head to make it look like we’re wearing a Freddy mask so we’re going to use the item command for this we’re going to replace the item on our head so we want it to be Us on our head and we’re going to replace the block on our head with a carved pumpkin right here so that way it makes it look like we’re actually wearing the Freddy mask so now once we’re done using the mask we actually want to remove it so what we’re going to Do is we’re going to replace the cuffed pumpkin with a block of air so that way we get our visibility back so now if we go ahead and test this out now we have the Freddie mask not applied because we can see clearly however once we were to Click this button again you can see that we get the Freddy mask applied and now our vision has been obstructed and it looks like we’re actually using the Freddie mask and if we want to take it off we just go ahead and click this button again and it’s been removed next We want to make it so that the player cannot use the flashlight when the Freddy mask has been turned on so what we’ve done is copied those three same command blocks we used for the flashlight power which removed these comparators and we’re just going to paste them in front of this command Block right here so every time the Freddy mask has been put on it will remove these three comparators now when the Freddy mask has been turned off we want to use the same three commands except we’re going to replace the air block with the comparator so that way They comparator gets turned back so that way we are able to continue using the flashlight so now the Freddie mask mechanic is now all completed however there is is a small problem that comes along with this and it is the fact that I made it so that the flashlight never Actually runs out of power as once the power gets removed from the flashlight it removes these three comparators now what’s the problem with this is if we were to put on the Freddie mask and then take it off these three command blocks re-add those comparators letting us Reuse the flashlight fixing this x Point wasn’t difficult at all however as all I had to do was replace the three chain command blocks with three repeating command blocks that require Redstone to activate them so when this redstone torch gets activated it will then send a continuous output into these three Command blocks here which will always set these three blocks to be air blocked so no matter how quickly we toggle the Freddy mask on and off these three blocks will always remain in AIR block stopping us from being able to use the flashlight moving away from Office Mechanics let’s take a look at the music box now this took a surprising amount of time to get right however I do think that they finally come up with a design that should work really well for this map and it all starts with something that looks a little bit like this There’s four command blocks on this side and two on this side however I want to first talk about this small system right here where we have two double chests going into two different Hoppers which lead down into the same double chest down here with the comparator in front Of it with a redstone dust line in front of that in each side of one of these chests and Hobbits we have a lot of boats and it is because boats are non-stackable items meaning they send a different signal strength than stackable items do so the way this works is these Two chests appear funnel extra boats into this chest here which is what determines how much charge the music box has as many items get funneled out into this chest this comparator will send out a different signal strength slowly going down which is going to then wind down The music box but however if we were to do that all those items are then going to get funneled down into this chest down here now unfortunately that happens really quickly so what we have here is a small system which slows down the time that it takes for all the items to get Sent into that bottom chest there so if we go ahead and start this little Redstone clock you can see that this redstone block here gets set and then removed allowing the items to slowly get transferred from this chest into this chest down here this system however is Not perfect as if we go ahead and open up this just you can see that there are a lot of items missing and if we look at the bottom double chest of this double chest obviously has a limited amount of storage so this would block Up the Music Box not allowing us to wind it back up again after all of these boats have left the chest so to fix this we have these two command blocks here so this command block here is cloning these two double chests which are filled with boats and are then constantly replacing them with These two chests up here so if we go ahead and activate it to always active now these chests are always active and are constantly being filled up with boats allowing us to have an infinite supply of boats that are going to be drained into this chest here now for the Storage system we’re going to be doing the exact same thing except this time we are cloning a completely empty chest so if we go ahead and activate it we now have infinite storage inside of this double chest down here allowing us to constantly have new items cycle through This system while these top two Hoppers are always unpowered they’re going to be constantly funneling boats from this top chest down to this one right here so the way we want to stop this is by powering these two Hoppers by putting two redstone blocks next to each other and You can start to see how how the Redstone Dust line starts to deplete in power which is what’s going to be winding down the music box now by doing this we actually have a way to wind back up the music box so if we go ahead and Remove those two redstone blocks you can start to see how the power of the Redstone Dust line is starting to regain itself and this is how they’ll wind up and wind down mechanic are going to work so once we’re in the camera system and we throw a specific item while looking At the price counter those two redstone blocks are going to get removed allowing this powered line to go back up fully and when we’re not looking at that camera or winding up the music box then those two redstone blocks will get put back and allowing the Redstone Dust line To deplete which will slowly wind down the music box and with the circuit now completed this is what the finished music box design looks like I’ve added in all the command blocks that make this functional by once again using the Boss Bar command as seen at the top of the Screen where we have another Boss Bar to indicate how much power in the music box is remaining so as this bar here starts to deplete in power it’s then going to unpower these Redstone repeaters which is then going to turn on these Redstone torches which is then going to send an Input into these command blocks which is going to show us how much power of the music box is left when the music box is fully charged up it’s going to set the bus bar to 100 value and every time these repeaters start to get unpowered It’s going to go down in intervals at 10 so it starts at 100 power down to 90 80 70 all the way down until the music box is depleted at zero percent when we want to power back up the music box this Redstone line is going to start powering Back up which is going to activate these repeaters here which go into these command blocks on top of these other blocks which indicate another value and this time they go up the same way as they go down so it starts from zero and goes all the way up to 100 until the Music Box Bar is fully completed so let’s go ahead and test this out so if I flick this lever we get an item called windup music box and you should start to see that the Music Box Bar is slowly going down now if we go ahead and throw This item you’ll start to see that it starts to get round back up again and this is exactly what we want so when we activate camera 11 at the music box then we’re going to throw this item and it’s going to recharge the music box only when we’re looking at that camera Because we don’t want to be able to wind up the music box when we’re looking at other different cameras so that’s something we’ll have to set up when we get to the camera system but as far as the music box is concerned the system is now all completed and I think it works Really well so is the music box now completed there is only one final gameplay mechanic remaining before we get started on the animatronic past movements and that is the camera system that lets us look around the FNAF 2 Pizzeria now this is actually a different design than the one I used for The FNAF 1 video so let’s go ahead and check that out here is an overhead view of the new camera design that we’ll be using for this map you can see that there’s a lot different compared to the one that I used for the FNAF 1 location However this design has a lot more improvements and fixes a lot of flaws than the FNAF 1 camera system heads so for example the first problem was that there were only nine inventory slots in a player’s inventory and there are more than 10 cameras in these locations so I Had to open up my inventory to throw the remaining cameras this system fixes that by having two different pages so these chests right here are going to give us the items that are inside of them so for example there are three different pages page one is cameras one all the way to Seven and then we have a scroll roll bar at the very end so if we were to throw that scroll item it would give us all the items in this chest allowing us to look at the other cameras in the pizzeria this command block here will Then detect that which will then send an input into this toggle flip-flop which will then change whichever camera system we are looking at so for example all these command blocks here are for scroll number one right here and then all of these chain command blocks here are for Page number two which give us all the items in this chest right here now this third chest is a little bit different as this is the music box chest as we don’t want to be able to wind up the music box while looking at any camera so this is a Little bit different so I’ve set up this small string of commands here so when we’re looking at the music box camera it will then give us that item allowing us to wind up the music box finally are these command blocks here which serve as the actual camera system itself so once All of these repeating command blocks have been activated they will then give the player all the cameras needed for that specific page and then they will detect when the player has thrown a specific item so let’s use this strip for an example which is camera 01 so When the player throws the camera or one item this command block will detect it which will then go into this comparator here which will turn on the redstone torch underneath this command block which will then activate this command block teleporting the player to the camera 01 position in front of the Teleport command there is any chain of chain command blocks after that now what these do are giving the player back the camera that they just thrown as well as all the other cameras that are in page one so for example when the camera has been thrown in page one they then want To be given the page 1 cameras back and not the page 2 commands so these two chain commands actually give out the two different pages as if we’re in page one we don’t want to be given a page two command and the same thing vice versa each one of these chain command blocks Then gives back the cameras in the same order they were given in the inventory and not anywhere else so that way we don’t have to actually open up our inventory to cycle through the rest of the camera so that leads us to these final command blocks here which clear The rest of the inventory to make sure no other cameras are in here which would end up messing up with the rest of the system so let’s quickly scroll through all the cameras so you can see an example so right now we’re in the office and you can see that the flashlight bar Is on top of the screen however once we we go ahead and activate the cameras you’ll see that the bar disappears and that’s because we obviously don’t need to see the flashlight power when we’re looking through all our cameras but let me just go ahead and scroll through all Of them until we eventually reach the end table we have the scroll wheel where it’s going to take us to the next page and we get taken to camera 08 the first camera in the next page so let’s go ahead and continue on through camera 9 The show stage camera 10 is this party room and Camera 11 is the music box and you can see that we got an extra item in our inventory which lets us wind up the music box and we also got the music box bar at the top of the screen so this is The only time we are going to be able to wind up the music box so that way it balances out the game a bit more and finally the last camera is Camera 12 and if we want to return to the office we start the office Tab and we’ve been Taken right back here hopefully you’re now able to understand how this contraption as well as some other circuits I’ve made in this video will work as I do understand how Redstone and command blocks can be rather complicated especially to those who don’t have as much experience with this stuff however Personally I do think it is really cool how I was able to improve upon a previous design and fix a bunch of floors while making get more compact in the process however it is now finally the time to move on to the animatronics themselves now since there are a lot of Characters to deal with here we’re going to be working on this in rows starting with the toy animatronics up here then moving on to the second row where we have different characters with different mechanics before finishing the whole thing off with this third row right here So we’re going to begin with toy Freddy toy Bonnie toy Chica and mangle as they really have the simplest mechanic out of everyone else as all we need to do is teleport the appropriate armor stand to the right place at the right time before they get teleported to the office and Then we get the timer mechanic which is then going to say whether they jump scare us or not depending if we have the mask on or if we flip up the camera a few hours later here is the current work done with all of the Toy animatronics Now fully completed you can see that this is kind of a mess however I’ve tried to sort things out as clearly as I possibly can and we’ll go over a few examples so we’ll use chica for our example here and she has the most visible changes as she gets towards the Office so you can see the contraption that we have here that actually moves the animatronics from place to place so when they start the night they’re going to be on the main stage obviously and and then they’re gonna go down to each one of these areas that I’ve marked with Designs here using all of these command blocks here and like I said earlier on in the video when we use the armor stands we have named each one of these armistence different names so that way we know where each one of these poses has to be placed around the pizzeria the Top platform commands are simply just for the animatronic movements themselves so when they start from the main stage all the way until they get to the vent in the office so these command blocks up here are just to have the animatronic in each area just so that I could know Where they were going to be and what that would look like so the system starts with this timer right here where this redstone block gets removed unpowering this Hopper here which means all of these items are then going to funnel into this chest and once all the items have left this Hopper this Comparator will turn off turning on this redstone torch which will then activate this chain of command blocks right here which is then going to move on to the next row right here or The Next Movement pattern is going to begin and so on and so forth all the way until the office Now the second platform underneath is dedicated to the jump scare and The Mask mechanic to scare away the animatronics and once again it starts with a timer here so once all of these items in this Hopper have left and funneled into this chest ales then going to start two Different circuits here one of them is for the mask and the other one is for the jump scares let’s start with this one so once all the items have left this Hopper this redstone torch will then turn on activating this command block right here now we also have a second Command block here which detects when this item right here has been replaced to an AIR block letting us go ahead and use the mask so this command block here is detecting when the mask has been turned on and this command block right here is detecting when that block has Been removed because we obviously don’t want the idle animation of the animatronics in the office while we’re just playing throughout the night so once that block has been removed and the mask is turned on it will then activate the sequence where the animatronic stands in front of the desk before Moving away and restarting their whole cycle the jump scare chain Works in a similar way where once a single item has been put into this chest here it will activate this comparator deactivating this redstone torch which will unpower this Hopper and start filtering items from the Hopper into this chest once all Of the items in the hopper have left it will then activate the threadstone torture putting a single input into this and gate here so the way this works is we want two different inputs to be activated for the other commands to be working so we want two things to happen For one thing to happen if that makes sense so our second input right here is detecting whether or not the player is in the office or in the camera system so right now we’re not in the office meaning this part of the system has been activated this circuit right here is Really just so that the animatronic cannot jump scare the player while they are staring at the animatronic in the event we actually need the player to be in the camera system so that the animatronic has time to jump at the player while they’re in the camera system because if we’re just staring at The animatronic then there’s no need for that so we want both things to be happening to be able to activate the chain commands to activate the jump scare it really is just a lot of repetition adding in each one of the command blocks for each character now of Course there are some exceptions to this where some characters work in different ways such as balloon boy which instead of having a jump scare he permanently disables the flashlight by using the same three repeating command blocks that we used when we put on the Freddy mask So that way once balloon boy gets in the office he permanently disables the flashlight the puppet also works in a different way as this isn’t an active character throughout the entire night so what I’ve done is I’ve added in a spare chain command block at the very end There so when the music box hits zero percent charge it will then start these chain of command blocks here which will rise the puppet out to the music box and then go ahead and jump scare the player I also added in each one of the music box themed songs such as the idle Wind-up theme and also the Jack-in-the-Box theme song that plays when the puppet is out to get used to each one of those is going to be playing at the appropriate times throughout the night but now it is finally time to move on to the final animatronics which is All of the Wizards here which should be pretty similar to all the toys however there are a few mechanics that do need to be changed up as well as some different gameplay mechanics in general such as withered foxy and golden Freddy who work very much differently to Everyone else here so I’m gonna have to go ahead and figure out how that will work however I do have some ideas that should work really well and now with all 11 animatronics fully added in we now have a completed gameplay system I’ve gone ahead and added in some bonus Features as well such as the features at the beginning of the night where we have a small room over there and also the time system here which indicates what time it is throughout the night but going back to the animatronics themselves you can see that we have an Even bigger mess than what we had previously but all the animatronics have now been added in and should hopefully work properly the way they are intended now let me quickly go over the withered animatronics as they do have a specific feature that is different from the toy animatronics and that’s the fact that They can teleport the player back to the office whenever the animatronics themselves enter in the office so they can take down the player’s Monitor and then the player has to react quickly by putting on the Freddie mask which will then scare off the animatronic and then make them restart that cycle that Mechanic carries over for withered Chico with a Bonnie and withered Freddy now for foxy and golden Freddy they too were in different ways so golden Freddy is set on a timer and will occasionally enter the office in the middle of the night so what we have to do is quickly Go back to the office and put on the mask and then it will scare golden Freddy away and then we can go ahead and continue what we were doing so he’s gonna occasionally appear using this timer system right here and if we don’t put the Freddy mask on in time then He’ll jump scare us with this invisible armor stand handle we have right here finally is Wizard foxy who works in the same way as the puppet does as we have a smaller version of the music box set up here so every time we use the flashlight In the hallway it will send a boat from this dropper into this chest which will eventually start powering up this Redstone line and eventually go into these chain command blocks here which will send foxy back to parts and service now before all that we have these three chain commands here which are what Actually teleport the armor stand to the hallway then once this chain is completed it will send over to this chain which is where the armist then gets teleported closer to the office before finally jump scaring the player if we don’t flash him enough in time so now with every gameplay feature now Added in we have a completed Minecraft map and we can go ahead and test out the gameplay and see if we can survive a knight of Five Nights at Freddy’s 2 in Minecraft I hope that you enjoy and let’s see how we do alright let’s go Ahead and begin 12 am the first night I’m honestly a little bit nervous for this as this is going to be a lot more chaotic than FNAF 1 especially dealing with 11 animatronics instead of for nap one’s core four but the first one we’re gonna deal with here is the music box so We need to keep this thing wound up at pretty much all costs as later on in the night it’s going to be really challenging especially when we have all the Wizards after us now yeah the toys are disappearing yeah they’re both gone awesome good to know that they’re both The toys are disappearing so they’re gonna appear in the hallway soon however for the first about half hour of the first hour We’re Just Gonna Keep winding up the music box and maybe actually I’d rather be safe than sorry actually let’s check if anyone’s here no one should be Here yet yeah it’s a little bit early let’s go ahead and honk the nose for the good luck and let’s go back to the cameras okay let’s check okay don’t need to think about that for the time being so let’s go back to the music box and Keep this thing wound up it is going to be our top priority 1am good start to the hour could be a bit better with the music box winding up we need to be better at it going straight back to the cameras once we’re done with everything in the office so check everyone’s here There’s toy Freddy at the end of the hallway that’s good to know let’s go straight back to the music box counter I really want to check all the other cameras however this music box is really going to keep us pinned to this camera I mean that’s that’s all for nav 2’s Gameplay really is it’s going straight back to the music box when you’re done with things in the office there’s golden Freddy get rid of him never all right good the mangle and toy Freddy is that okay hi guys how are you doing and Bonnie okay get rid of both of them can We get rid of both yeah there we go that’s Freddy is Bonnie going to appear now there we go there’s Bonnie as well so two birds with one stone wait for them to leave 2 A.M awesome so Mango’s hanging out there they’re eventually going to enter the office however for The time being let’s go back to camera 11 and wind this thing up just at about half percent power that’s okay we really want to keep it above the halfway mark however as later on it’s going to get really really important so anyway an event yep there’s balloon boy get rid of You wait for the mask to take off maybe oh no that’s cheek okay so good thing we kept it on and then let’s go ahead and take this off and check if anyone’s here that’s Freddy that’s wizard Freddy saw the Wizards are starting to move now all Right let’s go to the music box and make sure that’s nope never mind all right Freddy’s taking down our monitor so all the Wizards can do that so we are going to need a bit more attention to make sure that our monitor doesn’t get pulled Down by any of the Wizards so let’s not go all right put the mouse back on 3 A.M halfway through the night our flashlight battery is doing okay I’m not too worried about that honestly however let’s go ahead and go straight back to the music but yeah go right back to the Music box and wind this up that is not good we need this to be higher up than where it is right now even with all those animatronics in the office we need to keep it above the halfway mark and definitely not where it was just then Anyone there cheek is at the end of the hallway I think that’s the wizard Bonnie there as well yeah that’s wizard Bonnie anyone else in the vents we’re doing good all right straight back to no never mind all right where the cheek is that put the mask on for with The Chica and Bonnie at the same time all right cool both of them at the same time once again get rid of you trigger come on disappear whenever you feel like it we really need to go back to this music box was it Bonnie’s there 4am we’re almost there just keep this music Box wound up get it to at least 75 power there is good and now let’s go back to the office is anyone here with it Bonnie is still at the end of that hallway let’s keep that in mind as he’s going to appear in the event eventually however No one is there so we’re good to go back to the music box and wind it up all right we’re doing better now with it keep it at 80 and back to 100 awesome back to the office let’s make sure no one is here in advance or the hallway We’re doing good I’m tempted to check in the vent cameras actually yep okay building boys there put the mask on for balloon boy flashlight is halfway through however we are at 4am or 5 am I don’t remember which and does mangle and with a chica not with the Chica toy Chica Five a.m down stumbling over my breasts this is way too chaotic it is really manageable though I’m honestly having quite a fun time with this a lot more fun than I had with FNAF 1 doing this so nope okay go back to the office put the mask down for chica That was close I think we’re okay though that was really close all right back to the music box now okay wind this thing up that was really close was with a chica that wind this thing back up and go back to the office now anytime now There we go anyone in the office I think we’re good okay funny yeah put the mask on for Bonnie and he’s gone are we good now we’re so close to the end of the night there’s chica at the end of the hall again and Freddie Freddie’s joining Back again all right just leave me be please and here we go 6 a.m that was really intense at the end there but we did manage to pull through it and beat the Knight that was a whole lot of fun I’d probably say more fun than the FNAF One map there was definitely a lot more going on but that really made the challenge a lot better and I’m really happy with the ending result and I really hope that you guys all enjoyed that as well we did get very close there at the end was with a chica however Since we didn’t actually get jump scared throughout the entire night I’m now going to show off all 10 of the animatronic jump scares that I added into this map and then we can go ahead and wrap up this video thank you foreign Bring it but with that ladies and gentlemen that is going to wrap it up for today’s video hope that you enjoyed as it was a lot of fun putting this build together if you’re interested in future projects of mind then be sure to leave a like on This video And subscribe to the Channel with notifications turned on so that way you know next time I upload and you can also help the channel to continue to grow with all that being said thank you so much for watching and I will of course see you in my next video foreign Video Information
This video, titled ‘I built a working FNAF 2 map in Minecraft (Build + Gameplay)’, was uploaded by CuppaTeaExe on 2022-10-16 15:30:12. It has garnered views and [vid_likes] likes. The duration of the video is or seconds.
Today, we take a look at Five Nights at Freddy’s 2 and build it in Minecraft and then make it functional! Be sure to subscribe if you …