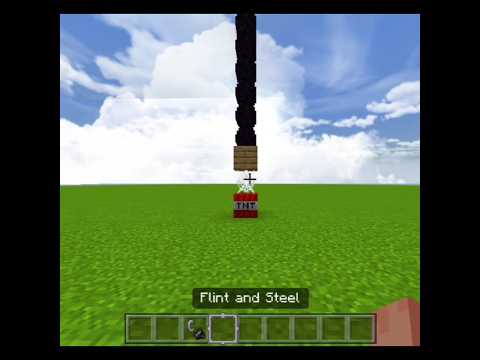
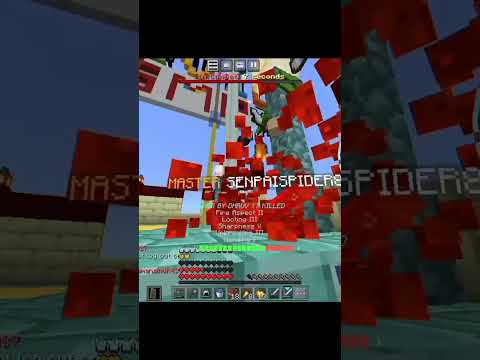
I already established that lego is like minecraft when i built my working piston ooh but what if i made a working dispenser by the way this build ended up being super complicated and cool so make sure you stick around to the end i found out before the giant redstone minecraft Blocks makes for really cool lego builds so i can use that same plan to build the dispenser and then build a button on top that activates it i want to use the same technique as i did with the piston and use a bunch of black pieces around the Edges to copy the look of the in-game dispenser but in order to do that with the 2×2 bricks i’m going to need over 100 and i definitely don’t have that many so i had to get creative i used a combination of tall panels blades and bricks and eventually got them high Enough okay now that we have the frame in place i need to start filling out the walls luckily i have all the plates and bricks left over from when i built my piston so i shouldn’t have to order any extra and yes the piston has been destroyed for months it’s actually Really nice because instead of a ton of detail on every inch of the block like the piston over one third of it is just entirely light gray pieces once i laid down the layer of gray on three of the sides i started working on the cobblestone texture of the top half Block the main problem is the lightest gray on the top of the dispenser is darker than the bottom part but i only have two gray colors to choose from so i don’t have much contrast i also started using white as a highlight and put a strip down between the two sections the White also came in handy for the face of the piston but i don’t need to think about that yet i slowly built up the sides of the dispenser and realized that every side is actually the exact same texture so i built all three walls at The same time which saved me a ton of boredom okay now that the back and side walls are done i can work on the front which has a lot more detail the light parts i added out white lines i mean what white outlines such as around the mouth Eyes and shape of the face thing underneath the white i put light gray and above it i added the same cobblestone texture that the rest of the sides have once all the textures were done i added a one pixel thick layer of black around the top and with that done Its mechanism time here we go when i first started building this i was going to use a button to activate the dispenser that presses down on one of these it’s one of lego’s spring-loaded shooters and i’m going to use it as some sort of tipped arrow disclaimer i ended Up finishing this but it felt really underwhelming by how it turned out and made something better but i’m still going to give you a quick and brief summary of how i built it because the mechanism is still what i used in the finished model and it just helps it make Sense basically there’s rubber bands inside the hook to this button which i built using the same cobbled texture as the dispenser it has a long technic beam assembly below with these weird ball pin pieces that hold onto the rubber bands and then it has this holder that fits Around the beams and connects to the actual dispenser then i made a black box with the 1×4 launcher piece in the center of it and set it back a couple pixels from the mouth then i made the top of the sensor by using a bunch of 2×2 tiles in both grays to make it the right texture i also added a bunch of supports to hold it up and then tested it huh okay let’s see what my friend thinks okay it’s time to make this better and way more complicated here we go first off i want to dispense An arrow when the button is pressed so i need to build an arrow it’s not going to be as long as the in-game one because it wouldn’t fit inside the dispenser and unlike minecraft i can’t just change the scale to suit each application i still wanted to have that pixelated Look so i went with diagonal building technique that makes the size look like the jagged in-game texture i also added a gray tip and these white feathers at the end alrighty with that part done i can move on to the super easy part of making everything work consistently like i said Super easy first off i need to add rubber bands to the mouth of the dispenser so that it launches the arrow it took way too many tries but i eventually got this design and it has an adequately sized hole for the arrow as well as two rubber bands hooked in place That fit perfectly in the feather part of the arrow when i pull the black box in place and secure it into the mouth dispenser i can pull the arrow back and it will launch okay now that’s finished i need to make some way to hold the arrow in place when The pulled back position so that it only shoots when the button is pressed and not as soon as it’s loaded i need something that basically works as one of these binder clips obviously the real thing is way too hard to press and it would just bend or snap anything made of Lego trying to open so i need to make a lego version if i use these l-shaped technic beams with larger beams connected behind them and then use the same small ball pins and hook rubber bands to it it makes a clip that when pushed down on the back opens up also This video doesn’t have a sponsor but i do have channel memberships and every single dollar that i make from there goes back into buying pieces to make my videos better so if you’re interested the button’s down below then i built a simple structure to hold it in place Which for some reason to me looks like a creature but maybe it’s just me i don’t know comment if you see what i mean now that the locking mechanism in place i need to make the button a lot different the top of it will work out but because The clamp has to be opened from a technic beam at the back just having a straight beam below the button won’t work at first i tried using angled technic beams to shift the force of pushing down on the button to the back of the dispenser but there was too much Flex and it wouldn’t hold then i decided to use a completely opposite technique and use only normal bricks i basically made a not very sturdy beam thing underneath the button that slowly branches behind it to hit the beam and make the clamp open all you need to know Is that the rubber bands were not strong enough to pull it back up once pressed and then instead of pressing down on the button it would start tilting backwards which isn’t exactly what i was trying to do i decided that i needed to make the whole button way less so i started by Taking away all the large bricks underneath it and using a mix of technic and normal bricks this way the connection at the top could be strengthened but the space in between wouldn’t require as many pieces therefore being lighter i added a line of bricks at the bottom so that it would Be stronger when hitting the back of the clamp okay testing time i didn’t have any rubber bands on it yet but i just wanted to see if we’d actually press down the clamp and release the arrow i put the arrow in pulled the button up pushed it and Yeah so i thought it was basically done see that thumbs up that is coming from a naive ignorant okay okay maybe not but i really didn’t know how much more was in store for me it might look easy just watching these videos but these builds are pretty complicated especially since i can’t Even access this one from the sides and could barely have any room to move my hands around from the top in other words a sub would be great there is one major problem with the design the rubber bands aren’t strong enough to pull the button back up even though i already reduced The weight and since it doesn’t work if the button doesn’t move obviously i need to figure out a better solution than rubber bands and what’s that you might ask lego suspension pieces i think they will have just enough movement to open the clamp enough to fit the arrow in and be Able to lift the button high enough to release the arrow since they are much stronger than rubber bands it shouldn’t be too hard to make work i modified the button to fit into these 1×2 technique bricks with a pinhole in the center and then built these structures to hold the Other end of the springs i had to use some of these tall panel pieces to hold it up but we are definitely getting somewhere and i’m not sure it’s somewhere that works after half an hour of nearly ragequitting over a couple thousand plastic molded feet killers i Got to the point where the only evident problem was lowering the strings by a single plate so that would open the clamp further allowing the arrow to fully fit okay now that that’s fixed it works so i’m going to put the top plate back on and it should be finished Okay well that’s totally not infuriating especially since it’s completely my fault that i didn’t realize that this brick would offset the entire button by a half stud meaning it won’t fit right into the hole at the top of the block in other words i had to take out the Springs yet again and risk breaking the weak internal structure but after a couple minutes where i think i forgot to breathe it was done okay hopefully the final moment of truth here we go let’s go i just built a working minecraft dispenser out of lego and it’s Pretty cool more cool videos on the horizon make sure to subscribe You Video Information
This video, titled ‘I Built a Working LEGO Minecraft Dispenser…’, was uploaded by RJMBricks on 2022-08-06 22:11:28. It has garnered 1941114 views and 44461 likes. The duration of the video is 00:08:02 or 482 seconds.
Join this channel to get access to perks: https://www.youtube.com/channel/UCwsvtU88eu2-fqQhTqrbwWw/join
In this video I made a LEGO Minecraft Redstone dispenser that is mechanical and actually works. It works with a Minecraft Redstone button on top that “activates” the dispenser.
Like and Subscribe!
This is literally my best video ever, not kidding. If you subscribe it will make me super happy. I have said this on a lot of my videos, but the editing, sound effects and music of this one come together to be my best video ever.
Current sub count: 203,258
Thanks for 200,000 subs!!!
Join my discord server! https://discord.gg/S44dk4ck5G
For business inquiries: [email protected]
SUBSCRIBE: https://www.youtube.com/c/rjmbricks
CHECK OUT my other mocs: https://www.youtube.com/watch?v=It1If…
CHECK OUT MY tutorials: https://www.youtube.com/watch?v=qEdqt…
MY BEST CREATION EVER: https://www.youtube.com/watch?v=iCoPh…
SUPPORT MY LEGO IDEAS PROJECTS: Village in the castle ruins; https://ideas.lego.com/projects/e2158… The viking Chieftain’s hut; https://ideas.lego.com/projects/32843… Playable arcade game: race!; https://ideas.lego.com/projects/83d50… Among us weapons room, the skeld; https://ideas.lego.com/projects/e1c93…
FOLLOW ME on LEGO ideas: https://ideas.lego.com/profile/RJMBri…
Thanks for watching!!
#LEGO #Minecraft #RJMBricks