In this episode of my let’s play minecraft series we’re going to be building custom mountains for 24 hours if you like the sound of that make sure you subscribe because there’s gonna be more things like this coming let’s get into it alright guys welcome back to where we Finished the last episode on top of my windmill and today’s episode we’re going to be doing like i said in the last one a lot of terraforming as you can see this is all going to get somewhat finished today i want to try and maybe get this connected down and Have some whatever connection down here and then i want to see if i can try and fill all these in up there and then we’ll see where we go from there oh and just fell off whoops um so that is the plan for this episode and hopefully this Time lapse goes well i’m hoping it does i’m gonna try does this look natural by the way i want some feedback on this i’m not too sure if it looks natural or not i mean i’ve got that but then i’ve also got a little bit there as well so i’m Not too sure if it’s gonna look natural if that makes sense let me know in the comments and uh yeah let’s jump straight into the time lapse where i’m going to be doing a good portion of that terraforming and custom terrain behind me as you can see let’s go Do All right guys welcome back from the time lapse and uh yeah between you and me that was seven days ago because i have had my pc upgraded i’ve got some new parts in my pc hence the bigger render distance and i’ve had a very very significant upgrade and i’m Actually going to show you so i used to run the nvidia 1080 gtx and i used to run the amd ryzen 7 1800x i’ve now got if you look at my f3 an amd ryzen 9 5 900 x 12 core my old one used to be Eight and i’ve got a new graphics card the rtx 3070 ti uh so yeah i can now run higher render distances frames per second i can even use shaders if i want all this was just to improve the videos and my next purchase is probably going to be getting 2k monitors because you know the way youtube compresses video these days i’m going to have to up my game um and try and get some better quality videos out uh because i know my audio’s there but my video i wouldn’t say is quite there yet But yeah that was that was a mega time lapse wasn’t it i’ve still got loads to do i’m gonna enter another time lapse um at some point during this episode to try so my idea is if i just take a bit of a fly over so Maybe go a little bit higher than what i am now that’s going to wrap all the way around and connect like that so essentially my starter area is going to be in the middle or sorry at the bottom of all these mountains and this is going to extend Just infinitely like as far as i can extend it to with the resources that i’ve got i’ve not got much stone left i’ve got this and a few boxes in my storage room and that’s all i’ve got left same with the dirt um that’s literally all my stone And dirt supply if i am not mistaken i don’t think i’ve got anything else the rest is just cobblestone and stuff like that i don’t know if i showed you guys actually but um there was another farm that i did while i was doing my revision I can’t remember if i said it last episode but i after the episode i’m pretty sure i said i forgot to mention it um yeah wait all of these shulker boxes i built the farm by ending credits the exact same one for those i watch hermitcraft Impulse just did it um but i can i don’t think i showed the farm it’s in the outer end island so i just figured i’d mention that so i’ve got an infinite sugar box supply essentially if they’re ever going to patch that i don’t know They might end up going now that’s 2 0p but at the same time we have a big inventory problem so i don’t see the point of trying to patch something that we really need so yeah right uh what i’m gonna do now actually and a shout out to one of you Guys i can’t remember the name for this suggestion over here so you saw me do this in the time lapse and basically i had this in mind already doing this like as a bit of a crater in the ground i had that in mind but one of you beat me to Extending that idea you didn’t even know i had that idea and someone said why don’t you make it look like there’s a crater in the floor which was what i already thought of but then they said why don’t you extend the biomes up and creeping out of the hole i was like That’s a genius idea that is actually genius so shout out to you my friend he was commented on my last video uh so if you go to my last episode uh you will see who commented that shout out to that person because honestly it’s absolutely genius and yeah i’m probably gonna be Doing this segment here now on camera just because i know a lot of people might get curious as to how i did those custom mountains because it’s not something everyone does and it’s very i mean there’s only very limited people that will build custom terrain like that So um i will show you my process a little bit if you just give me a second okay so this segment is going to be mainly me talking to you about how i do this and how i go on about planning so this is what’s called a skeleton this is Essentially the outline so imagine i don’t know if there’s any artists that watch me but imagine if you’re drawing something you’ll do the outline first to get a gauge of where you’re going and then you’ll do all the filling in and details after right so that’s essentially what we’re doing here that’s Exactly the same process but i don’t know if you’ve noticed but all my skeletons are essentially in i said that stood in a skeleton all my skeletons are essentially diagonal they’re not straight i’m not going from here to there and there to there because it doesn’t take a natural shape um i did Shout out antler boy a good friend of mine now in the last episode but i’m gonna mention him again because he’s been a massive factor in me learning on how to do this and to inspire me greatly to do stuff like this in survival minecraft i’ve never done anything like this before and To be honest ever since i started learning i don’t think we’re doing too bad to be honest i mean this is i far exceeded what i thought i was capable of but anyway so essentially what i will do now and this is something that antler taught me so let’s get Another bit of a skeleton in place because this isn’t enough to fill this in i’ll still need a bit more of a skeleton so what i will do is i mean this obviously comes down to practice but i will essentially come in here and i will i will take the bottom of This corner to the top of that one so i’m just gonna try and engage it and when you’re doing these i start when i stop the height of this i go back and across so let’s stop the height again back and across and take this one free High back on across to this one two this there is variation you can take with this and as you can see i’m already quite deep under that so i’m gonna retract what i’ve just done this is just my process now this is stuff i’ve been taught Um and i’m gonna from here go a little bit higher and then i’m going to take it across go a little bit higher and now we’re starting to get somewhere uh what i might do here is i might come across like this because i can always fix that problem down there when i’m When i’m doing the filling in later on back and across again and i’m going to come across and then connect it to this corner so if i go into freecam now you can gauge what i’ve done so you’ve essentially got this small gap here you’ll essentially have a Small gap here and once i’ve done this side you’ll see that it makes a bit of a crossover and you’ll be able to fill in a lot easier so same process again just in case you weren’t following along with that one also when you’re building try And have it different heights to the one next to it um so i’m gonna come across here and that is the same height as that one so i’m gonna go down and across and start again and then essentially i’ve connected to this one now so what i can do is jump onto this Make this one one higher and essentially start the process again and i can essentially connect that to there if i wanted to even though my target was over there but now because i know i’ve missed my target i’m going to come in here and then just do a bit more And carry it on as if i have not missed where i will go in am i directly under dirt here i am so let’s just connect this down and then i’ll probably do a bit more here so now we get a bit of a look at this you’ll See that that is a lot more digestible and you can fill that in so much easier i can just do this section here then i can move up to this section and then that one and then that little bit and then this one and it’s filled in It’s really really easy um i’ll actually talk through the filling in process because this is something i learned as well is sometimes when you fill it in you’ll have areas that look flat let me just fill a part of it in just so you can see the process let’s do this bit Together right so i’m going to start throwing this in and i’m going to try and do it at different heights so i’m going to take oops i’m going to take this one a little bit higher i should probably do this i’m off and but it doesn’t matter probably go a little bit Higher with that and then same with that and it’s a different and that’s the same height so i’m going to knock that out add one to that so it’s different heights again and then we’ll start the process down here so i’m going to do the exact same like this i Hope you guys are following along with this because i am trying to do this as somewhat of a tutorial aspect as well because i know some people are interested in learning this now okay i’m going to go a little bit higher with this one and then a Little bit higher ah okay i’m gonna die if i’m not careful but essentially you just got a gauge that’s the same height that’s not finished so let’s go and fix ah let’s not do that i’m sort of trying to gauge like the heights of these as well So i’m going to take that too high and i’m going to take another one and knock that down one and i’m going to bring this out like that so it’s just a bit of experimenting as you can see we’ve almost filled it in already it doesn’t take that long filling it in It might look like it takes forever but it honestly doesn’t uh so i’m gonna leave that there because that one’s that height and then we’re gonna do this bit and we’re probably gonna take this back a bit sooner because we’re at the bottom and then take it up a bit more and essentially We can just fill that in and what you will notice is that some of the areas can look flat as this area does so i could literally just go right one there two there uh you can just play around with it um so i am now adding a bit of shape to it On top of what it already had and already as you can see that section looks pretty good and from a distance if i go in freecam you can see the shape that’s taken and it’s very simple the rule to follow when you’re doing this is to um obviously not Have them the same heights as this although that’s the same height as that one so i might take this one a bit higher and then this one higher but then that one’s the same height so i’m gonna do it again and again and that one’s the same height again again And you just keep messing with it like this and that’s all you do it’s very very straightforward i feel like i’m turning into a tutorial channel but at the end of the day that’s that’s the stuff that i’ve learned and if you guys want to challenge yourself for doing This sort of stuff like i’m doing now then go for it you know exactly how to do it now one thing i would say is try to picture this is another thing that aunt the boy told me try to picture what you want and then draw it That’s pretty much how you’re gonna do it so i can already picture this going across and up here so like if i get to this section when i curve around the furnace bit it’ll go up uh probably stay at a decent height and then it will gradually drop to match that and then I’ve sketched this section out and then i can start connecting it okay i’m not going to do it now because i want this to be part of the time lapse speaking of time lapses that was my favorite bit from the one you saw earlier uh where i Did the lines across it went so well with the music that section that was probably my favorite bit i really enjoyed that part of the time lapse myself i just i had it on repeat for a few times don’t tell anyone i’d watch my own time lapses on repeat okay but yeah The idea just so i can gauge it with you before we start the next time lapse is it’s gonna go like this i’m gonna walk the path roughly of where it’s going to go and i’m gonna drop it down there as well and it’s gonna if this is gonna be tall This bit and it’s probably gonna go this way we’re going to purposely miss the sheep farm because i don’t i don’t really want to do anything with that i want to keep it out of sight and yes it is very close to um i actually do the paths here as well Because i actually did a drawing of where i want the paths to go because i do want some paths up um although i could do that another time for word and it’ll connect around here now my idea for the path right so we have a path Coming out of these crop fields here so let’s imagine this going like that and then it will curve up the side of the cliffs just like that one is all the way up but then i might curve it back in to go around um it’s probably something i’ll have to Experiment with during the time lapse we’ll have to figure it out i do know what i want but yeah i think it’s time to roll that time lapse that i said about um also i can’t believe how many hours we’ve done on this already it’s Crazy how far we’re into this i think if i’m if i’m not mistaken if my math is correct we’re about 13 hours in to this project which is absolutely crazy so yeah let’s start the next time lapse and i hope you enjoy [Applause] so [Applause] Do So All right guys welcome back hopefully you enjoyed that time lapse and unfortunately we’re now out of time we’ve gone over 24 hours building custom terrain in my let’s play world and i know that because i’ve been keeping track we started at time played 23.59 and if i scroll down now to time played We’re on 24.64 so we’ve just gone over 24 hours which is uh really exciting and you know what i’ve had so much fun doing this it’s been i never expected my world to turn out with custom terrain surrounding it i had no idea this was going to happen i just one Day decided to do it and i’m so glad i did any feedback on this is greatly appreciated and i’ve got some ideas and stuff that i want to build we might have to move this though because it doesn’t make sense it pointing over to rain does it I mean we we’ve got to go for some some little bit of realism in this world we might have to move that at a later date but until then we’ll uh we’ll decide on that another time so thank you all so much for watching and i’ll see you all in the next one Video Information
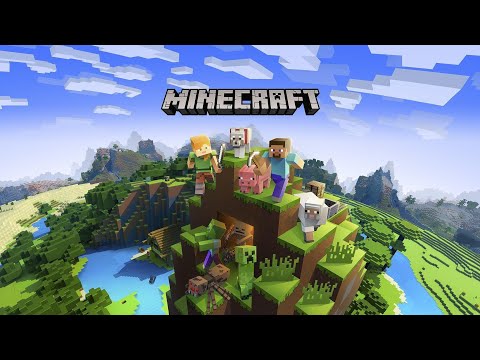
This video, titled ‘I Built CUSTOM TERRAIN For 24 HOURS! – Minecraft 1.19 Survival Let’s Play (#12)’, was uploaded by Metricate on 2022-05-29 16:00:31. It has garnered 5668 views and 524 likes. The duration of the video is 00:18:33 or 1113 seconds.
In this video, I spent 24 hours building my own custom terrain inside of my 1.18 / 1.19 Minecraft Survival world! This video took a lot of effort, grinding and planning so please help me out by subscribing, liking and commenting! This video took me completely out of my comfort zone with my creativity and building and found this a really fun challenge! We won’t stop here with the custom terrain, this is just the start. Who knows where we will end up.
This episode is me building custom mountains and terrain in survival Minecraft. All timelapsed and I even show you my process on how I learned how to do this so quickly.
Follow my socials: ➽ Twitter – https://twitter.com/Metricate ➽ Patreon – https://www.patreon.com/Metricate ➽ Instagram – https://www.instagram.com/realmetricate/ ➽ Discord – https://discord.gg/qJGrTzEH64 ➽ Twitch – https://www.twitch.tv/metricate ➽ Tiktok – https://www.tiktok.com/@metricate
Join this channel to get access to perks: https://www.youtube.com/channel/UC7whwalXB4J01Dk1F5yN3AQ/join
Building custom terrain and mountains inside of Minecraft 1.18 1.19 completely in survival!
All music provided by Epidemic Sound.
#Minecraft #Survival #LetsPlay