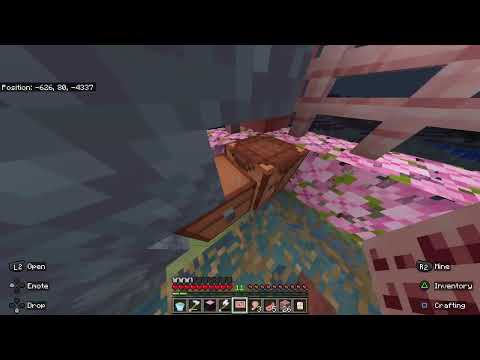
Hello everyone my name is pixel riffs and welcome back to the minecraft survival guide i hope you’re all having a good day i am down here at the very bottom of a pit that i’ve dug so that i can afk here at the slime farm or at least have a Place to stand while we contemplate what we’re going to do next because the slime farm has undergone a few changes i have mostly just lit up the caves in the surrounding area and as you can see the slimes are actually spawning inside this farm now in greater numbers you might Still only see one or two at a time but they are spawning much more frequently down here and i’ve had some pretty interesting comments about the status of the zombie pigmen here namely that pigmen spawned from portals should not affect the hostile mob cap in the world Which is a very interesting fact and one that i’m sure i will be able to use to our advantage later on but as you can see every so often we’re getting a slime spawning here in the farm it’s popping on through the portal and that should Kill it in the nether on the opposite side so we’re actually getting a lot higher rates from this than we were before purely from the fact that i’ve gone around and painstakingly lit up a bunch of the caves yesterday so a ton of the work has been done to make this far More effective one of the things that we still need to take care of is the fact that there are a few other slime chunks in this area and with the slimes able to openly spawn in those areas because there aren’t too many other hostile mobs spawning it does mean that we probably Need to spawn proof those chunks against slime spawning despite the fact they will spawn in whatever light level you give them slimes will not spawn in areas that are slabbed off or carpeted in the same way that other hostile mobs simply don’t find a valid spawning space Nothing to do with light everything to do with the surface they are spawning on and the fact that they still need to spawn in on a solid block so i might do a little bit more of that in the caves around here because this beacon mine is Not the only place that we have lit up where i’m seeing slimes spawning more frequently and if we zoom over here very quickly while i’ve got the camera account on me the other thing that we cannot really do a whole lot about unless we swim around this whole place Is lighting up the flooded areas in this drip stone cave because those are the places where the drowned will still spawn if there is a low enough light level and thankfully there are a few magma blocks around here giving off a low at light level which is preventing Some spawning in the area drowns spawn quite infrequently down here and there’s also stuff like glow like in torches from nearby caves and other bits and pieces keeping the drowned spawns from getting off the charts and ruining the rates of our mob farm over here with the Slimes but it is potentially an issue that we will get drowned spawning in this area as well and that’s something we’ll probably turn to our advantage in future if we want to make a naturally spawning drowned farm because considering we’ve already spawn proofed a large amount of the area around this Drip stone cave biome which is one of the biomes in which drought will spawn in open water it might be worth creating a drowned farm here at some point in future as well so with all that said i’m going to return to my body here we’re Going to log the camera account out i’m going to hop on through to the nether and we’ll see what dividends our slime farm has paid and yes i do still need to bring a few more ladders down here with me well i’m certainly hearing a lot of Zombie piglens as i get down here and it might even be worth swapping out the campfires around here or a little bit of xp coming on through it might be worth swapping out the campfire layer here for maybe powdered snow because i can pretty much be guaranteed that that would kill The zombie piglens as well whereas they’re immune to fire damage and wouldn’t take too much damage in that respect never mind we can just clear out the rest of the zombie piglens from inside the farm here we’ll get a little bit more xp and gold coming through to The loot chest in the process of that and yeah i’ll grab the rest of the xp from here nice to clear out the farm and let’s see oh okay we actually have we have a full double chest of drops in here most of which thankfully is slime Now we’re going to come up with some sort of system like i said to get rid of all of the pigelin drops we’ll throw all the gold swords out here for now can probably just throw them into a fire or something and have them disappear there is even incredibly one raw chicken in Here which i presume is from a zombie chicken jockey which i didn’t know could spawn from nether portals so there’s something i learned today but of course what is left in here is really what we’re here for we’ve got tons and tons of slime balls building up in here and One row of those is gonna be nine stacks of slime balls which equals one stack of slime blocks so having emerged from the nether we can take a look and we have five and a half stacks of slime blocks which is pretty darn good if you ask me That is one successful slime farm and so we can take a look at what slime blocks can do when you’re able to acquire them in large quantities so first of all slime blocks are kind of cool to look at to begin with they actually have a quite interesting texture there’s obviously a certain Amount of transparency to them visually you can sort of see through them they’re sort of translucent i guess and they do have this more solid looking but still see-through center so they’ve already got a bit of an interesting dynamic to them the further away you get actually The more prominent that that center part of it becomes it’s a cube within a cube and i think they look quite good as a result in larger quantities you can imagine them pooling at the bottom of a cave like this and having this kind of squishy slimy vibe to the whole thing as Though this had been part of like a chemical spill or something like that you could even imagine them as part of this ooze of green fog coming up from the bottom of a cave although honestly the fact that the texture tiles so obviously with that central section to Them maybe not the best use of them but as far as aesthetics go they are kind of cool and they won’t block light in any way despite the fact they are a full solid block they take up the entirety of this and they even conduct redstone power which is something we’ll get onto A little bit later you can still hide light sources behind them and if we put a slime block in front of that it doesn’t lessen at the amount of light getting to this area the block light from that glowstone is still reaching us here and providing 11 block light on the Block that i stand on so if you were inclined to do so and you had an area like this that you were completely filling up with slime blocks you could hide light sources underneath them like the glowstone down there and still leave the area with a nice ambient light while Effectively concealing where the light is coming from you might not want to use them for decoration in areas that you plan to travel quite frequently because slime blocks do slow you down they make your footsteps kind of sticky in the same way that honey blocks do and as a Result you’ll find yourself walking a lot slower on top of slime blocks i think that’s even slower than you move on soul sand although there are some instances in which that might be an advantage if you need to move slower for whatever reason then you could use slime Blocks to achieve that effect and the effect will even persist through blocks like carpet where the non-solid nature of the block actually allows the slime block to still be the surface you’re walking on and it’s just the top surface here that’s decorated by carpet you also still get the particles if you’re Sprinting the particles will still show through as slime blocks and the sound effects as well will indicate the fact that you’re currently walking on slime blocks as we’ve already demonstrated one of the principal traits of slime blocks is that when you fall they will bounce You back up into the air to a limited amount of height and there’s a couple of ways that you can control that as well but first of all it’s worth noting that they won’t bounce you even halfway up the distance that you fell there are Hard limits to this as well if you fell from 255 blocks up in the air onto a slime block you would only bounce about 50 blocks back in the air and i believe the maximum jump height from a slime block is capped at about 57 blocks 57 And a bit so it’s actually not possible to bounce super high with a slime block although you can try and push that to its limit if you want to regardless of the height you fall from you also shouldn’t take any damage of falling onto slime blocks as long as you let Them bounce you in the normal way one crucial thing to remember is not to crouch while falling onto slime blocks because then the bounce won’t take effect at all and you’ll end up falling directly onto them taking the full force of the damage as you would if you’d Fallen onto any other solid block so crouching as you fall prevents you from bouncing but it also applies the normal amount of fall damage now holding jump as you’ve fallen i’m going to take my elytra off for this demonstration just so i don’t activate them mid-fall if i Hold jump i will actually land on the slime blocks without bouncing and with no fall damage or effectively it limits the height of your bounce to the normal jump height you basically start jumping as soon as you hit the slime block and at that point no more bounce height Applies and if you’re designing an obstacle course or a parkour course you can pretty easily use slime blocks to have the players achieve massive jump heights if they jump from area to area that will mean they can clear obstacles that they couldn’t do otherwise but it’s worth noting that accuracy is important Here and there are a couple of moments when i was setting this up that i jumped down onto the slime block and took full damage and didn’t actually bounce at all that is because the player isn’t snapped to the grid when you fall on a block and It is entirely possible to fall between two separate blocks and if you are a fraction of a percentage of a block over if you are just a tiny pixel’s worth of space over onto a neighboring block and that block is not a slime block you will Not bounce if you look at my x y and z coordinates here you’ll notice the x is 333 and i’m looking down at this block of deep slate here the slime block is on 332 and so even if i’m standing on the slime block if i’ve fallen directly on The edge of the slime block like so and i’m technically over into the next block i can land on this space without taking any of the bounce from the slime block and instead i end up taking full damage so if you’re dropping from a great Height or if there is an area that you absolutely want your players to land on you don’t want there to be any risk of them falling halfway onto the next block over and not bouncing you probably want to enlarge your slime block pads to a Two by two or a three by three to give them a slightly wider target it’s even possible if you are quick on the draw to place a slime block or two as you land and use them sort of like the mlg water bucket catch being able to drop a slime Block right on the ground before you hit the ground naturally that has the effect of blocking all full damage and even propelling you back upwards if you want to get up to a certain height again in addition to you not taking full damage this can also be kind of a neat way to Cross spaces like this where there’s a ravine and you need to get to the other side but a player is not the only thing that will bounce on slime blocks slime blocks will also bounce items and so to a certain extent will beds if i climb up Onto a temporary pillar like this we can throw this red wool and you’ll notice it bounces a couple of times before coming to rest on the edge of the bed there the same thing will happen with slime blocks but they have a great deal more bounce and you’ll notice it bounces once and Then clears the other slime block completely falling off the side there even for players beds do have a similar bouncy property although they won’t block full damage completely the way slime blocks will and i’m pretty sure the bounce height from them is much more limited as well beds will reduce fall Damage they won’t eliminate it entirely in the way slime blocks do but items will bounce on top of slime blocks and we can use this to our advantage especially when you pair them with pistons setting up a slime block attached to a sticky piston is really where we can see These mechanics come to life for a start if i throw an item entity onto here like so for this block of sand for example and if i activate this sticky piston with the slime block attached to its front face you’ll notice the item entity gets thrown up into the air and has the Same kind of bounce mechanics that a player does although it comes to a stop a lot faster and even though sand and gravel are affected by forces like gravity and are falling blocks it doesn’t end up doing that when the sand is just a regular block although it can Potentially activate while the sand is falling onto it which might be a little bit difficult to do manually let’s see if i can time this right so if we place a sand block up there and yeah there we go managed to do that first try although the slime block has come disconnected From the sticky piston for reasons i’ll explain in a minute but we did manage to bounce that sand block up as it was falling so pretty cool the difference there is that a falling sand block is more or less an entity in its own right Kind of like the item entities or like a player or an armor stand or something like that speaking of which armor stands can be bounced up and down in the same way because they’re more or less simulating a mob or a player and for that matter players can be bounced up And down on one of these things as we’ve seen in the bounce pad i set up in the drip stone cave a while ago and here’s where things can get a little bit wackier because we’re also able to fire arrows at a slime block and hurl those Into the air as well although you want to be a little bit careful when they come back down if all you’re doing is propelling them vertically but slime blocks don’t just have an effect on something’s vertical momentum they actually have an effect on the horizontal momentum as well and to Demonstrate we can set up a slime block attached to a piston here at the start of an ice road which we’ll probably have to make sure that nothing connects to the slime block because otherwise the slime block will try and push it but let’s set up a row of packed ice along Here and if it gets to about there then that is about what is that 24 blocks long something like that let’s see how far an item can travel along this road of packed ice we’ll use a block of obsidian pushed up against that slime block as our test subject we’ll have to Activate it with a block with a button on it like so it is going to start dragging around at this one block of pack dice but let’s see how far that goes pretty much all the way to the end actually and it drops neatly off the end Of that so about 24 blocks worth of travel can be achieved with one slime block pushing an item entity that’s right up against the slime blocks face but i want to try throwing the block of obsidian onto the very edge of the block here to see if it makes a difference if It’s slightly off to one side of it and it doesn’t look like it does it’s going to travel the same way and yeah i did leave a little bit more packed ice on the edge here but it does look like it came to a stopper right there but here Comes the fun part because by applying a little bit of redstone engineering and some timing we can turn this into a machine that can use both a vertical and horizontal flinging properties of slime blocks so we’re going to throw a little bit of redstone together here we’re Going to put a sticky piston down here with a slime block attached to it we’ll need something down here to activate the piston so we’ll have some redstone dust on top of this block here and adjacent to the slime block we want to make sure the slime block isn’t going to attach to Something right here because it’s going to be able to move that block once it extends and in this case we’re going to use obsidian because obsidian can be neither pushed nor pulled with pistons and that means that as far as slime blocks are concerned it’s not going to Be movable from there we’re going to come along two blocks and up one we’re going to remove that block there that was just a placeholder but we can add some redstone stuff on top of this we’re going to put some dust right there we’re going to have a repeater facing into That block and some dust on top of it and then adjacent to that we can place our next slime block and our next sticky piston the sticky piston will go next to that redstone dust the slime block will go there and now if we place a button on The side of this we can press the button and both of these slime blocks will activate in a very short succession this one will fling stuff before this one does thanks to the one tick of delay provided by the repeater if you’re on bedrock edition you can set this to two Ticks i have tested it it will work a little bit more accurately but the main purpose of this contraption as you might have guessed is to be a tnt cannon because if we place a tnt block on top of there the power to this block is Going to light it and then the slime blocks are going to do their thing so if i hit this button right there there we go the tnt is lit it’s flung out into the lake where hopefully it will harmlessly explode unless there are any fish around in which case we just Invented dynamite fishing in minecraft but we could do the same thing with an armor stand here as well the armor stand could get flung out into the lake although players mobs and other entities might end up falling a little short like if i hop up onto this slime block i attach a button To the end here and i press that i’m gonna get flung out into the lake but as you can see not nearly as far as the tnt went gravity and inertia and all of that kind of stuff reacts a little bit differently to mobs than it does to Other items but say we attach a bunch of arrows to this and then we fling those those are all going to go as far as the tnt did now in some cases especially in the case of tnt it’s usually wise to add a wall on the back of this slime block Here and if you want to make sure tnt aligns with a specific block like this when it is primed then you usually want to use walls or something like that around this slime block because they’ll attach the slime block they’ll get pulled along with the slime block when It moves but the walls have a one and a half block high hitbox which is kind of invisible when you’re just looking at the block but it’s what prevents animals and players from being able to jump over them and in this case it’ll make sure that the tnt doesn’t move backwards too Far when it’s primed and gets stuck under the slime block underneath so this pretty much guarantees that your tnt will be flung in the same direction each time and a little bit further away from our testing area over there for my own safety more than anything else we’re Gonna set up a no block down here with an observer facing downwards into it like so some sort of solid block on top of that here and have that power a dispenser which is gonna feed tnt onto the slime block here with a wall behind it to make sure that the tnt doesn’t Slip backwards at all and now we can whack the note block a couple of times launch the tnt whenever we want to and we end up with multiple explosions happening over there so if i right click this a couple of times we prime a ton of Tnt fling it all in that direction and the resulting explosion can be very satisfying just don’t let the tnt cook for too long otherwise you might end up cooking at your slime block launcher instead but there’s two more left in here so why not throw those in there as well Now another key feature of slime blocks is their ability to push and pull blocks along with them we’re used to sticky pistons being able to push blocks and the blocks staying attached to the sticky pistons head and a slime block basically provides that but on all six Faces of the block i guess five potentially because in theory one of those faces of the block has to be connected to a piston but it can in theory pull a piston along with it as long as the piston is flat like this if the piston is extended then it can’t be Pulled or pushed and therefore it’s not really possible to do that but let’s say we attach a bunch of andesite blocks around the other five faces of this slime block we can activate this piston here and that will push all of the andesite blocks along with it basically Everything that’s attached to the slime block moves when the slime block is pushed using a piston and this is where it’s really important to know what blocks can be pushed or pulled by a sticky piston because not all blocks that can be pushed can be pulled and vice versa obviously there are blocks Like obsidian which we know can’t be pushed by pistons at all and it also can’t be pulled by pistons or slime blocks which might seem pretty obvious right but then there are some other blocks which can be pushed but cannot be pulled melons are an interesting example Of this melons cannot be pulled by pistons and therefore they cannot be pulled around by slime blocks either if we still touch this we’ll get the full melon block back and i’ll demonstrate that if we attach those to the sides of a slime block like so when we press the Button to activate the piston the piston extends and retracts with the slime block attached to it and the melons stay where they are the crafting table down there has been pulled back by the slime block but the melons stayed where they were now if you end up pushing a melon Either with a piston or with a slime block attached to a piston they break and in the case of the slime block they actually get flung away quite dramatically another example of a block like this that behaves a bit more conventionally is glazed terracotta glazed terracotta can be pushed but Cannot be pulled and therefore you can use a glazed terracotta to isolate slime blocks from other parts of redstone circuits because the glazed terracotta will not be pulled around by the slime blocks it’s worth noting that you can also attach several slime blocks together all in one pad like this and The whole pad will be pushed around if the slime blocks connect to each other although if you throw a non-pushable block in front of it like this obsidian and then we press the button the slime blocks aren’t going to go anywhere because it is more important to them That they stay connected instead of trying to be pushed around this obsidian block and leaving the one slime block that can’t be pushed past it behind slime blocks also obey the maximum piston push limit which is 12 blocks once you go more than 12 blocks attached To the head of a piston it will not be able to push them any further so if we take a look at this we’ve got six slime blocks there six polished underside blocks on the front that can currently be pushed if we add another slime block Right here can’t be pushed at all and if we added another and a sight block to the front of this once again this whole section cannot be pushed if we remove that one more time there you go all 12 of the blocks can be pushed in unison despite that however there are some Pretty clever ways of getting around the whole 12 block push rule and that’s usually by chaining a series of slime blocks pushing other components along with them let’s say for example we expand this pad of slime blocks so there are 10 blocks all being pushed by one Piston we can only add two more blocks so what we’re going to add is an observer facing this way and a sticky piston attached to it attached to the sticky piston we’re going to add another pad of 10 slime blocks all arranged like so we’re gonna make sure that these Don’t connect to this observer for the reason that the observer would be pulled around by them if this sticky piston activates if we activate this observer using anything a torch in this case it’s going to activate the piston next to it and push that whole bunch of slime Blocks along with it but then if this piston back here gets activated then it can push the entire contraption forward the observer fires that sticky piston which detaches the pad of slime blocks from the front of it and the whole contraption is moved over by a block It’s also worth noting here that slime blocks and honey blocks will not stick to each other but they have pretty similar properties honey blocks will move blocks around that are stuck on them the way that slime blocks do but if we place all of these side by side like So we have two sets of blocks that can operate independently of each other if i activate this sticky piston here using a button on top of a block then that whole thing is going to move and obviously it’s moved the block that i activated it With along with it but if we set this up with blocks that the slime blocks won’t get attached to we can see that these slime blocks can activate completely independently of the honey blocks but the honey blocks won’t pull these blocks back either but one of my favorite Things about slime blocks is the fact that we can use them to create redstone powered flying machines by placing two rows of slime blocks offset from each other with pistons facing into each one and observers facing towards the pistons this way and this way alternatively you can have the observers facing upwards Because they’ll channel the redstone current into the slime blocks which will activate the pistons adjacent to them we can now use a non-pushable block to activate this flying machine and there it goes it starts propelling itself through the air of its own volition each time the observer detects that it’s Moved along a block it will activate the piston and the pistons are effectively pulling and pushing the slime blocks across the world with them machines like this will keep going until they reach something that they cannot pass an obstacle that they cannot pass like for example a block of obsidian which i kind Of had to spam against the back of that because it’s kind of difficult to place blocks against components which are moving and in this case it’s actually swiped a log directly out of that birch tree which is pretty cool of it but if we hadn’t stopped it with obsidian here The slime block flying machine would have run on until it encountered enough blocks picked up enough blocks with it like the trees that it’s just managing to collect chunks of that it would stop entirely because the pistons would reach their push limit or if it was unobstructed it would just keep going Until it hit the edge of the loaded area at which point if the player wasn’t following along with it it would just go out of the render distance out of the simulation distance and stop but if you want to the player can even ride flying machines like this i’ve cut away a few Of the leaves here to prepare for the fact that we’re going to be coming on through here we’re going to put some sort of solid block behind us and then we can use a non-pushable block to activate this piston and we are headed back in the direction that we came Supported by the block behind us and we brought that chunk of the tree with us again but these flying machines can be used for a whole variety of things and it’s a design that we’re going to revisit over and over again in the rest of the survival guide when we get onto Automated farms collection mechanisms and all kinds of fun stuff as forms of transportation go they are pretty slow but in terms of technical stuff you can do with the game this is only at the beginning and what a beginning it is folks that is where we’re going to leave It for this episode of the minecraft survival guide rest assured we have not seen the last of slime blocks we’re going to be doing a lot of cool stuff with them in the near future so hopefully you folks will be on board for that don’t forget to leave a like on This video if you enjoyed it subscribe to my channel if you want to see more and i’ll see you folks soon take care bye for now you Video Information
This video, titled ‘How To Use Slime Blocks! ▫ Minecraft Survival Guide (1.18 Tutorial Lets Play) [S2E83]’, was uploaded by Pixlriffs on 2022-04-20 10:00:27. It has garnered 53170 views and 3046 likes. The duration of the video is 00:24:33 or 1473 seconds.
The Minecraft Survival Guide Season 2 continues. Now we have all this slime, what do we do with it? This tutorial will explain some of the most useful properties of Slime Blocks. We explore how they can be used for building and aesthetic details, how to use them in exploration and parkour, how to make a TNT cannon and fire items around, and how to build a slime block flying machine! Along the way we discuss what can be pushed and pulled by slime blocks, explain piston push limits and how to get around them, and how to avoid slime blocks sticking to other parts of your redstone circuits.
Season 2 world seed: -3821426255058016680
Season 2 of the Minecraft Survival Guide will teach you how to master Survival Mode in Minecraft 1.18 and beyond!
Follow the Season 2 playlist here: https://www.youtube.com/watch?v=u7lE0MG80qw&list=PLgENJ0iY3XBjpNDm056_NSPhIntVMG0P8
—-
Watch my streams live every Tuesday, Thursday, and Sunday around 3pm UK Time! http://twitch.tv/pixlriffs Follow Pix on Twitter for video updates, screenshots, and other fun stuff! http://www.twitter.com/pixlriffs
GNU Paranor001
#Minecraft #Survival #Tutorial #SurvivalGuide #SlimeBlocks


![[⭐] FreedomCraft | City Roleplay | Business Ownership | Political Careers | Custom Map](https://newsminecraft.com/wp-content/uploads/2024/05/FreedomCraft-City-Roleplay-Business-Ownership-Political.gif)