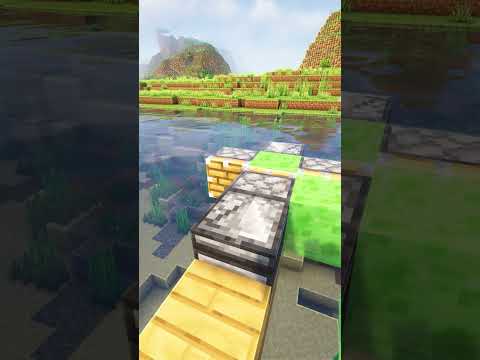
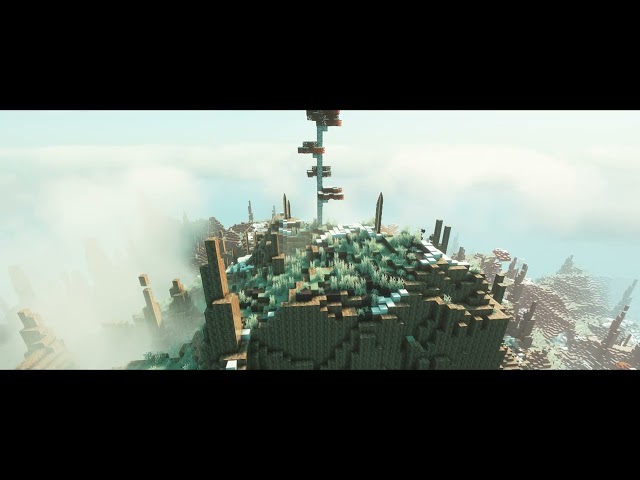
All right so after a bunch of testing testing a ton of different shaders as you can see here I’ve tested all of these I have found the best shaders in my opinion for Minecraft now I did narrow it down to three shaders one that looks just utterly amazing but gives you The worst performance another one that looks really similar but gives you much better performance and another one that gives you a much much better performance but doesn’t look anywheres near as good but it’s for the people that don’t have as powerful of a computer now keep in Mind if you want to use any of these shaders you will have to install OptiFine so I’m going to show you how to do that right now so first things first you want to open and run the version of Minecraft that you want to use OptiFine For so whatever version that is run that version of Minecraft and once you get to the main menu you can exit out and then we can go ahead and head on over to OptiFine right here which will be linked in the description but uh then you want to download OptiFine for whatever Version it is but don’t click download you want to click mirror and then click download and then it’ll put it right up here and it’ll ask you if you want to keep it just click keep now you want to just run this file you might have to go to your Downloads folder but for me it’s right here and then you want to just click install thank you just like so and then you have OptiFine installed and I want to install app to find you want to go over to the Minecraft launcher and for you it might Already be down here if it’s not go over to installations click new installation and then find this right here this will be it’ll it’ll say 1.19 or whatever version you picked and then OptiFine and then click that and then click save and you can name it whatever you want to but There you go now you have OptiFine and now let’s get into the different shaders that I picked okay so before we get into the shaders you probably want to know how to install them which we can do that by going to options video settings then shaders and then click on a shaders Folder right here and then this folder will pop up on your screen and you can take any of the shaders that you downloaded from your downloads folder and put them in this folder and then they’ll automatically pop up right in here as you can see just like so and That is how you install shaders but now that we got all of that tutorial stuff out the way the best Shader without a doubt in my mind is the complementary shaders right here which I’ve been using the entire portion of the video that I was in Minecraft now these shaders are Hard to run as you can see in the FPS counter up in the top left hand corner we are only getting it their 85 frames per second which it it varies between like like 50s and depending on where you’re looking it’ll go up to around 90. But I did adjust the settings in the Shader so I will go over to these settings that I changed which you can access by going to Shader options down here the first things first make sure you have integrated PBR plus turned on just like so and then if you want to Make the setting look a little bit better go to materials and then go to integrated PPR settings and make sure this setting right here is turned on and this one is turned on as well then we want to go back to lighting and make sure you’re seeing aware colored Lighting is on and then also this is where you can turn up your minimum brightness which if you turn this all the way down it will make it so that Knight is pretty much completely black 32 is the default I’ve turned it up to 96 just because I don’t like my Knights To be pitch black but then we want to click done and then we want to click sky and then go over to Aurora Borealis and then we want to make sure this is turned on I think it’s turned on by default but you can also change the settings right Here to make it so that it’ll be on every single night and then you can also turn off biomecheck which just makes it so that or the Aurora Borealis will only be in certain biomes now I normally have these two things turned on but you can Turn them off if you want the Aurora Borealis to pop up every night the setting is also optional I personally don’t have it on because I don’t really like how it looks but you can turn on Galaxies which will just give this nice uh nebula Galaxy kind of look in this Guy I’m not a fan of it especially when the Aurora Borealis is going on but if you want to turn it on and give it a try see what you think of it and uh yeah you can go you can go from there and then We’re going to go to post process go to click on Bloom settings and then make sure you have Bloom turned on I pretty sure it’s turned on by default but I have a handheld Bloom reduction turned off and turned on which will make it so that like torches in your hand it won’t Look as bright in your hand what they want on the crown and then Bloom is normally set the 0.4 but I turn it up 2.05 just because I like the look of Bloom and by the way if you don’t know what Bloom does it gives a nice glowing Appearance to anything that that emits light so yep and the last but not least we’re gonna go over to water here and make sure we’re water refractions turned on a water absorption is turned on and project protect projected cost access turned on this will make looking into Water look really nice but then to make underwater look nice we’re going to turn underwater fog distance up to around 224 this one’s kind of personal preference I like it right around here but if you want to be a little bit more fog underwater you can turn it down a little Bit I’m pretty sure its default is yeah 64. but I like it right there and then we’re going to turn to an underwater Distortion down to 0.3 this will get rid of that like waving effect on your screen underwater and if you want to you can turn it down to point zero which Will give absolutely no like a waving effect on your screen when you’re underwater I don’t really like that I like there to be a tiny bit of a way a waving effect but yeah that one’s kind of personal preference here but yeah I’m pretty sure that’s all the settings that I changed in the Shader so yeah this is by far the best Shader out of everyone that I’ve tested um now let’s move on to the second place one that gives you a little bit better performance and that is the the complementary reimagined shaders right here now I didn’t change any of the Settings in the Shader I left them all as they are when you you first download the Shader now this one has a really similar look to the complementary shaders but the clouds look different the lighting is a little bit different and the water looks a little bit different as you can see It doesn’t really have that realistic waving look it looks more like vanilla water just with some nice Reflections and the underwater looks a little bit different but with the previous Shader we were right around 40 to 80 FPS but this one we’re already up until the 120s And yeah it still looks really really really good you still get that awesome Aurora Borealis effect at night and uh yeah it just gives you a little bit better performance and I’ll tell you what’s really surprising is that the complementary reimagined shaders get about as good of performance as Cylinder’s enhanced default shaders and vanilla plus shaders which look way way way way worse than the complementary reimagin shaders as you can see we’re getting right around the same FBS but it doesn’t look anywhere near as good now if you still can’t run either of these two shaders Right here you should be able to run either these cylinders basic shaders fancy or the yo FPS plus low plus chalk pick 13s edit shaders right here now these do look a little bit different so I will show you both of them but this right here is the cylinders basic shaders And as you can see we’re getting a really nice FPS up into the 200s depending on where you look okay come on two there you go 200 hits but this Shader really doesn’t do much it doesn’t give you any Shadows I don’t think it gives you Reflections but it Does give you some nice and warmer more brighter lighting that looks much more better on the eyes but it does make the leaves and the trees wave and the grass and I’m pretty sure it does the wheat too um yep it does it also does the wheat so Yeah now it doesn’t look anywheres near as good as the complementary shaders but it does look much better than vanilla and that’s what we’re aiming for but now let’s check out the yo FPS shaders I think this one gets a little bit better performance now this Shader is pretty Similar in the sense that it doesn’t give you any Reflections or Shadows but it does give you some nice fog over there and reworks the lighting but it does give you waving leaves waving grass and waving plants down there as you can see and I’ll let you go ahead and choose Which one you think looks better but uh yeah those are all four shaders I think I said that there were three in the beginning of the video but I wanted to include a two for the low end shaders but yeah these are by far the best shaders from Minecraft I hope you all Enjoyed this video I hope it was helpful and uh yeah links to all these shaders and OptiFine will be in the description down below um and yeah like would be very much appreciated and get subscribed for more Minecraft content in the future and I’ll see y’all in the next one peace Thank you Video Information
This video, titled ‘Top 4 Best Shaders for Minecraft 1.19.4 | For Low And High End PC’s’, was uploaded by AerO R2 on 2023-04-06 03:55:34. It has garnered 43832 views and 519 likes. The duration of the video is 00:08:14 or 494 seconds.
in this video, I will show yall the top 4 best shaders for Minecraft 1.19.4 For Low And High End PC’s! I pick 4 shaders for the video the first one is the best looking but hard to run, the second one still looks really good and gives you much better performance and the last 2 look much better than vanilla and are super easy to run and give you tons of FPS for people who have a weaker system, also all of the shaders are for 1.19.4 and high and will be relevant in 2023, enjoy!
Earn Rewards by playing your favorite games with buff: https://www.bf3jdsk2d.com/X7PXL7/3QQG7/
OptiFine: https://www.optifine.net/downloads
You can find the Minecraft Shader 1.19.4 download here:
complementary shaders: https://www.curseforge.com/minecraft/customization/complementary-shaders
Complementary Reimagined 2.0: https://www.curseforge.com/minecraft/customization/complementary-reimagined
Sildur’s Basic Shaders: https://www.curseforge.com/minecraft/customization/sildurs-basic-shaders
YoFPS Shader (Chocapic13 Edit): https://www.curseforge.com/minecraft/customization/yofps-shader-chocapic13-edit


![Uncover the Secret Minecraft Update Mojang Hid from You! [Nobodies Retrospective]](https://img.youtube.com/vi/AB2PAooiffg/0.jpg)