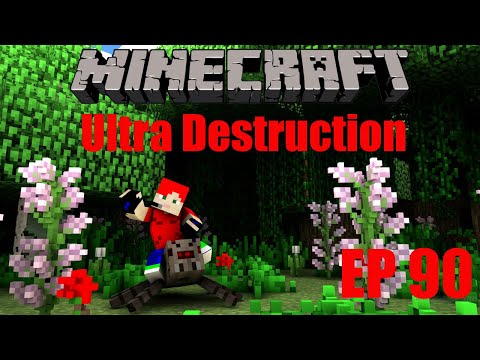
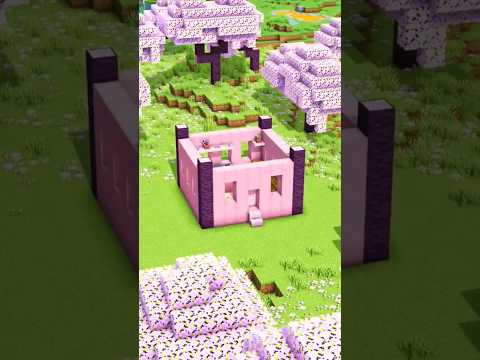
Hey what’s up youtube in this video i’ll be showing you how to make your very own trampoline park for all of your city building needs in this part of the tutorial i will show you how to make the entire outside building of your jump world but in part Two i will show you how to make the entire inside of your trampoline park and trust me when i tell you i think that you are going to want to make the inside this is a really really fun build to make and have for your cities if you enjoyed this Tutorial please do remember to subscribe to the channel and click the little bell next to the subscription button that’ll ensure that you get all my videos sent directly to your sub box and if you do want to make part two of this tutorial when it comes out check out the card System description below and the top of the comment section for that link you’ll be able to find it hopefully very very easily but without any further ado let’s get started i should be doing that on a trampoline let’s get started now just before we start building everybody here are all of the Materials that we will need to make our trampoline park please do make sure that you have access to all those materials and enough of them as well the amount of space required to make this build is a 48 by 42 block area as represented by the huge white concrete grid on the Ground which you are more than welcome to make if you are planning out a city i’d always recommend it and that’s it pause the video if you have to make sure you got all that stuff make sure you got enough room to make it make sure you’re Ready and once you are we can begin step one jumping enthusiasts come all the way over to the front right hand corner of your grid if you’ve made it count backwards from the corner 1 2 3 4 5 6 7 8 9 10 11 12. and then Left by one this is where we’re starting this off begin by placing a light gray concrete on the ground with seven purple on top of it one two three four five six seven extend that purple block to the left by twenty eight one two three four five six seven eight Nine ten eleven twelve thirteen fourteen 16 17 18 19 20 21 22 23 24 25 26 27 28 we’re then going to extend that towards us by five one two three four five and then we are going to take this block and extend it left by a further seventeen One two three four five six seven eight nine ten eleven twelve 13 14 15 16 17. we are then going to take the 17th block and extend it backwards by 33. one two three four five six seven 8 9 10 11 12 13 14 15 16 17 18 19 20 21 22 23 24 25 26 27 28 29 30 31 32 33 we are then going to extend this block all the way across the build so we don’t actually have to count this out thank goodness because it would be the longest row so far but we do have to make sure That this row lines up with the front of the build so you want to know that that has to be even to that now what’s important is we are then going to take this block and extend it coming towards the front of the build and we’re gonna place one purple concrete Nine glass pane so one two three four five hang on five six seven eight nine perfect and then we are going to place purple concrete joining so all in all we’ll have a huge shape and this gives you a good grasp at how big this place is that should look exactly like that Believe it or not that’s one of the hardest parts complete actually just getting the general shape down so what do we want to do next we’re going to drop all the way down and we’re kind of systematically going to work our way around the building i want to Install the entrance first so that we’re going to start our journey here with the only light grey concrete that’s here and we’re going to place another one left of it i then want you to place a yellow concrete inwards and left of the light gray and extend up by three one two three We’re then going to place ten yellow going left one two three four five six seven eight nine ten and then we’re going to join it down to the ground like this what we’re then going to do is we’re going to place a light gray concrete forwards and left of the yellow and We’re going to extend it left one purple on top glass on top glass to the left six purple going left one two three four five six and then four glass one two three four perfect just like that now you want to double up on all of that Glass meaning on top of every single glass that you placed you want to add an additional glass just like this Coming back to the entrance momentarily we have to divide this area up a little bit on the left side of the entrance we will be placing two vertical rows of glass pane with yellow concrete on the end on the right we’ll be doing the same but with three rows so one two So hard to place this and three there we go and then yellow concrete on the end we’ll have a double entrance with a bit of glass up above it i’d recommend replacing underneath all of the glass panes using some yellow concrete it’ll look pretty good like that Now around the entrance i just want you to kind of like frame this by placing some purple concrete that kind of extends above and around the yellow concrete of the entrance like this in addition to framing it like that i would also like to add a little bit more Detail to the entrance area whilst we are here um i want you to take the two inner corners of the yellow concrete that joined to the ground and i want you to place one two three four five six seven white concrete’s extending outwards from the ground from both sides Of the entrance so just two rows of white concrete like that we’re then going to leave gaps of three like on the left and the right like one two three and then we’re going to have more rows of white concrete that are equal to the original row so just Leaving a gap of three we’re pretty much gonna do that like this i want you to also have two more rows of white concrete so starting from the left here you want to leave a gap of one two three four and then on this fifth row white concrete one two three four White concrete and i do believe that that’s it i don’t think that we need any more and oh oh of course the rosa are going to be as long as the original rose so like this i know that this might look a little bit weird at the moment but that’ll all pull Together a little bit later on we need a path that leads us to the actual entrance of our jump world so that’s just going to be smooth stone spliced in between these two uh like thin layers of white concrete like this in addition to that that path is going To jot out two rows and it’s going to come as far left as here the end of what is going to be a flower bed and the path is just going to extend to the right like this so this is basically just a connection path um to your city or car park wherever You’re placing this um you’re going to want to connect that to wherever you to wherever you’re placing it because we all have different worlds so that’s what we want to have so far i know that that seems like a weird weird point to leave this off but what We’re now going to do is we are more so going to focus on this area that kind of like sticks out a little bit right so we’re going to take the two corners of this area on the front left of our build and we’re going to join them down to the ground however They want to join to the ground with a light gray concrete so you can take the walls and extend the walls down to the ground using purple but the actual bottom is going to be made using light gray concrete and that is consistent throughout the build so if You actually did want to what one could do is you could basically extend the light gray concrete and make it parallel to the row of purple that is above if that makes sense so you can give the bottom of the wall and the top of the wall if you wanted to anyway This area on the left this has to have two rows of purple concrete one two and one two placed in the top left corner and top right corner and then we’re going to place black stained glass pane underneath the row that is a little bit thinner up Above so in between the rows of purple we want to place black stained glass paint like that so we’re basically just creating a rather large window and then we’re going to fill this wall in particular in using purple concrete i was going to do this on mass later i was Going to completely like you know do all the details and then add all the purple but this particular part of the building has a yellow concrete area and the yellow concrete area is basically equal to the width of the glass pane that is up above and the yellow concrete is going to Start on the ground parallel to the glass um equal in width to the glass and the yellow concrete area is basically just going to sit one row below the glass so introducing a secondary color to that particular large part of the build very nice um we might as well continue this trend Of filling in the building we’re going to fill in all of the areas that we have just uh been working on so that’s really pretty much primarily only the front at the moment but we will be um we’ll probably follow this trend as we go Around as we kind of like put an end to a wall in particular we’ll probably just fill it in with the purple concrete it also leads to a little bit less tedium which is pretty good so let’s just get all this filled in with purple and uh and that’ll be that What i do want to do though is i want to add in some structure to where the sign is going to be so as you might have noticed there is a large sign above um the entrance um so basically we want to slot in two rows of yellow concrete One row above the doorway and one row below the top of the building and we’re going to have a row of yellow concrete that spans the width of the entire front of the build like this so again adding in more color contrast very good we want to have a yellow sign that Sticks out up above the door so the width of the door the area from the left side of the door the yellow concrete to the right side of the door we want to have a a further bit of yellow that just sticks out like this and above the entrance so like where the Entrance is where these two glass blocks are we’re going to dig that out and we’re going to place purple concrete there instead so that will allow us to place jump world um and it’s actually perfectly but above the entrance and it works out quite nicely as well because The separation is in line with the entrance so everything looks as though that it flows rather nicely that’s that’s what you’ve got to be careful of with these boats you’ve got to make sure that everything just flows together so now that the front has been completely Taken care of for the most part we’re now going to head all the way around to the right side of the build so on the right side of the build here we are going to work out all of the windows and stuff so starting in the top right hand corner We are going to place a row of four purple concrete going left one two three four and then a row of full glass pane one two three four and then a row of six one two three four five six purple concrete finish up with five rows of glass pane One two three four five and that is what we want to have right there we want to extend the light gray concrete at the base of the back of the build here we want to extend it back and parallel to the row of purple above us we want to join it together using Purple concrete to create a solid shape we want to take the row of four glass pane and we just want to extend that row of four glass down around and we want to take the row of five glass pane and we will actually want to extend it One row above the bottom of the frame which is why i just placed a little bit of purple there so i don’t know how many rows that equates to but basically it wants to extend all the way down until it almost touches the ground you want to Have row of purple and a row of light grey concrete in between and that’s the detail on this far end of the build the trampoline park is structured in such a way that this is kind of the end of the trampoline park um the trampoline park slowly gets taller and taller as you Kind of like progress through it and higher and this big window is kind of like um center mass of the park as the park is kind of like split into two in a in kind of like a weird way there’s a path that runs all the way up it and Where the path is is where the window is so that’s that’s why we have a rather large window if any of that made sense um what we now want to do now that we have done all of that is we are once more going to extend the light gray Concrete at the back we’re going to extend it all the way across and we can even just connect it to the front as well so you can connect the front to the back and around just like this it will look really good if you do this there we go so now again piecing These things together rather nicely i’m pretty happy about it and um what we’re now going to do is we’re just going to join this back corner together as well and then we can add in the final windows so final windows in this corner here we’re Going to place a row of one two three four five six seven eight nine ten eleven twelve thirteen purple concrete we’re then going to place four one two three four glass and then three one two three purple and then six one two three four five six glass pane Okay underneath this we want underneath the glass pane specifically we want to place two rows of purple concrete one and two and then we want to place two more layers of glass underneath where the glass is so basically just copying what we have up above us you’ll see this In a moment once we get there we want to have something which should look like that and then we can just fill the rest of the remaining area of the trampoline park inn using the purple concrete and we can quite literally fill the rest of it in meaning the final side the last Side that we’ve not really paid much attention to we actually added the glass in in its construction so we don’t really have to do much to it other than filling in with purple concrete we also have to add a fair amount of yellow concrete about the place as well um it’s This is one of the primary colors it’s i i guess perhaps it’s the secondary color it’s primarily purple secondarily it is yellow but you know if if it’s got a main color scheme it’s purple and yellow kind of like my original trampoline park But i i hope to think that this one is a lot better design so we’re just going to seal this side up as well and then we’ll be adding all of the yellow and then the roof which is surprisingly complicated believe it or not and then we’ve got a Sign to do and some car parking spaces and a little bit um a little bit of decoration but we’re making really good progress with this like it’s a huge building as you can tell and we’re you know we’re really we’re really digging into it so nice job Okay the next thing that we are going to do here is we are going to as i mentioned we’re going to add a lot of yellow concrete uh the first thing that i want to do kind of is i want to add a layer of yellow concrete that sits above And around the entire top of the trampoline park and when i say kind of it it sits above and around the entire trampoline park like this just like so and um it’s is the trampoline parts kind of separated into two different parts like we’ve got like the left part and the right part Which are going to you’ll see why they seem a little bit more separated once we start getting into the roofing area but we we still want to kind of like join them together using like a row of yellow like this and this row of yellow here On the right so like this part that kind of like sticks out on the right this no it it’s such a it’s such a hard way to kind of like try and describe how to how to separate this okay so you know how this part of the Trampolines park sticks out here yeah i want you to divide the trampoline park by cutting this area in half so i kind of want you to literally separate it using like a row of yellow concrete kind of like this right to which we are then going to add Another layer of yellow directly above it so now on top of this kind of like rectangular shape that we have now created and separated from the rest of the build we want to further separate it by adding another row on top this is where it differs from the opposite side so Now that we’ve kind of like half the area and added another on top you can see how these two parts are meant to be kept a little bit more separate and now that you have done that what we can now do is take the lower part of the build Here and we can add rows of yellow concrete that go all the way around whoa that that go all the way around the original layer so it’s almost as if that side is taller and this side is wider almost you kind of want to stop in The same place on the back as well the back kind of just wants to fade in like so i mean maybe it’d look better if on the back like we kind of just like went all the way across i’m not quite sure how to blend it in at the moment i’ll Think about that in a mo so we want to have something which should look exactly like that so far however i do think that we’re going to make it stick out even more we’re going to add another row of yellow concrete to it reason being is because we wanted to Stick out further than the actual sign as well so um i think that that would actually look pretty good so we’ll just make sure that this extends all the way over and across like this um but i don’t want i don’t want that to look a little Bit strange now you know that that almost looks a little bit weird so it might be better for the back of the build here it might be better for it to kind of like have a very clear and separate connection point perhaps so maybe maybe it just comes as far or Maybe like it it overlaps just a little bit that might be a little bit better i’m i’m not quite sure i think that that looks okay though so far so now that we have kind of like separated the roofs we’ve got like a nice overhanging roof over here which is Which is perfect i might even i might even shave off a layer here just on the right side because it does almost seem unnecessary for it to hang over that much on the right i think but it overhanging two is okay because what we can do is take the end of the sign Here the yellow concrete and we can extend this across and we can extend it backwards as well so we can extend it across and back and it kind of like breaks up a little bit of the monotony of the right side of the build too You could even go as far as to extend it through the back of the build but that would require a bit of um a bit of finesse so if you wanted to extend this across the back of the build and maybe kind of like so this is where this might work maybe If we like extend it around and join it and if we weave in between the windows or perhaps even we could change the placement of the windows then what we could do is perhaps connect the yellow concrete like up to the roof cone like that keeping The separations in in the windows and in between and then it almost looks more structurally sound so to speak i mean i know that this is a fake modern building but you know i mean that looks pretty okay i mean that that doesn’t look too bad at all really does It i mean and then that way it does look a tad a tad more put together i mean could we chop this part out or does that look silly no i think that that actually looks okay and then the back of the build now has a Bit more detail so i’m not unhappy about that and it gives a reason for us to have that like weird overhang i actually didn’t design it that way in the original uh in the original plans but i do quite like how that turned out you know what’s funny ladies and gentlemen Is i planned to do the roof on this part of the tutorial i plan for us to make all of these skylights and all of the alterations to the roof in this part ready for part two but i actually think it will be way better to do it in part Two so this is what our roof looks like right now but what i’m going to suggest that you do so this is what we are going to do to the roof in part one that’s this part simply fill in the entire top of your roof using yellow Concrete that will take you a fair amount of time trust me once you have done that we can then progress onto the next part of the build the next part of the build requires a couple of different materials so we’re just going to dump these out and we’re Going to grab first of all we’ll do the sign the dreaded sign it requires the loom yellow banners which i’m going to place in the most ideal position for banners which is here top left to top left corner move right by one and we need the Red dye and the yellow dye so um we’re gonna get all of that taken care of the entire sign there’s quite a few letters to make i think there’s nine of them uh let’s let’s do it so i’m going to chuck the loom on the ground if you don’t have A loom use a crafting table i would recommend using a loom and we’re going to crack open said loom uh we’re going to put the limb back in the inventory there we’re going to place a brand new fresh banner in the loom and we’re going to Chuck some red dye in there uh we we want a vertical row of red dye on the right side of the banner we want to grab that put that in horizontal row at the bottom of the banner that gives us our first letter which is j The second letter that we have to make is u so that’s basically horizontal row at the bottom vertical row on the right and a vertical row on the left so almost identical to what we just made with an extra step next is m bit more complicated brand new Banner in there we want to have the triangular cutout at the top of the banner so it’s that pattern we grab that put that in there get rid of the red dye truck the yellow dye in there and then we want this kind of like um kind of Looks like teeth at the top of the banner we want that formation grab that took that back back in get rid of the yellow dye chuck red back in there and then it’s basically just a horizontal row a vertical row on the right and a vertical row on the left and that will Give you your m p is also annoying to make uh we want a brand new banner in there with some what am i doing with some red dye in there too so we have to start off by placing a vertical row of red dye on the right we’re gonna get that Banner put it back in get rid of the red dye put the yellow back in and we want to make the lower half of the banner yellow we then want to grab that put that back in the loom get rid of the yellow dye get the red dye back out and We want to half the banner we want a horizontal row of red straight from the middle of the banner atop the cross across the top and we want a vertical row of red top left corner to bottom left corner also i don’t know what i’m talking about you guys can see What we’re doing there next we have to make w so that’s a brand new banner in the loom and we have to now it’s basically the reverse of the m we want to have the triangular part at the bottom of the banner grab that put That back in get rid of the red dye put yellow back in there we want to have kind of like the teeth on the lower portion of the band that’s what these two things look like by the way it kind of looks like teeth um we’re gonna grab That put that back in get rid of the yellow get the red back out again and we’re going to place a vertical row of red on the right and a vertical row of red on the left and that will be w next is going to be o so that’s going to Be a a brand new banner right in there with the red dye and we can actually use that a vertical row of red on the left a vertical row of red on the right horizontal row of red across the top and a horizontal row of red along the bottom that is o Now we have to make r r is made with a vertical row of red on the left horizontal row of red on the top diagonal row of red top left corner to bottom right corner r now we have to make l that is a vertical Row of red on the left and a horizontal row of red along the bottom l last we must make d which is rather easy to do um but might not be uh maybe it’s it’s not made in the way that you thought about so we have to have a Vertical row of red on the right side the banner grab it put it back in get rid of the red dye put the yellow back in there you want to create a you want to create a yellow circle in the middle of your banner like this We’re going to grab that put that back in there grab the yellow die put the red back in there and then we systematically want to place a row across the bottom a row on the left and then a row along the top and that will give you D pretty good so that gives you all of your letters it fits in our inventory and it will also fit across the sign that we made j u m p double gap w o r l d jump world and the red contrasts so well against the yellow That’s that’s why we used red looks really nice and adds another cool color as well so now that we’ve used those i can get rid of all of them and all we have to do is kind of like mark out um how we’re going to fill in this particular part of The build we need green terracotta as your blowouts oak leaves lime terracotta oak doors as well yet because we’ve not placed those yet and we also need a bit of gray concrete and i think that we’re good so left and right of the entrance area basically i want to have a row of Flowers in the middle of the flower bed areas that we have like left and right of the footpath and we’re basically just going to play some green terracotta all the way around the flowers and that’s just going to make the flowers pop a little bit we’re using white flowers just as a What would be the word as a neutral colour because i don’t want to use any more yellow and i don’t want to use any more purple and there’s not really another color that’s associated with the build hence the white but feel free to use whatever you like there we go that’s Looking pretty good um we want to have a car park area this car park area starts here on the left side so basically against the wall where these three car parking spaces are we just want to have a row of basically grey concrete like actual gray proper Grey concrete that just kind of like encapsulates this entire area like this so the gray concrete is just going to kind of like split the build in half it’s uh and that’s just going to all be like uh all car park pretty much all of this um The area here on the left basically everywhere else remaining mostly inside of the grid we’ll be removing the grid and we’ll be uh filling it in with all of this but i’ll tell you what we’ll this area here on the left is um is primarily um What we want to fill in um this area here is going to be filled in with lime terracotta um i’m going to add bushes all over the place so there’s going to be some bushes kind of like just um we’re going to place bushes pretty much Around the entire part of the build to be on like around the entire lower part of the build starting from like this particular like this corner that kind of like juts out next to the car park we’re just going to have leaves all the way Around the base of the build because i i just feel as though it needs it you know i just feel as though there’s some builds that just need a little bit of added nature a little bit of something this is a very very modern looking building so i just want to Offset that with a bit of a bit of grass and stuff um i’m also going to fill in this little this little patch here just to the right and i think that that will uh there we go that that just puts like a really nice finishing touch it really just adds A nice end to it so all that is left is for us to rip up this uh this area here replace it with grey concrete rip up this area on the left play some lime terracotta and one of my favorite parts to do with any build is chuck the doors On it so i’m actually pretty happy with all of that um let me do all of those things ladies and gentlemen i’m actually going to do them off recording because it will take far too long to do i’m recording let’s not make this video any longer and i’ll show you what it looks Like once you have reached the end of part one of your jump world so this is what your jump world should look like once it’s been 100 fully completed as you can see i have integrated it into my little city street that i have going on Here my very long city street by adding an actual road to the front and to the side but more importantly i have filled in the car park area with the gray concrete i’ve also filled the little area to the left in using the lime terracotta and you might not really Be able to see it but i did also add lime terracotta underneath all of the leaves and you can kind of tell it does look a little bit better so um that’s that’s exactly what your jump mode should look like once it has been 100 fully completed ladies and gentlemen or At least this part and that’s it i do hope you guys have enjoyed this tutorial if you have please do remember to subscribe to the channel and click the little bell next to the subscription button that’ll ensure that you get all my videos directly sent to your sub box If you have enjoyed this tutorial if you would like to make some other things by me including part two of our trampoline park then check out the card system the description below the top of the comment section all of that for the city builds playlist Where i show you how to make all sorts of cool stuff for your cities and also some other things too but the city builds playlist is the main part of the channel at the moment i do hope that you guys have enjoyed everything thank you so much watching everybody i love you All very much and i’ll see you guys in the next one goodbye You Video Information
This video, titled ‘Minecraft Tutorial: How To Make A Trampoline Park “2019 City Tutorial”‘, was uploaded by TSMC – Minecraft on 2019-12-28 12:06:23. It has garnered 285375 views and 4453 likes. The duration of the video is 00:32:50 or 1970 seconds.
In this tutorial i show you how to make your very own trampoline park called JUMP WORLD! this is a great build to add to your minecraft cities and stream city is certainly going to enjoy this one 🙂
Jump World Part 1 – https://www.youtube.com/watch?v=kMt-AIUO9F8&feature=youtu.be Jump World Part 2 – https://www.youtube.com/watch?v=ygFbuhjkbr4
How To Make a CIty Playlist – https://www.youtube.com/playlist?list=PLVfyBBWTXosBc2X7FdAzrdKffZoY1ZzZG
#tsmc #tsmctutorial #citytutorial
Want to Support the channel? 🙂 – https://www.youtube.com/channel/UCIui-Mt1PmcJYpoBATftj7g/join
Check out my merch 🙂 – http://tee.pub/lic/uCgw3hVWL6c Check out My Instagram! instagram.com/tsmcyt/