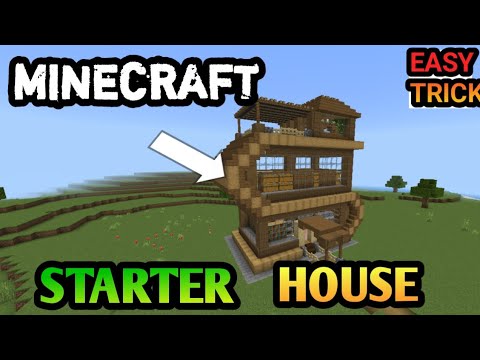
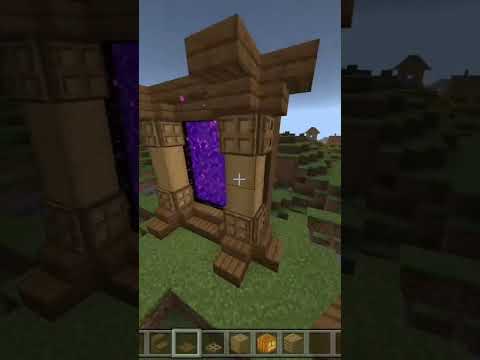
New mega tree farm tutorial this is a universal tree farm that works for almost every tree in Minecraft even the most difficult trees to harvest and survival like Mangrove and Cherry this Farm can handle them just fine it also works for Acacia aelia Oak Birch jungle and Spruce the only thing this Farm Can’t do is dark oak trees but I already have another specialty farm for that if you need a large amount of logs for any project this is the farm for you it is your One-Stop shop for all types of trees no matter what you want to harvest This Farm can do it to throw some numbers at your face this Farm produces about 19,400 blocks an hour when using Mangrove that’s about 12,000 Roots an hour and about 7,300 Mangrove logs we have five different Cube makers in this Farm because it produces so many logs And even then it fills up all the cube makers within about 13 minutes which is about 300 trees worth of logs there’s a lot of trees in this game so I didn’t test all of them individually but I know that Spruce and probably jungle Birch and Oak all share about the same rates Of around about 4,800 logs an hour to put that into perspective this is 12,000 Roots you’re going to be getting this every single hour and this is 7,000 Mangrove logs this thing makes a lot of logs now luckily you can actually compost all those roots in a composter And that’ll give you about 600 bone meal now you’re also going to be getting a fair amount of moss carpets and you can also compost those as well and let’s take a closer look at how this Farm works whenever you plant in a link down below that’s going to grow into a full Tree and then this Farm is going to absolutely dissect that tree and if it’s a large tree like Mangrove aelia or cherry it’s going to get separated out into four different directions as you can see the harvesting of the tree is actually fairly quick mangrove trees Have a lot of blocks in them so we’re activating the farm twice in order to pull out all those blocks we even have a separate mode for the one by one small trees that will prevent the farm from firing twice that way it runs much faster and there’s much less less lag From the main chamber all the blocks get pulled out and pushed into their various different Cube makers we even have a micro cube maker off to the side is that way we can get some additional block storage over here otherwise the farm would fill up way faster and by the way You can instant mine all the logs and even all the roots if you have an efficiency 5 ax and a haste 2 Beacon so mining out all these Cube makers is not a big deal we’re using this really clever system right here to detect when our Cube makers are full so whenever a Block touches one of these walls it’s actually going to change the orientation of it which will then change the orientation of all the walls down below it so we can detect blocks anywhere in this area for basically free and it’s really fun once the cube makers get full They will activate a safety circuit this will completely turn off the farm it will prevent you from planting new saplings it’ll prevent the farm from running and this is to prevent the farm from accidentally breaking once it gets full of logs it also turns off the bone Mill circuit to help reduce lag you might have noticed that mangrove trees are H how do I say this kindly they’re really stupid looking so there’s not a good way of detecting once they have grown in your farm but we’ve gotten around that by using daylight sensors And some comparators so whenever A Tree Grows in the farm that’s going to put some leaves above your daylight sensor and then that’ll activate your farm and harvest the trees and of course we have a secondary circuit to detect the regular trees so whenever a saw block is Right there the farm will also Harvest now because we’re using daylight sensors you have to have a couple blocks that are going up to the surface so if you’re building this Underground you’ll need to mine out a block directly above it in a couple of spaces that way you get the Daylight and for some reason it also doesn’t work if you have daylight cycle turned off I don’t really understand that one another nice feature about this Farm is that we’re actually using smart Pistons all over the place so that we have minimum lag when we’re activating our cubers so we’re using this little Trick with the walls and The Observers that way whenever blocks get push next to them they’ll actually get pushed smartly so it’s not going to activate a bunch of Pistons that it shouldn’t and we’re also using this for the main piston walls so it’s only going to activate Pistons that are required this Significantly cuts down on lag it’s also a requirement because of course Mangrove is just like super weird and you get blocks in really random places so those are the inner workings of the farm and here is the complete layout it’s mostly taken up by the five different Cube Makers that we need for the huge amount of blocks that we’re getting from this Farm you could make the cube makers a little bit thinner but then your block capacity would be reduced really just the core of the farm is the comp Le Lex bit and it might appear to be spaghetti Red stone and that’s because it is spaghetti red stone but it all works really really well and it all works really reliably without any issues so in the long run it’s going to be worth it if you like this kind of Mega tutorial then consider subscribing there’s a lot More videos on the way using the farm is really easy we have a simple control panel right here so when you flick this lever that’ll turn on the farm and now you can use it for aelia Acacia or cherry trees if you want to use it for The mangrove trees then you will need to turn on the prople farm because mangrove trees don’t actually drop their own saplings so we just added a little prople farm to the side using the farm is really easy you just come up here and stand on the AFK spot and then you can Plant saplings on the dirt right there those will grow into trees and as you can see the entire Farm just gets dissected and pulled apart now you’ll notice that mangrove trees might leave a log behind on the side right here that’s actually perfectly fine because mangrove Trees are so weird that they just don’t care so you can AFK here for as long as you want and just hold down the place a button you’ll be automatically dispens new saplings when the farm is ready for you and the farm will automatically shut off once it’s full of logs and can’t Harvest anymore and it even works for acacia trees right out of the box with absolutely no changes to the Redstone this Farm also happens to work with cherry trees it wasn’t designed for them but they happen to work in the farm just fine there is a silly bug of cherry Trees however the Cherry leaves prevent all saplings from growing and no matter how much you bone meal this the sapling will never grow and in fact no saplings can grow underneath Cherry leaves this bug has been the game since 1.20 released Mojang still hasn’t fixed it I Need your help to go up vote this bug report and tell Mojang that this is important because with this bug if you want to use the cherry trees in this Farm you need to manually break all the Cherry leaves otherwise you’re just going to waste a bunch of bone meal it’s Really silly if you want to use the farm for Oak Birch jungle or Spruce it’s also the same process we have a lever here to turn on the farm and then a lever here to deactivate the second pulse of the farm so that it only fires once that way We’re not you know wasting time and as you can see you can just plant in your saplings and everything works just fine when it comes to Oak saplings you do need to place in a temporary piece of glazed terra cotta up there that way you don’t get the large oak trees cuz That’ll break the farm but otherwise the small oak trees work just fine I had a couple of commands going to remove the leaves because it’s kind of a mess in here with all the leaves otherwise but here’s what it looks like normally as you can see you get a bunch of those Leaves broken you actually break enough leaves to get proper sapling return for all tree types so you’re never going to run out of saplings when you’re using this farm when using the mangrove Farm you want to put a few sticks and Mos carpets in your inventory that way when The dispenser shoots them out they don’t get put into your main hand that way you’re always holding a sapling and you can AFK use the farm huge shout out to firm for Designing the original base design of this Farm they sent this to me several months back and then we spent a Couple of months working on it together refining it upgrading it and improving it to work with all the different trees overall we went through 18 major revisions and changed thousands of little things to improve this Farm in every way you can find their Channel linked down below and again major thank You to firm for sending in the original design this tree farm has been in the works for months we spent so much time building and designing and testing every single aspect of this farm so that it always works reliably for you and so that it can work for as many different Trees as possible it was originally just a mang gr Farm but we’ve up upgraded it to work for basically every other tree this Farm does have one Quirk with it and that is because we are using daylight detectors to detect when our trees grow sometimes when you skip the Night or change the time of day this Farm will activate even when there’s no trees in it I can see that possibly being an issue so I would recommend that you always go ahead and leave the farm in the shut off State this way it cannot Activate and it cannot run so as a general rule of thumb i’ would recommend just leaving it in the off State that’s the only manual intervention you would ever need but I’ve also added a button on this side because sometimes during my testing this block would get left out Over here and that means that your clock is running for your propal farm but you could just press that button to reset it and a quick aside about mangr trees these are demon trees this is the worst tree that Mojang has ever added to Minecraft and they’re just horrible in Every way I mean if you look at them when it comes to farming them or even harvesting them in survival I think you understand they’re bad and they’re also bug buy there’s several bugs where they can overwrite blocks and other Shenanigans overall they are the worst Tree to try and make a farm for probably the only thing that really saves them is the fact that they always grow in cardinal directions so they’re always going to grow in a plush shape they’ll never have a diagonal block which makes it significantly easier to design a farm For them so when you’re running your farm you might legitimately have a tree that just doesn’t have any blocks in the bottom six layers and that’s just totally normal for mangri of so of course this is a very long tutorial because it’s a very large build however I put a lot of time and effort into making sure this is as simple and as modular to build as possible so you don’t actually need a lot of Minecraft skill in order to build this now there’s also going to be a World download in the description of the video for your Convenience that way you can download it check it out make sure it works before you get too invested now of course this Farm is a Mega Flex to have in your world so that is a primary reason of building this I also have a two by two Spruce tree farm and a dark oak farm and if you build all three of those then like okay what do you need all the wood for but also you just w Minecraft and let’s take a look at everything you need for this Farm These are the materials That you’ll need for the core of the mangrove Farm itself and as you can see is kind of a few resources now for the cube makers that go on the outer edges of it you’ll also need all of these blocks and then you’ll also need all of This stuff down here now you may need a tree farm in order to make all these pistons and let’s jump into the tutorial so the first thing first is spacing we’re going to need ourselves an entire chunk marked out for the bottom layer of the farm and these diamond blocks right Here are going to be the center of the chunk so these are eight blocks in diagonally from the corner right there if you don’t know how to chunk align then you can check out the tutorial linked everywhere but as you can see this is properly chunk aligned I also Don’t think that this Farm is directional however we are going to be building this facing south so as you can see with the locator map we’re facing towards the bottom of the map and here’s a sunflower for reference of course these are always facing East so when you Are looking at your control panel you should be facing south in the front of our area we’re going to have our little platform a couple of blocks above our bottom floor layer here and this is where we’re going to have our control panel our chest for saplings and then Our stairs going up to the AFK spot so make sure it’s all built just like so and of course you can expand this platform going backwards a couple other spacings that you should know about we’re going to be going up sever blocks to the floor layer of our main Cube Makers and then our tiny secondary Cube maker is even a few blocks higher than those now I’m not sure if sub chunk borders matter with this build or not I don’t think that they do but if you’re really worried about it this is the sub chunk marker right here on Foxy’s chunk Border pack and it should be going right between these two blocks sub chunks are a very sneaky thing and sometimes they can mess up your Redstone again I don’t think it affects the build but you should probably sub chunk Al line it just to make sure first thing we’re Going to do is go to our two stairs right here place in ourselves a block and then a couple scaffolding going up we need an upper slab right here and then we’re going to place a piston diagonally off of the corner of it like cell with a dirt block right here that Should be in the bottom left corner of your 2x two as you can see it is in the middle of our chunk just like so first Redstone we’re going to install is going to be for with the one by one tree mode so come underneath this lever right here We need to have ourselves two solid blocks going down like so and then three blocks in these areas a block up and then five blocks going along with the one on the very end being up by a layer so it should look like this and now We’re just going to get redstone on top of all of it like so a redstone torch right here for Redstone Dust going along and now we need a sticky piston on top of this with a Target block on its face come over to this side we’re going to Place in a redstone going down into a solid block another sticky piston right here with a saw block on its face and now we need three repeaters in this area all of which are going to be on four ticks just like cell we need another one right here going into a solid block Another repeater right here on two ticks this is going to be going into a solid block and this is going to be five pieces of redstone dust going out in front of that repeater come to this block right here and we need a couple more solid blocks going up like so and Then a couple pieces of redstone dust and a four tick repeater and now for the on switch of the build we’re going to come to this block right here and place in ourselves a piece of redstone dust we need a solid block right there to cut that Redstone and then a sticky piston On its face with a solid block we’re going to over to this location right here place in two solid blocks with two Redstone torches solid block right there and then a slab in this location with redstone dust on top of both of those we’re also going to place in ourselves a Sticky piston right here with an observer facing away from your control panel so it should look like this now come to this side of it and we’re going to place in a couple of Saw blocks in this area so it should look like that now place in one more block a comparator Right here on subtract mode and three Redstone Dust going out out this is going to be the main bone meal clock of the farm we need another saw block here and one up like so a repeater redstone torch another block above it and then another redstone torch that’s going to Power all of your droppers and dispensers now come to the back side of this repeater and place in a couple blocks like this and then a Target block going up like so we need a redstone torch there block another redstone torch on top of it and then another block Right there that should be directly underneath your piston and now we’re just going to place in a saw block right here and then a couple blocks to the left of it until it lines up your target block and three blocks to the right of It go ahead and fill in a bunch of solid blocks right here and now we need five repeaters on four ticks each just filling up this entire row you also need redstone dust on top of all of this and two more Redstone Dust right there now We’re going to place in a solid Block in front of that repeater and a slab next to it four solid blocks going to the left and then we need a couple blocks up in these locations right here a block up right there another block right here and Then a slab going down then we’re going to have a solid Block in front of that repeater go down by another block and now we’re just going to continue this line of blocks going out until we reach the edge of our chunk over here go out by another couple of blocks and then We’re just going to have in a solid block here and here and here and then remove these three blocks so it looks like this now we need redstone dust on top of all of these blocks a repeater right here on one tick redstone dust on Top of all of these until we go to this corner and then it’s a repeater on Forex and another repeater on Forex like so now we need a saw block up right here and to the side remove that block we’re going to continue this out until we hit The target block we’re going to go up by three blocks like so and then we need this little shape right here so all of this is going to have redstone on top of it and then a repeater right here on one tick come over to this corner right here And add in a piece of redstone dust next to this repeater and then we’re going to add in a solid block above that piece of redstone so those are all the spaghetti Redstone lines that are going to be controlling your main piston walls and now we’re going to install the Overflow Safety switch so we’re going to put in a solid block right here underneath this corner two Redstone dusts going down repeater on four ticks and a block this should be lined up with the Redstone line that we had coming from center now we need three repeaters on four ticks Coming out of that and going into a solid block this is going to stair step up by four blocks and then it’s going to go back down by a block right here and go over and then we’re going to have a saw block right next to this redstone Torch we’re going to have a piston right here and then you probably guess it we need redstone dust on top of absolutely all of it now we need a glass block above this right here and then three saw blocks going across like so two more saw blocks going forwards and then we just Need a little shape down here until we line ourselves up with this repeater so now we’re going to place in ourselves a piece of redstone repeater right here redstone on top of all of this until we get to the glass block so all this should be connected together and now a Repeater right here on four ticks now place in two blocks next to that repeater we’re going to place in a block on top of that one down there and then stair step it up until it reaches up here and now we just need redstone dust On top of all of that we’re going to place in another block right here and another one on the side of it Redstone Dust next to the Target block and then a repeater going into that one like so and now for the main shut off circuit we Need a solid block next to that repeater a slab right there we’re going to place a piston here Sol block above it and below it a redstone torch right here and then a redstone lamp and Redstone Dust next to that that should power this whole line your upper piston should Extend that one should extend and now we’re going to get out by a couple of blocks and place in ourselves a piston facing forwards right there so there should be a one block Gap and place in yourself a button we also need a redstone dust right here and then a Solid block above it and then a regular piston right here and now for the propagule farm that allows you to AFK plant mangrove trees come over to your double Redstone torches place in a saw block here and then a repeater off of that you need a sticky piston facing Upwards above that redstone torch saw block on top of it and then four saw blocks in these locations like C place in a comparator right here on subtract mode three redstone dust in these areas glass block and then a redstone dust now we’re going to placeing a sticky piston On the back side of that block and then a saw Block in front of it saw block behind this Observer and then a slab to the side of it with a piece of redstone dust right there go down and we need a another solid block right there another Slab right here two more saw blocks and then we’re going to step it up by two blocks just like so now we need Redstone in all of these areas and then a redstone torch right here and a redstone torch right there now come to this redstone torch and we’re going to place In a piston to the side right here two dispensers facing forwards in these two locations we need some Hoppers going into the sides of those and then a double chest right here you need to place in a mangrove Leaf in front of this in order to get propagules from it And now we’re going to come over to the side where we have this slab and red stone placing yourself a dropper facing upwards and then another one and then dropper facing to the side on your AFK spot this is going to give you one propag every time you harvest a mangrove Tree now we need a hopper facing into the side of that dropper down there and then just continue along a hopper line until we get underneath this Leaf right here place in a glass block to the side couple glass blocks above all these Hoppers and now for the tree detection Circuit but first this main piston right here is actually supposed to be a sticky piston so just lower that dirt back down by a block and now we’re going to place in a daylight detector right there and then a solid block next to it another daylight detector right there and then a Solid block here here and here switch both of these to be nighttime detectors and now you need a piece of redstone dust right here a comparator right here and a comparator coming out of that one this comparator needs to be on subtract mode and then we need a block in front Of it with a redstone torch on the side of it a regular piston right beneath that facing forwards so these two should be matching and now we need a solid block here two more solid blocks to the side like so a repeater right here on one tick and then two Redstone Dust Going downwards we now need a solid block up behind that repeater and then two redstone dust in these locations like so so daylight detectors are a bit weird they detect block light like to their sides and stuff so we need to place in ourselves a glass block next to That dirt block and then three solid blocks right here go around to this side place in a block here here and then two blocks in this area this area and this area like so one above that comparator and then of course make sure that’s on subtract mode and now just bury that in There with an extra two blocks and now for our Bell meal dispensing system we’re going to place in ourselves a dropper facing upwards right here and then two more above it and then a dispenser facing in towards your dirt block we’re going to place in ourselves A saw block right there and then two droppers facing to the side and then two droppers facing upwards for that little L shape and now placeing yourself another dispenser facing towards your dirt block we’re going to flip around to this side right here and place in two Hoppers facing into the bottom dropper Right there and a hopper right here and then just a double chest on top of both of those for your bone meal storage now place in one piece of redstone right there that’s actually going to power all of your droppers and dispensers and then place in a dropper right here this is Actually going to return these saplings to your player now we’re going to install the hopper floor above this farm and it’s going to be a lot of Hoppers so the first thing we’re going to do is place in ourselves a leaf block directly above that daylight sensor and then we Need all of our hoppers on the floor to be leading into this dropper right here we’re going to start by placing in four Hoppers to the backside and then we need to build up this general floor layout of Hoppers they’re all going to be going clockwise until they reach that original Dropper so get them all placed in in this exact layout now we need to place in some things to stop Roots leaves and logs from generating where they shouldn’t so we’re going to place in three buttons on the sides of all that stuff right there and then a sign right Here and a sign on the side of that sign and then a side right here and a sign right there and then a torch right there we’re going to place in a comparator above that glass block going into a piece of glaze terracotta and then a Torch right there and then we just need two torches on that side so that was the easy part of the build and now it’s time for the Piston walls now might be a great time for you to go take a break before we get carried away this side With your control panel is always going to be referred to as the front of the build so we’re going to have a front piston wall this right here is going to be a left piston wall this is going to be the right piston wall and then your comparator is facing towards the back The build and that is going to be the back piston wall so we’re going to build up the four easiest bits first so first of all you’re going to need to place on yourself a piston right here and then another piston right here and then you Need one more right in this location and another one right here as well so all four of these are going to be built up exactly the same so everything that I do to this one you also need to do to the other four we’re going to start by Building this up by 15 blocks so that’s 2 3 4 5 6 7 8 9 10 11 12 13 14 and 15 now we need to do the same thing on the opposite side with sticky pistons so we should have a tower of 15 sticky pistons Going up right here now we’re going to go back behind these sticky pistons and place in three slime blocks and then three honey three slime three honey and then three slime and that should line up now we’re going to place in a temporary block down here at the bottom place an Observer facing away from the build that way the butt of the Observer is stuck to the Slime and then you guessed it need a tower of these going all the way up until you reach the very tippity top now we’re going to place a sticky piston at The top bit of this slime and then the middle bit of this honey and then the bottom bit of this slime right here so it should look like that now move up a couple layers and we’re going to place in another sticky piston at the middle Bit of this honey and then the bottom bit of that slime right there and now do that on all four sides once you’ve built up your Four Towers they should look something like this now this back wall we’re not going to touch for this next step we’re going to focus on the left Wall the front wall and the right wall cuz they’re all the same so we’re going to come to our front wall right here and we’re going to place in ourselves a red stone block right here and then a temporary block and then two sticky pistons going up now a temporary block Two more Pistons temporary block two more pistons and keep doing this until you reach the top and you should be one block short now go ahead and rip out your temporary blocks in the middle we’re going to start by placing in three honey blocks on the bottom and then Three slime and do that going all the way up until you reach the top now continue up the tower of redstone blocks on the side of it now we’re going to place in some observers on the bottom piston the top piston the bottom piston the top one and then the bottom one so It should look a little bit like that and now come down to the bottom one over here we’re going to place in a piston facing that and then for the rest of these we need a piston directly underneath them like so so that when this piston is powered it’ll activate That Observer so just do that for the rest of these ones going up until you reach the top and it should look like this and now we need to place in a couple of buttons and signs in this area basically we’re just trying to prevent ourselves from getting blocks generating In these areas so just put yourself a button on top of The Observers and a button on the sides of them if you have air gap just put yourself a sign in there as well and that should stop us from having anything generating in these weird zones so once you’ve built up this Left side piston wall that’s what it should look like now we’re going to build two more of those at this location for the front wall and this location for the right wall they are absolutely identical we’re not going to fill in this back one yet it’s slightly Different and that is our three main walls installed now for the back one it’s going to start off very similar so we’re going to place in our redstone block right here and then our temporary block to the side of it and then double Pistons spacer double pistons and then You know the deal we’re just going to build build this up until we reach the top and it should look like that now you can remove your temporary blocks go ahead and fill in your Tower of redstone and of course to fill in your three honey then three slime going all the way Up and now for the different bit we need double observers next to all of our Pistons this way we can get a double extension out of the thing so now we’re going to place regular Pistons Behind These so we need a downwards facing piston for these two and then upwards And then downwards and then upwards and then one more downwards and that’ll activate all your double observers just like so and now it’s time to install this middle row of pistons for our three walls the back wall is yet again going to be different so let’s just start with This left one right here we’re going to have a sticky piston on the bottom right here and then two buttons above it three slime blocks and then a piston in the Middle with buttons above it and below it three honey blocks and then that pattern just repeats so it’s a bottom Piston with two buttons and then three slime middle piston two buttons three honey bottom piston two buttons and three slime and now you can do that same thing for this front wall and also the right wall so that’s the middle bit of our three main walls done and now It’s time for the middle bit of the back wall this is actually easier so it’s just two sticky pistons and then a button and then we got three slime on the bottom and then it’s two sticky pistons button three honey and it just repeats this process going all the way Up and you should end off with two sticky pistons button and then three slime on the top just like cell that’s actually all of your piston walls complete now we just need to wire them up with a ton of redstone and now it’s time for the Redstone lines so we’re Going to start off with the front wall the left wall and the right wall and we’re going to be on this little double extension system right here so at the very bottom we just need to place in a couple of glass blocks in these locations and then we’re just going to Be stair stepping up Redstone all the way to the very top piston and it really is that simple it should just look like that so go ahead and do the same Redstone tower for this system right here on the left wall and for this system right here on the right wall so That was super easy now let’s head to the very back wall on the same double extension this one is going to be basically the same but it’s going to be sideways so start off with your two redstone blocks right here and then just stair step that going all the way up to The very top piston and it should look a little bit something like this now we’re going to install the Redstone for this Tower of pistons and this Tower of pistons and this is actually the same Redstone for all four sides so just do them all the same we’re going to start At the bottom here and place in a redstone dust next to this piston and then just stair step these pieces of redstone and glass going all the way to the top and then on this side it’s just going to be the opposite of that so we’re going to have a redstone dust on This side next to that bottom piston and then just stair step this Redstone and glass going to the top and that’s what it should look like so the top of this Tower ends at that piston and the top of this Tower ends at that piston and it’s Basically just a stair stpp of glass going all the way up so install these Redstone Towers for all four sides of the build it is only slightly different on the back Tower here so at the top we need an extra block and red stone for later and then at the bottom here you Don’t need the extra glass block and Redstone that you normally have because there’s no piston otherwise it’s exactly the same that’s all the basic wiring for the towers the Pistons now we just need to install all the timings and this is where it gets a little bit more messy so Go to your front Tower of redstone and we’re going to count up by four glass blocks so this is one 2 three and four and now we just need to make in ourselves a little platform right here placeing yourself a solid block right here next to that piece of redstone and Now we need a four tick repeater right here and a two tick repeater and then two Redstone behind it now we’re going to place in a solid block above it with a couple more blocks here and then we’re just going to make in a little platform So it should be this General shape and all that is directly above this repeater so we’re going to place in ourselves a three tick repeater right here and then a couple pieces of redstone dust a four tick repeater and then a two tick repeater and two pieces of redstone dust To power this left Tower and now we need to add all of these repeaters and all of these upper repeaters to the left wall and to the right wall those are the basic timings for our three walls now we’re going to work on the back wall this one has significantly more timings For the double piston extension starting with the left Tower we’re going to count up by two glass blocks so this is one and this is two we need a saw block above it right here and then just a little platform for our repeaters so we need a couple Redstone Dust here and Here a four tick repeater on the left and a two- tick repeater right there now we’re going to count up by three glass blocks so this is one two and three and we’re going to place in a little platform right here this should be at the same layer as this redstone dust and Then we need in a two tick repeater right here a four tick repeater another four tick repeater and then just a one tick repeater couple bits of redstone dust right here and then a block in front of that repeater and a block in front of that one now we’re going to add In a solid block right here and then two more going out and now we need to Stair step this up by a couple of blocks so it looks like this now we’re going to place in ourselves a sticky piston on the side right here and an observer facing away From the build place a block on the front of that that should activate your piston wall and then another block right here now we’re going to go ahead and place in two blocks above that and then another two blocks Right Here and Now place in a couple of glass blocks stair Stepping up and then one more saw Block in that location for this General weird shape now we’re going to place a redstone dust here a three tick repeater and then red Stone Redstone and then Redstone in all of these locations just like so now we need a two tick repeater A four tick and then a two tick and a four tick on the very top right here and that is what it should look like now we’re going to extend this out on the back side so we need five saw blocks going across right here until we’re Lined up with this Redstone and now a solid block right here and two more like so we need a two tick repeater right here and a four tick repeater and then just connect that up with a redstone line now come to the front piston wall Of the build we’re going to come to the very top of this right Redstone line place in a block right here and then we need a piston in front of it with a saw block right there and then we just need in a redstone torch in this location Like so and then another piston right here now we need in a little platform going to the side this should go out by four blocks and then on the end we need a block up so it should look like this once you have it built up and now we’re Going to place in a bunch of four tick repeaters in all of these locations and then a block right here next to that piston we need a redstone dust right there a sticky piston right here facing to the side and then an observer facing away from the build we also need to Place in ourselves one more for tick repeater right here now we just need to go off of this middle Redstone line so stairs step up with a couple bits of blocks and then we’re just going to place in two Redstone to connect it together now we’re going to go to the Right wall over on this side and we’re going to place in a sticky piston right between these two regular pistons and it should connect this Redstone Dust right here we need an observer facing towards the back of the build right there and then a block behind it with redstone Dust on top of it place in a block in front of it that should activate your entire piston wall and one more block right here you also need to do the same thing on the left wall and this is what it should look like on the left wall Again that Observer is going to be powering the Redstone line behind it and that is all the wiring and timings on the Piston walls done now we just need to connect them together to the lower Redstone in the brain starting on the front wall we’re going to connect up This Redstone right here so go out by two blocks and then we’re going to step it up by four blocks like so and then after that we’re going to go to the left by another two blocks now just cover all of this in Redstone Dust like so and We’re just going to stair step this up until we reach our repeaters using glass blocks and it should be connected just like that now for the right wall we’re going to come down to this slab over here and we’re just going to go out by two solid blocks and then stair step up Into the right by five solid blocks and then we just need to cover up all of this with redstone dust so it should look like that and now we’re just going to stair step up some more with some glass blocks until we reach this point In which case we’re just going to go out by a block to connect that together for the left wall we need to go all the way down to this repeater on the back side right here we need to go up by three blocks just like so and then over by Another two and now we just stair step this up by five blocks and that should bring us underneath our repeaters right here cover up all of this with redstone dust including on top of that block right there and now we’re just going to place in a couple of glass blocks right Here to connect that together and now for the back wall of the build there’s actually multiple Redstone lines so starting off with the first one we’re going to come down to this repor and place in yourself three saw blocks on top of it like so and then we need to Stair step up and out by three blocks we’re going to connect this together with a bunch of redstone now make sure that none of these three Redstone lines right here are touching or connecting and now we need to go back up to here so placing yourself another two glass Blocks to continue stair stepping that up now we’re going to stair step it to the side by a block and then place in yourself a glass block and a saw block and then two more Redstone right there and that’s going to connect it all together for the second tower we’re just Going to go down to this Redstone line and place in a redstone dust and then we’re just going to start towering up with glass blocks until we reach these double repeaters so once you get up here you just need another glass block going to the side and then a redstone dust to Connect up to this and now for some extra blocks at the top of the farm this is going to help you prevent leaves Vines branches and other stuff from generating outside of the build so all of these walls are actually going to be the same we need in a glass block above The Slime and the Honey terra cotta in the middle and then glaze terra cotta on the side in these three locations and it’s going to be the same on all the sides so glass glass glaze terra cotta in all of these four areas and then just keep doing this going around and that’s What it should look like once you have it all in place now we’re going to fill in a little roof above this just add of glass blocks so it’s just going to be a 5×5 of glass and then right in the very middle of this roof we’re also going to Place in a solid block to help prevent our trees from growing up and now we need a couple Wings Around the top here again to help prevent those branches so this is going to be the same on all four sides we need to place in a couple of Saw blocks next to these buttons down here and then a line of Saw blocks right here and then just continue it up for this General shape and then right here we need in two extra buttons and do this for all four sides lined up with your middle glass block right here and lined Up with the middle of the farm so that’s all four of these things installed it is actually slightly different on the back wall because of course it is so this is the general shape that you need to install of course we have the buttons on the front there now down inside of here We have a redstone here to prevent you know branches but we also need a button on the side of that piston to prevent a branch from generating right there now we just need to install the blocks on these main piston walls so go inside the build the main three walls are going to Be the same but this back wall is going to be different so starting with the left wall here we just need in a piece of glazed terracotta behind that Observer and then some saw blocks and then behind every Observer going up you need glazed terra cotta otherwise just Fill it all in with solid blocks and it should look a little bit something like this so do that for the left wall do it for the front wall and also do it for the right wall so that’s your main three walls done and now for the back wall It’s basically the same so we’re just going to place a glazed terracotta behind all of our observers and then regular blocks in the gaps between them and this will allow us to properly have our double extension and it should look like this once you’re done again this All needs to be glazed terracotta that is actually the entire core of the farm done congratulations and now it is time to test this thing and hope that it doesn’t implode we just need to add a couple bits of redstone before we’re ready to test fire so come over to this Double piston right here place in a solid block right here and then a button and then we need in a regular piston right here make sure it is a regular piston and then an observer facing directly upwards like so and now the farm is active and ready to fire so be Careful this redstone torch should currently be turned off if it’s not then make sure that your daylight detectors are on nighttime mode and also make sure that there is direct Sky access directly above this block and directly above this block right here you can’t have any solid blocks leaves or anything else That blocks daylight so it can only be glass blocks and like air above these two locations I would highly recommend that you make a world backup before activating this thing in case it does implode that’ll save you a ton of Reb bu time now what we’re going to do is we’re Actually going to break one piece of redstone on our left wall Redstone line here and then on the right wall Redstone line and also on the front wall Redstone line we’re going to test these walls individually that way we can pinpoint if there’s any particular issues so right Now only the back wall should be activated and if we go ahead and place in a leaf block above this comparator right here that should activate our entire back wall and that is what it should look like a proper two cycle Activation so once you confirm that that One’s working go ahead and add in your bits of redstone dust and test out each wall individually once you’ve confirmed that each Wall Works individually now it’s time to try them all out together so place a leaf above that again stand in the middle and you should see all of This glorious Redstone activate around you and absolutely everything is working properly and one final test we’re just going to make sure that these blocks actually get pushed out properly so we’re going to place in a little plus sign of blocks in here and place in the One above the comparator last so this is going to be a full plus sign and all of this should get pulled out and put into your four different directions and as you can see it is working absolutely perfectly if that did not work perfectly then go ahead and double check our your Timings make sure that everything is built exactly as shown you can also put a couple stacks of bone meal into this dispenser and then if you place any solid block right there that should also activate the farm and now we’re good to go just making sure that this also Activates that’s it if the farm imploded during any of that I’m I’m really sorry World backups are your friend and now it’s time for the final leg of the build we need to install the five cube makers around here now these things are really simple so I’m going to show you how to Build up one of the main ones and then you should be able to figure out the other ones really simply from that so we’re going to go to the front right side of the build right here and placing ourselves six temporary blocks so that’s 1 2 3 4 5 and six and then place in a wall right here Observer and then a piston facing to the side like so and now we’re going to place in five more blocks so this is 1 2 3 4 and five and then place in a wall Observer and a Piston facing to the side right here and now we need 12 Pistons going across so 1 2 3 4 5 6 7 8 9 10 11 and 12 now we’re just going to fill in a layer of solid blocks down in front of them like so and Now you need to count out by 12 light emitting blocks so like sea lanterns Jack lanterns glowstone just needs to be something to emit light so this is 1 2 3 4 5 6 7 8 9 10 and 11 and then 12 and then just make this a big old square and Connect it up on this side as well so you need to fill in this entire floor right here with solid blocks it needs to be solid blocks that way it doesn’t let light and shadows travel downwards cuz that can cause a lot of lag so fill in This entire thing now we’re going to come down to the edge of this build right here and place in ourselves a wall and then another Observer facing that on the end so all of the Observer and wall combos need to be 15 blocks tall so they Should be lined up with the top layer of your Redstone and pistons so we’re just going to go ahead and make ourselves a tower of wall blocks right here lined up with the top of that Redstone and then a tower of observers right here and then Of course a tower of Pistons as well so you kind of get the idea go ahead and do that same type of combo in this location and then this entire line of Pistons right here also needs to be 15 blocks tall so this is where the build actually gets Expensive so once you have your entire wall of pistons in place and all this stuff is looking good now we need to install the Redstone lines which is really easy so we’re going to make a redstone line at the very bottom right here it’s just going to be a line of all Blocks with redstone dust on top of it and then we need another line right here here here here here and here I did say this is where it gets expensive so for this very top one we can do it a bit differently so we’re just going to put a Block right here and then redstone line and then just go across all this top row pistons and then a saw block on the end right there and that is the basics of how you build these Cube makers they’re essentially all the same they’re just in different orientations basically and now We’re going to work on this back right Cube maker over here so we’re going to go out by seven blocks from this redstone block so 1 2 3 4 5 6 and seven placeing yourself a wall there Observer and a piston facing to the side and now You just need your 12 pistons in place so that is four 5 6 7 8 9 10 11 and 12 and now you know the deal you need your wall on the end right here your Observer and then your giant floor in front of it stack all this up and build it basically Identical to that one they really are the same and that’s what it should look like once you have this entire thing built up as you can see it’s basically identical to that one for the front left cuber we’re going to go down to this redstone block right here and placeing Ourselves six temporary blocks going out to the side so just like that and then a wall right here on the side Observer and a piston facing to the side and then you know the deal we just need our 12 Pistons going out and it’s basically the Same as those two it really is quite simple and for the back left Cube maker we’re going to go out by nine blocks from this redstone block right here so that is 1 2 3 4 5 6 7 8 and then nine and then we just need a wall right here And then an observer facing that and a piston to the side now we’re going to go out by another four blocks so that is 1 2 3 and and four and then we’re just going to rotate it to the other side so a wall on this one Observer and then Your pistons and then you know the deal from here on out it’s just 12 Pistons going out to the side here and it’s the same thing that you’ve already built three times and congrats all of your cubers are now done and if you think that that’s a lot of Pistons this Farm Was originally like six layers taller so you’re welcome I just saved you like I don’t know 300 Pistons or something and now we’re going to install the Overflow detection systems this is actually really really really easy so we’re going to come to the back corner of this build Right here and place in a wall of walls going all the way up to the top uh level with that and then we need a wall of solid blocks on either side of it and as I mentioned earlier this is going to automatically detect whenever this area Gets a log in it and that’ll tell the system to shut off underneath this you also need an observer facing downwards and then we’re going to install another one on the back left wall so it needs to be the furthest Edge from your you know original input of the system so we’re Going to have our wall going up right here saw blocks to the left and to the right of it and then of course your Observer down below and build this up to be the same height as this and once you have that built up we just need to run a Redstone line from this block going all the way across to this block over here I’d highly recommend that you put in some temporary levers that way you can run a redstone line whenever it gets to its final signal strength just send that into a block repeater and block and then We’re just going to run another Redstone line underneath this ledge right here and then both of these edges should be able to power that repeaters so as you can see the front of the farm can power that repeater right there and then the back of the farm can also power that Repeater right there and then this Redstone line is just going to go until we are lined up with this Glass Tower right here and now it’s time for our third detection Tower and this one’s going to be going on this back right corner over here so you know the deal we Need in a wall right here and this is is going to be going all the way up and then we need saw blocks on either side of it for this one the Observer is going to be facing out to the side this way we can save a couple Redstone Dust again You want to put in yourself a temporary lever and then just run this Redstone line until it runs out send that into a block repeater block and then we’re just going to send it downwards and we’re going to do the same thing for this side Over here that we built up for the other two Cube makers so both of these are just going to be going down into a little corner and then we’re just going to send both of these lines into a solid block right here which will then power that piston and activate your light and That is going to completely shut off your farm and prevent anything from harvesting or running and now you can go ahead and just remove your temporary levers now this corner of the build never actually gets filled up first I think it’s just due to the directionality of trees growing so you Don’t actually need a detection circuit on this side but if you want to add one it’s not a bad idea it’s basically the same as you know the other three and then you just run a redstone line into that one over there basically you just need to make sure that whenever this Gets full it activates the Redstone line and those are your major Cube makers completely done now I would recommend adding in the little mini Cube maker to the side over here because this one gets the vast majority of the blocks especially if you’re on Mangrove because this is getting the double extension Into it so what we’re going to do is we’re going to build in a mini Cube maker right here at the most popular levels that way you don’t need to harvest the farm as often so the first thing that we need to do for the mini Cube maker is come back to to our back right cuber and now we’re going to go down into this little tiny area back here we need in a tower of temporary blocks right here and then on the fifth block up we’re going to start placing in Observers so this is one 2 3 four and five and then we just need four observers going up this should be layers 5 through eight so we’re going to get in a saw block behind that one and that one Redstone Dust on top of both of those And then we need in a repeater coming out of that block right there and then another repeater above it just like like so and both of these are going to be leading into solid blocks with one piece of redstone right here and now we’re just going to get a block right here and Then one up to the corner and one right here and redstone dust on top of all three of those now we need a sticky piston right here with a barrel or really any other inventory on the front of it it just needs to have one item Inside of there now we just need in a solid block right here and a comparator on it and now whenever this Barrel is in this location that’s going to activate this with a signal strength of one so that it can power these four Pistons right here so if you activate any of These observers right here that should activate your little circuit and then power those four pistons on the front so now we’re going to go to this little corner on the back right cuber and we’re going to pillar up by five blocks so that’s 1 2 3 4 and that’s number five Right there so this little four block pillar is going to represent where the logs are going to be coming in from and that should be lined up with the four observers that we just installed on the back so now we need some sticky Pistons that are going to grab those blocks and Pull them in and then a line of Pistons right here and then our 12 Pistons going to the side on the left so that’s 1 2 3 4 5 6 7 8 9 10 11 and 12 and then of course on the end of this you’re going To have your wall and observer so you can go ahead and fill in this piston wall and The Observers and the Redstone behind it all of that is super bog standard and while you’re here you can also go ahead and fill in the regular floor in front of it it’s just going to Be the standard you know 13 blocks long with your 12 lighting blocks as you can see it is pretty standard and now we’re going to come to the back side of this right here and place in ourselves four walls right here for the actual detection of the moving logs and then we Need four observers behind that and then block here and here we’re now going to go down bu a couple blocks just like so and now just cover all of this in Redstone we also need two glass blocks right here now we’re going to run this Redstone line into our little platform Over here so just go ahead and mine out a couple couple blocks and go to the other side so run this in here with a line of redstone and then we’re just going to go straight into this light block right here so just run a redstone line into that make sure this block Actually conducts the Redstone if it doesn’t then just replace it with a solid block and then we’re going to get in a repeater right here going into a solid block now we’re just going to pillar up with our three additional sticky pistons right here and then place In ourselves a solid block at the bottom and at that layer now we’re just going to place in a couple of solid blocks right here go up in the corner by a block and then redstone dust on top of all of that now place in a glass block Here and here and then just go ahead and run redstone on top of all that as well now we’re going to place in a sticky piston facing upwards right here Observer facing to the side saw a block here and then one right here another one Here and one like so cover up all that with red stone and now one piece of glass and one Redstone Dust on top of it and that is your mini cuber complete I have two last minute additions for you so we’re going to come to the left side Wall right here we’re going to add in a couple extra Hoppers just underneath this piston to catch any extra saplings that might be there and then we’re going to come over to our main shut off over here make sure those two lamps right there just makes it easier to see and We’re also going to place in a button above this that way you can manually turn off the build and prevent it from activating uh you could easily add in another Redstone line to activate this piston that way the button is like closer to the front of the build or Something and of course you want to go around and put some Bell meal into your chest here and and here and you also want to put some bone meal into your propig chest as well whenever you turn on the main lever of your farm that’s going to start pumping bone meal from Your chest into all of your droppers and your dispensers but of course your dispensers are not going to be active if your lamps are turned on you also need to come in and place in a couple of Planks on your walls so go up by six Blocks so that’s one 2 3 four five and six right here i’ recommend placing one in each wall at this level and this is of course the indicator of where you need to place in a glazed terra cotta when you are doing Oak saplings if you do not have this glazed terra cotta Above your dirt block there then you’ll get the large oak trees which have diagonal branches and that will destroy your farm so never plant an oak sapling in here unless you have that block this is a bit optional but if you want to you can put a glass block Above This leaf And then install a hopper mine cart right there and you can also put in another one right here as well this will help you collect a little bit extra saplings that would typically be landing on these blocks just make sure you push them to the side a little bit that way If an item does go in there it’s actually going to end up into your dropper over here you can also add another Hopper right here and one more right there just to collect a couple extra saplings and now we’re ready for the first test fire of the machine I Would recommend that you also make another world backup just in case something goes wrong here you don’t want to spend a lot of time rebuilding so we’re just going to turn on the main lever go inside the farm now make sure that you have daylight cycle turned on If daylight cycle is off then you might have some issues now we’re just going to place in a regular like Spruce sapling just to try this thing out and of course it’s a bit hard to see sometimes but there goes the tree we can also try out The mangrove trees as well that’s going to grow in and then get harvested out and it’s looking pretty good uh keep in mind that you can have a couple leftover logs right here when you’re in Mangrove mode this doesn’t actually affect anything that is intended cuz it helps Speed up the farm and it doesn’t block them from growing of course before you switch it to any other types of trees you’ll want to remove these excess logs that are right here or you can just activate the farm Again by placing in like a block right there and that’ll get Rid of any logs that are on the side and now we can try out a cherry tree and as you can see that’s going to get fully harvested and dissected as well looking very good again with the charer leaf bug you’ll need to remove these before you Plant in any other saplings which is kind of silly thanks for watching this video it’s been in the works for a very long time hopefully you enjoyed if you did then drop a like share it around and subscribe for more Mega tutorials I’ll see you guys down in the comments and in The next one and then there was silence Video Information
This video, titled ‘MEGA TREE FARM Tutorial! Mangrove + Cherry! 8 Type Universal Tree Farm! Minecraft Bedrock (MCPE)’, was uploaded by silentwisperer on 2023-12-25 19:15:01. It has garnered 28705 views and 1797 likes. The duration of the video is 00:54:03 or 3243 seconds.
New MEGA TREE FARM tutorial for Minecraft Bedrock Edition! This tree farm works for MANGROVE & CHERRY trees! It also works with oak, spruce, acacia, birch, jungle, and everything else except dark oak! Subscribe for more Minecraft Tutorials!
This Minecraft tutorial works on Minecraft Bedrock Edition, MCPE, PE, Xbox, Playstation, PS4, PS5, Switch etc:)
Huge thanks to @firomlp for designing the original build and helping refine it!😀
Latest video! https://youtu.be/XwE0gUyPJ20
World download! “Mangrove tree farm” https://silentwisperer.com/downloads
How to find chunk borders: https://youtu.be/X5q32h22fEc 2×2 Spruce tree farm: https://youtu.be/w51SLBHKD5E Dark oak tree farm: https://youtu.be/M-ZiAw3rLj8
290+ Minecraft Bedrock Tutorials! https://www.youtube.com/playlist?list=PLv0ngaVTZt4HGuq-IbONrSnvwc4NAp16o
Truly Bedrock Survival Series! https://www.youtube.com/playlist?list=PLv0ngaVTZt4GBB_zsGIGV9qhVg1T5NtRi
Become a member of The Silence! Join our community and subscribe! 💙Second Channel ► https://www.youtube.com/c/silentwo 💜Twitch ► https://www.twitch.tv/silentwisperer 🧡TikTok ► https://www.tiktok.com/@silentwisperer 🔹Twitter ► https://twitter.com/silentwisperer_ 😁Discord ► https://discord.gg/silentwisperer 💻Website ► https://silentwisperer.com/
Consider supporting the channel! Get benefits such as whitelisting on our Minecraft servers & so much more! 🥰Patreon ► https://www.patreon.com/silentwisperer 💖Memberships ► https://www.youtube.com/channel/UCUxzwCjOUhswNDsLA5ux0IQ/join
Get 30% off Minecraft Servers with Nodecraft! Nodecraft allows you to host 30+ games per server, and swap between them seamlessly! Nodecraft servers are extremely easy to setup, and they have amazing customer support! Joining Nodecraft also supports the channel! 💠► https://nodecraft.com/r/silent
MATERIALS LIST: 386 solid blocks (6 stacks & 2) 352 redstone dust (5 stacks & 32) 229 glass (3 stacks & 37) 156 sticky pistons (2 stacks & 28) 96 slime (1 stack & 32) 91 observers (1 stack & 27) 89 pistons (1 stack & 25) 84 honey (1 stack & 20) 76 buttons (1 stack & 12) 62 hoppers 60 redstone blocks 59 repeaters 42 glazed terracotta (yes, it has to be glazed) 18 signs 12 redstone torches 10 droppers 7 slabs 7 chests 5 dispensers 5 comparators 5 redstone lamps 4 torches 3 levers 2 scaffolding (or ladders) 2 target blocks 2 daylight detectors 2 leaves (at least 1 mangrove leaf) 2 stairs 2 hopper minecarts 1 dirt bonemeal
CUBERS: 1,143 solid blocks (17 stacks & 55) 862 pistons (13 stacks & 30) 614 redstone dust (9 stacks & 38) 203 walls (3 stacks & 11) 170 light blocks (2 stacks & 42) 166 observers (2 stacks & 38) 141 slabs (2 stacks & 13) 6 glass 6 sticky pistons 7 repeaters 1 comparator
0:00 MEGA Tree Farm Tutorial! 0:30 Universal tree farm rates 1:26 How does it work? 4:45 How do you use the farm? 5:44 Farming Cherry Trees 7:17 Credit:) 8:02 The farm has a personality:3 8:40 Mangrove: The Demon Tree 9:29 Tutorial start! 10:08 Materials needed 10:40 Build location 11:58 AFK spot and switches 14:12 Brain raedstone 15:58 Safety system 17:50 Propagule farm 19:20 Tree detection 21:13 Hopper floor 22:06 Piston walls! 26:30 Middle piston towers 27:28 Piston wall wiring 29:14 Piston wall timings 33:13 Connecting to the brain 35:19 Upper safety blocks 37:28 Testing the core! 40:00 Cube makers 47:00 Mini cuber 50:52 Final details! 52:39 Final test!
Music by Argofox: http://bit.ly/2vsxAF1
#Minecraft #mcpe #tutorial PieIsTheBest in the comments If you made it this far down 😉