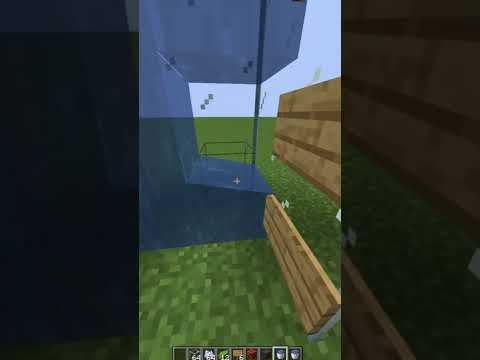
So in today’s video we’re gonna take a look at dynamap in Minecraft plugin which allows you to add a Google Maps like map to your Minecraft server it is really cool extremely easy to install and today I’m gonna show you exactly how it all works so before we start do make Sure to subscribe to my channel a very big part of my viewers who regularly watches my content is still not subscribed so do me a favor check that subscribe button down below make sure it’s pressed and then without any further Ado let’s add Dive Right into This so the first step of course will be going to the Dyne Maps picking MC page a link can be found down below simply click on download now after that go to your Minecraft server directory look for the plugins folder and simply drag down map inside then after rebooting your Minecraft server inside of the console it should say something like din map enabled if that is what it says then you know it is working now the next step will probably be the most difficult if you’re hosting localhost you don’t really to worry about this but if you’re Hosting your micro server at a Minecraft server hosting company you need to make sure you have access to a second Port now I’m hosting my Minecraft server at alien host they have been a channel partner for a while now and they offer very powerful Minecraft servers with Dedicated Hardware so if you want to check them out I’ll leave a link down below and if you use code Casa Sera you can save a whole 20 of your first order but if you are hosting an alien host then one of the tabs on the left of your Screen will say network if you click on there you will see that I currently have one out of 5 allocations of This Server meaning that I can create four more so we’re simply gonna create a new allocation just like that and this will be my secondary Port so we want to copy That then go back to your Minecraft server directory after that to your plugins folder and then go inside of your din map folder inside of the diamond folder you want to look for the configuration.txt file simply open it up and then the very first thing you want To do is specify your storage style So currently it is using file tree storage and this is something I would not really recommend you can use it so if you leave it default it is fine but what I would actually recommend is using an sqlite database or a mySQL database whichever One you prefer but for the Simplicity of this video I’m simply going to use an sqlite database so in front of line 30 I’m simply going to type a hashtag to disable it and then I’m gonna remove the hashtag in front of line 32 which enables the sqlite database okay perfect Now next what you’re gonna do is scroll down all the way to line 350. why is this so low I have no clue but on line 350 you got the web server port and this port you want to replace with the port you have available at your Hosting provider so for me it is 25541 now I’m simply Gonna Save the file again and then once again restart start the Minecraft server now after that what you want to do is copy the IP address of your Minecraft server so for me this will be the IP address and this will be The port but instead of this ports that I use to join the server we’re gonna use this secondary ports that we just linked to dinette so this is what we’re gonna type in in the browser then we’re gonna press enter and there we go this is our Live map now you will see absolutely nothing here so you might be really confused now this red line you see over here this is actually my world border and this here is my spawn location now right now you won’t see anything yet but when we now join our Minecraft server And we start to jump around a little bit look at me jumping around having the best time of my life and you will see that slowly the map will start appearing also you will now see me on the map now obviously this looks awful we can see Some chunks we can see others we even have some land outside of the border right now out but I would actually love to see everything inside of the border that would help but luckily for us din map has a couple of commands that you can use to make sure that more tiles Will appear inside of dying map now if you use the command slash dynmap render it will only render the chunk or the towel you’re currently standing in that is of course not very helpful if you want to generate the whole world or at least a big part of it what you can also Do is use the slash dynmap fill render command so if I would do slash dynamap fill render and then worlds it will attempt to render all the maps of this world the world called world now you might be wondering are there multiple maps from Worlds yes I will show you That in a second now the comment I’m going to execute in a little bit is slash dimap radius render 500 so this basically means that in an area 500 blocks around me so not spawn but around me it will start generating tiles so when we now press enter render of 500 Blocks radius starting on World’s called worlds and over here it will now give you updates on which tiles it has already rendered and when we now go back to our world map you can see that a lot more stuff is rendered now that is beautiful nice so now everything is out Of my world order and even outside of it has been rendered now you can see it is still a little glitchy from my experience they will mostly disappear over time when just more stuff is rendered in general now like I mentioned earlier there’s not just one map no no Of course not there is a lot more so when you force your mouse to the right side of your screen like Ben it will open a menu and over here you will be able to select the world and what type of map you want to see from that world So currently we’re looking at the normal world map the flat world map so to say but just like with Google Maps there’s also a surface map which kind of is a 3D map and then there is a cave map which actually allows you to see cave systems So if we will now click on Surface this is what you will see now this is extremely impressive you literally have a 3D view of the world so you can see a beautiful River here you can see all the trees you can see that over here behind This tree is the spawn point this is where I’m standing right now which is completely accurate with where I currently am in the game over here there’s an air balloon even the shadow is generated that is impressive stuff now if you want to cancel a render we Can of course do slash Dyne map cancel render there we go it is canceled so let’s now visit the nether there we go and now I’m going to execute this same command dimap radius render 500 and now we will start generating it for the world world’s Nether and when we now go Back to the nether map after it’s finished rendering you can see it is a complete mess just like the nether should be so we got a 500 by 500 block completely rendered here in the nether map and of course we can also choose for the surface option and we will have a 3D Render of the Nether and look there’s my nether portal that I just created and I’m standing over here somewhere that is very cool that is really really impressive and then this will be all for today I really really hope you enjoyed watching do make sure to smash that Subscribe button if you’ve not done so yet and then I will see you in the next one bye bye bye Video Information
This video, titled ‘How To Setup DynMap On Your Minecraft Server’, was uploaded by KasaiSora on 2023-09-14 14:01:00. It has garnered 2754 views and 169 likes. The duration of the video is 00:07:48 or 468 seconds.
Become a Channel Member to unlock epic perks: https://www.youtube.com/channel/UCjUrZyueysuEQ1a5qntzI9Q/join
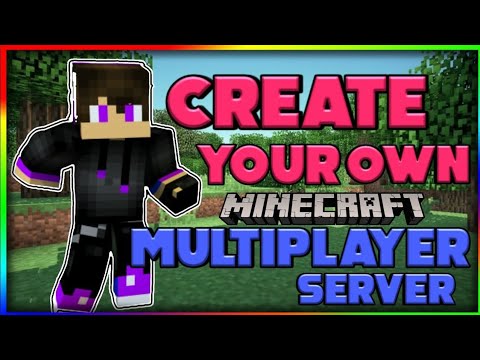
How To Setup DynMap On Your Minecraft Server. In this video, I am going to show you how to install and setup DynMap on your Minecraft server. DynMap gives you a Google Maps-like Map for your server. In your preferred browser, you can see your complete world, all live player locations and even cave systems.
Check out Alien Host through the link below and use code *KASAISORA* for 20% off your order! Website: https://alienhost.net/
MY SOCIAL LINKS ▀▀▀▀▀▀▀▀▀▀▀▀▀▀▀▀▀▀▀▀▀▀▀▀▀▀▀▀▀▀▀▀ *DISCORD* | https://discord.kasaisora.com *TWITCH* | https://stream.kasaisora.com *ALL LINKS* | https://links.kasaisora.com
I upload mostly Minecraft-related videos. Like tutorials, plugin & mod showcases/reviews, challenges, hardcore series, and much more. Make sure to hit Subscribe and click the 🔔 Notification Bell to never miss a video!
LINKS ▀▀▀▀▀▀▀▀▀▀▀▀▀▀▀▀▀▀▀▀▀▀▀▀▀▀▀▀▀▀▀▀ DynMap: https://www.spigotmc.org/resources/dynmap%C2%AE.274/
This is a NEW Minecraft 1.20.1 plugin tutorial. In this video, I am going to show you how to install DynMap on your Minecraft Paper/Spigot/Purpur server. This plugin adds a Google Maps-like-map for your Minecraft server. After setup, you can simply go to your web browser and see your whole Minecraft world on a very cool and detailed map. You can even activate a 3D view which allows you to see even more. There is also a cave map and there are even maps for the Nether & End worlds. You can see live player locations and much more. It’s very cool, fun, awesome and poggers! This plugin makes your Minecraft insane and amazing! Your players will absolutely love it! I had lots of laughs and fun. Hopefully, you’ll get some useful information from this video. I love Minecraft fun!
Minecraft Paper / Spigot / Bukkit / Purpur Tutorial. Also BungeeCord / Waterfall / Velocity proxy Tutorial. Minecraft: Java Edition / Minecraft: Bedrock Edition Server Plugin Tutorials. These plugins come from SpigotMC / MCMarket / BuildbyBit / CurseForge / Modrinth and Github. Minecraft Plugin Tutorials / Installation Tutorials / Plugin Setup Tutorials / Plugin Showcases / Plugin Reviews. Plugin support / Plugin Setup Guide. New Minecraft Plugins. Top 10 Minecraft Plugins / Best Minecraft Server Plugins. Top Minecraft Server Plugins. Paper / Spigot / Bukkit-based Plugins. But Minecraft Mods as well. Forge / Fabric / Quilt Mods. Most Fun Minecraft Mods. Download and Installation of Minecraft Plugins / Mods. Minecraft Mod Showcases / Mod Reviews. It’s a KasaiSora video on YouTube. Not The Breakdown / Skip the Tutorial / Phoenix SC / Shulkercraft or any other creator. This is amazingly fun and absolutely poggers.
#minecraft #minecraftplugins #minecrafttutorial #minecraftshowcase