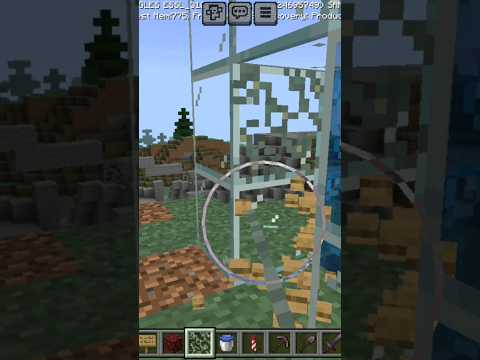
How’s it going guys anxious cynic back again or maybe for the first time with something new and as you can see from the screen and from the title of this video we are going to give blend or a spin so first a couple of things I want To get into before we get into this tutorial sorry it’s long-winded I’ll try to have some on the screen if you want to avoid the intro here but I want to get this out of the way so first of all why am i doing blender tutorials One is I’ve been asked to by a number of people and I just kind of wanted to myself but unfortunately I’m not the most familiar with blender I’m not proficient at it I’m not very good at it so if that’s the case why would I make a blender tutorial well my schedule with Making videos and things like that has become rather strained and I find it hard to make myself get in the blender to actually practice with it and do more things so what I’m hoping is to try and make a somewhat comprehensive tutorial series and we’ll make an animation maybe Over the course of the series and that’ll help me to dedicate myself to putting time into blender and actually doing something with it we’ll see how it goes if nothing else hopefully I can do this video and help you guys get started so that you can find better resources Than this one um but anyway that’s all to say I’m going to give it a try so expect a bumpy ride but hopefully there’ll be something of some you know substance and of some help to someone and some people the next thing I want to Say is this is not a blender tutorial if you’re not familiar at all with blender then this is probably not where you want to start there is a channel that I use to help get brushed up on blender which is born CG I’ll have a link in the Description of the playlist for his channel of the videos he’s done to help you know get the beginners getting started with blender and everything this is primarily going to be aimed more towards just using blender to make minecraft animations what I’ve learned about doing that so far and any other Little tips that I picked up along the way will be hopefully sprinkled in there as well so if you just want to make minecraft animations with blender then maybe this will be you know enough of a resource for you but in general if you really want to Kind of know how blender works and how to interact with it more than that series is definitely what you want to go to so as far as minecraft blender animation tutorials series goes there is one that I’m sure most of you are aware of which is by arbiter six one seven of The black plasma studios Fame so if you haven’t seen that already how kind of surprised if you haven’t but he did a tutorial series on it and a lot of things that he covered there I will be covering here I did learn some things from his tutorials as well so I will try To my best to reiterate those and include those tips in this tutorial series so finally before we get into the meat of this you may know that I do minam ater tutorials so you may be wondering why why go to blender well blender can produce better quality And it gives you a whole plethora of other options when it comes to 3d animation and whatnot you can expand on Mauna Mater a bit but if you really want to graduate into more of the big leagues quote-unquote then blender is definitely the place to start it is after all a Free program and you know I know a lot of you guys are fans of the aforementioned black plasma studios and are birder six one seven so you know a lot of you want to make animations the way that those guys do it so I thought It would be cool to do a tutorial series on it and that’s why you might would want to learn blender a little bit alright okay so now we’ve got all that over with hopefully I said everything I needed to say and I get I apologize that Took so long but here we go so when you start up blender we’re gonna we’re going to get into how to get blender or stuff in a moment but this is what you’ll see so what I want to do though I’m just going to click in here to get rid of That you can start up your previous file from that screen and whatnot but I’m going to do is go back to the factory settings of blender because I already have some customizations and I don’t want to confuse you with that so this is what blender is going to look like when You first get it so let’s go ahead and bring up I have blender installed on my Steam account as you can see here and I personally would recommend it because of having it through steam does is keeps blender up-to-date so whenever they come out with a new version steam will Automatically download that and install it so you can constantly use the newest version of blender without having to do it yourself and as you can see here if you have steam installed if you don’t I recommend you get it if you don’t wanna then you can of course go to blender org I’ll probably have this link in the description and you can download it just like anything else and you’ll have the standalone version of blender but again you’ll have to keep it updated yourself so hopefully you’re aware of how to download and install programs and whatnot if you’re coming from my minor Matter to toriel’s and wanting to graduate to blender then I’m sure you know how to do that so yeah so moving on let’s go ahead and check what we need to do to get blender set up to make minecraft animations so what I’m going to do is go to file here you’re Going to go to user preferences and what we have is this little window here and I’m going to go each one one by one alright so this is the interface tab and there’s not much we’re going to mess with here I don’t think hopefully I don’t forget any of these I made some Notes so hopefully we’ll cover it all a couple of things that I do check is zoom the mouse position this is totally subjective you can you know play with these settings and see what you want to do and how you want to use a blender and I have rotate around selection again Like I said these are just my settings what I typically use it doesn’t mean that you have to do it I might change them myself in the future but this is just how I’ve had mine set up alright so we’re going to go into some of these Other ones I don’t believe I’ve changed anything in editing again if you watch the born CG tutorial series then he explains some of this stuff so we’re just going to skip this one and move on to input and here’s one of the things blender is different than most other Programs whereas you have to select things with the right mouse button instead of the left mouse button and that can be really confusing and to me it adds an extra level of complexity to already trying to learn a complicated and daunting program so what I’ve done Is I generally just go ahead and change this to select with the left and that kind of helps to get rid of some of that you know daunting this of like how do I interact with the program what not you can try it the default way but I’m going to have it This way so when I say left or right click which blender is very specific about these things just remember that I have changed this if you don’t follow along with that pretty sure that’s about all we’re going to change there maybe some more but for now we’re just going To go ahead and leave it at that we’re going to come back to add-ons in a moment and when you go to themes this is the default theme that I have here and it’s not so bad but a lot of people like to use the Elysium one I believe and you Can see how that changes it it kind of gives it a nice dark cool look or whatever but I think for now we’re going to stick with the default theme for this series if I change it somewhere along the way well it’s not going to make any Difference it’s just the colors or you can you know you can check out any of these presets or you can of course customize it yourself which is a rather in-depth and tedious process but you can alright so under file the only thing we’re going to really change under this At least for me is the autorun pipe sorry about clicking on that I was just checking out what it was the autorun Python script so what this is is blender uses Python scripts to execute certain tasks like when you download an add-on and whatnot which We’ll be getting to in a moment it uses these Python scripts so sometimes if this isn’t turned on those scripts won’t run because blender is not told to auto run them and you can have problems so I generally just turn this on and leave it on so that when you use add-ons it’ll Work flawlessly hopefully unless there’s some other problem the only problem with this is python scripts apparently from what I’ve heard in passing is they can be malicious like if you do download a bad one it could spell problems for you so if you do this make sure you know What you’re downloading and that you’re going to reputable sources and not just downloading python scripts for blender willy-nilly and stuff okay so that’s pretty much it we’re going to change under this tab I believe and we’re going to move on to system alright so now that we’re under system the only thing we’re Going to do under here is two things one of which is universal you want an untape bitmap I’m not sure what purpose this serves if you’re doing general 3d animation but for minecraft animations you need this off so that the textures will load properly at least that’s what I’ve come To understand I don’t know if there’s any exceptions to that rule and finally you have the compute device option here and it says none and CPU and this is meaning it will use the CPU the processor in your computer to render the scenes and generally unless maybe you Have a really beefy processor this can be kind of slow and tedious but if you have a compatible graphics card if you’re using a desktop in particular but maybe a gaming laptop or something you can use the OpenCL option which is generally what I use and my graphics Card is an AMD graphics card so it’s going to say Tonga because that’s the the chipset or whatever I don’t recall that that card uses so I’m going to have it on this if you don’t have that option that’s perfectly fine just leave it on CPU and you’ll be able to do the same thing it’s just rendering will take longer which is unfortunately a huge problem with blender but we’ll leave that where it is okay so I’m going to go ahead and click Save user settings we’re going to have to do this again but just So we don’t lose anything in case blender crashes because it does crash sometimes we’re going to go to add-ons and the only thing we’re going to really need here is the MC prep add-on so let’s go ahead and go into Firefox and we’re going to go to let’s close that MC prep Now this is what’s going to help make blender a little bit more like minam ater if you don’t want to create everything you’re using or have to append things which we’ll get into at a later time this makes it really easy to spawn in certain things and whatnot so You’re going to go this link it will be in the description and you’re going to come down here to the bottom and you’re going to download the zip file again I don’t if you’re on Mac which I think blender can be used on Mac unlike my no Mater I don’t know how all this stuff works for you guys so hopefully you can sort that out for yourself all I know is you’re going to download this zip file and we have a couple of things that you’ll have to download as well or at least one thing in particular But we’ll come back to that in a moment so back in blender we’re under the add-ons tab and what you’re going to do is click on this button down here that says install from file once you’ve downloaded the MC prep add-on of course so once you click on that you’re going To get this screen which is a general like file browser type screen and we’re going to navigate to where we have that zip folder saved to you’re not going to extract it or anything like that you’re just going to leave it as a zip folder And as you can see here it says MC prep add-on 2.13 zip and I’m going to click on that and I’m going to go up here and click install from file so once it’s done with that you’ll see that nothing happens here and we’re going to go into The search and type in MC and over here you see the object MC prep add-on so I’m going to go ahead and tick that and there you go you have this add-on is now enabled so that we can use it I’m pretty sure there’s no settings in here that we Really need to work with hopefully I’m correct in thinking that and with that on I’m going to click Save user settings so that way any time we come back to blender we will have that good to go and not have to enable it again another thing like as far as using blender in General when you you have a lot of add-ons they actually come with it that are not turned on so I recommend if you want to do more than just minecraft stuff or basic minecraft stuff then you look into a lot of these and what they Can do for you and whatnot but as far as the setup goes that’s it you’ve got your add-ons and you’re good to go and you save the user settings so every time you start up blender you should have all that stuff done and you shouldn’t have to do it again maybe Unless or until so make notes above those settings anything you change in there when blender updates you may lose that all right so before we get started with how to set up everything else in blender I’m going to go ahead and go over these this is JMC to obj this is a Software you’re going to use that helps you to import your minecraft worlds into blender so I recommend going to this link all these links will be in the description downloading this by clicking on download the latest release and you’ll have that you may have to extract it I’m not sure we’ll get to This at a in a probably a later part we’re not going to go into it today but just so you have everything set up you can download this and have it ready and then on the Honda how you pronounce is Rim the Denise Rim Denise II I don’t Know anyway Rinda desi net he has this huge pack of like it’s like character rigs and models and all the objects in Minecraft and all that cool stuff he’s already got ready and rigged up and ready for you to use so you can go to this link and then down here by default It’s usually on internal and we’re going to be using the cycles rendering engine which I’ll get to in a moment it’s up to you if you want to try internal then that’s fine but we’re going to be using cycles in this tutorial series so if you Want to use this and follow along if we use any of these things then I recommend downloading the cycles version so yeah just get this stuff downloaded and ready to go and you should be prepared for anything that we do or encounter in this series ok so a few things about the Blender interface and things that we need to do to get set up so for one thing by default blender comes with the blender render engine selected by default as I said so you’re going to click on that and come down here and click on cycles render and when you do That some things are going to change it’s not really going to be that noticeable right now but there is a big difference in how cycles and blender render work and generally cycles is better cycles is the new engine it’s the future it works better you can do more With it so yeah you definitely want cycles if you want to keep up with the the updated changes of blender that all came out very poorly but anyway just suffice to say if you want to use blender render which is technically I think supposed to be somewhat easier and Faster than cycles then you can but in my opinion like I don’t know why you would waste time learning that if it’s outdated and it’s kind of getting phased out cycles is from my understanding where the future of blender is and if you’re not learning it then you’re kind Of like putting yourself at a disadvantage so you’ll notice over here we have this toolbar on the left and as you can see there if you can see that that’s MC prep there on the bottom so when we enabled that add-on in our user settings then This tab showed up so when we click on then we get this a little view over here with all the options that on gives us and as you can see we have friendly mobs hostile mobs passive mobs and player mobs and what this is is like rigged Characters that we can actually bring in just by clicking on one and stuff like that and then as you can see up here we have the world exporter one of which is JMC to obj which we I advise you to download and then you have mine ways Which is another option the reason I said JMC to obj is because in my experience it works better and it actually interacts with the MC prep tools but yeah that that’s what I recommend if you want MC prep tools and the importer of your worlds to interact Then as far as I understand JMC is going to give you the best circumstances but if you want to check out mine ways I’m not going to provide a link to it but you can google it you are free to do so and compare the two and see which one You like but we’ll be getting into that at a later time basically over here if you are coming from my tomato this area over here is kind of your crafting table so to speak this this is all the stuff that allows you to like spawn in things you can Spawn in planes and cubes and Spears if I click on this then blender crashes okay sorry about that but for some reason blender wants to be wonky today and that is unfortunately one of the downsides to blender o anyway so you can do things you know you can spawn and Stuff but there’s usually more preferred ways messing with things but this is a way to do things without having to learn as much about blender whether it’s key bindings and shortcuts and all that kind of stuff this of course can be gotten rid of you can press the T key on your Keyboard and that is basically stands I guess for toolbar and lets you bring it in and out or you can drag it just like you saw me do earlier and when you do drag it out you’ll get this little plus sign and when you click on that it Brings it back out so that’s the basic interface you can also hit the in key or use this thing over here and this brings out your properties window and this gives you information about the location and rotation and all sorts of other things that we won’t really get – at this point in time again this is kind of like general blender stuff so yeah I recommend you watching the born CG tutorial series in any case the in key gets rid of this and brings it back up so I can do like that but anyway let’s move on to actually getting Blender setup obviously I need to change this stuff because it changed okay so the first thing I want to do is under our render tab this little camera is our render tab and this is all of your render settings if you’re coming from my animator then you may recall the like The project tab where you change things and you have the render settings and all the quality and all that kind of stuff but that’s basically what this is the resolution and everything and what I have here is the devices CPU by default but as you may recall I changed it to The OpenCL option in our user settings so I need to come up here and click GPU compute and that’s going to make it use my graphics card for rendering instead of the CPU so those are two steps you have to setup to get that going for you By default blender is set up to render at 1920 by 1080 which is full HD resolution and this percentage here means it’s going to render half of that frame size so instead of 1920 by 1080 it’s going to do 50% of that and the reason that is is because you may want To set this up for the size that you’ll ultimately want to render your final project at but while you’re working on it you want to do like test renders and stuff you may not want to render the full frame size and it takes forever so You can bring this down you can leave it at 50% you can bring it down even further just so you can like render a quick test and go from there so anyway those are the basics and we can get into more this later on but for now we just Want to set up blender so that it’s ready to go when we’re ready to use it so for this thing down here we went to the performance tab and we have the tiles option here and for me since I’m using a GPU it’s better for me to have This be a higher number which is 256 by 256 and what that is is the size of the tile that it renders out it’s the way that cycles renders we’ll get into it at a later time but just suffice to say if you are able to do the GPU compute Then you’ll want to up this if you’re using CPU you may want to bring it down there are some articles and stuff that people have done to talk about like the best sizes to make this I think if you’re using CPU they recommend that you bring it down to like sixteen by sixteen So I recommend looking into that if you want but for me it’s going to be not to 65 it’s going to be 256 by 256 the next thing we’re going to do is go to the next tab over here which is our render layer River layers tab which Jesus Christ uh-huh and this is stuff that’s not going to really come into play right away but we were just going to go ahead and try to get it set up and we’re going to go down here to passes as you may have seen and I’m going to click on Missed and I’m going to click on vector we’re just going to enable both of those so they’ll be white with it ticked and you’ll be good to go there that’s all you want to do with that and finally we’re going to go over here to our world Tab and we’re going to come down here to ambient occlusion now this is optional I recommend you play with it and see whether or not you want ambient occlusion meinem ater actually has kind of a simulation of ambient occlusion but obviously blender has a much more robust And realistic version of it I generally ticket I play with it every now and then to see what I want but generally I’ll leave it ticked and what I do here for the factor I actually bring that down to about 0.35 again this isn’t something I’ve experimented with a whole lot but I Found this to kind of give me the results that I want in my experimentation so yeah there’s that and all this stuff will be relevant more later on particularly if you’re doing other things with blender but it does have some effect on what we’ll be doing for minecraft animations so I think That’s pretty much it and now that we’ve got those things set up what I’m going to do is go over to file drop that down and I’m going to go to save startup file so when I click on that and it’s going to say ok and I’m going to click again Or you can hit the enter key however you want to do that all of these changes we’ve made with the add-ons we’ve got the MC prep add-on enabled we’ve got cycles render enabled we’ve set up our rendering options for GPU compute you did that and what the size of the Tiles that we’re going to be rendering with the world settings all these things will be saved and every time we startup blender that’s what we will be using right off the bat and we won’t have to change all that stuff again so again I’m sorry that this was very wordy and light And lengthy and whatnot but once you have all the stuff set up we can kind of focus on what we want to do with blender all right so those are the basics again I am NOT the best when it comes to this stuff I’m not fully understanding of it If that’s the right word I think it’s fried my brain at this point in any case I’m just trying my best and I hope it was helpful to you guys and yeah so sorry to spend so much time getting all the stuff set up but hopefully that will Expedite the process in the future as we continue so hope that was helpful guys I hope you want to see the series if you do then feel free to let me know let me know if you want to see more and whatnot of course like I said I’m doing this as Kind of a self help as well as to help you guys so if anyone is more experienced than me I highly would appreciate would HIGHLY appreciate there we go any tips or whatever you can offer in the comments and things like that other resources for learning and Tutorials and whatnot but yeah so that’s it so thanks for joining me guys I hope this was helpful as always if you want to help me you want to support the channel feel free to like comment and subscribe if you’re watching with an ad blocker it also helps to feature in that Off when you watch my videos but I’ll leave that up to you as far as supporting my channel directly I also have a patreon page so feel free to check that out if you want to support me and help me to continue doing this stuff and afford me more time to play with Blender and become daunted and give up on it like I have in the past anyway that’s it for me guys thanks for watching hope you enjoyed it and I will see you in the next video Video Information
This video, titled ‘Getting Started! – Blender Minecraft Animation Tutorial | 1’, was uploaded by AnxiousCynic on 2016-11-23 20:00:00. It has garnered 51334 views and 898 likes. The duration of the video is 00:24:34 or 1474 seconds.
A complete, thorough, and easy to follow guide to getting started with making Minecraft Animations in Blender 3D!
If you watch channels like Black Plasma Studios and wish you could make awesome Minecraft animations of your own, then this tutorial series is for you! Also, if you’re a Mine-imator user who’s looking for an upgrade and a new challenge, then I will be referencing Mine-imator in this series to better help you understand the Blender interface!
Using Blender 2.78, in this first part I cover all of the basic essentials that you’ll need to get ready to make your own Minecraft animations!
Get Blender: https://www.blender.org/ or get Blender on Steam: http://store.steampowered.com/app/365670/
MCPrep: https://github.com/TheDuckCow/MCprep/releases
Jmc2Obj: http://www.jmc2obj.net/
Rymdnisse Minecraft Rig Pack: http://www.rymdnisse.net/download/blender-rigs/minecraft-blender-rig/
TUTORIALS BY OTHERS:
Learn Blender – BornCG tutorials playlist: https://www.youtube.com/playlist?list=PLda3VoSoc_TR7X7wfblBGiRz-bvhKpGkS
Black Plasma Studios / Arbiter 617 tutorials playlist: https://www.youtube.com/playlist?list=PLpgMPL6TD5pgjAyNiylbBsOxknyVwAEDY
Support the channel and help me make more of these videos! https://www.patreon.com/anxiouscynic
Also check me out on: https://twitter.com/AnxiousCynic http://facebook.com/bishworld http://anxiouscynic.tumblr.com/ http://www.twitch.tv/anxiouscynic
Video captured with Bandicam Audio captured with a Shure PG42