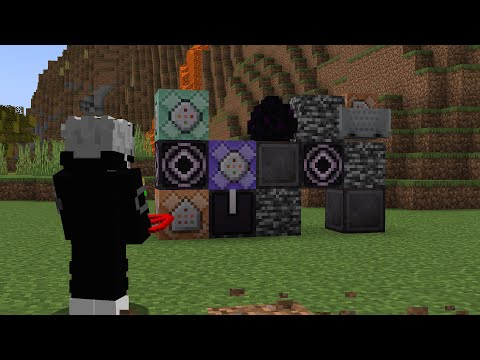
Maps are a unique and incredibly useful feature of minecraft from making a giant world atlas to displaying beautiful artwork learn all that you need to know about cartography in this guide now you can’t do anything more than just basic features with maps until you have a cartography table so let’s start with How to make that by using the crafting recipe recipe and putting two pieces of paper above it that will give you the cartography table this item only has two uses in the entire game the first one is to give villagers a workstation and you can see this just turn the villager into A cartographer villager which will basically sell you map related items as well as buying paper and give you awesome things like woodland explorer maps sell you empty maps and even banners and of course the biggest use with the cartography table is its functionality around maps all right now To get the map itself you want to make some compasses which of course are crafted like this and then with the compasses you can craft a map by surrounding those in paper if you’re on bedrock edition this will make you what’s known as a locator map and also on bedrock you can actually Make a map by just filling up the crafting grid with paper and that will give you a map that does not have a little marker of where you are on the map you can of course also buy maps from the cartographer which after some zombification and discounts can be quite Good so of course you use a map by right clicking on it and that’ll open up a map in your inventory you can see it kind of facing forward in the middle of our screen like it is right now filling in the area around us although that basically happens instantly if you’re Anywhere near the center of the smallest map size you can also have it in your offhand to see a smaller map i personally suggest this when exploring but the actual way that maps function is a lot more interesting than just showing an area where you are because if we Looked at a big map of our overworld it would be cut up into a grid centered at 0 0 and then from then on going into sections of 128 blocks if we’re on the smallest map size the way that works is that maps are always oriented to that Grid so i would basically explain it as let’s say this is zero zero and we’re anywhere within this area and we open up a map it would always appear within this area so for instance on this map here let’s say we open up a brand new map we Are on the edge of the map right there you can kind of see a little pointer even though you would assume it’d always be in the center the problem is if it was then different maps would overlap even if they’re of the same scale making just an incompatible system now there is A little pointer on the map showing where we are and if you’re on a multiplayer world and another player is on the map they will not show up however if another player is holding the exact same map which of course can only happen if you gave a player a copy of your Original map on a world with a small world border and every player has a map in your inventory you could basically track where every player is now you may be wondering how do we exactly copy a map if we’re in the same area and we right click the map has a different id Well it’s simple go to your cartography table place empty maps in there and place your filled map next to it and that will copy over as many times as we want however the good news is you don’t actually have to use a cartography table For this all you have to do is put an empty map in the map you want to copy in your crafting grid and it can copy it that way as well which is probably a lot more useful just as the maps will mark out where a player is on the same map if It’s holding it maps will also mark out where other maps of the same type are so for instance we have a map place down right here and you’ll notice on the map there is a green little arrow that’s pointing this way let’s say we have a Map that’s all the way over here on this item frame and we place down a copy of that original map a green marker will appear there as well how do you scale maps this is another thing you can do at your crafting table or at your cartography table basically if you place Down eight pieces of paper around your map in your crafting table that will zoom out that map by one level or for instance over here at a cartography table if we place down a map and we place down a piece of paper in the map with only one piece of paper not eight We get to zoom that out as well now something interesting you may notice is that basically all of the maps that we zoomed out are now showing the same thing and the reason for that is that they all went into the same larger area as of course each one of these maps is Only showing 128 by 128 blocks when they become bigger let’s say it would show a 2×2 right here which is exactly what it would do because it is 256 by 256 it’s showing now and our previous maps were like here and here if they’re both within that 256 then they’re both going To appear on the same map so let’s talk about the five different scaled layers there is the first level which i will show you right here and this is the level that is one pixel one block or one to one and it is showing an area of 128 By 128 blocks then there is level two let’s put level two in here and right here with one piece of paper that’s now level two also known as level one out of four and you can see right here we can also see that circle loading and around Us and this has nothing to do with your render distance by the way but basically on this map every single pixel on the map is two by two blocks so that would be four blocks total as the map size is basically doubled on each side all right Now for the next one which is level two out of four you can see here we can see even more instead of two by two which is a total of two blocks every pixel there is four blocks by four blocks which in reality shows us a 16 block area per dot On there the size of the map is 512 blocks by 512 blocks that’s why for instance something like these paths do show up because they are roughly four blocks by four blocks but something smaller and more nuanced like let’s say these hay bales does not show up because Whatever block has the most number of it on that area of the map that’s the block that they show for that color and for the next scale of zoom and we’ll do this right here this is level three out of four now we can see it’s even more Zoomed out it’s actually hard to see the village there’s just a couple brown dots on there to show the villager houses and maybe a couple of the pathways and that’s because every single pixel on there is showing eight by eight blocks and the size of this map is one thousand Twenty eight by one thousand twenty eight blocks it’s showing but this does go one level further out and on this map we’re looking at an area of 2048 blocks by 2048 blocks very very difficult to fully fill one of these out and quite a good challenge actually and On this map every single pixel we see has to be an entire chunk of the world which is 16 by 16 blocks so it’s better for seeing things just like big rivers mountain ranges biomes and maybe some very large builds that you have alright so those are all the different scales of Maps but a good question would be all this is sort of about the overworld do maps work in the nether and end dimensions and i’m going to show you that right now here we are in the end dimension if we open up a map you can see that the end dimension does indeed Work on a map it’s interesting to see however that the void is symbolized as gray not as black probably the obsidian and the void are not mistaken also these maps do really show the true scale of the main end island as of course the obsidian pillars are shown There actually looks really cool to see all of those on the map but yes maps do work in the end dimension but now the big question is do they work in the nether well they unfortunately do not however there are some interesting things about the nether dimension and Maps so number one you’ll notice it does sort of show us our position however the pointer is turning around randomly also the pattern on there you would assume i guess that’s of the bedrock ceiling is actually a randomly generated pattern because if we open up a separate map and Load it in a new part of the nether and we basically compare areas on the map what you might see is that there are tons of discrepancies and those two areas are really not similar at all but now that you know the basics of maps here are some more technical and Advanced uses of them which i think you will find to be quite important to enjoying them fully now how do we lock a map interestingly enough we use a glass pane and what we can do is over here let’s put one of them in here and let’s Lock it you can see a little lock symbol appears when we add the glass pane this map is locked and locked forever there’s no way of changing a locked map but something you will notice is that it does show a position on the map so what we’ve done is we’ve just made this Little thing that says hi on the map and you can notice on the locked map that doesn’t show up it doesn’t show up at all however if we go to the not locked map you can see it does show there we have our little text that shows each Block being a pixel of course because that’s the scale that we’re at so basically no matter what happens to what we change this map will show its original interpretation of the area permanently now this next feature of maps is unfortunately for java edition only so if we place a banner down Anywhere within our world but more specifically anywhere within the map that we’re trying to mark out let’s say right here then we take our map that that banner appears on we right click on the banner a waypoint will be added or sort of a banner marking you can see right here The little red banner appears on our map but also something interesting is that you can mark these banners out on locked maps as well and something you can also do is if you have that banner on the map you don’t want it there anymore right click again and that will remove it or Of course if the banner itself is broken that marker will also be removed however this feature is massively improved if we rename the banner so let’s just call this something like our base or whatever you want it to be and then basically let’s say our base is this building Right here and we place down this banner inside the building by the way you can place down banners and break them and the name will still remain interestingly enough then take your map and right click on there not only will that banner itself appear but the name will appear As well because of that of course you can name where different things are there are a lot of things you can do with maps one of them being pixel art and although of course this can be at incredibly large scales for instance taking an image converting it into Minecraft blocks and then displaying it on a map showing you an absolutely amazing piece of pixel art on a map this can be something less artistic and more useful like for instance going to a really clear area that you can’t really see a lot in so maybe like the ocean And marking out let’s say where railway lines are on there or maybe where different shops are or maybe some info you can even make like a newspaper or something for that where you update the info one of the last main uses of the map is as a mega map or a giant world Atlas and i will go into that in a little bit but first how to display your maps you can place maps down in item frames which is of course fairly obvious but there’s more to this than meets the eye for starters for instance the item frame texture itself actually changes When a map is in it you can notice this right here so you can see those pixels are transparent instead of on here they’re sort of like this map texture another thing that is interesting is with most items they can be in eight different positions so they can be in North east south or west or they can be in the diagonals that are between that whereas with maps they can only go north south east or west now unless your base is perfectly lit up something you want to be sure of is that the area where your maps is is bright enough there’s Two ways you can do this either you can place your maps on top of glowstone so for instance we can place down our item frames here and you can see those are at full brightness there but something you can do as well is to use glow item Frames we put glow item frames down and we’ll put some standard ones down next to it just for a bit of context and you can notice this one is at full brightness just like the ones where the glowstone dust were and this one has no brightness also interestingly enough the Texture for the glow item frame also becomes larger and so because of this without actually having this additional light around the area and also with only using a single glowing sac per item frame you can display your maps here in a fully lit up fashion and it also Enables you to have literally whatever block you want beneath the item frame there instead of having to be a light block like glowstone or maybe sea lanterns and so that’s everything you need to know about displaying a map now for the last section that i’m sure a lot Of you have been waiting for how do you make this a massive and amazing mega map of course it doesn’t have to be anywhere near this large or at this scale of one block meaning one pixel but anyway creating one of these isn’t quite as easy as just filling out maps and Placing them down as organizing something like this can be somewhat of a puzzle well the first step is to always plan out how big you want the map to be oftentimes i’ll expand on a mega map that i’ve planned out and so we should probably do is have space around that You can expand from so for instance don’t have like the wall of your base on the side of one of the edges of your mega map now for this i’ll show you on a 3×8 mega map so once we’ve laid out an area we have to basically find what to Orient our entire map around let’s start by making a singular map we’ll make one right here now once you’ve made that map place it down wherever you want that to be positioned on your mega map for me i’m actually going to put this in the top left corner As that’s easiest but you certainly do not have to oh and by the way something incredibly important when placing down maps is to make sure they’re positioned the right way so for instance this is north and the top of the map is north the left of the map is west the right of The map is east and the south of the map is the bottom of our screen and so because of that what you want to do is you want to make sure that the top of the map is facing the north of the world because then it’ll orient correctly if The top of the map is not facing north what’ll happen is all your maps will sort of form a jigsaw puzzle instead of going in order all right so once we have our main map here you want to lay out eight other maps in your inventory like this and personally i would suggest Waiting to make a true mega map until you have elytra but of course it is up to you but i will show this with a lighter to save time we have our first orienting map and you want to put this in your offhand now you have to remember This map is going to be right here and the other maps are going to be off from it so because this is north we’ll know that this is the direction we have to go and that corresponds with our arrows we’re going to fly into the other position right click and fill up that Map and we’re going to continue to fly right through that map as long as we’re sure that every single pixel in there is loaded in we’re going to right click and load in our next map and keep going until we go to the next one and Basically so on and so forth fly through all of these different areas until you get to the next map to fill in also as a note when you first load in a map even if you’re in the right center of it the very very edges of the map will not load In unless it’s been up for maybe about a second in your inventory and so because of that if you really really quickly right click and go to a new map then you will actually lose a lot of the details on the edge of the map which will show As cracks in your map once you have placed it down in the item frame we’re going to place down our first map in the top section here like this now we’re going to place them down in order after that so just one and then as our Inventory shows it it’s going to be an order already then two three four five six seven eight you can see we actually have a ninth one there and that’s actually good because if you notice here we have a double up because apparently i made two maps in the same area this is Actually rather common it’s one of the reasons why you want to make sure to bring a lot of extra maps with you and to also allocate a lot more maps to this than you may actually necessarily need but anyway once that’s corrected you can see this definitely does correspond to The right positions now what you may be wondering is you may be wondering why do we do this in an eight block pattern because if you hadn’t made the mistake of course there would be a ninth map there and i’ll show you why we’re gonna grab ourselves our map right here and Again that’ll be orienting us and we’re gonna place this right here and we’re gonna lay out eight more maps down here with our fireworks and this time we’re going to go south so we want to do is we want to go like this south create a map And then once we’ve created a map right here we can just keep creating maps until all our maps are gone and you can notice here there are eight slots and that’s how many maps we have in our inventory so we’re gonna go south and you’ll see here that we’re about to go Off of the edge of the screen then we’ll make our new map that new map is sort of showing us this area that is south now that we are south we don’t want to keep going south we want to go to the right direction if we remember the shape of Our map that direction is east so we’re going to go east right here and once we get off of the map we’re going to make a new map and keep flying down through there and once we’re done with that we’ll just continue to make these maps Until all the maps in our inventory are gone and you can always use your base map to go back to the area that your make a map is at so now that we’re back just start by putting your orienting map back where it goes then after that take All your maps and place them in the bottom row in the order that you have them so just one two three four five six seven eight and you can see that is already starting to show even more of our mega map area now i’ll show you the Last section a bit quicker but basically there is a difference which is we have a different orienting map so we are still going to lay out here eight maps we’re still gonna have our fireworks here we’re not gonna grab this original map we’re gonna grab the map below it this One right here we’re going to do is we’re going to try and remember exactly where that map was and we can remember that it’s right here and so because we did the same pattern here we want to again make one map south of this map and Then make eight maps to the side of it including the one that we went south from this and so what we’re going to do is we’re going to go straight south until our pointer is in the middle of this map once our pointer is in the Middle of this map it’s pretty easy to do and so now that we’re here we’re just going to keep going south until we’re south of this map again you’ll know if you’re south of the map if your dot is on the bottom part of the map now we’re Going to open up a new empty map you can see this right here is showing us being on the map and you can even see we’re on the right map because once our pointer goes off this map it appears on this map now that we’ve done that we can simply Find the east direction again which is the direction that we’re going and start filling out new maps from there on and what you can even do at this stage is you can just put fireworks in your offhand and use those and just make a New map as you go all right now i made a mistake on this one and made a double map so i’ll show you what to do first of all let’s put back our orienting map where it goes let’s start placing these down and once we notice a discrepancy Like we did right here we’ll simply take that incorrect map throw it away and keep going on from the correct maps positions and because i knew that i made a mistake i made an extra map you’ll notice here this is in the wrong position we only have two maps left so We’ll put this one right here and this one right here and ideally that’s correct and it is you can basically just rinse and repeat that exact same feature to make an absolutely humongous map just like the one i showed on my survival world anyway i hope you’ve been able to Navigate your way through this map guide i’ll see you in the next one and have a great day bye you Video Information
This video, titled ‘Minecraft 1.20 Map & Cartography Table Guide | Mega Map, Scaling, Copying Locking & More!’, was uploaded by Eyecraftmc on 2022-07-27 14:00:25. It has garnered 1136468 views and 26896 likes. The duration of the video is 00:18:27 or 1107 seconds.
Minecraft 1.20 Map & Cartography Table Guide
🟪Twitch: https://www.twitch.tv/eyecraftmc 🐤Twitter: https://twitter.com/eyecraft_mc 🔵Discord: https://discord.com/invite/tMM6B8Nc3M
Learn How to Use and Make Maps in Minecraft with this Cartography Table Full Guide for Minecraft 1.20 Java and Bedrock. Including How to Use Maps & Cartography Table in Minecraft and How to make a Giant Map Wall. Maps and the Cartography Table are Fully Explained in this Minecraft Survival Guide. Also How to make your entire World and Create a Mega Map and Awesome Tips and Tricks Like Scaling, Marking and Locking Minecraft Maps
📑Chapters📑 0:00 – Intro 0:11 – Cartography Table & Maps 1:22 – Using Maps Explained 2:31 – Maps Use in Multiplayer 2:52 – How to Copy a Map 3:43 – How to Scale / Resize Maps 6:49 – Maps in The Nether & End 8:02 – How to Use Locked Maps 8:44 – Banner Map Marking 9:46 – Things To Do With Maps 10:27 – How to Display Maps 11:54 – Planning Out a Mega Map 13:35 – How to Create a Mega map