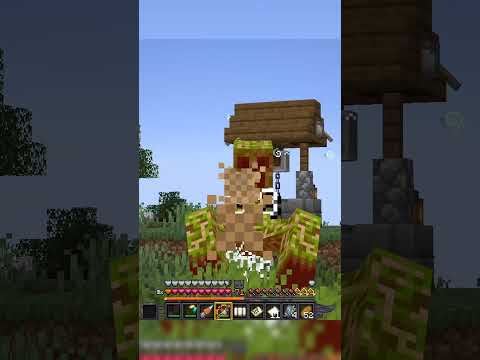
Block blender is a tool that lets you turn any 3D model into Minecraft blocks and it could be a game changer for people trying to plan complex builds it works especially well on Photo scans but you can also use it for text images videos you can model things in real time And I’m not sure why you’d want to do this but you can use it on animated models too turn your purple models into purple you can download it on gumroad or blender market and yes there is a free version stick around until the end to see what block blender is really capable of No no no no no no no no no no no no making this tool was quite a process and I wasn’t even sure if it was possible to do there were a few roadblocks that almost made me give up my goal was to turn an object into a Bunch of cubes and then check the color of the original object and place the correct color cube in that spot I already knew some of this was possible because I did it with Lego bricks a few weeks ago turning an object into cubes is pretty easy make sure you’re using Blender 3.4 to use all of the nodes that you’re seeing here start with a mesh to volume node make sure the resolution is set to size and then get a distribute points in volume node set to grid get an instance on points node and use a cube As the instance object now if you use the same value for the voxel size the spacing and the scale your object will now be made of Cubes getting the colors working was a lot more complicated because instead of just changing the colors of the cubes I needed to compare The object color to a bunch of Minecraft blocks the first method I tried was pretty close the object I was using had an image for the color so I brought the image into geometry nodes and used these sample nodes to get the color of every point on our model I made a few Different colored cubes and then I made a node group that took the image color and compared it to the color of my block if the color was close enough then it would instance that object onto the corresponding points this worked but there were a few problems I had to put All of the colors and objects in manually and if there were no colors that match close enough then parts of the model were just left blank this is the first time that I almost gave up but then I talked to nugget on Discord and he shared this idea with me the idea is Really similar and it works by finding the distance between the object image color and the color of the blocks color is usually three different values a red green and blue value in blender we can use these values like their X Y and Z coordinates and plot them in 3D space so If we’re doing this with a few colors we can now see how similar they are to each other based on their proximity so we’re checking the distance between our block color and the object color and if the distance is smaller than whatever we set it to the group will choose the block That we tell it to it will then take the distance between the two colors and send it to the next group in here if the distance is smaller than in the previous group the object will be replaced with the new one if it’s larger then it’s ignored in it checks that distance with The next group this ensures that the chosen block is always the one with the closest color I still have to set the color in object index manually but it worked well enough that I decided to move forward the next problem I had to solve was getting all of the full Minecraft blocks into blender I decided to leave out things like slabs and stairs because figuring out how to rotate them correctly would make this way more complex maybe I’ll tackle that in the future I really didn’t want to individually unwrap and place textures for every block so I try to find a way To download them but everything I found was missing most of the blocks Sam from my Discord server told me about Minecraft debug worlds which is a world that has every single block in every state he was even nice enough to get that into blender for me using mind ways So I opened it in blender and saw that everything was a single object which means that I would have to manually look at each block decide if I wanted to use it and then separate it into its own object there were easily thousands of blocks in here because blocks that could Be waterlogged or rotated were all listed as being different I knew this was going to take too long so I figured I’d try to make a super flat world and I just place all of the blocks that I needed I gave up on that pretty early Too because it was taking a long time and I was worried that I’d forget blocks this is the second time that I almost gave up stop crying it won’t do any good and anyway you have a lot of work to do starting right now but then I decided Maybe I’ll go back to my first idea of doing all of the textures manually I went into the Minecraft File got all of the block textures and brought them into Affinity designer this would probably work in inkscape 2 which is a free program I was able to distribute all of The textures side by side to create a Sprite sheet and conveniently they were still in alphabetical order which made organizing them really easy I exported that and brought it into Affinity photo to find a way to average all of the colors and luckily there is a blur option that does exactly that Affinity Lets you make things called macros which basically record actions you do so you can repeat them more easily so I selected a block averaged it and then moved the selection 16 pixels now I could press one button in and repeat all those steps so I made another macro that Repeats that action 10 times then I made another macro that repeats it 10 more times so now with a single click I could average 100 blocks and there were over 800 blocks so this method only took a minute back in blender I made a one Meter cube and duplicated it so I had as many cubes as there were squares in the Sprite sheet I selected all of them went into edit mode and projected from view while looking straight ahead then I could basically move them in the UV editor until they lined up pretty well Then I used this option here to snap them to the nearest pixel so they were Pixel Perfect the other sides were still stretched because of how I projected it so I selected all of the edge points based on their normal Direction and put them in the right place in the UV editor I also had to check all of the blocks with multiple size to make sure that they were actually using the right texture since they were all using the same material and texture I could change the roughness all at the same time I even added an option to use the Sprite Sheet as a bump map by setting it to linear instead of closest I brought in the Sprite sheet with the averaged colors too and it was the same size so everything lined up automatically okay now that I had all of the pieces to complete the project all I had to do was Make a node group for all 363 full-size Minecraft blocks select their average color and say what number they were in the collection of blocks yeah that’s it that’s all I had to do and I decided that wasn’t enough work so I also named all of the blocks when all Of that was completed I put it into a group and plugged it into the instance on points node and it finally worked to test it out I went and bought some donuts to photo scan it was my first time using polycam but the results still Came out really good the way I had the group set up meant that I could mute any of the blocks that I didn’t want to use so I sorted them into categories like natural blocks that don’t need crafting utility blocks like furnaces and valuables like ore and diamond blocks Then I could toggle them on and off to decide which ones to use I was so excited that it worked and I started adding more features to customize it and then I showed it to Ben on Discord to get his input on a few problems that I Was having and he responded with a way of sorting the blocks automatically without having to manually pick each color and index like how I just spent a whole entire day doing okay so I didn’t need to do a lot of the work that I did but honestly I wasn’t Even mad because this new method opened up a lot of possibilities it’s hard to explain completely but basically it’s capturing the color of each block face and then using the RGB channels to place it in 3D space like I explained earlier then each point is given a new index Based on its position and when we pick the blocks we want we can use the new indices to accurately pull the block with the closest color it’s super cool being able to see all of the blocks lined up by color this is what it looks Like if we use HSV instead of RGB one axis is Hue this way it gets more pale and it gets darker at the bottom so after I switched everything to use this new method I wanted more ways of controlling the color I used the images as planes add-on to bring some pictures Into blender one of the issues with how Color Works is that we only get the color of the nearest face so when this plane is made of only one face it’ll be a single color so I threw in a subdivide node to add some more geometry and this Solved the problem for now I also made a few color palettes so people could add custom colors to their models more easily I’ve used this method in a lot of my other videos basically you can set your object to use this image for the color and then go into the UV editor I Like to scale everything down to zero so it’s a single point and then you can hit G to drag it around and make it whatever color you want if you want a face to have a different color just select that face and move it to a different spot on The palette I made this other palette that shows where all of the Minecraft blocks fit so it can be used as reference if you want to choose something specific like a grass block you can also hit U to project from view to color models with gradients I also Made it so you can use vertex colors to paint your object go to object data properties and under attributes click the plus button this should add a new attribute called color then we can make our node tree use the color attribute instead of the image go into vertex Paint mode and now we can change the color of any point on our model I tested this out by quickly modeling a mushroom and it worked pretty well one other thing I wanted to add was some Randomness for when you don’t want gradients to look so clean and when you Want a wider variety of blocks instead of just a single one this was as easy as adding noise to the image color to push it around if we use the factor the blocks move around but the colors don’t change much if we use color then the Color of our blocks will change a little bit more I wanted to make it easier for people to use this as building reference so I made it so you can view blocks by layer which would help people build things from the bottom up the only way I Could find to view block quantities was in the spreadsheet every block has its own ID so you can delete everything that doesn’t equal that number and then you can see how many of those blocks are in the model you still have to scroll through to find the ID of each one you Want to count but it works for now hopefully I can find a better way to do that in the future if you add a realized instance node at the end you can also convert this to a mesh if you want to export the model I’m hoping to add Things to this over time like finding a way to get the color of our object without having to use an image texture adding more blocks like staircases and if possible I’d like to be able to import things things straight into Minecraft one week later it’s finally Done and you saw my process so now we can look at some of the possible use cases the easiest way to get good results is to convert existing models I like using the sketchfab add-on because it lets you download models without ever leaving blender and they have a decent Amount of free photo scans which work pretty well because they all have image textures I found the scan of a person’s face and the subtlety of the colors is so cool to look at I also found this rotisserie chicken you can use other models too but if they don’t come with Image textures then you’ll have to bake one or add your own colors I added my own color to this bridge model if you set the resolution to one meter then it’s the same size as Minecraft and you can hit F3 and go into walk mode and actually walk around the model to see What the scale is like this is also really useful for text you can add in a text object and extrude it in the settings over here and when you add the node tree you can view it as blocks now you can set it to any font you have on Your computer and make some awesome custom signs in your Minecraft world if you want to change the color you can convert the text to a mesh and use the coloring method I talked about before my favorite way to use it is by modeling in real time for example here’s a quick House that I made and textured all at the same time I used some noise to randomize the colors a little and I made a separate object with a displacement modifier on it to create some bushes if you know some simple modeling techniques you can use them to make really complex Stuff in Minecraft now you can even use a bunch of primitive shapes and still get good results and just to show that it can be done I built one of my Creations directly in Minecraft so what do you think does block blender seem useful to you if you think it is Consider liking and subscribing like I said before you can download this from gumroad and blender market and I’m also sharing the free version and some of the previous project files on patreon where you can also watch my videos early and get coupon codes for free products I Also donate some of that money to environmental causes each month if you liked this video consider watching one of these ones next have a good one Video Information
This video, titled ‘Minecraft ANYTHING with this new Blender tool’, was uploaded by Joey Carlino on 2022-12-14 16:19:10. It has garnered 1687934 views and 60635 likes. The duration of the video is 00:11:37 or 697 seconds.
Block Blender is a tool that can convert any image or 3d model to Minecraft blocks with the power of Blender geometry nodes! See my process as I figured out how to make it. Making block palettes and gradients is super easy now.
Learn Blender: https://youtu.be/uOmYInaX-wE Get BlockBlender on Gumroad: https://joeycarlino.gumroad.com/l/blockblender Get it on Blendermarket: https://blendermarket.com/products/blockblender Schematic exporter by Bryan Valdez: https://gumroad.com/a/1050848467/ouapf All BlockBlender Videos: https://youtube.com/playlist?list=PLzg4_2BrWAVzZPDyoso2rLbB-po16T7Eq BlockBlender FAQ and common problems: https://joeycarlino.notion.site/BlockBlender-FAQ-34faa2b0eb664766b4dc4bca659a9059
Thanks for the help! Nugget: https://linktr.ee/NuggetMcHotdog @CartesianCaramel: https://www.youtube.com/@CartesianCaramel @samb2o: https://www.youtube.com/@samb2o
Patreon, Gumroad Shop, Discord, and other stuff: https://linktr.ee/Joeycarlino
Models used: https://sketchfab.com/3d-models/sailing-ship-model-ac65e0168e8c423db9c9fdc71397c84e https://sketchfab.com/3d-models/japanese-temple-5917e267ca3e48ac8a27f9ec5809fc29 https://sketchfab.com/3d-models/vastanfjard-stone-church-in-kemio-finland-8766d38950014c548bdbb0392171cdc0 https://sketchfab.com/3d-models/day-150-lily-0fb5137fda7e4278b8e23ffd60ce634b https://sketchfab.com/3d-models/retro-robot-61917a7224a54369ac23fef701fcd929 https://sketchfab.com/3d-models/beach-ball-free-download-c915a99e9bae4dbe8dd7be3215e19ba0 https://sketchfab.com/3d-models/will-smith-61e397ca8a5f4f48a0dc947933015bc4 https://sketchfab.com/3d-models/face-scan-example-aec8bfae679f4f05b42f9236973b641a https://sketchfab.com/3d-models/roast-chicken-004fb4d72f6c4e55a15b9025a868d1a3 https://sketchfab.com/3d-models/kokura-castle-aba23531911c45439067a6e0aaccad07 https://sketchfab.com/3d-models/helix-bridge-1221edc4c2454b29b3b6adcd6fdefb0e
00:00 – BlockBlender 00:40 – Turn to cubes 01:16 – Color method 1 and 2 02:53 – Getting the blocks 04:56 – UV stuff 06:35 – Color method 3 07:30 – Adding options 09:46 – What it can do
▶Links Patreon: https://www.patreon.com/joeycarlino Youtube Membership: https://www.youtube.com/channel/UCPYtQkET_jYxFvXe34YI3_w/join Discord Server: https://discord.gg/dvmAZdwf5e Gumroad Shop: https://gumroad.com/joeycarlino Blender Market Shop: https://blendermarket.com/creators/joeycarlino Tip Jar (Paypal): https://paypal.me/JoeyCarlino TikTok: https://www.tiktok.com/@joey_carlino Instagram: https://www.instagram.com/robospunk/ Twitter: https://twitter.com/joey_carlino Email: [email protected]
▶Things I Recommend (not affiliated) Dotbow Blender Launcher: https://dotbow.github.io/Blender-Launcher/ Blender Beginner Playlist: https://youtube.com/playlist?list=PLa1F2ddGya_-UvuAqHAksYnB0qL9yWDO6
▶Places To Donate: https://www.nrdc.org/ https://wck.org/ https://blacklivesmatters.carrd.co/ https://www.catf.us/ https://www.evergreenaction.com/ https://350.org/ https://www.conservationfund.org/
▶What’s On My Desk? GPU: EVGA GeForce RTX 2070 SUPER CPU: AMD Ryzen 9 3900X Motherboard: Asus PRIME X570-PRO Memory: Team T-FORCE VULCAN Z 64 GB (2 x 32 GB) DDR4-3200 Monitor: LG 25UM58-P 25.0″ 2560×1080 60 Hz Drawing Tablet: XP-PEN Artist 15.6Pro Mouse: Logitec MX Master 3s Keyboard: Redragon K580 VATA Speakers: Mackie CR3-X Headphones: Beyerdynamic DT 700 Pro X Microphone: Beyerdynamic M70 Pro X Audio Interface: Universal Audio Volt 2