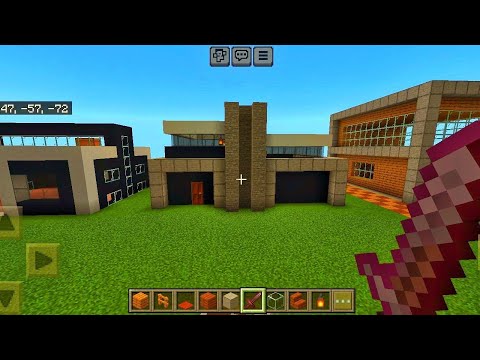
All right here’s the deal i have a highway and i need to get pedestrians from one side to the other what’s the best way to do this we could make a tunnel but then you won’t be able to appreciate the design as much so i think the best course of action is To design a pedestrian bridge in this video we’re going to cover each of the basic sections of a pedestrian bridge we’re going to talk about the design and then the underlying structural engineering concepts before we go any further i’d really appreciate it if you click the like button for the youtube algorithm Just one click makes a huge difference in the growth of the channel and it means more and higher quality content for everyone all right we have this area that crosses the highway and has a meeting in the middle it’ll be pretty unrealistic to have the bridge span the entire length without a Center support on either end we will build abutments the purpose of these are just to prevent lateral or horizontal movements the surface in which people will walk or bike across is called decking we obviously need railings but i want to do a double layer of railings with one of those layers being two Meters high since we can’t have people accidentally falling off onto the highway so now what we’re gonna do is we’re gonna add these fancy rectangles that’s around the top of the bridge and we’re also gonna add some horizontal lines that serve zero purpose aside from decoration I’m not going too crazy with the design because i don’t want to distract from the other bridge that crosses the river one thing i should point out is that the lowest point of the bridge that hangs over the highway should be at least nine blocks above This just makes it so that trucks won’t hit it when they drive underneath okay we have it all planned out so let’s get started let’s start with the abutments let’s go at roughly a 45 degree slope and follow the shape of the highway we don’t want it to be too steep because We want gravity to work in our favor it’s important to understand the basics of how soil puts pressure on foundations retaining walls and abutments i’m going to use the example of a flat retaining wall but keep in mind that the concept can be applied to many different shapes Let’s say as an example we have some soil that needs to be kept in place by a retaining wall let’s say this pit is five meters deep and we can divide it into five equal parts soil never wants to stay in a perfect cube it will always want to spread Itself outwards until the angle of repose is reached this angle is different depending on the material moisture content and a bunch of other factors okay let’s find out how soil behaves in terms of exerting pressure on a retaining wall the very top of the first layer should theoretically exert no pressure However as we go down the second layer also has the weight of the first layer on top which will increase the horizontal pressure for section two this trend continues down to the bottom which means the very bottom of the retaining wall has to deal with the most horizontal pressure Keep in mind that this is an approximation and can vary greatly depending on the circumstance okay great but why do we design our bridge abutments on an angle let’s say you’re in line at tim’s to get some timbits some guy walks in he walks Up to you and cuts in front of you in line and you’re like hey buddy what’s the big deal and he’s like i see there’s only 10 tim bits left and i want all of them you say no way buddy back of the line those timbits are mine But this guy’s mean and decides to try and physically push you out the door and you’re not going to let them because you want those timbits now here’s where the application of 45 degree bridge abutments comes in if you stand up straight and let him push you he’s likely going to win But if you push back with your body on an angle you stand a much better chance at getting your timbits anyway let’s get back to the bridge since we can’t have a clear span across the entire highway we need to have a central support let’s build a support connecting to the Median and on top we can have a cap to help distribute the force if we don’t have the cap we run the risk of having a punching shear failure now we can add the girders all girders are beams but not all beams are girders typically large beams are referred to as girders Okay so let’s go back to the top of the abutments real quick i’m adding this black color to signify that the type of connection is a roller in first and second year structural engineering courses they teach you about the three main type of supports fixed pins and rollers fixed is as the Name implies you can’t move the connection out the support pins are interesting because they resist horizontal and vertical movements but they can rotate if you allow them to rollers are the most interesting because this support can actually move in one of the two directions either horizontal or vertical but not both I know this sounds really weird but let me explain let’s say you have a bridge on this bridge is a truck since no material is ideal you will have to have a small deflection wait a minute if you have a deflection that means the surface of the bridge now Has a very small curve to it if this bridge is fixed on both sides the laws of mathematics dictate that the curved surface is ever so slightly longer than the flat surface this means that your material has to be somewhat elastic or stretchy if you want to call it that Newsflash concrete isn’t very stretchy so if we revisit the design let’s replace one side with a pin and the other side with a roller since both sides can now rotate and the roller can move side to side it no longer has to try and stretch the bridge But wait if the bridge moves won’t there be a gap yes there will be you are correct have you ever wondered why there’s these seemingly useless metal strips at the start and end of bridges these are called expansion joints and they are used mostly for that reason but Also to accommodate for vibrations and thermal expansion or contraction okay now that we’ve completed the bridge substructure we can move on to the superstructure we can add little drainage holes for water and change the decking material at this point we could add railings and Call it a day but i want it to look nice we can add the rectangles mess with the materials a little bit and then duplicate it on either end you can see that the width of the deck flares out at the end so to make the rectangle fit we have to cut it Back hold on pause before we go any further we need to figure out how to actually attach the horizontal elements the easiest way is just to make the vertical parts one block wide since it’s a bit more thick now let’s also add a second brace across the top for stability Now let’s add some railings i’m using jungle fences and jungle fence gates alternating in the wooden hills biome in cube’s pack i also don’t want people accidentally falling over the railing onto the highway so let’s add some glass panes two blocks tall along the entire length Now we can add in our expansion joints and the horizontal connections between the big rectangles again these serve no purpose aside from helping frame the shape of the superstructure let’s now duplicate it on either side for the final touch we can add a divider on the top of the decking with some lighting I’m not a huge fan of the lantern so let’s go with some glowstone instead underneath the center line all right that’s it that’s a pedestrian bridge if you want to see me make another bridge but this time going really hardcore on it hit the like button to let me know I’ll dive into elastic material properties rebar placement support calculations and lots of other good stuff also check out www.alpinearch.com i have some pretty sleek champion branded hoodies and shirts but i’m only keeping them up for a short while longer so get them quick i’m wearing one of the hoodies right now So i can confirm they hold up to canadian winters anyway i’m matt and thanks for watching You Video Information
This video, titled ‘Minecraft Bridge using Structural Engineering (“Tim’s Bridge”)’, was uploaded by Alpine1 on 2021-06-17 19:17:42. It has garnered 489742 views and 35293 likes. The duration of the video is 00:08:07 or 487 seconds.
This Minecraft video will discuss the design and engineering behind bridges! We will build one together in Minecraft over a highway.
Hi! I’m a Canadian Architectural Engineering undergrad student and make Minecraft building videos.
[ONLY FOR A LIMITED TIME, GET THEM QUICK!] https://alpinearch.com/ Ottawa | Los Angeles Designed for the Architectural Enthusiast.
Follow me for the latest building updates: https://www.instagram.com/alpine.builds https://twitter.com/alpinewastaken ——————————————————– CubedPack (https://cubed.community/texturepack/) Filmed on Cubed Community (play.cubed.community, Java 1.14.4) Apply for builder here: https://cubed.community/apply/ https://cubed.community/discord ——————————————————– In-game skin made by Tarago Intro animation by Jodiix Third-Party clips from pixabay.com ——————————————————– Business: [email protected]
Disclaimer: I do not yet hold a P. Eng., I am in my fifth year of Architectural Engineering, and work in Project Management on Architectural Engineering-related projects.
#city #minecraft #tutorial


![🟢 EPIC SLIME BATTLE! "Not Giving In" - Minecraft MV [Exit From Darkness E26]](https://img.youtube.com/vi/dJ8vyNIsP_4/0.jpg)