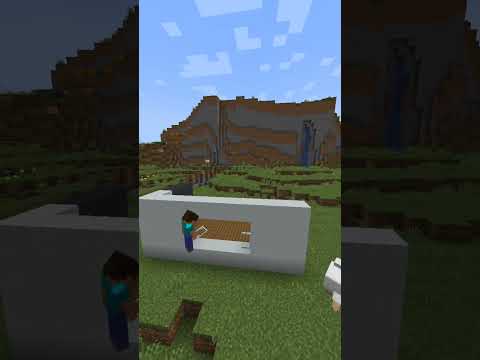
Hey guys what’s up it’s hex here and today i’ve got something quite awesome for you this is my fully automatic potion brewing system so there’s a lot of automatic potion brewing systems out there why on earth would you build this one well for one thing it’s incredibly Compact i’ll show you the redstone in a minute and for the other reason it does not use a hopper timer so let’s go ahead and check out the redstone on the back so here it is i think this is incredibly compact for one of these fully automatic brewing Systems and what is controlling this is not a hopper timer but rather the the brewing stand itself so right now we are brewing a new potion and you can see the netherward is going in then in this hopper you can see the glistening melon will go in and then this right here uh Has just some items in it and we’ll talk about why that is in a minute and then our spider i just dropped in and then in this one here we’re gonna put in our glowstone dust for power this to make it a splash potion and then one more netherwart that’s weird well what Happens is basically as this thing brews through um it’s detecting this hopper right here so if there’s an item in this hopper an ingredient for the potion then our piston is going to stay extended keeping this block right here powered making it so that this hopper is locked and so the water bottles Actually the potions don’t go through so once this glowstone dust goes in we’ve got our last ingredient the gunpowder here right there and then so once that gunpowder goes in then what’s going to happen is this piece of netherwart is gonna fall in but the netherwart won’t Be able to brew the potion and also it’s going to empty uh an item out of this and then you’re gonna see um when that happens that the piston is gonna fire and when that piston fires it unlocks let me show you the redstone it unlocks the hopper right here because this this Uh repeater is powering this and it also unlocks um no it actually locks i’m sorry it locks this dropper right here let me show you right here so this dropper right here which is where our water bottles are coming from i do not know why these Things are in here sorry um and then so it’s gonna allow these water bottles to come through into the brewing stand so it’s a very efficient system and the reason that this is important is because ill mango pointed out recently that if you have a brewing stand and you put An item in it like let’s say we do this and we have an item brewing let’s just check this out let’s wait for the next item okay so once this thing makes a little bit of progress and i log out watch what happens so i’m gonna go ahead and log out And log back in notice that it started over well if you have a hopper timer the hopper timer won’t start over it’ll continue to put the items in whatever order they were currently in and so then if you log out or if you unload the chunk then what it Will do is it’ll throw off your timing also with a hopper timer the hopper timer needs to be tuned to the largest potion that you could make so this is i think a five ingredient potion but if you only want to make a two ingredient potion with just say you know some netherwort And a bit of water breathing or something if you just want to make a two ingredient potion then you actually still have to wait the five ingredient time with a hopper timer but with this system once that potion is brewed then it will do the next potion so Let’s go ahead and jump into the tutorial you’re going to want to start things off with a chest a double chest so right here the double chest that’s going to be our output chest okay these two blocks are now completely unnecessary because i just needed them To so i could set the double chest so you got your double chest that’s your output chest right into that double chest you’re going to put a hopper facing this way so i’m going to build this one along the um east-west axis and then that one’s on the north-south axis because It’s kind of weird like the way that hoppers and droppers interact as far as the order that things go in so i’m gonna we’re gonna talk about that a little bit after the tutorial is over all right so then what you’re gonna do is you’re gonna take your brewing stand and you’re Going to put it on top of that hopper right there then you’re going to take and put a hopper facing into the brewing stand going downwards and one facing into the brewing stand going sideways so this is a little trick you have to actually point at kind of The bottom of the brewing stand like that because the hitbox of the burning stand is actually completely down here maybe they fixed that in 1.13 we’ll see anyways uh then after that you’re gonna put a double chest right there and that double chest right here this is Where your water bottles will go so your unbrewed like water bottles go in there and your output will be right there so that that’s that chest and that chest over there um just so you can orient yourself of where we’re at okay next what you’re going to do On the back side of this thing we’re going to build the redstone so on the back side you’re going to put a block like this then on top of that block you’re going to put a comparator facing outwards like that then out of that comparator you’re going To take and you’re going to put a sticky piston that is facing down so you’re going to kind of look at the edge of your comparator shift click and put that down right there then you’re going to put a redstone block on the face of that sticky piston just like that okay next What you’re going to do is you’re going to take and come back here to your output hopper and you’re going to put a block right next to it like that so shift click put a block right there and then you’re going to come down a block and out and back to like that Okay so this is our output and then we have a block there and then two like that okay next what you’re gonna do is you’re gonna take a um a repeater and you’re gonna place that repeater right there and then you’re going to take a redstone and place it right here like that Okay that’s that portion so what this does is when the redstone block comes down that’s going to lock the output hopper allowing your potions to brew very cool all right up here on the side of where this comparator is right here on the block underneath you’re going to put two Blocks coming out not a torch two blocks thank you not not that two blocks there we go thank you very much then you’re gonna put a comparator facing into that comparator and then a hopper on top of that okay so what we’re gonna do is we’re gonna put some items in this Hopper and these two comparators are gonna compare this hopper with this hopper and that’s going to be how it decides whether or not to put power to this piston uh and then turning the system from um being able to pull the water bottles or not then what you’re gonna do is you’re Gonna place a block right here you’re gonna come down one right there break this block and you’re gonna put one there put one on top of it like that and break that block so you have this shape here okay on the back side of this block you Are going to place a redstone torch okay on top of that torch you are going to place a block and then you’re going to break the block that was underneath this hopper that we had there and you’re going to place redstone right there okay then you’re going to go ahead and Take and place redstone there and there so basically when this goes down that’s going to power this redstone that redstone is going to turn off this torch which is going to unpower this which is going to allow water bottles to go into here i’ll explain why that is important Later okay next what you’re going to do is you’re going to take another block and you’re going to place it next to that redstone right there and then you’re going to place one on the end of this chest and one on the end of that chest just like that These two are completely optional you could place like a hopper right here to have more water bottle storage or you could place like a hopper under here have more chests for more potion storage it doesn’t matter but this right here this block that i’m pointing at Is that’s where our on off switch is going to go so we’re going to place a lever right there and then if you don’t need any extra water bottle storage you could go like this and say this is on and this is going to be off surprise surprise okay like that very good All right next what you’re going to do is you’re going to swing back around here you’re going to place a redstone torch right here on this block right here behind our repeater redstone torch right there then off of that redstone torch you’re going to place a dropper facing up like this okay Then on top of that dropper you’re going to place a hopper going down and then you’re going to go ahead and take and put a single item of some sort into that um i had some diorite set up somewhere but i’m going to just use a piece of dye polished Diorite and drop it into this little hopper right there so that means we have one item right here okay then what you’re going to do is you’re going to take a block put it on the side of this dropper like that and then you’re going to place a comparator facing out of that Hopper on that on the face of that comparator you’re going to place a block redstone torch on the side of that block and then i’m sorry not on the side of it on top of the block and then you’re going to place another block on top of that like that okay Easy peasy that’s actually all of the complicated redstone stuff done the rest of it is just the droppers and stuff all right speaking of droppers we’re going to come here and we’re going to place one more block on top of this you could potentially put a hopper right Here facing into this and then use that as your um blaze powder storage but you don’t really need it okay then when you’re gonna come out from this bottom one you’re going to come out 17 blocks for all of the items up to 1.13 so if you’re in 1.13 you want Every single possible potion item then you’re going to come out 17 blocks now if you only need like i don’t know 10 of the items or something because you don’t really care about some of the potions um kind of more like i do like i don’t care about Swiftness i don’t care about i don’t really use poison very much i don’t really use i don’t know regen that much i probably should um i don’t really make tipped arrows um question of leaping i very rarely use so um you know you can kind of plan in advance what you Want or you can just do all 17 doesn’t matter all right so i’m going to do all 17 here but you could kind of think about what how many you really need so 1 2 3 4 5 6 7 8 9 10 11 12 13 14 15 16 17. On top of every single one of those blocks that you just placed you’re going to place a dropper facing up so 1 2 3 4 5 6 7 8 9 10 11 12 13 14 15 16 17. of course that number could change depending on what you said on what you Need as i just said okay next what you’re going to do is you’re going to take your hoppers and you’re going to place a hopper chain so that it goes on top of every single one of those droppers like this like that all right that’s done so all these hoppers should Face into this hopper going into this brewing stand all right next what you’re going to do is come around the back and you’re going to place a line of solid blocks next to each of these droppers like this then you’re going to put a long redstone Line on top of those blocks all the way down so redstone redstone redstone redstone redstone redstone redstone redstone redstone redstone and it should turn it should be powered after you pass this block right here because it’s powered by this torch okay very cool next what you’re going to Do is you’re going to come around the front and you need to put some of these levers on all of these items so um on all these blocks right here so 1 2 3 4 5 7 8 9 10 11 12 13 14 15 16 and this last One you actually don’t need a lever on because the very last one should be your nether wart unless you’re on um the what is this let me just double check to make sure i say this right what is that the x y axis no sorry the north-south axis if if You’re running it on the north-south axis then for some reason you have to put the netherwart in a slightly different place but we’ll talk about that in a minute when we start filling up the items so levers on all these now when the leather lever when the leather when the leather Is down when the lever is down that means that particular hopper is not going to be active okay i know that’s weird because these are turning them on but basically it’s on back here already right so this is going to turn off and on giving a pulse to all of these droppers But if it’s already on on the lever then the pulse won’t really do anything does that make sense so then if one of these is up then this dropper will be active so like let’s say this is your um you know your glistening melon then your glistening melon will actually go Into this hopper and be pushed down when the system runs okay so this is basically item off item on so it’s kind of backwards from what the normal lever would be okay very cool that’s actually all of the difficult stuff done so from now on all we have to Do is just load up our items and we have to put some items into this hopper here and this hopper here and i’ll explain that in a minute okay so what i did is i put a little nice frame around mine so you could do that If you want to with some sort of detail block i’m just going to use this white concrete but these blocks are completely optional these have nothing to do with the function of the thing it’s just to kind of finish it off okay that and then this would be like your floor That all the way down here that just like that okay cool uh then like your item frames would go on all of these like this and then because i’m a bit of a i like to put the signs of what the effect is so that i can remember like oh yeah the Blaze powder is strength and the other one is this and then i keep getting redstone and the uh um glowstone powder mixed up like which one’s power which one’s duration so i recommend like putting your signs on here so i’m going to put a sign right Here this one’s going to be our awkward potion and so on and so on and so forth and then this one might be down here this one might be like your i don’t know i think i put swiftness on this so i put a sign and then swiftness Like that and yada yada and so then up here would go your sugar and then down here would go like your netherwart just to kind of give you an idea of like really easy like what goes in here now here’s the weird part what you’re going To do is you’re going to come to this hopper right here and you’re going to get take out some items that you don’t care about like diorite for example and you’re going to take and you’re going to put one item in that slot one item in that slot one item in that Slot and 19 in that slot and so once again 19111 empty okay now in this hopper back here you’re gonna do the exact same thing except this is gonna have one that’s gonna have one that’s gonna have one that’s gonna have one and the last one is 19 again 16 17 18 19. there we go okay the next thing you need to do is put in some water bottles like this just going to dump in a bunch of water bottles and we’ll get some more like that so then all your water bottles will go in here and you can fill this Thing all the way up and like i said if you need more storage then you could put another um hopper where this on button is going into this chest and then you could add more storage if you want to uh once you got your water bottles in there Then what you’re going to want to do is put in your first potion so then how are you going to do that well you’re going to start things off with one netherwart so you put one another wart into the brewing stand okay like that all right once that thing is in there Then what you want to make sure is make sure that the switch is turned on otherwise it won’t start and then what you’re going to do is you’re going to put your very first potion in there so all you need is like one item right here so i’m going to go Ahead and put in a piece of sugar into this one here and then we’ll also do i don’t know a piece of glowstone and then another wart like that okay so then all you have to do then is wait for this thing and it’s going to brew so we’re Brewing our netherward we’re just going to turn into an awkward potion there we go then we have our sugar then the next ingredient is going to be this one here the glowstone there goes the glowstone bluster dust and then in here we should have our nether wart now once again once this Netherwart uh drops into the system it’s going to empty this hopper which should uh retract this piston which is going to uh trigger this mechanism here there’s our pulse and we start the next potion okay uh to order your potions what you need to do is you need to put everything in order In the direction from right to left that it’s going to be going into the potion right so all of your ingredients are going to go here so like your carrots are going to go here uh let me let me get out some items here um we’ve got swiftness poison water Breathing night vision leaping fire resistance healing strength regeneration turtle master which is for 1.13 i’m currently in 1.12 uh making this tutorial but um soon 1.13 will be out you’ll have turtle master slow falling so that’ll be your membranes from phantoms turtlemaster i believe is the scute or something like that from The turtles and then corruption is your spider eye so that like makes like your poison effects and stuff and or your corrupted effects and then lingering potion for tipped arrows power uh for israel is the glowstone dust duration redstone dash and then these two are actually backwards because i was Having some issues so this one here is going to be our splash right there so we’ll do sp and the last one um you could just put awkward that’s awkward awkw awkward did i spell awkward awkwardly i think so anyways you don’t really need that lever then So then the very last thing you should know is that when the lever is up that’s when it’s active okay so right now the only thing that the only ingredient that’s going in right now is the water breathing uh the puffer fish and our netherwart right here but if you wanted To put some of these other things in then you could do um okay so we’re gonna let’s switch it over to like a splash potion of night vision so we got our night vision and then we’ll have let’s say some extra duration so that’d make it an eight Minute one and then turn that into a splash bushing okay so then these are all the active ones the ones where the um where the lever is pointing up and not down all right that’s the entire thing i hope you guys have enjoyed this little tutorial i know I’ve enjoyed making it i really like this potion brewing stand i think it’s going to be really awesome i hope you put it in your world and give it a try um and if you do like this video don’t forget to leave a like and don’t forget To subscribe if you want to see more videos like this but for now i hope you’re having a wonderful day and god bless You Video Information
This video, titled ‘Minecraft Fully Automatic Potion Brewing Station, Compact no Hopper Timer’, was uploaded by MrBlockHead on 2018-04-29 19:00:07. It has garnered 38394 views and 530 likes. The duration of the video is 00:20:40 or 1240 seconds.
In this Minecraft Tutorial, Hex shows you how to build a super compact, fully automatic potion brewing system.
This potion brewing station is only 4 blocks deep and uses no hopper timer. It automatically adjust the brewing time based on how many ingredients are in your potion. Check it out!
CONSIDER LEAVING A LIKE IF YOU LIKE THIS VIDEO!
check me out out on twitter: https://twitter.com/hexregulus
Texture Pack: https://mods.curse.com/texture-packs/minecraft/236821-faithful-vanilla


![-+- ⭐ TMF Country SMP⭐ [1.20.4] -+-](https://newsminecraft.com/wp-content/uploads/2024/05/TMF-Country-SMP-1204.png)