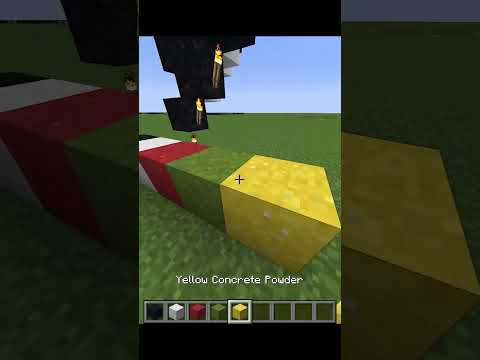
What’s up everyone how you doing blue nerd here and welcome back my friends to our minecraft swamp village i sure hope you guys are having an awesome day now today guys we are back with something that is completely different from my usual style of builds and something a little bit fantasy i suppose So i posted this in the community tab on youtube about a week or two ago about about a week and a half ago and you guys went crazy in the comments asking for a tutorial for it so today we’re going to build this a block for block and guys I’ve got to say i really really like this style of build it’s completely different to what i usually build but i suppose that’s why i enjoyed it so much now it’s a really cool little build there’s not a lot of room down the bottom but there is a decent amount of space at The top inside to build your base we also have a little smoking chimney which i thought was a little bit of a weird one but it kind of fits so i’m really over the moon with this guys and i really hope that you guys enjoy this Tutorial too if you guys want to see more builds like this in the future be sure to hit that like button and also if you want to see more of the swamp build tutorials i’ve got tutorials for all three of these builds over here so be Sure to check the playlist link out in the description but for now guys let’s go ahead and build this okay for this build you’re gonna need a white block of your choice now i am using the white terracotta block but in some texture packs the white terracotta Is a little bit pink so you might want to use the white concrete block instead or maybe even the bone block depending on whether you’re planning survival or not we’re also going to be using some red concrete some oak doors oak planks stairs slabs trap doors and buttons some stripped oak Logs some birch fences some clear plain glass panes or glass panes of your choice it doesn’t really matter some cobblestone cobblestone stairs and slabs cobblestone walls and then just some blocks for decoration so some note blocks some barrels some lanterns maybe some flower pots and then just some Things like some leaves tall grass and flowers of your choice to decorate the area and that’s about it so with that being said guys let’s build this okay guys here is a layout of the floor plan now i’m using the new color coded system here so as you can see the red Blocks are one block the yellow blocks are three blocks and the blue blocks are five blocks so i think this should make it a little bit more easier for you guys to see the layout so if you want to pause the video for a minute just to get A screenshot or an idea of the layout be sure to do that but with that being said guys let’s go ahead and build this okay guys we’re going to start with the mushroom stem and we’re going to start right at the front of it and we’re going To place five of the white terracotta blocks in a row or the white block of your choice now from this corner here we’re gonna go up and to the left and place another one then we’re gonna go up and to the left and place one two three four five then We’re gonna go up and to the right place one there up and to the right and place one two three four five we’re going to go down into the right place one down to the right again one two three four five down and to the left and place one there And that should complete a kind of circular shape at the bottom like this now we’re gonna go ahead and raise this by three blocks so one two three on top which should be four in total and we’re gonna do that all the way around Okay once you’re done come around to the front again and right in the center here just break two blocks out at the bottom here for a doorway just so that we know that this is the front of the build now on the front here we’re gonna place Three on top of this row here and then one in the center so you should have a stepping shape up like this we’re gonna do the same on all four sides so three in the center and one on top three in the center one on top Three in the center and one on top now we’re gonna just come up behind the back here and we’re gonna go a couple of blocks in the corners here okay right where we got this gap just gonna be temporary for the moment and we’ll do that on all four corners Just like this and then we’re gonna raise it by one two three okay one two three do the same for all four corners and then we’re just going to go ahead and break the blocks at the bottom of them okay because they were just temporary just like this Now on the very top here you just want to go one two one two one two and connect the two pillars together okay do the same on all four sides just connecting them pillars up so we cover in the front and we should now have something that looks a bit like this Now from here what we’re gonna do on all four sides here we’re gonna go one two three in the center okay we’ll do it on all four sides three in the center three in the center and we’re going to raise them by six more making them seven in total so one two three Four five six and we’re going to raise all of these ones that we just placed and do exactly the same okay okay that’s looking good and now once you’re done just go ahead into these corners here where we’ve got the empty space place the temporary block there And then raise this one up until it is the same height as the top of the wall and then just break that temporary one at the bottom do the same here and then break that bottom one and just do the same on the other two sides okay that’s looking pretty good Now what we’re going to do we’re going to just make a little bit of shape down on the ground here so depending on where you’ve built this you might just need to ignore this section it’s depends on where you’ve built it so for me i can see part of the ground Here so what i’m going to do is i’m going to come across to the floor level so there’s the floor and we’re going to come up to the first block okay and on the right hand side here place one block in the center one at each side and one on top And then underneath because i can see the edge here i’m gonna place two layers of three like this and then because i can see that bottom one we’re gonna do the same now where the first two blocks are we’re gonna leave those and then we’re gonna Place one just there on the third one and then the same on the very bottom like that do the same on this side so one down here leaving two blocks down and one here okay and now because we can see them back ones there we’re going to replace Those with some white terracotta blocks and the same for these because they can see be seen so you want it to look like it goes into the ground okay that’s looking good for this side now if you wanted to you could replace that one and also that one there as well Just to make it look a little bit more supported and you could also replace those two there as well to make it look like it kind of goes around so it’s entirely up to you for here i’m not gonna do this one here because we’ve got the one on top there So it might look a bit funny if we did now round to the other side here on the left hand side we’re gonna do the same thing so on the first layer at the bottom here place one in the center and one at each side one on top Then we’re going to just break into the ground here a little bit because we can see the ground now if your floor is this level all the way around you don’t need to worry about it it’s only because i can see this and that is why i’m doing it here Two blocks down place one there then i’m gonna place one in there because we can see it and also one in there now obviously i’m not gonna go down any further because we don’t need to because the rest of it is actually covered by the ground okay so we’re gonna leave it Like that if you really wanted to you could place a one in there just to sort of make it look the same as the other side there but it’s entirely up to you okay guys now we’re gonna break out some windows so let’s start from the right Hand side here we’re gonna come to the right hand side of the build we’re gonna break one window each side of this single block at the bottom here okay then we’re gonna go up and where this single block is we’re gonna leave a two block gap and then break one just there okay Do the same on the left hand side of the build so around here we’re gonna break the two at the bottom and then come up where the single block here is leave a two block gap and break the third one now around the back of the build all We’re gonna do is come down to the bottom at the center so right in the middle go up one block and then break the one to the left and one to the right and then the one above those just like that and as for the window we’re going to Come around here this will probably turn into a door but we’ll see what happens so we’ve got the single block here above one two block space break the third one and then finally round the front right where we have the single block one two and break that third one Now we’re gonna do the same here for all four sides so what we’re gonna do is place a block above the window and then one two blocks above that one and then one two three four five six blocks above that one let’s do the same on this side so one then the two And then one two three four five six do the same for the other two sides okay that’s looking pretty good now what we’re gonna quickly do here guys let’s go to our red concrete and we’re gonna place one on the tip of the beams here we’re gonna do the same thing For all four sides okay so place one on the tip and then go one two three four one two three four okay so one in the center and then for each side so there’ll be nine across here and do that on all four sides so one One two three four this side and one two three four this side do the same at the back and the other side Okay once you’ve got that done what we’re gonna do is behind the corners here we’re gonna place one temporary one and then place one two break the back one and then we’re gonna break place one there and place one there and break that one okay so we go across and then we’ve Got two and then one on this corner here place one there temporary one two break the back one and then one just in there okay and we’re doing that on all four sides of the corners so one here one two break that one one here and one here break that one One there one two break that one one there one there break that one down to the back one one two break the back one one one break that one one one two oops one two break the back one one and one and break that back one okay last side two here then one Two here then one okay that’s perfect so now that we’ve got the perfect shape for the um for the actual mushroom that is gonna fit in nicely so what we’re gonna do here is we’re gonna now go from the center point here we’re gonna place one here and then We’re gonna go one two three four place one in and we’re gonna come around this entire edge making sure that we don’t place any on top of any of the blocks we placed okay so you just want to go around the edge of it like this okay Now this time if you want to you can leave the corner blocks it’s up to you or you can break them out like this each time so it’s entirely up to you how you do it it’s probably easier to go around first of it rather than breaking them out as You go but however you prefer just make sure you follow it and do not go onto the edge like here you want to make sure you go around it okay okay that’s looking good now we’re gonna actually do a little bit it’s gonna probably be a Little bit awkward doing this so i don’t know if you want to do it now or after okay but what we’re gonna want to do is what we just done on that one we want to do exactly the same underneath here so underneath as you can see our top row basically we Just want to extend it down so bring a row underneath that one and then we want to complete the same pattern underneath okay but we rather than rather than making it just this thing we can actually feel that back piece there it doesn’t matter so we can go one two One two one two one two okay so just each one just go around that you can see on that upper edge and bring it down one on the white bit here just place one and then you just wanna bring down the two because the idea we want to do is we Want to get a little lip you see how we get that little inner lip all the way around and that’s what we want to do all the way around okay so go around and get that all in just make sure you bring in that top one just straight down okay Okay that’s looking good now guys what we’re gonna just do now is we’re gonna come to the outside here and we’re gonna just raise one two on this edge okay one two and we just want to do that all the way around just making sure you raise the front Edge of the outer one like this all the way around because we basically want to have a free free block thickness for the actual um for the actual mushroom cap itself Okay once you’re done you should you should have something that looks a little bit like this now guys i know it looks a little bit strange at the moment but don’t worry you know with the way we’re doing it we’re doing it the way we are for a Reason um the reason we done we done a lip on the on the um on the back before we place this one underneath is to give us a guide and then we do this one at the top here because we now got a guide for the next level so for instance here We just want to raise the inner edge okay again by two so one two one two one two and we go all the way around raising it by two okay but we don’t go there we stay on that inner edge that we see of blocks There so that we now get a little extra lip again going in because now we’re gonna curve the mushroom over so go all the way around guys and raise all of these ones here by two blocks Okay once you’re done you should have something that looks a bit like this so now we’re starting to see a bit of a shape of that mushroom now it does look a bit funny and that’s because we don’t don’t have any spots on it yet we’ll put The white spots in once we’re done but for now we just want to complete the shape of the mushroom so now what we’re going to do is we’re going to just place a temporary block on any corner like this so for me it’s going to be at the front on that little Right hand corner on the inside place one above it then we can just break that one for now and then we’re going to run one more row again all the way around on the inside like this again coming around those corners like that and we can Always break them ones on the inside we don’t need those like that keeping it on the inside and breaking the corners that are not needed and we’re going to keep coming all the way around break the corner and just do this all the way around guys just make sure you don’t place any Blocks on top of the edge that we’ve just placed okay we want to keep it just one block behind it all Okay that’s looking good right guys now we’re gonna go up again and this time again we’re can do exactly the same thing for the next stair so place a temporary block on the inside place the block above it we can break that one and again we’re gonna run Another level another layer all the way around the inside again breaking those little corners because we’re not gonna need them in there this one will come like triangled around like this so we keep all of those break that one there again and then just keep following that pattern all the way around Okay that’s looking pretty good now for this level guys because we are on the third one we want to slightly bring it in so what we’re going to do is where we have the nine blocks across the front here so this one is straight break one off that corner like that and one Off that corner there and what we’re going to do place one underneath one underneath and then we’re gonna place one on that edge one on that edge like that okay and then what we’re gonna do break the corner one here and place one in here and again on this side because we’ve got Three here break that one there put it on there and we basically want to repeat the same on all four sides so now we come around this side break the one on this side the one on this side place one underneath one underneath one against that one one against that one okay Break this third one place one underneath now this side here we already done because that was part of that side so we’re just going to continue our way around so let’s come around here again to the four block break one on the long lengths place one underneath and then one against that one One against that one break this corner one here because that one over there has already been done place one underneath move around to the side one on this end one on this end place one underneath against that block down there same on this side place one in there and one in there And now we’re back around to the front so now you see it’s curving in just a little bit more and now we’re gonna do the final layer at the top so what we’re gonna do for this one is we’re gonna find the center block on the long bits at the front here So now we should have one two three four five six seven so we want to find the middle block which be this one here place a block like that for a moment then we can come behind it and place one there and break that one then we’re Gonna go one two on this side one two on this side then we’re gonna place one there one there okay now what we’re gonna do is we’re gonna go how we can do this one we’re gonna place one in that corner and one in that corner then we’re gonna place one here bring Two down one here bring two down okay now back again to this side we’re gonna find the center one place one behind it and break that front one two each side one on the lower corner there where the gap is one on the corner where the gap is and then we’re gonna place One in this corner here and then one on top one two then we can break the one underneath one in this corner then we can go one one two break that one this one here place one on it and then go one one two okay so i hope you’re seeing the pattern now So on this top layer here we’ve got five then two then two and five then two and then there’ll be two so be the same pound five two and two okay and then what will happen is you’ll end up with gaps on the little corners here here and Here like this just make sure you fill them in on that next level so let’s continue our way around from here so now we’re gonna go place one underneath and then we’re gonna find the center block place one there break it one two one two one on that lower piece one in that Corner one on top one this way then we’re gonna break that one place one over here place one two break that one and then one there then we’ve got one in the corner and then we can go one in the center here one two one two one in that corner Then we can just place one there and come back one two now i know that was a little bit awkward to follow guys so i hope that kind of makes sense but basically once you’ve got your five in place all you’ve got to do is go directly back and do two Then do two gun the opposite way there and then you’re on to your five like this and then any holes you may end up having which will probably be these ones here you just go ahead and place them like this on the inside to fill them gaps okay And now that we’re at this level this is our top level so all we’re going to do here is just from here is fill all of this roof in like so with our red terracotta fill it in all of the way and then that is the mushroom shape roughly in place Okay guys right that’s the basic structure for the mushroom all in place so what we’re going to do now is we’re going to come down underneath here and as you can see i’ve just thrown a few torches in just to make it a little bit lighter in here for you guys to see So now what we’re going to do where we have these supports that connect at the top of the mushroom here we’re going to basically create a floor at this level so go ahead and place in one two three four five across here and then just co Fill the gap all the way around at this level because this is now going to be the roughly the roughly the floor level for you to work from so go ahead all the way around and you just basically want to fill all of this in any gaps make sure you don’t miss it And fill it with your white block of choice whether it’s the white terracotta or the white concrete or whatever you’re using just make sure you fill all of this in like so all right guys and once done we can probably get rid of this top little layer here because this is going to Actually be where the flooring is now so let’s go ahead and just break this one little layer here that we came up by one block too far there we go perfect and this is going to be the flooring area for our top floor which we will work on a little bit later on All right guys now we’re going to just make a little bit of a neater shape up here so first of all where we have these little supports here we’re gonna place one here and then two like this do the same over here okay so this like three like a little Triangle and on this side here we go one on one okay do the same on all four sides so one two three this side here one two three just like that and then one and one same again here one two three one two three one one and then finally around this side as Well one two three just like that one two three one and one and it just gives a little bit of a better shape around the top there and kind of makes it feel a little bit more like a mushroom all right guys now that we’ve got our Top part of the mushroom in place we’re going to start working on the porch at the front so what we’re going to do for this is we’re gonna come over to the doorway first of all and we’re gonna break out a three by three block space So basically you just wanna break a row around the door like this okay then we’re gonna grab our stripped oak logs and we’re gonna break one two three four on this side and then place our strips oak logs going up we can do the same on This side one two three four and then just replace the four with the stripped oak logs we’re gonna place three across the center like this then we’re gonna go one two three from the top on that one one two three from the top on that one and then we will Have a three block gap and we can bring a log up here and a log up here and that should leave us a three block gap in the middle and we just want to go one two three across like so now on the top bars of the corner here You want to place a log and then one in the center and we also want to do the same at the back here so one on every other block like this and also on this side down here then we’re going to grab our oak stairs and we’re going to put an upside down One underneath the logs where the pillar is so like this we’re also going to place one at the bottom on those sides for the pillars and then we’re going to place an upside down one in the gaps so place two there two there and then two on this side here Then just go ahead get your white tarot card or the white block of your choice and then you just wanna fill this gap in on the side just like this do the same on this side round here make sure you fill the wall up in line with the pillars Now here we’re going to grab our oak strips oak logs again and in the ground here we’re going to break these three here and place three of them going across and then the one block behind we’re gonna place three on this side three on this side and then one above there for our Doorway then all we’re going to simply do here is place an oak log there a upside down stair each side and then we’re going to grab our birch fence place two in here and two in here and then finally we’re just going to add A oak button on the front of all of the logs that are sticking out all the other sides and also on this side okay perfect now we’re gonna go ahead and get the red the red concrete and we’re gonna make the little roof for here so what we’re gonna do is we’re gonna Place a row across here of five and then a row across here of five and then a row down here of five and then what we’re simply going to do here is just we’re gonna place one in that corner one two three four five in front one in that corner Five in front of these ones one there and then five down this side and one in that corner then we’re just going to place five on top of the first ones we placed five on top of this row that we placed and then five around this edge So we’re getting a slight little bit of a curve now and if we just go ahead we can place one in each of the corners like this and now we’re going to go to the back wall place one here bring it up where we’ve got that corner One there we’re going to come around it bring it across and then just go all the way around like so so that you don’t touch any of them blocks underneath and then all we’re going to do now is just fill in the ceiling with our red to our red concrete just like this And there we go that’s the front all done now we’re going to go ahead and we’re going to put all the white spots on there in just a minute but for the moment we’re just going to leave it like that but we will come back to it and do All the detailing up in just a minute now we’re going to work around the back here and get our balcony in place so the first thing we’re going to do here is where we have this with our windows here we’ve got a pan a sort of a bit down the side here So we’re going to break one two three four and replace them with the oak logs or the strips oak logs one two three four on this side of the window and bring that up and if you have any gaps like this and it goes down it’s Probably a good idea just to make it look like it goes into the ground and this side should be fine down the bottom here we’re going to place a log sticking out on each one of these okay now if you take a look there’s one gap In between and i’m just going to quickly while i’m here i’m just going to quickly put in a little bit of a little bit of grass like that just to change the um texture because for some reason here the um overlay is coming on there and it just looks a little bit funny Now i’m gonna just place an upside down oak stair like this and then we’re gonna count here so we’ve got one two three four we’re gonna go five six on top and five six on top making sure they all face the same way okay right now we’re gonna go from here We’re gonna go one two three four and from this side here above the log there one two three four okay right in the middle one two three four okay perfect now we’re gonna just grab the white block of our choice that we was using for the mushroom and we’re gonna just Place two of them in there like that above them we’re gonna put some oak planks with two more oak planks in front and an upside down one at the very front there then i’m gonna come around to this side here we’re gonna place a log there and a log there and we’re Gonna break this block here and for the moment we’re gonna put a white terracotta just temporarily in there and we’re going to stick another log sticking out like this and then replace this one here with a log like so now do the same on this side round here So we’re going to place a log on top of that one log there leave a one block gap to this side place one there break that one and that one and we’ll place a log there we can put the white terracotta on that one there and then the log on the outside like This that looks pretty good and then two upside down stairs here we’ve got our two on the front already and then two on this side like so then on this corner here let’s put a stripped oak log there two on the corners like this and then one back on this pillar here Then we’re gonna put our birch fences across the the edges like this joining up to make ourselves a nice little balcony break that one in the center there for our doorway and then we’re just gonna get our oak trapdoors and place them on top of the logs like this Just so that they blend in and just look a little bit nicer something like that and then finally we’re going to grab our oak buttons and we’re just going to place them on fronts of all of these logs and to make it look a little bit more Supported we’re going to get our stair our oak stairs we’re gonna place one on each side like this two in the center like that with one underneath okay just to make it look a little bit stronger and if you wanted to you could also put a stair on this side and on This side okay that’s looking pretty good now i’m going to quickly grab myself some glass panes so we’re going to get some of those and then what we’re going to do here is just going to put two windows in here two windows in there up the top here’s gonna be a doorway but Round the side here we’re gonna put one window in there one in these two down here at the top underneath here we’re gonna put a window in there one in this side two in here and that’s looking pretty good okay right so now we’ve got all of the Structures and that all in place it’s time to kind of neaten everything up make it all look a little bit nicer get the spots in organize the interior and stuff like that so i think first of all the first thing we’re going to do is let’s finish off this little Bit on the outside so let’s get ourselves some lanterns and some birch fences so the lanterns first of all we’re going to come under the inside edge here and where we have this little a little tip here okay we’re going to go one in and we’re going to place a lantern there On the middle so we’ve got three here place one there do the same on all four sides because we’ll have the same thing and we just want the lantern right in the middle like this to create a little bit of light underneath here because it’s a Little bit dark and this just kind of gives it a bit of a glow and just overall just makes it look a little bit nicer also again just place a lantern in the corners here so right in those little corners and that’s looking pretty good Now the oak fence i thought this was a pretty cool little idea guys so what i’d done is i went ahead and where we’ve got this gap so right we’ve put the flooring in for our top floor yeah basically we want to go around the whole lot and Place in some birch fences like this underneath okay just fill all of this gap in with the birch fences make sure you don’t bring it down you don’t want it hanging down you just want one layer all across like the ceiling edge here okay and what It does it gives it um it gives it that kind of effect you know underneath mushrooms you have that kind of i don’t know how to explain it they’re like little kind of um little thin sliced areas and when we do this and we look from underneath down here It almost almost kind of gives that same kind of look as what you get underneath a mushroom and i thought it looked pretty cool so it’s entirely up to you guys if you want to put all of these fences in you haven’t got to of course But i think they look quite cool when they’re all done and it just gives a nice effect to the house and a little bit of detail so let’s go ahead and we’re going to do that underneath all four edges so we’ve got this corner we’ve got that corner Over there which is done this corner here and then these two around the back here so i’m going to go ahead and just fill all of those in okay once that’s all done we are pretty much done with everything else on the outside the only other thing left for The outside is to get some white spots on so first of all let’s start with the little porch here so for the porch here i’m just going to use the white terracotta here use the white block of the choice that you want to use any white block will be perfectly fine And what you want to do is actually just place a few random ones in on here now we will make some bigger spots on the roof up there but this roof down here is quite small so down here we’re only going to use single blocks and we’re Just going to place a few of them in just like this just to make you know just the odd little spot there that kind of looks nice and fits with the size of the roof okay the last thing we want to do is overpower the roof with some big Spots because it just won’t look right so for here i think something like this is probably good enough we don’t need to really go any more than that i think that looks pretty good now for the top half we can go a little bit bigger and because we’re building With squares and stuff i think it’s better to keep the squares the spots kind of square shape they tend to look a bit better so for here what i like to do is on the sides here is do maybe a few four blocks which is two by two like This okay a few large ones you can even do them on the bigger parts here so you could just do like two here and then do two right above it like this okay and i think you can get away with that then you want to go ahead and just throw In a few single ones as well again you don’t need to go too crazy here but make sure they’re kind of well dotted around you want to kind of kind of make sure that all of the sides and the little angled bits at the side here Get a few on as well just to kind of blend everything in and make it look um look like a mushroom so you can blend some in the side like this add a few down here again down here um we want to make them pretty well spread out so maybe one there Um i normally this row at the very bottom here i normally leave that all red i don’t put any spots on that very last row that’s kind of uh sunken back a little bit i leave that as it is so we’re kind of going for something a bit like this Don’t forget to put some spots on the very top as well so again you want to place a few of your bigger spots i normally put one kind of in the two opposite kind of corners really something like that and then maybe randomly maybe one here something like that And then again we’re gonna just go ahead and place a few sort of dots here and there i try to make sure that they’re not on the same rows you know i kind of try to move them about so that they end up looking random do All right guys so once you’re done you should have something that looks a bit like this and as you can see from the outside now we’re pretty much looking very nice and i think this is pretty much done on the outside other than a bit of decoration with some leaves and Bushes and stuff like that but the actual structure itself i would say is more or less done on the outside so we’re going to go ahead and go on to the inside and first thing we’re going to do here is we’re going to put down a flooring we’re also going to need some Um some doors so we’re going to grab an oak door we’re going to grab some oak slabs and then we’re going to grab a cup or a few oak logs for the moment so first we’re going to do let’s go on to the inside here and just for a moment We’re going to just throw a few uh lanterns just up on the side here just for a minute they will be moved just to give us a little bit of light and we’re going to start by filling in ourself a floor so let’s go ahead replace all of the Grass on the inside here with the flooring of your choice i’m just going to use the oak planks but you guys can use any floor that you wish okay once your flooring is all in place let’s go into the little porch area here right at the front let’s place ourselves In a front door so we’ve got a door in there and then up above here i think what we’re going to just do is we’re going to fill this in with our white terracotta or white block of our choice let’s fill all around the edge like this So we got something like that and then i think we’re gonna go ahead and because we’ve got this wall here i think we’re just gonna bring this wall all the way down if we can reach there we go and then i think i’m just going to cover that red up with two layers Of the white terracotta to bring it down a little bit lower and then i’m just going to place a lantern underneath like that just to give it a bit of light as we come in and i think that will do for that little bit there Okay now can we remove these no we can’t so we can put that back there right so now i want to get a doorway coming in up to this block here this is going to be the um the walkway out to the balcony so let’s head down here And what we’re going to do is first of all let’s put three planks in here and don’t forget to put one in there where the door is gonna go then we can go ahead and throw our oak door in there like that then i’m gonna grab the oak log And i’m gonna find the center block here so if we left that one there we’ve got one two three four five so this one here would be the center so let’s go all the way down to the center point and bring this one up just like that let’s remove those and Then i’m just going to throw that plank back in there like that now i’m just going to raise the log all the way up until we reach the roof okay so let’s bring it all the way up and we should be able to get all the way up to there there we go Perfect now i’m going to come down here and we’re going to start because we’re going to make a stairway which is going to curve all the way around and up but we want to make sure that we can get to this door here so what we’re going to do is we’re going to Place slabs at this height here okay then decide which side it is that you want to come down so i’m going to bring the the walkway i think from this side round up like this so now what i’m gonna do is i’m gonna start stepping this downwards so i found gonna do One there so we’ve got a straight bit there and then we’re gonna go two stairs in here we’re then gonna go in one two down there um i think because this is a corner i might just keep it do two more like that then we’re gonna bring it down one Like this place one here temporarily bring two more down here and again we’re on the corner so let’s just make it a four then we’re going to bring two down to here one there and then we’re gonna break that one after put four here because we Again we’re on a corner then we’re gonna go two two like that and just keep bringing it down and round and every time you get to the corner you can make a kind of a bit of a square okay so you get the four like that and then we’re gonna go From there we’re actually gonna change it up a little bit so from here we’re gonna break these two so for at the bottom here once you get to here break it one there and then you can go for a full block there and then a slab About here okay so we’ll be able to come in and walk around and up like this now we’re just going to neaten this bit up so let’s get ourselves a another log and the log’s going to go right here and join to that block up there no one next to it right there Um we’re gonna break that there and we’re just gonna bring this log across and join to that wall and then we’re just gonna put a full block in those two gaps there for the moment okay so we have something that looks a little bit like this From the bottom going up and this will take us up to the balcony okay now i think because we’ve got the corner here i’m just going to add that one block there and then two blocks there to finish that off two in there and then this one here i’m I think we could probably just bring this one all the way down for the moment and we might as well bring this one all the way down as well okay so you’re gonna have not very much room underneath here but it is still gonna be usable so we can come around Here and in this side here i think we could go ahead maybe use a beam across there with the white oops and we can do something with this area that you want you could put some candles uh not candles uh you could put some lanterns maybe a lantern down there like that Um you could put some bookshelves in here you could put some anything you kind of that you want any sort of useful items you might want to make use of the space with it’s entirely up to you for the moment i’m just going to leave a lantern there for now Let’s break that one and that one for the moment and if we go back downstairs so we’ve got that side done on this side here i’m just going to put three in the against that gap there and then what i’m gonna do is grab my slabs and i’m just Gonna cover these ones here okay and then get the slabs and just go around the edge with this with the one block like this all the way around okay so kind of just around the edge and it just creates a little bit of kind of um shape to the ceiling Now in this edge here um don’t have to do anything with this or if to just fill it up with some planks i think we might just do something like that maybe put one of those up there a stair like that just for a little bit of shape i think that looks alright And again guys you’re gonna need a bit of light down here so i would suggest um maybe put in a lantern or we can’t put one next that’s a half block so down here you could do something down here with this area you’ve got a lot of areas to play with I would go ahead and probably have a lan lantern or actually that’s a area there we need to cover that so let’s bring our white blocks down by two blocks in this gap here and cover all of that that’s a bit better that gives us a bit More sort of a shape to everything now so place a block in there maybe why are we on here so yeah we could could go ahead break those two and put in a couple of upside down stairs if you want to make a little bit more shape down here and you could Probably fill this up with something again so for instance i would probably go ahead get some things like maybe some crafting tables um what else might you use down here maybe some chests for some storage just any little bits that you might find useful we can decorate with some flowers um Yeah maybe a loom block might be handy and then make sure you get a few flowers for your flower pots as well i’m just gonna grab some orange ones for a minute so i’m gonna just go maybe um maybe a few little crafting benches down here like That we’ll put a lantern in that corner there i’m gonna change that one there with a loom i think that looks pretty cool yeah something like that just to just to make a nice little area in that corner and of course you can decorate the rest Of this room up as well again doing something very similar to what you’ve done here maybe you could to make a kitchen down here or a brewing area or something like that it’s entirely up to you um i’m gonna go ahead maybe i’ll do a bit Of decoration at the end but for now we’re going to leave it like that now let’s go ahead and finish up our stairway which is going to lead all the way to the roof so let me go ahead we’re going to go all the way up to here now So now that we’re here we’re going to come here and we’ve got the end of the slabs here so let’s put a slab by up by half a block and then round the corner like that then we’re gonna put in two here we’re gonna put in one just there We’re gonna put one on the bottom half of that window i know it is a window there guys but it doesn’t matter it’s not an issue if it does bother you you can always take it break the window out and put in one of the um the white blocks it’s up to you Then we’re gonna go up another step and we’re gonna wrap around the corner for that one again up half a step again we’re gonna go up and we’re gonna wrap it into the corner there half a stair up again half a stair up wrap it into the corner And just keep on repeating that same pattern all the way around until we get to here and we’re finally at the top of the house so i think up here what i would probably do you’ve got a few blocks of space here i would go ahead myself get in some oak maybe some Oak planks and fill the flooring in first of all so i think let’s go from about here cover around this edge here all the way around that edge and then just take it all the way out and fill all the rest of the flooring in with your planks that way you know the Flooring up here isn’t gonna be all white and you’ve got a nice bit of flooring in here to do a little bit of decorating and make the area look nice okay right once you’re done and you’ve got that all in place you just now want To make sure that you’ve got a way up to your landing so let’s go ahead here let’s put in another stair here and then finally one in that corner there so now we should be able to come all the way up to the landing and we should have no Problems in going down either perfect okay now it is a little bit dark on the way down here so what you might want to do is find a spot where you can hang a lantern maybe on that one something like that i think that’s a pretty cool little spot And maybe one somewhere down here maybe above the door there and then again we’re gonna find another one maybe in that corner there perfect and we can get up and down with no problems i’m gonna just go ahead and for now down here let’s just put in some of these Across here just for the minute and then we’re going to put a lantern in there just to brighten it up in here and there we go that’s pretty cool so now we’ve got our way all the way up to the balcony and all the way to the top it’s entirely Up to you guys or what you really want to do up here but i’ll give you a quick idea of what i would do first of all where your stairs are at the very top here i would put some trapdoors like this um i would also do Um how we’re gonna do is just do another trapdoor there then we’re gonna do three across here on this side we’re gonna face that one so place one there three across here then it might actually get away let’s quickly try this just put some slabs across there can we still get underneath Yeah there’s plenty of room and we can even get away with one there as well even one there so we can put the slabs in all the way up to there so we can break that one just there let’s put two of these in on this side Now if we open this one for a minute and this one we can place one there temporary and crouch place one on top open it break the bottom one and then we got something a little bit like that and again we can do the same around here Let’s place one there crouch place one on top open the one on top break that one underneath and then i think i’m gonna put a slab there as well just to make that a little bit nicer as we come up the top there cool right now i think here because of the Way the walls are we’re gonna want to just fill this bottom piece in at least with some red of the uh red concrete like this so i’m gonna go around just bring the wall out and in fact to be honest i think i might even just bring it out to this one here Yeah i’m gonna bring it out so it’s level of that way that way the walls are all level because that will just bug me but you guys haven’t got to do it it’s entirely up to you i’m gonna do it like this now you have got to bear in mind guys That you probably are going to end up with a few of the white spots showing through and there’s not much i can really do about that unless i added another layer on the inside and i really don’t want to have to do that because that will just really take away a lot of The space up here so the best way to really be to do with that to deal with that will be to cover it with something like bookshelves or some kind of picture or something like that on the wall just to kind of hide it Out of the way it would be the best way to really do it but you shouldn’t end up with too many because we are going to be covering most of these walls all up so we want to have something like this basically all the way around okay so i’m Gonna go ahead and just fill the rest of these walls in quickly just so we can cover everything all up like that there we go perfect now before we finish up guys there’s a couple of things i did actually forget to do on the outside one was the chimney So now at the front here this is the front here so i want to go to the back i think on the right hand corner here i think is a good spot for the chimney so what i’ve done here is i’ve done something a little bit different what i’ve done is So from the very corner over here we’ve got two and two on the back corner so what i would do is i’d go forward one to somewhere about here and you want to do a shape like this okay with one block in the center place two more blocks on top of those so We’re about three blocks high then you want to get a stone brick stairs you want to place one here one here and one here then what you want to do is actually place a stone a solid stone brick on this side and place an upside down stair Like that then one against that one that one and that one and then you want to do the same pattern on the stairs so one two three and four and then raise these up by maybe maybe three blocks as well we’ll go free again like that then on the top i’m gonna put Cobblestone i’m gonna put a campfire right at the very top there and then stone brick slabs like this just to make a little chimney like so and then we get a really nice kind of looking effect now like i said guys you could use cobblestone or any block of your choice To make the chimney it’s really entirely up to you um but i think that looks pretty good all right guys once you’re done you should have something that looks a little bit like this now as you can see guys i changed the chimney out for some cobblestone just to show you guys what It looks like and i think i actually prefer the cobblestone to be honest i think it looks a little bit nicer down at the bottom here i’ve got myself in a pathway i’ve made these little mushroom blocks out of a birch fence and a red mushroom block We’ve also added some never uh some neverwood on some soul sand we got some magma cubes and soul sand in the water to create some bubbles other than that it’s just a a bunch of leaves and some flowers around just to make the area look nice and just to Blend it in really with the swamp area and overall guys i’ve got to say i am over the moon with this one i really like the look of it and it’s something completely out of my usual style of builds now if you guys would like to see more Builds like this please be sure to smash that like button and let me know in the comments below and if you’re new to the channel then please consider subscribing i post tutorials on most days of the week as often as i can so that’s your sort of thing be sure to consider Subscribing just don’t forget to hit that bell so you get notified every time i post a new video but for now this is blue nerds signing out and i will catch you guys in the next one Video Information
This video, titled ‘Minecraft How To Build A Mushroom House Tutorial | Minecraft 1.14 Tutorial’, was uploaded by BlueNerd on 2019-07-06 11:00:01. It has garnered 1094690 views and 35079 likes. The duration of the video is 01:00:09 or 3609 seconds.
Minecraft How To Build A Mushroom House Tutorial
► Swamp Village Let’s Build Playlist: https://www.youtube.com/playlist?list=PLKZ36uW8BdjiCD0SsbNU9gu-L2UDVbpTI
Hello Everybody, and welcome back to the swamp. Today I have a very different style build. We will be building a large mushroom house in this minecraft tutorial.
Thank you so much for watching, smash the like button if you did enjoy and i’ll see you on the next episode!!
► World Seed (PC Java Edition): 6779344106537292488
► JermsyBoy’s Texture Pack: https://minecraft.curseforge.com/projects/a-little-taste-of-jerm
#minecraft #tutorial #bluenerd
*******************
Want More? Subscribe and Never Miss A Video ► https://www.youtube.com/channel/UC1ANc72wQdusmOHwOL1-93g?sub_confirmation=1
Follow Me:
► Website: http://dm-gamez.com ► Facebook: https://www.facebook.com/BlueNerdYT ► Twitter: https://twitter.com/BlueNerdYT ► Discord: https://discord.gg/mmPqzEK
*******************
Music By Vindsvept ► https://www.youtube.com/user/Vindsvept
Intro/Outro Music By No Copyright Sounds ► Marin Hoxha – Endless