
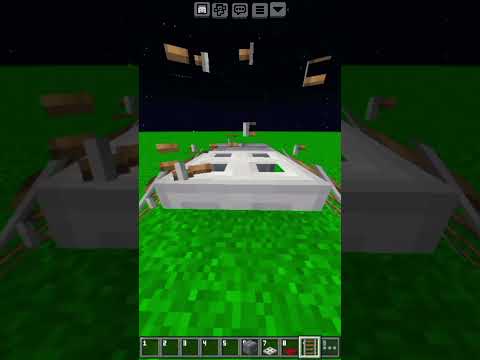
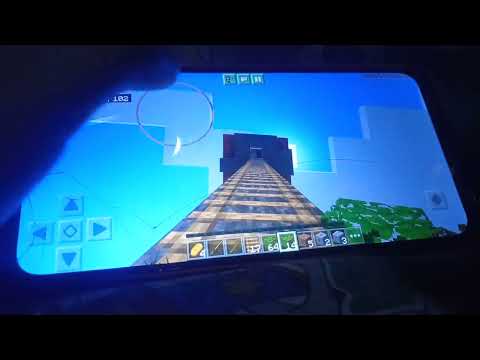
Hi everyone and welcome to another how to build tutorial. Due to popular demand, I’ll be showing you how to build an underground trading hall in this video. The trading hall consists of two floors and has 30 spaces for villagers. You can have this as a build on its own like I do or add it onto an underground base that you already have. I really hope you enjoy this video. Make sure to leave any feedback or suggestions in the Comments section below and if you like the tutorial, be sure to subscribe if you haven’t already so you never miss a new video. Lets get started by building the entrance to the trading hall. I’m building mine in the side of a hill, so i’m just clearing out a bit of the ground So I have a flat area to work with. You can build this in any hill in your world. Now we’ve got a spot ready, place 5 stripped spruce logs going up on the left hand side. Leave a gap of 3 and then place another 5 stripped spruce logs. It should look like this. Directly in front of the stripped spruce, add 5 normal spruce logs, as shown. So you have something that looks like this. Now, next to the stripped spruce column, add 4 stripped spruce logs with another two directly in front, just like this. On top of the two block high logs, add a spruce stair with a second stair in front at the bottom. Now repeat on the other side. So four stripped spruce logs with two in front. Then add a Spruce stair on top of the two block high logs with another stair in front at the bottom. After you’ve done that, add a normal spruce log in front of the 5 we added earlier and place a dark oak stair on top. Do this on both sides and you should have something that Looks like this. Now that’s done, go to the top of the spruce column and place an upside down dark oak stair facing inwards. Add another dark oak stair behind this and one on top. Add another upside down stair in front of the top one and you should have something that looks like this. Now repeat on the other side. So an upside down stair at the top of the spruce logs. A stair behind this with another on top. Then a final upside down stair in front of the top one to finish it off. The two sides together should look like this. Now add a dark oak slab on top of the top stair, a block, then another slab to join the two sides together. Once you have the outline done, add two more dark oak stairs next to the bottom stair so it comes back to touch the hill behind. On the next layer, add two spruce stairs coming back. Then add dark oak slabs at the top coming back to touch the hill. It should look like this. Now we’re going to do the exact same on the other side. So dark oak stairs across the bottom, then spruce stairs on the next layer and finally dark oak slabs to finish it off. And we should now have this covered entrance. To smooth it out underneath, add an upside down spruce stair next to the dark oak stair as shown on both sides. On the next layer, add 3 spruce planks going across, touching the hill behind. Then fill in the gap at the top with two dark oak slabs and add a spruce slab in between the spruce stairs. Add a lantern to the middle of the outline to light up the entrance. After that, remove the ground between the spruce logs and replace with dark oak planks. This includes the short spruce log at the front. Next to the taller spruce column, add two dark oak fences going up on both sides with a dark oak fence gate in the middle. Now the entrance has been built, I’m just going to add some more grass blocks on either side to tidy it up a bit. After that, I’ve added a sweet berry bush on either side for decoration. Then, using a shovel on the grass blocks in front, I’ve created a worn looking path Starting at the entrance and coming outwards from it. Around the path I’ve used bonemeal on the grass to add long grass and flowers for extra decoration. We’re now going to move onto the stairs that will lead into the trading hall. Remove all of the visible ground between the spruce columns. The height of this section will be in line with the spruce planks that we added at the top earlier. We will remove the block in front of the dark oak planks in the floor plus two more coming down. You can make your staircase longer if you’d like. So, in front of the planks add a row of 3 dark oak stairs and repeat this on the next two rows. So 3 steps in total. Now, come to the bottom and remove the ground on either side of the stairs. This includes The ground that the bottom stair is touching and goes all the way to the top. You can then remove the next layer in front like I’m doing so there’s a bit more space for you to work in. So we should have something that looks like this so far. I’ll show exactly how tall This should be in the next clips. Remove the stone in the wall that’s touching the stripped spruce logs. Next to the middle step. And remove any extra blocks from the ceiling, so its all in line with those spruce planks. Now we’re going to add an 8 block tall spruce log column next to the stripped spruce one, going all the way up to the top. Add an extra stripped spruce log at the bottom on both sides if there’s any dirt or stone Showing. Then add the 8 block tall spruce log column on the other side. So the two sides should be identical. Now, start digging out the ground to the sides and going all the way up to the top. So its 8 blocks tall. Remove the blocks next to the spruce log column. You can leave the top block as this won’t be seen. Then remove another two layers from the side going up to the top. So the wall goes in by one next to the spruce log but then out again and goes across by two. On the second layer, only go up by 7. Now, leave a block and remove the two next to it, going up by 7 blocks as shown. Repeat all of this on the other side. So we need to remove the side blocks coming up by 8 for two layers. Then the block next to the spruce logs and come up by 7. Remove another layer from the side but come up by 7 now. Don’t worry if you break through to the surface at any point, you can just fill it in and tidy it up later. Then leave a block and remove the two blocks next to it, coming up by 7. As you can see I’ve come up by 8 because I broke through to the surface but i add these blocks back in making it 7 blocks tall. Here’s what it should look like as if you were looking from one side to the other. And here it is from a slightly different angle so you can see it better. Now we’re going to remove the next layer from the back wall, following the shape of the ceiling as shown. So 8 blocks tall in the middle and 7 blocks at the sides. One block below the top on the 3rd layer in, we need to mark out a 3 block tall section, leave a block then add another 3. There is only room for 2 on the bottom one so this Is where we will bring the floor down by one block. Where we’ve made the floor come down, add some dark oak stairs to mark it out. This is what it should look like. So two blocks in front of the bottom stair is where we’ve brought the floor down by a block. Here’s what it looks like from the side. You can see the two 3 block high sections that I mentioned earlier now. We need to mark out the two 3 block high sections on the other side now and then remove a few More layers from the back wall, following the shape of the ceiling again. Because we came down by a block, it will now be 9 blocks high in the middle and 8 blocks high at the sides. For the gaps at the sides, we need to add another gap next to the one we already have that goes back by 3. The gaps either side of this need to go back by two. Do this on the top too. I’ll show a still of this so you can understand it better. So the first gap comes back by two, then three, then two. This will be where the villagers will go. We’re then going to do the exact same on the other side. So two blocks back, then three blocks back then another two on the top and bottom. Exactly like what we’ve just done. Now we’re going to remove more layers from the back wall. Starting from the stairs, or the first 3 block high gap in the side wall, we need to come back by 11 blocks in total. I’ll show this in detail shortly. After you’ve removed a few more layers, mark out the gaps in the side walls again. It will always follow the pattern of 2 blocks then 3 blocks and alternate like that. Here’s what it looks like with 3 of the 3 block deep sections dug out. And of course we will also need to do this on the other side as well. I’m marking out the sections as I go to make it easier to count how many blocks across I’ve dug so I don’t go too far. Here’s what this side should look like at the moment. Its exactly the same as the wall opposite. Now we need to carry on removing layers from the back wall until we get to 11 blocks across on each side. If you didn’t know already, I post extra content on my Instagram page. I’ve been Trying to theme each week to the main build that I put up on youtube so there’s plenty of content for you all. If you’re interested the link can be found in the description box below. Once we’ve reached 11 blocks across on the sides, remove one more layer. I’ll show This in the next clip. So, as you can see, we have 11 blocks across in the gap we have made in the side walls. This means we have 5 3 block deep gaps in each wall, which will correspond to 5 spaces for villagers. Both of the side walls should be identical. Now, for the back wall, make sure you’ve removed that extra layer I mentioned earlier. Then leave a block and start marking out the 2 block and 3 block deep gaps again on this wall too. Remember, the gaps are 3 blocks high and there should be a one block gap between them that Is left filled in. It should line up perfectly with the side walls. If you’ve got the dimensions of the room correct then the length of the gap in this wall should also be 11 blocks across and have 5 of the 3 block deep spaces. When you’ve finished digging it all out, here’s what the back wall should look like. The gap is 11 blocks across and there are 5 3 block deep spaces, where the villagers will go. Here’s what the front of the room should look like now we’ve finished digging the main space out. And here’s the room as a whole. We just have the top of the ceiling left to dig out. For the ceiling, we need to remove the 5 middle blocks. So there should be 2 blocks on either side of the 5 block wide gap. This gap should go all the way across from the back to the front. Here’s what it should look like. So we have the two blocks above the gap in the wall, then another two blocks above this, then finally the 5 block wide gap with two blocks on either side of it. Now we’re going to start decorating the room. So to start, add spruce planks to the 7 block tall gaps that we left next to the spruce logs at the front, just like this. After this, add an 8 block high spruce log column to the next part as shown. Then fill In the space behind it with spruce planks. The spruce planks will be 7 blocks tall. It should look like this. After that, add more spruce planks going up in the corner, also 7 blocks tall. Next to them add spruce logs. Remove the bottom stone block so the spruce logs go up by 8 Blocks here. You should have something that looks like this. Now we’re going to repeat all of this on the other side. So an 8 block high spruce log column with 7 spruce planks behind it. Then another 7 spruce planks in the corner And finally an 8 block high spruce log column next to it, making sure to remove the stone at the bottom. When the two sides are done it should look like this. Now, in the entrance, add an upside down spruce stair on either side below the spruce planks From earlier. Then add another two one block down on the next layer. Above these, add a spruce plank with an upside down stair in the middle. It should look like this. At the top of the spruce planks in the wall, add a spruce plank in front of the dirt we Left with an upside down stair below it. Do this on both sides like this. Now, on the side of the plank, add an upside down spruce stair facing inwards on each side, as shown. In front of the stairs, create a block using spruce slabs and add another spruce slab to The middle. Just like this. When its done you should have this arch going over the entrance. For a bit of extra detail, add an extra dark oak stair facing outwards on each side of the bottom step, so it looks like the stairs wrap around. Now, next to the last spruce log column, where the floor goes down, leave a block then add a 5 block high spruce log column, making sure to remove the bottom stone block like this. Then repeat on the other side. So skip a block then add a 5 block high spruce log column. It should look like this. Now, extend the dark oak stairs that we added so they go up to the 5 block high spruce logs, but when you get there, turn the stair so it looks like it wraps around here too. After that, remove the 3 blocks behind the middle 3 stairs and the 5 blocks behind that. It should be in line with the stairs from the entrance. Then fill in this gap with spruce planks. After this, replace all of the remaining stone from this step with dark oak planks. So you Have dark oak planks on either side with spruce planks in the middle. It should look like this once you’re done. We will now move onto decorating the walls. So, as I mentioned earlier, this is where the villagers will go. To start on this, head to the far side and add 3 stripped dark oak logs on the first block of the 2 block deep gap. Behind this, add dark oak planks. Then add dark oak planks to the next gap, the floor Above this and more in front of the next stone column, like this. After this, add the stripped dark oak logs in front of the planks again. So there’s a one block gap between the logs. Add an upside down spruce stair to the top between the logs and place a torch on the Back of it. After that, replace the floor inside with dark oak planks. Then add a spruce trapdoor underneath the upside down stair between the logs. Now repeat this for all of the remaining gaps. To make it easier, add all the planks first. These just go directly in front of the stone That’s already there, following the shape of the wall. Make sure to add the extra plank in the floor above it too. When the planks are in place, add the stripped dark oak logs in front of the planks that stick out, so theres a one block gap in between each of the logs. After that, add the dark oak planks to the floor inside the gap. Then add the upside down stair to the top between the logs with a torch on the back of it. And finally add the spruce trapdoor underneath the stair. And repeat this for every gap. The torch keeps the gap light so there’s no chance of anything spawning in there and the trapdoor means that the villager can get in but it won’t be able to walk back out. I’ll show this in action at the end of the video. When all of the gaps are done, it should look like this. Now we’re just going to add a spruce log column to the corner on the far side. This will be 8 blocks tall. The finished wall should look like this. We will now do the exact same for the other walls On the lower floor. So, for the back wall, add all of the dark oak planks in front of the stone, following the shape of the wall we’ve dug out. And don’t forget to add the planks to the floor above while you’re doing this. After that, add stripped dark oak logs in front of the planks that stick out, so theres a one block gap between all of the logs. Once you’ve done that, replace the stone in the floor in each gap with dark oak planks. Then add the upside down spruce stair between the logs at the top with a torch on the back of it and add the spruce trapdoor underneath the stair to finish each gap off. All of the gaps are the same and should be identical to the other wall that we built earlier. So there should be 5 spaces in this wall too for villagers to go in. After you’ve done all of that, add the 8 spruce logs in the corner again, going up to the ceiling. Now we have to do the exact same one more time for the last wall section on the lower floor. So add the dark oak planks following the shape of the wall. Then add the stripped dark oak logs in front of the ones that stick out, so there’s a one block gap in between them. Replace the stone in the floor in each gap with dark oak planks and then add the upside Down spruce stair between the logs with the torch on the back of it. Then add the spruce trapdoor below the stair to finish the gaps off. Once this wall is complete we can start work on the second floor. Here’s what the room should be looking like now we’ve done all of the walls on the bottom floor. Now, for the next floor we need to start by adding two dark oak planks in front of the stone border above the walls on the lower floor. This will go above all of the walls on the lower floor but not across the front. This is to create a walkway for the upper floor, otherwise there would be no room to walk around up there. Once you’ve added the two rows of planks above the walls it should look like this. Now we need to add a border of upside down dark oak stairs going all the way along these planks. This is to make the walkway slightly bigger but also to create a nicer transition along the edge of it. The upside down stairs should meet up with the 5 block high spruce logs at the front if you’ve done it correctly. And here’s what it looks like now the walkway has been completed. For a bit more structure, we’re going to add upside down spruce stairs at the top of Each of the stripped dark oak logs on the walls, so it looks like its holding the walkway up. Do this for all three walls on the lower floor. These stairs help to make the build look a bit more realistic but also add more depth to the walls, so they aren’t just flat. When all of the stairs have been added it should look like this. For the floor, start by replacing the stone between the spruce logs with a dark oak plank. Then remove a one block border in front of the walls and remove an extra block in each corner. Don’t remove the stone in front of the stairs for now. Here’s what it should look like so far. Once you’ve done that, remove the blocks on either side of the corner block that we removed. So the corners have 2 diagonal blocks instead of one. Here’s what it should look like. We’re now going to fill in all of this with dark oak planks to create a border around the room. So in front of all of the walls, there should be a border of dark oak planks with extra Planks in the corners but no dark oak planks in front of the stairs. Heres what it looks like from a better angle so you can see how I’ve done it. Now we’re going to remove the one block border in front of these planks, going around The circle that we’ve created. I’ve added torches so you can see it better. On the corners i’ve come in and across, so it creates a constant line going around the circle. Now I’m going to fill this in with spruce planks. So we have the dark oak planks around the outside, followed by a border of spruce planks on the inside. Now I’m going to remove all of the remaining blocks from the centre of the circle we now have. If you want to check you’ve got the size correct, the gaps at the front and back are 5 blocks across and the gaps on the left and right are 4 blocks across. Now we’ve done that, add a border of dark oak stairs around the inside of the spruce planks that we just placed. These stairs also come across and back in, so its a constant line of stairs going around the spruce planks, as shown. It should look like this. After that, add dark oak slabs in front of the stairs on the sides with one in each corner. Then fill in the remaining space with spruce slabs. The spruce slabs should have 3 on the front and back sides and two on the left and right. Now the last thing to do down here is to add some lighting. So, add a dark oak stair on the side of the top spruce log so it goes over the stairs and hang a lantern from it. Do this on both sides. After that, head to the gap between the spruce logs and fill in the corner with two spruce Planks and add a dark oak plank above, in line with the walkway. Then hang a lantern from it. Do this on the other side too. So two spruce planks to fill in the corner, a dark oak plank above and hang a lantern from it. Now we’re just going to add a couple more lanterns in the remaining corners of the room and remove any torches we have left over. If you need more lighting, you can replace some of the spruce planks with a spruce trapdoor and hide a light source underneath. The middle of the room is slabs and stairs so mobs can’t spawn here, but I will be adding a chandelier to the centre at the end of the video. Now that’s done, head to the front and add a dark oak stair in front of the gap between the two spruce logs. Behind this, add a dark oak plank with another dark oak stair on top. Then add a dark oak slab on top of the spruce planks we added in the corner earlier. Then add a dark oak slab on top of the spruce column to top it off and thats the staircase leading up to The walkway finished. We’re now going to repeat this on the other side. So add a dark oak plank to the gap with a dark oak stair in front and on top of it. Add a dark oak slab on top of the spruce planks and another slab on top of the spruce logs And that’s both staircases completed. Now we’re going to add dark oak fences going all the way around the outer block of the walkway. So this is on top of the upside down dark oak stairs we added earlier and should join up to the spruce logs. It should look like this now the stairs and the fences have been added. Now it’s time to decorate the walls on the upper floor. These walls follow the exact same pattern as the walls below but this time we are using spruce, not dark oak. So add the spruce planks in front of the stone, following the shape of the wall again. It should look like this so far. Just like the walls below. Now we’re going to add 3 stripped spruce logs in front of the planks that stick out. So the logs all have a one block gap in between. Again, this is just like the wall below but using spruce this time. Here you can see both of the walls together. Now we need to replace the block in the ceiling with spruce planks but for the floor, replace It with dark oak planks to match the walkway. There should already be one dark oak plank in place from the floor below. Now add the upside down spruce stair to the top between the logs with the torch behind it. Then add the spruce trapdoor below the stair. Now we’re going to repeat this for all of the other gaps. Just like we did below. So replace the stone in the ceiling with a spruce plank and the stone in the floor with a dark oak plank. Then add the upside down spruce stair with the torch behind it and The spruce trapdoor below this stair. It should look like this when it’s done. To finish it off, join the tops of the spruce log columns together with sideways facing spruce logs. Then we’re going to do the exact same for the next two wall sections. So add the spruce planks in front of the stone, following the shape of the wall. Add stripped spruce logs in front of the planks that stick out, so there’s a one block gap between them. Then replace the stone in the ceiling with spruce planks and the stone in the floor With dark oak planks. Finally add the upside down spruce stair with the torch behind it, the spruce trapdoor and the sideways facing spruce logs across the top to finish it off. Then the final wall section is exactly the same again. I chose to do the upstairs in spruce and the downstairs in dark oak so it adds a bit more detail to the build and makes the two floors slightly different, so they aren’t an exact copy of each other. If you’re following along with this tutorial and building it in your own worlds then feel free to tweet me with your screenshots! The link for my twitter can be found in the description box below. It’s great to see that people follow my tutorials so i love receiving screenshots from you all! Now that the final wall is finished, here’s what the whole room should be looking like with all of the walls in place. We just need to add some lighting to the upper floor and then we can start decorating the ceiling. At the front, replace the stone in the corner between the spruce planks with a dark oak plank and hang a lantern from it. Then head to the back and do the same in the corner between the spruce logs. Then repeat on the other side. So a lantern hanging from a dark oak plank in the back and front corners. Now its time to decorate the ceiling. If you’re in survival, scaffolding will be very useful here. To start, we’re going to add a row of slabs along the top half of the spruce logs. The pattern of the slabs will be dark oak, then two spruce then another dark oak and so on. The first dark oak slab should have been where the lantern is, that’s why we replaced the Stone in the ceiling there with a dark oak plank. The next layer will follow the same pattern but we will be using planks this time. So one dark oak, followed by two spruce and so on. In line with the slabs below. It should look like this so far, with all of the blocks lining up perfectly. Next we’re going to add a whole row of upside down dark oak stairs, directly in front of the planks we just placed. For the next layer, fill in the gap at the side and then add planks following the same pattern that we did below going across. So one dark oak followed by two spruce. Make sure that you stop in line with the lantern, don’t go all the way to the end. We will Fill this in later. Now we’re going to repeat all of this on the other side. So on the first layer, the top half of the spruce logs, add a row of slabs. Remember, the lantern is in place of the dark oak slab at the start and end. On the second layer, add a row of planks following the same pattern as the slabs below. So one dark oak then two spruce and so on. Directly in front of the planks, add an entire row of upside down dark oak stairs. For the next layer, at the top, fill in the gap at the side and then add a row of planks following the same pattern as below. All of the dark oak planks or slabs should be in line on both sides. We will be joining them together in the middle next. So, head to the front and fill in the gap with spruce slabs. After that, join the dark oak planks together across the top with dark oak slabs and then bring the dark oak slabs all the way across the middle of the ceiling to the other side. Join the two sides together at the other end and then fill in the gaps on either side with slabs, following the same pattern as the planks behind them. So one dark oak followed by two spruce. Do this on both sides and that’s the main ceiling Design completed. We just have the side to fill in and the chandelier to add, which we will do now. So, find the middle block of the ceiling, it should be dark oak, and turn the slab into a block. Then remove the four blocks surrounding it and replace them with upside down dark Oak stairs all facing outwards. It should create this small cross in the centre. Now, add two dark oak fences coming from the middle block and on the second fence add more fences surrounding it, including on the corner blocks. So you should have this 3 by 3 square of fences. After that, add another fence coming down from the middle of the square with an extra fence on each side, but not the corners this time. It should look like this so far. Now add an extra fence coming out of the middle fence on each side of the 3 by 3 square. After you’ve done that, hang a lantern from the middle fence at the bottom, then hang one from each of the fences we just added sticking out of the side of the 3 by 3 square. It should look like this. The fence layout should be easier to see now the lanterns have Been added and have lit it up. This chandelier is mainly for decoration. If you’d like to do the lighting in a different way then feel free to. Now, head over to the side at the back and fill it in with spruce planks. And that’s all of the ceiling completed. Now there’s just a few final details to add to the room before I show you how to get the villagers in. So, if you head down to the bottom and look towards the front, you’ll see the gaps we left between the spruce logs. Add a couple of chests here for storage while you’re trading. If you can’t open the top one because of the lantern then move the lantern. The chests do open on Java though. Now, by the stairs, add a cauldron with a couple of leaf blocks on top on each side To add a bit of extra colour to the build. Finally, head back to the upper floor and add the upside down spruce stairs at the top of each of the spruce logs on the walls. Do this all the way around to add a bit more structure to the build, so it looks like the ceiling is being held up by them. Once that’s done, that’s the entire underground trading hall completed. I’m now going to show you how to get the villagers into the trading hall. To make this easier, I’ve built a small pen so when I place the villager it can’t escape. Id recommend keeping your villagers in a room close by so you can transport them one at a time like I’m going to do. I’m going to use rails to transport the villagers because it’s the easiest way in my opinion. You’ll have to replace some of the blocks, like the stairs to be able to place the rails. That’s why I’ve placed stone. I’ve added some powered rails so it doesn’t get stuck. So bring the rails down and then into one of the gaps but leave the last block clear. That will make the villager stop inside the gap instead of bouncing off the wall. So, when you’re ready, get a villager into a minecart and send them down the tracks that we’ve put down. I’m in creative so i can just spawn one but in survival you’ll have to get one from a village or from your breeder and move it over here. Follow the villager down the track to make sure it ends up in the right place. Then remove some of the rails and carefully get rid of the minecart taking care not to hit the villager. As you can see, the trapdoor keeps the villager in place. Now you can add your workstation between the logs and find the trade you want. You’ll have to do this for all of the gaps, but once you get the hang of it its quite easy. All you have to do is move the rails over to the next gap and so on. So, if we get another villager in the pen we can send it down the rails into the next spot. Make sure that you do this during the day so no mobs spawn. I’ll also show you how to get the villagers into the gaps on the upper floor too. So again, remove the rails and the minecart then place the workstation. You can also add a sign to the upside down stair saying what trade the villager has if you want. To get them upstairs, you just have to move the rail so it goes up there. You will have To remove the stairs though and replace them with full blocks so you can place the rails. So i’ve just replaced the two stairs and the slabs with some stone so I can place rails going up to the next floor. I’ve used powered rails here so the minecart doesnt roll back down. Then I’ve placed rails heading into the first gap so we can get our villager into it. Make sure any powered rails you’ve added are actually powered and then get a villager into a pen and send it down the tracks. Because we added the walkway around the upper floor, it gave us the room to be able to add rails going into each of the gaps, otherwise it would be very difficult to get villagers up there. So as you can see, the powered rails sent the villager straight up to the second floor And into the gap. We can then get the minecart back and add a work station. Then repeat for all the other gaps. When the villagers are in place, make sure you replace any stairs that you’ve removed and the fence gate at the entrance and that’s the whole underground trading hall completed. Thank you so much for watching, I really hope you’ve enjoyed this video and liked the build. If you aren’t already then please consider subscribing to see more content like this and leave a like if you had fun watching. I really appreciate all of the support. Video Information
This video, titled ‘Minecraft: How to Build an Underground Trading Hall [Tutorial] 2021’, was uploaded by Spudetti on 2021-04-02 16:00:14. It has garnered 474098 views and 14785 likes. The duration of the video is 00:32:13 or 1933 seconds.
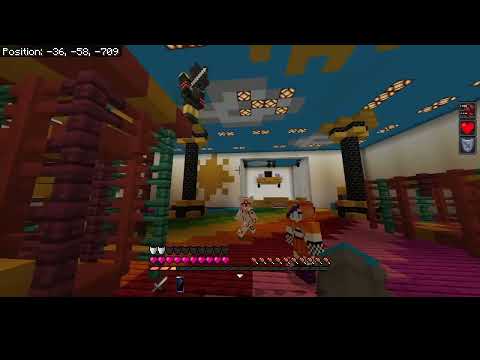
Learn how to build this Underground Villager Trading Hall in your own Minecraft worlds by following this step by step tutorial!
You all voted to see me build an underground trading hall in my last poll so I really hope that you like what I’ve come up with and enjoy the tutorial 😄
* SEED: -5405061352920635065 (Java 1.16) * LOCATION: X: 938 Y: 71 Z: -1398
* You will have to remove some trees and flatten the area a bit if you choose to build in the same spot *
* Please note that this seed is for Java 1.16. I made this world when 1.16 first came out and so there may be some minor differences in world generation in newer versions of Minecraft *
This Underground Villager Trading Hall has space for 30 villagers and is a perfect add-on to any of my previous underground builds:
Underground Bunker *New*: https://youtu.be/9-B5BtTFxrQ Underground Storage Room *New*: https://youtu.be/w5uNrpp17A8 Underground House: https://youtu.be/jBzF6RM4A2I Underground Base: https://youtu.be/IakWR_FL4YI
Join this channel to get access to perks: https://www.youtube.com/channel/UCCG0k1eqamuln38WBqUSU8g/join
➜ Minecraft: How to Build an Underground Villager Trading Hall in @Minecraft ➜ Thumbs up & Subscribe for more! ► https://bit.ly/SubscribeSpudetti
Join my Official Discord: https://discord.gg/vs3zGVcQfx
➜ Follow! ● Instagram: https://www.instagram.com/spudetti/ ● Facebook: https://www.facebook.com/spudetti/ ● Twitter: https://twitter.com/5pudetti
➜ Let me know what you think in the comments section below!
➜ Download music: https://www.epidemicsound.com/referral/3x3vt6/
➜ Texture pack: x32 Faithful v1.16.4 ➜ Shader pack: BSL Shaders
#Minecraft #Underground #VillagerTradingHall
Timestamps: 0:00 Intro 0:35 Entry 4:00 Digging out the room 10:55 Entry decoration 13:45 Lower floor walls 17:06 Walkway 18:15 Floor design 21:06 Staircase designs 22:01 Upper floor walls 24:30 Ceiling design 28:26 Final details 29:12 Getting the villagers 31:56 Outro ————————– Don’t reupload or modify my videos in any way on YouTube, TikTok or any other video sharing services without my permission.
If you use my builds in a YouTube video then please credit me for the design.
Copyright 2021 © by Spudetti.


![Minecraft: How to Build an Underground Trading Hall [Tutorial] 2021](https://newsminecraft.com/wp-content/uploads/news/minecraft-news-best-8.jpg)