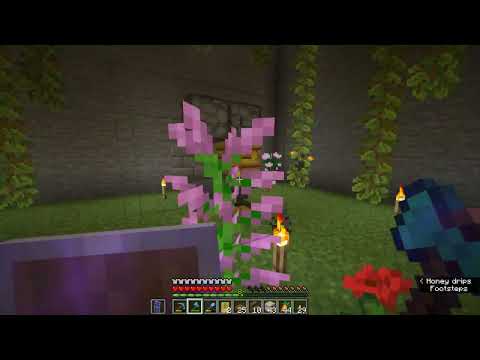
[Applause] [Applause] hey what’s up youtube in this video i’ll be showing you how to make the ultimate survival tree house that also has a water slide honestly guys i’m really proud of this one i think that this might be my best tree house that i’ve ever made if you’re new around here Please subscribe to the channel and click the little bell next to the subscription button that ensure that you get all my stuff sent directly to your sub box and also just a little side note i have also made the interior so if you make it all The way to the end of the video i’ll show you the inside of the house too and all of the fun inner workings of how everything happens but you’ll have to make it to the end to see that part of the video without any further ado let’s get started Now before we start building here are all of the materials that we are going to be using please make sure that you have all of those and enough of those materials as well the amount of ground space required is a 14 by 14 block area this is the very smallest amount of Space you need on the ground this does not cover all of the other things that you might want to place around the base of the tree house for decoration if you want to better plan out your build make this grid if you don’t then feel free not to it’s not necessary pause the Video if you have to gather your materials make sure you’ve got enough room make sure you’re ready to make this epic tree house and once you are we can begin so ladies and gentlemen step one involves us coming all the way to the very front right hand corner of The grid that we have made if you’ve not made the grid it’s no big deal just hang in there one moment from this corner of the grid i want you to count backwards one two three four five six blocks count to the left by one and this is where i want to start Place an oak wood in this position place an oak wood going left place an oak wood back and left then an oak wood behind there an oak wood going back and right an oak wood going to the right an oak wood going front and right and Then finally an oak wood in front of that to make sort of kind of a circle it’s not really a circle it’s more of a square but you guys get the idea on top of every single oak block here i want you to place 21 additional oak woods this takes some counting 1 2 3 4 5 6 7 8 9 10 11 12 13 14 15 16 17 18 19 20 21 and then you want to do the same to all of the other oak woods it is always worth mentioning that you can alter this if you like you may feel as though that You want to have a higher tree which i respect and understand build it to the sky limit if you like however the water slide is sort of kind of designed to be at this kind of height you will need to make alterations to the build if you do build it higher or lower But absolutely feel free to build it higher i just wouldn’t build it any lower though because then you’re going to have to start really really taking care of what you do in regards to the water slide and the pathway up to the top of the tree this Is a good height feel free to only make it higher is my suggestion once you have made the trunk of the tree like this what we are now going to do is place ourselves two birchwood planks in front of the very top two oak woods like this one two one two like that I want you to extend the birchwood planks left or row and right a row they should connect back to the tree trunk i then want you to place a birchwood plank on top of this left birchwood plank and on top the right birchwood plank place upside down birchwood stairs between And then two rows of glass on top of those birchwood stairs with birch wood planks left and right of the glass additionally we are going to place a row of birchwood planks on top of this on top of the birchwood planks and the glass both of them We are then going to extend the top of this window here all the way to the right buy 10 additional rows of birch one two three four five six seven eight nine ten we’re then going to extend it downwards by three one two three and then i want you to extend the bottom Of this inwards around place two upside down birchwood stairs one two then a birch plank on the other side connect it upwards fill the middle or i should better say fill on top of these stairs blocks in using glass and then fill the right of this in using birchwood planks like this We are then going to add two more rows of birch wood going left of the window one row and then two rows like this then i want you to kind of meet this side in the middle by extending the left window here to the right by two rows one two like this We are now going to extend the birchwood planks here forwards a row on the left and right so the birchwood plank area left and right of the empty space forwards row place a glass right at the top in the middle and then i want you to place oak wood Slabs left and right of the top of the door extend the oakwood slabs forwards around and then inwards up in and finally up extend the necessary blocks backwards to form a doorway later on there is going to quite literally be a door there you can even Add it now actually if you like all you would have to do is add a row of birch wood underneath the doorway like this and then place an oak door in that position there is a lot more to the house however so once you have completed that we are Going to crack on a little bit so the next thing that we are going to do is come all the way over to the right side i want you to take the very bottom right corner of the build here this birch wood plank block and i want You to extend it to the right by three blocks one two three and then upwards by four one two three four take a nice little sideways view of what we’ve just made and then i want you to extend all of this backwards by six rows it would be easier if you only extend The four blocks backwards by six rows one two three four five six so you can see that we’re leaving the blocks underneath completely alone i now want you to extend these blocks inwards by three rows one two three and extend them inwards towards the center of the tree house by that many rows I now want you to extend that third row backwards by four rows one two three four and of course extend all of them backwards by four rows we now want to extend across the back of the tree house we are going to extend across the back By in total 15 rows that’s a lot one two three four five six seven eight nine ten eleven twelve thirteen fourteen fifteen and we want to make all of these the same high we will be adding windows and stuff as we see fit later we don’t have to do it Now it’s actually easier to add those sorts of details in after the fact when it comes to this side of the treehouse what we’re going to do here we want to take the very top of this side of the tree house and extend it upwards by an additional three rows one two three We then want to do this we want to extend inwards and then upwards we then want to go to the right by five one two three four five and then we want to do this four times this exact same thing we want to go down and right that’s once down and right That’s twice down and right that’s three times and then down and right that would be of course four times we are then going to extend and connect to the front of the build like this and then what we’re going to do is we are going to extend the front of The build here next to this window we actually have to extend a couple of rows backwards we want to do one row coming backwards and then two rows coming backwards we are then going to extend this two rows coming out one and then two just like that so you can see we create This nice little gap here fill that little middle part in using birchwood planks i would highly recommend filling this entire side here in using virtual planks we can carve out the detail later this is where the grand water slide is going to begin so don’t worry there is a lot More to this particular part of the build that might meet the eye right now so now that we have accomplished this laden gentleman i want to turn our attention all the way back over to this side of the treehouse the right side so i want to give you guys an idea of What this side of the tree house is about we need to install the staircase on this side this is easily done by adding oak wood stairs in this position here between these two rows of empty birch and then adding three rows of awkward stairs coming upwards like this to Come and meet the same height as the surrounding area We want to place birchwood planks on the inside of the stairs here and the birchwood planks want to just serve as a way to box in the staircase you can feel free to completely fill the top of the tree house here in using some form of oak whether that Is oak slabs or oak planks oak slabs are more difficult to work with however give you a little bit more head space oak planks on the other hand are more solid easy to use block however do not give you the same versatility and space as an oak wood slab would choose wisely Now that you have done all of that using your oak slabs we are going to add a very small bit of detail onto the house You see on this side here there is actually going to be an entrance into the house the entrance is going to be somewhere in these blocks here but it wants to have a little overhang we’re going to use awkward slabs like this to create a small overhang just Overhanging where the entrance will be it’s just a nice little bit of detail like so what we’re also going to do is we are going to add a balcony area to this part of the house to add the balcony we need we need birch wood slabs and we’ll even need actual Solid oak wood blocks too we are going to extend the birch wood plank area here from this back corner and all the way over to the other back corner we want to place one two three birch wood slabs coming out across and connected to the other back side of The build i don’t actually have oak wood planks on me but i’m going to destroy these birchwood planks here and i’m going to replace them using oak planks i can use the slabs as planks as a little bit of a placeholder we don’t need too many of them this certainly Isn’t the most efficient way to do this but you can absolutely get around it especially if you feel as though that your inventory is a little bit cluttered like i always feel like it is but this is creating a back balcony for the treehouse which we can have a look At the surrounding environment from isn’t it lovely coming back towards the front of the treehouse i want you to take this corner birchwood plank block and on top of this i want you to use oak fence and i want you to place a fence going left of this block i want you to Place an additional four fence one two three four then place a virtual plank we actually then need to use birchwood fence as well we want to place three birch fence going left one two three and then another birch plank extend both planks backwards by two one two one two We’re then going to extend upwards by two one two one two place an upside down birchwood stairs coming inwards from both sides and then you can place a birchwood plank on top of these and then in the middle although we might have to get rid of the two corner virtual planks later In the middle of this area is going to be a door the door is set one row backwards from the actual birch frame the reason being for this is because we want to place oak around the door and we want to have a really cool effect so From the outside we’ll have this really nice archway look like this i really like that and now that we have done this we can actually construct another huge part of the house by taking out our virtual planks and we can extend backwards this row of free birchwood here Place eight rows of birch coming backwards from this one two three four five six seven eight it will line up with the opposite side you want to have in total three rows of birch planks extending back you then want to from this row of free birch wood that we have right here We want to create a doorwheel doorway again so we’re going to place an upside down birchwood stairs coming inwards a birchwood plank on top extend right by two and then place an upside down birchwood stairs underneath virtual plank going right and then extend down in the center of this shall be a door And surrounding the door shall be the same oakwood planks that we placed earlier and once again we are going to be adding further detail to the house as we progress but for now actually we will build this in ladies and gentlemen what i want you to do is Install a rather large window we do this by placing a row of upside down birchwood stairs we place birchwood planks on the left and right birchwood stairs coming upwards to meet the frame and then we place glass preferably glass pane inside of this window area here and like this Just like that that’s perfect and then later on we’ll join everything else up we’re going to use oak fence to place oak fence around the outside of the top of the tree house the oak fence is going to go all the way around on top of all of the birch like This so you can see we have a nice little area up here which you can use for all sorts of different things and we have a balcony that goes all the way around like this we do have yet to seal up a little bit of the house but it’s actually quite Easy to do indeed i mean if if you like you can do a little bit of it now i’m very tempted to do a little bit of it now before we move on to the platform so the roof is actually a little bit strange i will grant you But most of it is covered up anyway so it doesn’t really have to be that fancy the roof begins its journey on the front left hand corner of the house which is here and we want to place a row of oakwood stairs that comes across the front of The house like this they’ll come as far as where we were just working on with the uh with the terrace next to the stairs we then want to place additional rows of oakwood stairs here that come up and sit on the side of the balcony area like this The upward stairs actually want to come up about as high as here and probably no higher additionally we want to add in a a roof to this little mini part this little balcony area here and to do that we’re going to have to destroy that stair turn it into a solid plank block And then we want to place an oak wood slab here coming out in front of the frame and then the same on this side extending out from that side of the frame and then you simply extend these slabs up and inwards like this on both sides just like that And this is where we actually have to delete those corner birch plank blocks i didn’t think that they get in the way but i guess i was wrong you can extend all of the slabs backwards naturally and you may even find that you want to place slabs and planks backwards behind The door like this we’re actually going to extend all of these awkward slabs back and we’re going to form a similar shaped roof to overhang the top of the door on the back of the build this is the only way to get up to the back of the build like this And we’re going to destroy these two birch plank blocks and we’re going to have the same sort of arrangement we’re gonna turn some of them into planks and then you can connect the front and back entrances together you really shouldn’t run into any conflicts in doing this that should be fine When it comes to the roof on the back it’s a little bit strange but we want to extend the entrance oak slab here across the side the roof it wants to overhang the side of the build like this and then we’re going to use oak wood Slabs like this to build up the back of the roof and it’s going to come and sit forwards like this just one row above the oak stairs then you extend all of these slabs inwards like this you want to make sure that the oak stairs overhang the side of the build Placing upside down oak stairs where possible all over the place like that so you can see the roof’s a little bit weird but it it really doesn’t matter too much because you won’t be seeing much of it at all and then you just want to fill the top Of this in and you may have to destroy a block or two you want to fill the top of this in using some oak slams and once more the roof isn’t that fancy because we’re actually going to be building a massive pile of leaves on top of it so the Reason it’s nice and flat on top is because you’re not going to be seeing it anyway so this is what we have at the moment we have a pretty fancy house built on top of our tree the next thing i want to do is i want to place birch planks directly underneath All of the empty space underneath the tree house so what i mean by that is you can see on the inside the tree house we don’t have a floor i want you to use either birch wood or oak wood for this and i want you to place a floor this is Going to just sit directly underneath the tree house itself this is going to just serve as a platform and from this we are actually going to make a shape for the treehouse so i actually want you to want you to do your best to form a rectangular shape Like this um you’ll be able to see a bit better from the underside so like we’ll have this here this here and we want to have it here so we want to have a nice solid plane shape like this a nice big platform what we’re now going to do is we are Going to extend the platform so that it comes around all of the uh all of the treehouse and you’ll be able to walk around it nice and freely so what i’m gonna do is extend the platform forwards two rows this is gonna be one row and then two rows just stuck Out in front of the platform on the sides we’re going to extend out the side the platform by one row and i don’t think we’re going to add two rows i think we’re actually going to leave that we’re going to extend it out one row on the opposite side of the platform as Well and then we’re going to place two rows of birch planks coming out of the back of the platform so that’s gonna be one row and then two rows i actually don’t know whether to make the platform a little bit bigger on the back or not i Might actually just leave it as it is and kind of leave it up to a personal choice as to whether or not you want to you know what on the back of the platform let’s add another row just just so it’s a little bit bigger back here Okay so now here’s the thing on the corners of the platform we actually want to make it so that the platform is a bit shaped so i want you to destroy the corner blocks of the platform and the two blocks next to the corner so i want you to Knock off the corner and then these two blocks as well on the sides of the platform i want you to do this on the front as well this will give the platform shape that’s all there is to it just gives the platform a nice little bit of shape We want to place oak wood slabs all the way around the side of the platform like this when we begin building the water slide the water slide itself is going to get in the way we will have to delete a couple of blocks here but i’d actually Prefer to get this part of the build nice and completed because we’ve actually almost done the entire house ish part of the build and then on top of the oak wood we are going to place some oak fence on top of the oakwood slams this is going to go All the way around the top and it’s a very nice pleasing effect once this is done we are going to add a couple of windows just to the back of the platform or to the back of the house i should say and we’ll add an entrance as well in the necessary place Like this so that’s what we want to have so far i’m going to just get rid of the birch slabs and i’m going to grab oak trap doors on the front of the house i’m going to place oak trap doors next to the glass areas where we have the windows so oak Trap doors left and right where we have the glass i want to do the same thing on the back on the back here we’re going to take this upper window and we’re just going to place uh trap doors on the lower half of it just like that Would it look okay to actually place these that actually looks kind of cool i like that placing some oak slabs to come down where we have the window i kind of like that effect on the back of the build here you can see that there’s plenty of space to add Another window i’m going to add one down here which is where we have the window up above us i don’t actually want to have another window on the left side but up here i’m going to destroy two rows of free directly below where we have the Window up above and i’m gonna have the same upside down birchwood stairs like this underneath the underneath the window itself and then i want to place glass inside of the window too which is glass pane and we’re going to use some oak trap doors left and right of the window like This boom boom perfect like that so that’s a nice way to make a window and then where we have this overhang we have a door you don’t have to make this fancy just a double oak door where this overhang is is perfect you can even extend the Overhang i mean if you want like another row if you so choose something like that if you want to keep everything nice and centered but other than that ladies and gentlemen we’ve actually pretty much done the actual house we’ll be taking care of the water slide A little bit later but for now i want to focus on the lower part of the build i want to focus on the ways that we can get up to the actual house itself which involves us taking a tumble all the way down to the very bottom of the build Okay so now that we’re down here we have two separate ways that we can get up to the top of our tree we can either climb the ladder system hidden inside the trunk of the tree or we can walk up the spiral staircase on the side of the tree The staircase is the first thing that we’re going to be building it’s very very easy in this position right here right here it should be quite easy to find corner at front left corner of the tree move out diagonally this is the starting position place an oak stairs on the ground You then want to place an oak stairs up and back from that oak stairs and then you want to place another one coming up and back and then another one coming up and back just like this now once you reach a corner side of the Tree you want to use your oak slabs and you want to place oak slabs coming back and wrap around the side of the tree like this so you negate the corner by placing these three oak slabs and then you place one two oak stairs coming upwards so on the Straight sides of the tree you place the stairs coming upwards and then you place the corner slabs like this to allow you to place two more oakwood stairs coming upwards on the sides of the tree that’s all there is to it you place the stairs on the flat side of the tree and On the corners one two three oak slabs coming upwards or around the tree rather i should say to allow you to place more stairs the stairs away you climb and the oak slabs are where you maintain eventually you will get pretty high you will find that on what is it the Second time you wrap around the front of the tree you have probably gained enough height where we can now build ladders leading from this point here upwards so the ladders are simply going to be placed on the site on the actual oakwood plank on the actual oak wood blocks here And they’re going to be built up inside the platform that we have for the trees so we’ll climb up into the actual treehouse itself directly from the trunk like this what we can also do is just wrap the platform around a little bit just so that it connects to the front side like That now that we have made a way to actually get up to the top of the tree i want to add one more so come all the way down to the very bottom front of our tree house destroy these two oak blocks here and place a backwards facing ochre door In the empty position destroy above the oak door and place a glass block i want you to place sideways birchwood stair next to the glass block and then a front extending birch wood stair in front of it place a birchwood slab going right and then up like That and then we’re going to open the door and place two rows of ladders coming all the way up to the very top of the tree which will lead you inside of the base of the tree house again so you’ve got two different ways you can climb all the Way up and around or you can take the ladders or you can include one of those or none of those and have your own way up it’s completely up to you i’m going to connect the entrance down to the ground using birch fence on the Left and i’m also going to show you how you can make it look a little bit fancier the actual trunk of the tree that is so it doesn’t really matter where you add this but here’s a cool effect if you knock out what blocks do we have To knock out for this so along the along the tree if you knock out about like three rows like if we start here just right at the top of the entrance we knock out these oak woods here these three and these three and we place glass block On the inside of the trunk of the tree here and extend it upwards and place birch wood slabs at the base and top of the glass like that you get a really cool effect you can do this a little further up the tree as well so maybe like knock Out these three blocks and these three blocks or the ones lower or higher whatever and you can place the glass block inside of the tree like this and birchwood slabs at the top and bottom just like that it looks it’s a really cool effect i’m wondering if the Corners if you connect the corners does it look a little bit weird i don’t know whether i like the corners connected together or not but you guys get the idea like it’s a cool thing to add to the trunk of your train you can do it to the back of the front and Wherever as long as it doesn’t get in the way of anything some additional decoration for the tree itself i would recommend adding some actually we will wait until decorating later because it kind of i don’t want to get in the way of the water slide or anything crazy like that So now that we have done that laser gentlemen we’ve done like a huge portion of the tree we can get up we can get down we have the trunk we actually have the house itself up top here i want to now focus on the water slide i know the Part we’ve all been waiting for the water slide okay so the first thing that we have to do is make the water slide entrance it’s quite easy to do if you come all the way up to the top left side of the house and you locate this birchwood slab block here Count forwards by one two three right here i want you to place a birchwood plank in front of this block extend that plank down forwards down forwards down and then you want to use upside down birchwood stairs for this part and you want to place five upside down birchwood stairs moving forwards like One two three four five coming towards the front of the build place nine upside down birchwood stairs one two three four five six seven eight nine like that the ninth block actually wants to face forwards though like this it’s kind of a funky looking slide We want to have a similar deal two rows away from this so coming all the way back up to the top here where we have this first birch wood plank we want to leave a gap of one and two and then place a virtual plank extend down forwards down forwards down And then we want to extend forwards by one two and now use upside down birchwood stairs and place six upside down birchwood stairs in front one two three four five i guess it’s only five because the sixth block wants to be a regular facing birchwood stairs as long as it is the Same as the opposite side you guys get the idea now you have two options the more annoying option is to use upside down oakwood stairs to form the base of this the second least annoying option is to use oakwood slabs and the least least annoying option is to use oakwood planks Oakwood stairs look the best what you would do is you would place upside down awkward stairs back to back from each other like this back to back underneath the empty space and you get a really cool slide shape it’s so tricky to get the right angles here And the water slide wants to come to here like you only want to come this far you don’t want to come all the way to the end and then you place your other opposite facing poke wood stairs on this side and then you get like a really cool Looking slide look like you can see it’s really shapely and it will look even better as we add more and more layers that’s the cool part of this what we also want to do by the way is we want to make a bottom to the water slide Which is really simple you can just use maybe like oakwood planks of this and just add a bottom to the slide so that when we apply the water it’s not going to run out or anything crazy like that we also have to make an entrance to the Side which is actually going to be here it will lead directly into the house and you might even choose to add like maybe just a small lip using oak wood slabs or something like that you can make the door look a little bit fancier by perhaps using a mixture of Like oak fence left and right of this and then maybe you can place like i don’t know maybe like birch wood slabs and ma maybe something like this i i don’t know maybe or maybe even like raise it in the top here maybe just like add something like that just to kind of Like outline the fact that this is the entrance and then you can place like backwards facing oak doors here so now you have kind of like a cool looking entrance leading out onto the water slide we will be adding the water later but the way that we make the water slide Is quite an easy pattern you want to place four oak fence coming down from the end stairs one two three four one two three four you then want to place upside down birchwood stairs underneath the fence and join them together what you would then do is extend each upside down birchwood stairs backwards One two three four five six seven eight blocks with a regular one on the end you’ll see why it’s eight in a second one two three four five six seven eight and then nine to make it irregular this is because the water slide is the Same size on the top and bottom on every single layer it’s very pattern orientated all you would then do to apply the bottom of the water slide is of course place upside down back to back oakwood stairs or slabs or planks planks are the best option slabs are the second best option stairs Are the best looking but most annoying option by far i’ll let you guys decide what you want to do so you can see it’s really really cool what we’re doing what we would then do when we get to this end is place one two three four oak fence coming down one two three Four and then we would do the same pattern so we place upside down birchwood fence connecting both sides together and then you extend both sides forwards by eight one two three four five six seven eight and then again we’re gonna do one two three four five six seven eight and apply a Downward spacing stairs on the end like that it’s as easy as that and then you just keep applying the upside down stairs and you keep doing it and this is exactly what we’re going to be doing we’re going to be doing this until we get near the ground I think that we’ll be able to do one more of this if not two more before we actually hit a point where we’ll be like ah i don’t want any more water to slide you’ll be able to quite clearly tell when that point will be so we’ve placed the back to back stay It’s all looking good and then we’re gonna add another row of one two three four one two three and four yeah we’re going to be able to do two more after this the second one after this is going to take us down to the ground so underneath this you guys Know what to do upside down birchwood stairs and then extend backwards one two three four five six seven eight solid one on the end or a regular facing one on the end same on this opposite side here we then want to place the upside down upward stairs like this underneath on both sides Oh it actually plays properly sometimes when you do that fast like they start turning the other way and then finally we’re gonna do one two three four one two three four and i just want to show you guys so this is the point that we’re at we’ve Got like four parts of the water slide like this right which is really really good we’ve made a huge amount of progress here so what we’re going to do from here this is the last one we place our regular upside down birchwood stairs underneath like this And then we’re going to take both sides and extend forwards we’re going to start with our usual 9 1 2 3 4 5 six seven eight nine and on the other side as well we want to do the same one two three four five six seven eight nine but now We’re going to extend this far end forwards by one two three and then one two three coming this way and then all we have to do is just extend these forwards a couple of rows so these stairs like one like one two one two and then we’re gonna drop into a Pool right here or alternatively you can you know have the pool drop a little bit sooner or you know wherever what have you but the idea is that we now have like a whole system and we just have to place the upside down oakwood stairs which is by far the most difficult on These bottom parts here but we still want to have the same back-to-back stairs and we’ll figure out exactly where the splash pool the drop pool is going to be um once we’ve just done this part so that one there sideways perfect so just like that oh that’s going the wrong way silly me So this wants to go this way and how do i do this can i place here and then here yeah not there there there we go all connects together now perfect and yeah there you go so now we have all of the waterslide component which looks Really really simple now that we look at it all we’re missing of course is the water that’s the hardest part to add believe it or not i know hardest to last so what you would do is you would start all the way up here and you would place Some water right all the way up at the top i think that i hope that that water actually hasn’t sunk into the actual inside the house we’ll find out a little bit later on but if you start from the top you drip water down you’ll be able to see where you have to Add more water you cannot add water directly onto the stairs blocks it will fall directly through it so what you’ll have to do is something like this you’ll have to place some planks and place some water coming from it like this this is why it is far better Far far better to use like it is so much easier to use like uh slab or plank blocks preferably plank blocks and uh the water is actually now dipping straight down so we’re gonna have to just reduce those stairs here the oakwood stairs we’re gonna extend them In a bit i didn’t realize that we’d have to extend them in and then that way i’ll show you guys in a second we did make a slight boo-boo there we go so that’s fine so all of the oak stairs just knock a row off of them And then that way the water will drop directly into the previous part of the water slide and then we’ll be good i i was very very silly i i admit that was completely my fault but you will find that if you get good water flow up here Then you will be able to directly make your way all the way down the slide the most challenging part is going to get good water flow at the top but once you’ve found that you’ve got like a decent water flow at the top you will actually gently float down to the Previous um levels of the water slide like this so like you’ll you’ll gently like float down like this and you’ll follow it all the way down and the water will go all the way down which means all you’ve got to do is on this base level Here you’ve just got to add more water blocks that’s uh all you’ve got to do and um you know however whatever way you want to do that it’s going to be tricky no matter what unless you’ve used planks as a base um but you will be able to make it so that um I think that is possible yeah it is possible to get a good flow it’s difficult but it is possible to get a flow going so you know something like that looks really really cool and then you can make it so that the water slide Itself i mean you can make it so that it stops a little bit shorter and you can add a bit of a pull around like the base of where the water slide is you know you can make a little bit of an indentation in the ground and you can really make a Nice water feature out of it i’ll be showing you how you can accentuate this when we go back to the original version of the house but this is what we have so far ladies and gentlemen we’ve got the trunk of the tree we’ve got the actual tree house Itself we’ve got the water slide we can get up we can get down in a manner of ways now we’re going to decorate the lower part of the tree and then we’re going to do the actual top part of the tree and then we’ll actually don’t Believe it or not i know it’s not a hard tutorial but well done for sticking with it so for this we’re going to need oak wood oak leaves and torches coming up the side of the tree i would like it if starting from the bottom we had some leaves So around the bottom i’m just going to place some oak leaves for decoration just to add another color at the base of the tree something like this right just going all the way around i want to apply this in a few different levels so for instance i want to also apply it here Where we have like the window area and i want it to look as though it’s climbing as well so like to follow the shape of the tree we’re going to have the oak leaves sort of like climb up the side of the tree like this like the pathway does just like that Make sure that you are still able to walk around by the way so yup that’s perfect so make sure you’re actually still able to navigate around the tree as you add these i would recommend adding two different branches on the tree the first branch is going to be up here On the top left side of the tree the branch is going to look like this uh just a random collection of oak wood like this right and then we’re going to place oak leaves on the side and around it to form a branch this is going to look as though That it supports the platform that we have a little bit that’s its entire purpose is it doesn’t have to be a massive branch at all i mean you could you can make it massive if you want like you could extend it all the way into like where the water slide Area is if you like but that’s what the branch looks like you know it’s something like that it can even be a little bit bushier and it can even come up a little bit higher like this but the entire point of this is just to make it look as though it supports part Of the platform like that make it look nice and normal and natural we want to add another branch and this is more important because this branch is going to look as though it does hold up the actual like platform itself this is going to be a really chunky branch and It’s going to have a bit more of a bit more of a leafy base than the other side sounds like we’re making a salad doesn’t it with a leaky leafy base and a leaky base with the water slide so you know add in like a Row of oak wood to guide you but then just place like leaves make it a circular shape if you like to sort of start off with or it will be more like an oval actually because that’s a better shape for the platform kind of like make an oval shape of Leaves going around the tree branch like this like that that looks alright and then add layers to it that’s all you got to do then add some layers underneath it you can even fill it uh in a little bit more on the inside if you wanted to look a bit more Dense a little bit green and this is more important because this is the really like overhanging part of the actual tree itself so it does look as though it needs some stability here so if you add something like this i’m going to show you the difference now and We might have to add some more layers to it that there you go oh that’s wonderful that looks great now it looks as though that the actual tree house is being upheld by the tree branch which that is fantastic i really like how that turned out If you want to make the trunk of the tree lighter add some torches that’s all that’s that’s all i have to say really add some torches if you think it’s too dark you can do that going all the way around the side and place them on the Side like that if you like especially if you like this view like i do then that way you know it’s not in the not in the way at all so the last thing i’m going to recommend from this point onwards until we get to like some further decorations that’s Going to completely be up to you later i’ll show you on the original version we have to make the top of the trunk of the tree come out the top of the tree house and we want to add leaves to the top of it this takes a long time to do Okay so i’m not sure whether you guys remember where the original trunk of the tree is but i can remind you if we come inside the tree house and you extend the trunk of the tree upwards upwards up through the tree house you get a cool effect You get an effect that looks like the actual tree house is built or the actual house i should say is built into the tree which is a cool effect to have not as if you’ve just built a house and then a tree underneath it it looks as Though in survival mode you have done exactly what i’ve just described you have built a tree or you’ve built a house into a tree rather than you’ve built a tree on or a house on a tree if that makes sense i hope that’s making sense you’ve built a house in a tree Integrated into the tree rather than you’ve built a house on a tree so i want you to locate the oak woods from earlier and extend them up through the top of the tree house like this you’ll have to destroy the roof partially to do this but it’s okay So you’ll see they’ll actually poke out the top and they carry through up through the actual treehouse itself make sure that the oak woods extend upwards one row higher than the actual trees or the actual tree house itself apply a layer of oak leaves directly at The top here on top of all of the oak woods like this form a square that’s the best shape that you can start off with okay what are we going to be doing now we have to determine a shape for the leaves the easiest way to do this is to feel it Out what i mean by this is extend the left side of the leaves outwards until you are happy with how they look i would go about as far as the actual water slide when it comes to the left side extend all of the leaves out to the left like this So the leaves are probably going to come out about that far if not a bit further i want to extend the leaves out to the right side this time i’m going to extend them out about as far as the balcony area here and i’m going to extend all of these outwards like this You want to determine how to extend the leaves forwards as well how far do you want to go i’d say about as far as the house so where the actual entrance to the house is probably extend them about that far right about that i’ll give or take something like that you know So what how many more a couple more rows this isn’t the science by the way do this in any any way that you like but you know kind of just that’s got maybe another row maybe another round that would be great so like this and this is how it starts this Is how the very natural look begins with a nice solid rectangular shape like this extend all of the leaves back until you are happy with how far backwards the leaves are gonna go so i would recommend in terms of the back it can overhang the back a little bit more if you like We don’t the back of the treehouse isn’t as detailed that’s not where the focal points of the build are so feel free to really i mean come as far back as you like but not in a stupid manner like you probably want to come back maybe about As far as the balcony something like that don’t make it ridiculous but you know you do want it to come back a decent distance i mean maybe even that much is fine maybe i’ll add two no one more one more okay so we have a nice big template Let’s round the sides it’s easy to do on the left and right side we want to make an oval simply add a couple of rows of leaves on the side that are one row shorter than the previous layer something like that or just knock out the corners i don’t Actually want to make this any longer on the sides so i’m just going to knock out the corners so like that similar to what we did with the platform you can do that just like knock out the corner blocks like this it’s actually not a bad way to Do it and then you’ll make an oval so to gain height on your tree house all you have to do is add leaves around the outside of the top of the leaves there’s two ways that you can do this you can do this number one to either gain high This would mean stacking the leaves directly on top of the outside layer of leaves this way you’re going directly up and it’s the most efficient way to just build directly up on top if you want to add layers and depth do a similar thing but all you’ve got to do is shrink it Along the outside so you can do a similar thing but shrink the leaves along the outside like this and you can be clumsy because we are going to make this look more man-made the more layers you add the more messy you are the more normal and real it will look So that’s how you would add a layer looks very man-made however what you can do to combat this is along the sides you can add random blocks you can destroy random blocks you can make it so that the actual leaves are not perfect that already looks better If you can add leaves on top you can add leaves underneath and random patches of leaves coming underneath the tree house like this you can see the difference between the left and right side the left side looks awesome the right side looks boring and flat be sure to add random patches of leaves Underneath the entire part of the leaf like not underneath it all of it literally all of it but to add depths and layers and all that fun stuff you’re gonna see that if you add it in the back as well it will benefit like if you take A look from the side now you will benefit from it it doesn’t even have to be loads of leaves either you can just add some of it you know you can just add a little random patches and they they just add up to me they add up the small details add Up to make really large details and that’s all there is to it like that’s how you shape the underneath that’s how you shape the side and to add more layers to the top i mean i’ve already went over it add more and more rows of oak leaves or whatever leaves or You can even use certain green blocks just not even leaves you can use certain green blocks with this too and it’ll work just fine but you just add another layer of leaves once you have shaped and once you’re happy or once you’re not happy with the height That’s when you add more leaves not when you’re happy with the height but you guys get the idea and i’m not going to go through all of this but like this is how you do it like you you just add more layers like this chunk out some blocks and it’s it to see How normal that looks that looks great and you can keep doing it and doing it and doing it until you’re happy eventually you’ll you’ll reach a point where you are happy and you’ll just put a top on it so once you have reached the point where like ah the leaves are big Enough they’re tall enough they’re green enough they look random enough they look good enough very natural ah perfect the natural look it’s not dyed at all you’ll reach that point and you will then just put a top on the leaves and that will be your treehouse complete once you have done that Now the leaves of my treehouse do not look perfect but you will see the leaves that i really really like once we flip back to the original version that version has to have a lot more time spent on the leaves because it’s not in a tutorial i had plenty of time to not nice and mold and shapenize the top of the tree but you see you don’t even have to put that much effort into it to make it look really really good it will look great as long as you just put a little bit of effort in that’s all you have to do And you’ll end up with looking something looking and you’ll end up with something that looks exactly like that and that looks awesome that that is how you make an ultimate survival treehouse with a water slide attached to it now ladies and gentlemen this looks all messy and dirty and everything at the Moment but what i want to do now because the tutorial is finished we’ve made every single part of the treehouse ladies and gents i’m going to show you the inside the treehouse number one and i’m also going to show you details that you can add to your treehouse to make it Look a little bit better from the outside so let’s walk back over to the original i’m going to take my portal here we are back at the original version of the treehouse as you can see very much is the same but a little bit is different The first thing that you may notice is that the leaves and branches and small details are more refined on this version of the tree house they’re much more how i want them you really do get in or get out rather what you put in with these Things so the more time you spend the happier you will be as we look down towards the base of the tree house you will see that we have a pool at the edge of the water slide with a grass path surrounding it to accentuate the shape We have a farm around the base of the tree house which once more accentuates that shape it’s all about creating that circular shape at the bottom of the tree house we even have a walkway using some spruce trap doors as well we have two entrances into the tree House of course we can climb up through the trunk of the tree or we can climb around the trunk of the tree here as we get up into the actual inside the tree house this is the sort of space that we’re looking at we have enough room for A crafting furnace brewing smelting area we have plenty of places to upgrade our gear we have a full enchantment library we even have little secret hidden away chests by the way that you’ve really got to look hard for but you could even utilize this space a little bit more if you wanted to The only way to get up onto the second floor is to walk around the house and by the way on the back of the platform we have access to much more survival related things as well we have some more chess crafting area we have more smelting we Have armor stands which you could keep bows on and like shoot on oncoming enemies and mobs and all that sort of fun stuff to go to the second floor there is only one way the one way is to explore the platform and climb up onto the second Story of the house via this staircase here where we have an outdoor farm with some chests to cultivate our crops but more importantly we have a door this doorway takes you into the second story of the house which is where we have the beds we keep all of our Valuables up here we have more storage more crafting more fun stuff like that we have a way to get out onto this little mini balcony right here hello and we can also access the water slide one of the house’s key features and that is a nice little tour ladies And gentlemen of the house i do hope that you guys have enjoyed it i hope it was worth your time making this if you have enjoyed this tutorial ladies and gentlemen please do remember to hit that like button as it really helps me and the channel out very very much if you Are new around here please consider subscribing and click the little bell next to the subscription button that’ll ensure that you got all my stuff sent directly to your sub box and if you would like to make more things by me not only should you leave a suggestion if You want to see something specific but if you want to see something of old then feel free to check out the card system and the description below because and also the comment section to our pins something at the top of the comments i’m sure that you guys will Like because i make all sorts of stuff i make city birds i make large suburban houses i make large survival houses on my second channel i make more fun and goofy things too i make pretty much everything that you might want to see in minecraft so check out my channel maybe Even my second channel too that’s in the card system description below and in the comment section too right at the top i’ll pin you something really really cool that i think that you guys will enjoy but i’m going to jump off something high to say goodbye because that’s kind of my Deal thank you so much for watching everybody i hope you have a great great day great great great great great day i’ll see you guys in the next one good bye i can’t believe i cleared it nice You Video Information
This video, titled ‘Minecraft Tutorial: How To Make A Ultimate Survival Tree house With a Water Slide 2019’, was uploaded by TSMC – Minecraft on 2019-03-09 11:31:01. It has garnered 2301924 views and 25114 likes. The duration of the video is 01:02:32 or 3752 seconds.
In this tutorial i show you how to make the ultimate survival treehouse in minecraft that has everything you need to survive in minecraft survival mode! including a water slide! this is my favourite tree house tutorial i’ve made in 2019!
More Tree Houses! – https://www.youtube.com/playlist?list=PLVfyBBWTXosAnItnu9A4quLEcvcyLqD8Q&disable_polymer=true
If you are looking for an awesome and super simple, easy to make survival treehouse this video is for you! for pocket edition ( mc pe ) xbox xbox360 , ps , ps3 , ps4 , pc
#tsmctutorial #minecrafttutorial #tsmc
More Tree Houses! – https://www.youtube.com/playlist?list=PLVfyBBWTXosAnItnu9A4quLEcvcyLqD8Q&disable_polymer=true
Want to Support the channel? 🙂 – https://www.youtube.com/channel/UCIui-Mt1PmcJYpoBATftj7g/join
Check out my merch 🙂 – http://tee.pub/lic/uCgw3hVWL6c Check out My Instagram! instagram.com/tsmcyt/