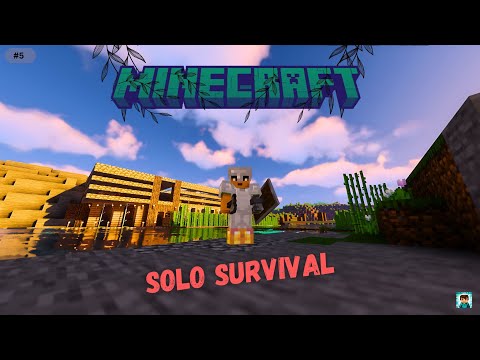
Is your base uh can you get a bit closer a Little Closer okay Jesus dude not that close is your base quite frankly and maybe you’re needing something a little more suited for the end game well you’ve stumbled across the Right video as today I’ll be showing you how to create one of My biggest tutorials yet for the ultimate wooden survival base we’ve got a lot of features to Showcase so let’s get into the tour okay so firstly starting off the tour let’s of course take a look around the exterior so along the outside here we of course have our Main gate that we can use to obviously enter the base and then beside that on each side we have this nice fence design with some azaleas with a oak fence above it and we’ve got a bunch of lanterns around the place as well to keep your Base nice and bright and then as we transition over to the sides here we have some actual walled off areas and I’ll show you why as we go into the interior of the base but yeah that pretty much spans all the way across the sides of the base here before we head Inside I wanted to actually showcase what the base first started out as what the hell I don’t know if you guys can hear that but that’s my cat he likes to just sit in the kitchen and meow but uh yeah so this is what the base first started out As obviously it’s not finished there’s no interior or anything and then I felt this might have been too small for an ultimate base so then I extended it to be this massive thing which I do actually really like the look of but I feel like I like the look of this a lot More it’s a lot more detailed a little less repetitive than that one as well and yeah let’s just finally get inside the base and take a tour so firstly heading to the right we have four separated animal pens we’ve got cows pigs and chickens and then in this one Over here we also have our horse then as we head down the path all the way to the end here we have a whole bunch of sugar canes and these are all growing thanks to some water in these slabs here and then we also have some storage back here For your sugar cans it’s a little bit easier to access after you’ve actually harvested them so there we go now you can actually get into them and yeah so that’s it for the right side of the exterior now let’s head over to the left where we pretty much just have a pathway That leads underneath the base here and we’ve got a whole bunch of gardens with a bunch of flowers as well I really like this Garden here it’s kind of like a gradient it goes between white to Yellow to Orange to red and then turning around we can head underneath the base here Where we have our firstly our enchanting area which of course does reach a full level 30. to the right of this we have our crafting area where we have pretty much all of the essential crafting blocks you should need then to the right once again we have our Brewing area Followed by our smelting area and then to go along with our smelting area we also have a fully fledged super smelter at the back of the base here so if you wanted to just do some automatic smelting leave it going while you’re gone and exploring and then to take up Space we have this like kind of giant Island thing that’s just spanning across the entire center of the area we’ve got a whole bunch of chests and some barrels as well and then just some decoration stuff on top of the table in the middle here all right and that pretty much Covers the first floor of the entire base now let’s head up to the second floor and firstly heading over to the left here we have a whole bunch of crop farms so we’ve got one for wheat carrots and potatoes and then we can head around to the back here where we have pretty Much our main storage area we have a whole bunch of double chests and then we can head out of this way here and that yeah is obviously underneath the house over here and yeah that’s pretty much it for the entire second floor and now let’s head up to the final floor firstly Heading to the left we have more crop farms yeah there’s a lot of crops in this base and now we can take a look at the actual house itself I feel like I should probably show the exterior of the house first so firstly on the side walls Here we have a pretty cool design where we’ve got some kind of caged in oak leaves we’ve got a whole bunch of Windows along the sides as well this is what the side of the house looks like and then the back is pretty much the Same as the front and then for the roof as well we have a pretty cool design this took me quite a while to make this so we had to go through a whole bunch of different designs but we’ve kind of got like a nice gradual slope at the Beginning and then it goes pretty steep up to the top and it gives a pretty unique looking roof and we’ve also got this thing here as well I can’t remember what it’s called a dormer I think or something like that yeah all right now let’s finally take a look on the inside Of the base so heading through the front door as you can see we have this kind of hallway thing where our ladder leads up to and we’ll get back to that and then heading through the next door we have our bedroom where we’ve got three beds To accompany you and up to 2 other sweaty Gamers we’ve also got some barrels for storage over here with some decorations all around the place some armor stands and pot plants and also this nice Leaf design as well and then turning around on the back wall here we Have a couple of double chests and a bunch of crafting blocks as well now heading back out of the bedroom here we can use our ladder to head up to the attic where our secondary storage is where we have a whole bunch more double chests along the bottom and along the Top as well and yeah this area is meant to just kind of be like the offhand storage you wouldn’t use this too often maybe you store like dirt and just random blocks you don’t use too much up here and then right in the center here this is where like the Dormer thing is That I showcased before you can just have a nice read and stare out your window if you want to and just relax you know but yeah that pretty much covers everything in the base wait what the hell did you see it is that the sponsor of this video raid Shadow Legends if You’re like me and get frustrated from constantly being violated by creepers then it’s time to take a break and give raid a try they’ve recently added some brand spanking new end game content called the Doom Tower which honestly looks so awesome as it’s essentially a giant prison it’s full of bad guys that The Arbiter couldn’t take care of so now it’s up to you make sure you have ways to remove debuffs and high resistance before you get started and to get to the top you’ll need a well put together Army of Champions as the bosses here are crazy strong some of which even have Specific mechanics like the Scarab King you’ll need to ensure you always have a shield Buff when attacking him as he’ll wipe out your entire team otherwise raid has also just released a massive new feature Awakening and a brutal new dungeon the iron twins Fortress if you’re strong enough to take down the Twins then you’ll get a huge payoff being able to awaken your Champions which lets you choose a blessing to transform how they battle and add so much variety to the way you can use your Champions which has really added an entire new layer of depth to the game Which is amazing but here’s the big news raid has just added a new super powered legendary version of everybody’s favorite Champion death knight and they’re also giving him away entirely for free all you need to do is log in and play raid for seven days between now And October 27th and you’ll get death knight to help you through all of the previous mentioned content and what’s better yet you can use the promo code DK Rises for a bunch of free items to instantly level your new strongest Champion all the way to level 50 5 Star Ascension and if you haven’t started playing raid yet be sure to click the link in the description or scan my QR code here on the screen and you’ll get unique bonuses worth thirty dollars we’re talking a free epic Champion Aina 200k silver one energy refill One XP Boost and one ancient Shard so you can summon awesome Champions as soon as you get in game all this treasure is only available for the next 30 days for new players and we’ll be waiting for you right here in your inbox it’s that easy just click the link in the description And I’ll see you in game thanks to raid for sponsoring this video and like I was saying if you want to build this base for yourself feel free to stick around and we’ll get started in the tutorial right now foreign Off you’re of course going to need a massive open area similar to this one and firstly we’re going to be adding in the base of all of the pillars so you’re going to need a whole bunch of oak logs for this part and starting off we’re Going to place the first pillar at the very front left of the base here and now just so I’m not repeating myself a whole bunch the gap between all of these pillars is going to be three blocks and so now we’re going to be continuing on To the right by eight pillars so this is the first two so one two and then we’re going to go all the way up to eight and eight there we go so that’s the entire length of the front of the base there and you can use this to kind of Position where you want your base to actually situate a little bit better I’m just going to leave it here because I’m a lazy bastard now from this point here we’re going to continue backwards by an additional Five Pillars so that we have six in total including this one but We’re adding on five so one two three four and five now with that side done we’re going to basically link back up over to this side making just a giant Square out of some pillar blocks just a handy tip you can use the pillars in front to just align yourself up and Place them nice and quickly and there we go so that’s the entire outline of the base done this is how big it’s going to get now we’re going to be adding in some extra pillars along these blocks here so head to any side and we’re going to Count two pillars to the left so one two and then in line with this one here we’re going to pretty much connect up this pillar to this pillar spacing them apart by three blocks and there we go so that’s most of the outline of all the Pillars we’re gonna have to do more as we get up to the other platforms and stuff as we’re gonna have to add in more pillars then but now what we need to do is raise up all of of the pillars to the correct Heights so for the first pillars We’re going to be focusing on these ones here so the front ones and then one on the sides and we’re going to be raising these up to be two blocks high in total now for the next pillars which is this entire strip here we’re going to raise All of these up to be four blocks high and now for all of the rest of the pillars remaining here we’re going to be raising these up to B7 blocks high alright and now with all of your pillars added in it’s time to add in the first floor walls firstly starting off with The gate here right in the center and let’s just Chuck in three fence gates like so now heading to the left of this in between these pillars here let’s place a mixture of Azalea and also flowering Azalea so we’re going to keep this pretty randomized between all of The ones we’re going to be placing and then above the central Azalea here let’s place an oak fence and then to the left and right in these gaps Place some Oak fence gates then on top of each of our pillar blocks here let’s play some Oak Slabs and then finally on top of our Central fence here let’s Chuck on a lantern now this exact design here of course randomizing these Alias is going to be repeated in all of the front sections here and then these two sections on the side as well and over There and then for the left side we’re also only going to be repeating it and this section right here as well I’m just going to go ahead and do all of that right now and just show you how it looks alright so now with everything added in we should have something looking like This and on this side section here we won’t be adding in the lantern just to uh keep a note of that and now for the rest of all of the outside of the walls here we’re simply just going to be adding in the azaleas only if you wanted To feel free to add some lanterns on top of these just to keep the area around your base a little bit brighter but I feel like we have enough lanterns on the next floors so yeah I’m just going to leave those out and there we go that’s Pretty much all of the outside of all of the walls done now and now what it’s time to do is head on the inside of the base and we’re pretty much going to be Excavating all of this grass so one block past all of these pillars here and So from this corner to this corner over there pretty much we’re just going to excavate an entire layer of grass alright and now with all of that area excavated we’re going to be heading over to the left side of the base over here and starting in this section right here So one to the right of the one that we didn’t add a lantern to and we’re going to start adding a wall on the inside so behind these azaleas and this wall is going to be three blocks high and also made out of stripped oak wood and so We’re going to be continuing this wall all the way around the base all the way around here up until we meet back up to the center of the base here so this is where we’re going to be adding our staircase in and we’re going to stop on This block right here and so yeah now let’s just fill in that entire wall all right and now with all of our walls added in we can head back to the outside here and continue adding in our walls and so what we’re going to be doing is Starting one block above here in line with the azaleas we’re going to place three upside down Oak stairs like so and then on top of those we’re also going to be placing an oak fence in the center and then an oak fence gate on the left And right side with a lantern on top and now we’re going to repeat this exact same design in every single section around the base including this one to the right I don’t know why I didn’t start with this one uh please forgive me but yeah we’re going to add it in here And then we’re going to continue this all the way around here back up to this section right here okay and now with all of those sections added in you should have something looking like this now we’re going to head over and add in the front wall designs firstly starting off On the left side here and so in between these two pillars we’re going to be doing something similar to what we just did up here except instead of adding Oak stairs across like so we’re going to be placing them like this to create an archway instead and then in between These we’re going to connect them up with an oak trap door now on top we’re going to be just repeating the exact same thing we did so an oak fence fence gate and then finally a lantern on top in the center and now we’re going to repeat this exact same thing in this Section and also this section and now with those added in we can also add in some Oak slabs on top of the pillars and we’re going to continue this all the way down over to this side as well now moving to the right so pretty much in The center we should be in line with our gates here we’re going to be adding in our staircase and we’re going to start this one block in front of the pillars so add in three stairs here then we’re going to add in the next three above it And then using a block here we’re going to just place this temporarily so that we can place our next three and then we can remove this block and yeah so that’s it for the stairs now we’re going to head over to this section and just repeat exactly what we did over here in Every single section now with those done we can fill in these weird gaps up here with some Oak planks so just do this in every single section all the way across then heading back over to the left here in these two first sections we’re going to be removing the central block here And then replacing them with some Oak fences now that’s pretty much all of the main structures done for the first floor we obviously need to add in our farms and Pathways and stuff but we’ll get back to that because now we’re going to be moving up to the second floor and Firstly up here what we’re going to be doing is placing in some dirt is obviously going to be for the crop farms so first we’re going to head to the back left corner here and in line with our kind of fence design here we’re going to Place in three dirt and then we’re going to extend this all the way down to here pretty much in line with this fence right here and then Branch it back over and then just fill in this entire rectangle here with more dirt now that’s it for the first plot now we’re just Pretty much repeating the exact same thing to the right once again in line here and then also in this section right here and we’re also going to be extending these all the way down to be in line with our first Farm as well next we’re going to be adding in the water For the Farms now as it just makes things a little bit easier and so to do that what we’re going to do is just first head over to any of the sections in between the two Farms here and we’re going to place three Oak planks and then On the next one we’re going to place an oak slab on the bottom half followed by another Oak blank then we’re going to continue our Oak planks all the way down until we’re in line with this fence gate here where we’re going to be placing yet another Oak slab on the bottom half Followed by more Oak planks then in these Oak slab blocks we can place in our water buckets and now let’s repeat this exact same thing to the right here so we’re going to place three Oak planks a slab followed by some more planks all the way up until the end here with some More slabs and planks and Chuck your water in those as well now while we’re at it we might as well just cover up these water blocks with what they’re going to be covered up with so firstly we’re going to play some composters on top of these ones and then Behind These We’re going to place some barrels as well and then we’re going to repeat pretty much the exact same thing over here except the barrels are going to be on top of the water this time followed by our composters in front of those now with all that added in let’s head down Our stairs over to the left side and then in this Gap here we’re going to be adding in three Oak stairs like so in every single section and now we can head back up the stairs and we can fill in both of these gaps here with some Oak planks now on top of All of the walls here we’re going to be placing some Oak planks all the way around including these gaps here in between the walls and then for the rest of the entire platform here we’re just going to be filling it in with some Oak slabs okay and now with our platform fully Filled in we can now add in some more pillars so all of these pillars we’re going to be adding are in line with our first seven block High pillar here and so the first set is going to be directly behind these barrels here we’re going to Extend these up to of course B4 blocks high then the next ones are of course behind this Barrel as well and then in front of this plot of farm here and then yeah the next are all just they’re all pretty much in line with these pillars Here so that’s the base of all of them and we’re going to raise these all up to be four blocks high as well now in between the middle ones we can add in our staircase and so these ones are actually going to be starting in line With our pillars here then for the next row we can just place a temporary block and then place in our next three stairs and do the same thing for the next layer as well making sure not to fall down like I did then we can remove our temporary blocks and yeah that’s our Staircase done now let’s head all the way over to the left side of the base and start adding in the kind of base of the walls for the next floor so firstly starting in this section here one block below the top we’re going to add in some upside down stairs connect connect them Up with an arc trap door add in a fence and then fence gates and also a lantern on top of the fence and now let’s repeat this exact same thing in this section and this section as well now with those added in we’re going to head all the way Over to the left side of the base and for these sections specifically we’re going to be repeating this design here as we’re going to have another layer of dirt up here and we kind of just want to cover up that dirt on the outside as it looks kind of ugly instead of our Archway design we’re instead going to have some just solid stairs like so and we’re going to extend these all the way around up until we reach the center of the base here so in this section here in line with our one over there and then of Course on top of all these we’re going to add our Sam fence and fence gates design now with all of those done to the left of this section that we just finished up with we’re going to once again add in our Archway design this time with the trapdoor and then the Fence and fence gates of course with our Lantern and then for all of the remaining sections all the way around we’re simply just adding in our Archway so it’s just going to be the stairs and then the trap door now with all of that done we can start adding in our platform For the final layer of the base and for this we’re going to have to grab out our dirt again as we’re going to be repeating a pretty simple only thing we did down below except obviously it’s going to be a bit shorter this time so firstly starting in the left side we’re Going to add in our dirt and we’re going to extend this all the way down to the front leaving a one block Gap here and then let’s just fill in the rest of the dirt and then we’re going to repeat this in this section and this section as well Pretty much just directly above the existing Farms below then in between those we’re going to be placing some Oak slabs and unfortunately we can’t add the water in the center it’s going to have to be off centered by one but it doesn’t really matter you’re not going to see it Anyway so yeah on this block here we’re instead of going to be placing our Oak slabs on the bottom half and then we can repeat this exact same thing on this side here as well then we can add our water to the slab blocks here and then On top of the water let’s add in our barrels and then in front of those barrels our composters now similar to what we did down below we can jump down and Behind These archways here we can add in some Oak stairs all the way across like so on every single section And now all that’s left to do for the rest of the entire platform is fill it in with Oak slabs now with all of that done we can add in our roofed section for the Farms here feel free to leave this out if you can’t be bothered I Completely understand so to start this off we’re going to be adding in some Stone and brick walls on top of all of the pillars to the left of the staircase here and just all of these pillars Here and Now on top of all of these we’re Also going to be adding on an oak fence next we’re going to be placing a ring of spruce trapdoors all the way around these but to make placing these easier what we’re instead going to do is firstly add in our campfires so just head to Any Corner Chuck on a campfire This is just temporary so is this one and then we’re going to place our next one here this one’s gonna stay so we can remove those two and then we’re going to fill up this entire rectangle of campfires making sure that we’re leaving a gap all the way around so on top of All the fences here because we’re going to be placing trap doors instead so extend this all the way to the right and then we’re going to bring this all the way down here and then just fill in this entire rectangle of campfires pretty much and then also extinguish them with A shovel and now with all of that done we’re going to be adding in our ring of spruce trapdoors and the reason why we placed the campfires first is so that it’s easier for us to place all of the trap doors facing the right way so if we Change directions like this it’s going to look kind of weird and we kind of just want to keep them all facing the same way I’m gonna have all of mine facing this way so to get the side ones placed right we can place this one first And place the back one and then we can just use those trap doors to place in the rest of them just like so and then yeah I’m just going to go around and fill in the rest of all these trap doors okay and now so that’s it for our roofed Section and now it’s time to add in our house and so to start this off we’re going to be raising these pillars up an additional three blocks so one two three and we’re gonna do this to every single pillar now with all those done we’re also going to be adding in an additional Pillar right here in between these two pillars and raise it up to the same height now starting off on the front walls we’re firstly going to be adding in some oak leaves on top of our Archway here and let’s just do this all the way around and let’s just add these into all Of the three front sections now in front of all these leaves we’re going to be placing some Oak Signs Now Behind These leaves we’re going to be adding in our walls of stripped oak wood and we’re going to raise these walls up to be three blocks high now with all those Walls added in we’re going to be removing the essential two blocks replacing the top one with some Oak stairs and the bottom one with an oak fence and now with that done in each section we can now link up the pillars with some more oak logs in between them Like so we’re also going to be adding some more oak logs on the intersection points here and then in between these we’re going to add in our same design as we have down here so we’re going to add in fence case on the sides with an oak Fence in the center and then our Lantern is instead going to be hanging down below like so and now let’s just quickly repeat this on every side and now with that done we’re going to repeat this exact same thing that we just did on this side right here all right and now With our back and front walls added in we can head over to the right side wall and for this we’re going to be doing something pretty similar to what we just did so first let’s add in our oak leaves across like so and then behind it we can Also add in our walls in between at the top here we can add in our Oak stairs with our Oak fences behind them and then we can also connect up the pillars like so except this time we’re not going to be adding in the pillars here on the Intersection points to one two buckle my shoe one two three buckle my pee then on the central pillar here we’re going to raise this up an additional two blocks and then we’re also going to be adding in some stripped oak wood in kind of an L shape on the left and right side Like so now heading over to the left side wall so where our doorway is going to be we can firstly add in some stripped oak wood logs here and then also to the right of this on this section as well at the top so we can add In our upside down Oak stairs and then on the right section we can also add in some more Oak stairs and place our Oak fence here then on this left side we’re obviously going to be adding our door right here so just Chuck in an open door And then in front of this window here you can add this in if you want to Chuck in three flower pots and the first one an oxide Daisy Then followed by a lily of the valley and finally an Azure blew it and now we can repeat exactly what we Did on the other side here so connect up the pillars like so raise this one up to be two blocks high and then to the left of it add in our L shape of oak logs like so on each side all right and now It’s time to add in our roof and we can start this on either side and we’re going to be starting with the trim so firstly in line with our logs here we’re going to be placing a spruce slab and then on top of that an additional Spruce Slab and to the left of this we’re going to be placing some more Spruce slabs like so to make some full blocks then to the left of this once again an additional Spruce slab but instead on top this time we’re going to be adding some Spruce stairs and then Behind These Spruce stairs we’re going to place some more Spruce stairs and then on top some more stairs and then once we reach the middle here we can place some upside down stairs like so and also on top of this another Spruce slab and now we can pretty much repeat this exact same thing On the other side here so two slabs like so then we’re going to Branch this off into some full blocks followed by another slab and on top of that Spruce stairs followed by more Spruce stairs and finally some more Spruce stairs and that’s it for the Trim Design we’re now Going to quickly repeat this on the other side now with our trim added in on each side we can connect up the trims at the very bottom here with some additional Spruce slabs all the way across and linking them up like so and then we’re going to repeat this onto the Other side as well and now with that done we’re pretty much linking up the rest of all of the roof here with some Oak slabs and Oak stairs so let’s first add in our two Oak slab sections like so then once we transition to our Oak stairs we’re going to continue across Until we’re in line with this pillar here where we’re going to place an additional stair and then we’re going to bring Branch it out like so now let’s just repeat this on the other side as well so our stairs all the way out until we reach this pillar here so we’re in Line with this pillar and we can bring our stairs out again and obviously this is where our kind of Dormer thing is going to be I don’t know if that’s the right word for it I think it is but yeah next we’re going to add some upside down Oak stairs in front of these stairs here and then on top of those some more upstairs then in between these we’re going to place some more upstairs and the top an oak slab now with that done we can head back over here and just start adding in the rest of our Oak Stairs and once we reach this point here we’re instead going to turn it into this stair block and then we’re going to do the same thing with the slabs on top here so we’re going to obviously bring all of these across to the other side we Might as well just link those up right now if I can click today oh my goodness and then yeah we’re going to connect them up with the slab that’s on top of the thing here now all that’s left to do is just fill in the rest of these stairs here And then with all of this side done we can now just add in an oak fence gate right here and that’s it for this half of the roof now we’re just going to add in all of this side except this side we’re not going to be adding in our Dormer so with the stair section here we’re just going to continue adding our stairs all the way across and there we go that’s pretty much all of the exterior of the house done and pretty much all the exterior for the entire base done all that’s left now is just All of the Interior stuff and just a Finishing Touch for the house if you wanted a little bit more brightness you could add in some lanterns in these two sections here and you could also add this on the other side as well over here if you wanted I’m just going to Chuck Them in for the hell of it alright so first starting off with the interior we’re going to head back down to the bottom floor here and add in our pathway and this pathway is going to consist of stone bricks Stone and andesite it’s just going to be randomly textured feel Free to also just make this a solid block of just stone bricks or stone or whatever the hell you wanted I’m going to do it the textured way because I like it and so I’m just going to quickly show you the outline of the pathway by just Destroying the blocks and I’m going to fill the blocks in later so we’re going to first destroy it all the way up until the stairs here then on the left side of the base we’re going to align muscles with this pillar and destroy the first Block and then to the left and right of it to make it three blocks wide and we’re going to continue this all the way down until we reach the pillar and then once we’ve reached the pillar here we can then align ourselves with this entrance here and then just destroy all Of these grass blocks and we’re going to leave our Gap destroy the rest of these grass blocks leave another Gap and do the same thing and we should be left with a strip of grass here here and right here and now on the right side this time we’re instead going to do a One block wide pathway so once again aligning ourselves with this pillar let’s just destroy it all the way up until this point right here we’re going to be stopping in line with the center of this section then we’re going to destroy up until this point here and Then similarly up until this point right here so we should have kind of like a wonky looking tee that’s leaving a one block gap on the edges now at the end of this tee so just this strip here we’re going to be adding in some stone slabs On the top half blocks if you are texturing your pathway feel free to add some andicide in here if you want it’s not really going to be seen so I just can’t be bolded and then we’re going to be filling up all of these slabs with Some water and now I’m just going to quickly fill in in all of these blocks here with some andesite Stone and stone bricks okay and now with all of our Pathways filled in we can then next head underneath our platform here and then in front of these blocks here so in line With our pillars we can add in some Stone stairs then before we continue on as you can see we have some dirt underneath these pillars so on all of these exposed pillars we’re just going to extend our pillars down replacing the existing dirt blocks and that’s pretty Much all of the blocks that you need to do it too now what we’re going to do is replace all of these grass blocks that you can see here and dirt blocks there’s a couple of dirt blocks and we’re going to be replacing them with the same thing That we did for our pathway so in my case it’s going to be the textured Stone andesite and stone bricks and uh yeah let’s do that right now okay and now with all of that filled in we can now just turn around and head back outside And add in our cute little Gardens on the left side here so firstly we’re going to start in this little two block Gap and at the very back here we’re going to add in a peony and then in front of that a pink tulip then in the Right section we’re going to add in a rose bush followed by a red tulip and then in the final little section here we’re going to add a lilac followed by another tulip and now for this front garden we’re going to be adding in a pretty nice gradient that’s going to go From white to Yellow to Orange and then to red but to make it look a little nicer we’re firstly just going to sprinkle in some grass Ferns and also tall grass so we’re going to place one single tall grass block back here and then we’re going to place another one Here you don’t really have to be this specific with it I just have found that these placements seem to be nice and then we’re going to add in a couple more grass and fern blocks just around the place like so and now we can start adding in our flowers starting with the White ones at the front here so we’re just going to sprinkle a mixture of oxide Daisy lily of the valley and white tulips we’re just going to place four like this then we’re going to transition into some dandelions let’s just place two then we’re going to place a couple Of orange tulips in these sections Then followed by some poppies in these sections then finally into some red tulips along here actually we’re going to replace this one instead with a rose bush and then we can place another red tulip right here and there we go we just Have a nice looking Garden if you can find a use for this little area here then you can of course just instead replace it with something useful I just wanted a garden because it looks nice right now with all those Gardens added in we can head over to the right side of The base and start adding in our animal pens so firstly starting on this back side here we can add in some fences that come out until the pathway here we can do the same with this section and this section too then we’re going to have to choose which section we want our horse To be if we’re going to have a horse at all and in here I’m just going to Chuck in a few hay bales to kind of decorate it I might actually replace this one with a campfire instead and then for our horse stable we’re going to need to Place three Oak fences as just a single oak fence is too small the horses are pretty fat and huge so they need a big open area to get through then for our section to the left here we can place two Oak fences and then a single oak fan Skates right here then turning around on this section right here we’re pretty much just going to repeat the exact same thing that we just did so we can add in our Oak fences here followed by an additional two and then an oak fence gate in the center like so and so that’s It for our animal pens now let’s head over to where the sugarcane Farms are going to be and firstly add in our strip of barrels along the bottom followed by a double chest and a single chest then we can add in sugar canes in pretty much Every section that we can all the way across here there’s of course going to be two gaps in the sides but oh well it’s just the way it is and now with all that done we’re pretty much done for the entire exterior first floor now we’re gonna head underneath the platform here And add in everything in here all right so let’s start off with our enchanting area at the very back left area over here and firstly what we’re going to do is add in some bookshelves in the corner and then we’re going to extend this to the left all the way over here just Stopping one block shy of the end here and then just fill in this entire rectangle and then we’re going to do the same thing to the right so four bookshelves along and then just fill in everything now we can add in our enchanting table right here we can also Ensure that it reaches level 30 of course it does I wouldn’t do something like that to you guys and now on the left and right sides we can add in some barrels at the bottom followed by some chests above those now what we can do Next is cover up all of this ugly dirt with some Spruce trap doors this is of course optional if you’re fine with having this dirt here then you can just leave it there and yeah so we’re pretty much just covering all of these dirt blocks with some trap doors also I Should probably mention with this side here we can leave out this strip as we’re going to be placing some blocks here and now to the right of this here where we have this kind of weird Expo closed half dirt blocks we can instead just fill all of these in with some more Oak slabs to make these blocks above Some solid blocks all right now let’s add in our crafting area so to the right of our barrel and chest here we’re going to add in a strip of oak logs then we’re going to leave a gap of three and place In an additional Oak log pillar thing along the bottom let’s add in a single smithing table followed by a crafting table and a loom then above this we’re going to add in a little shelf design of an oak slab and then two Oak trap doors in the central one let’s place an anvil On the right one here let’s place in a grindstone it might be kind of tricky to place there we go and then on the left side we’re going to place a stone cutter now before we add in the next sections let’s actually just add in the rest of The pillars so for this next one we’re going to once again leave a gap of three blocks and place in our pillar and then for this next one we’re going to leave a gap of five this time so one two three four five and then place our pillar on The Block to the right of that and then above all of these pillars and also in the sections between them we’re going to fill in these slabs to become full blocks like so and then to the right of this pillar here we’re also going to leave another gap of one and place in Our pillow like so also adding in our Oak slabs next we’re going to be making some more solid blocks by placing some more slabs and all of these are going to be pretty much a strip that’s going to be in line with these pillars so for This first one let’s add in a strip all the way to the end then for this one we’re going to do the same thing and then for this last pillar here once again the same thing and now with those placed in we can add in our lanterns so For the first Lantern we’re going to head one block to the left of the enchanting table and place our Lantern here and then for our next Lantern we’re going to align ourselves up with the very far right Azalea here and place our another Lantern now staying in line with This we can place in the rest of our lanterns on top of all of these sections all the way down to the end except for this one here as we’re going to be adding some glass and stuff in this section and then to the right of this we Can place in the rest of our lanterns making sure we’re of course in line with our Lantern down at the end there and there we go that’s all the lanterns added in next let’s add in our Brewing area right here to the right of our crafting area and so firstly along the Bottom let’s place in some polished andesite on the left and right side and then we’re going to place some backwards polished andesite stairs so they’re kind of facing in towards the wall here and in this block we’re going to place a water bucket then in front of all these Blocks here let’s place in some Oak signs along the top let’s place in a strip of barrels and then on top of the solid blocks here we’re going to place some Brewing stands and then in front of our water source seal let’s place in a trip wire hook next onto our smelting Area we’re first going to be adding in a strip of barrels all the way along the top and then down on the bottom we’re going to add in a strip of furnaces then on top of the second to the left furnace let’s place an extinguished campfire and Then leaving a gap we can place in a flower pot with a blue orchid now for this final one block wide section here we’re going to place some upside down Oak stairs then on top of that and armor stand and then you can just Chuck in Your armor of choice I’m gonna go with some iron now turning around we can actually remove these gaps here so to the left of our fence we’re going to go two blocks so one two and remove this strip here then I’m going to do the same On the right side remove this strip then let’s extend these peel blocks down so that they’re touching the bottom and then we can also add in some more of our floor blocks replacing the dirt that was there now we’re going to leave this gap for now and instead in this Gap here We’re going to place some upside down Oak stairs another armor stand and then your armor of choice I’m going with gold this time now we can head all the way to the right here remove these blocks and replace them with some barrels and then this is our staircase here and what we Can actually do is just add in some Oak stairs in these blocks here if you wanted to you could also replace these slabs here with some more stairs so that it’s more of like a gradual slope I guess looks a little bit nicer okay now With those added in we can now add in our Island that’s going to be in like the center of the floor here and to mark it out we’re first going to place some barrels and these first ones are going to be in line with the end of our Furnaces here and keeping that in mind we can then use the lanterns above again to align ourselves so our first Barrel is going to be placed right here so it’s in line with this furnace and then one block to the left of the lanterns and Then the next Barrel is just going to be spaced apart by one and placed like so then we’re gonna head all the way over here and then our next barrels are going to be in line with these pillars here so we can just use this pillar align ourselves up with the existing barrels And then place in our two like so now in between the end barrels we’re going to be placing a single chest and then in between the long ways kind of barrels we’re going to place a whole bunch of double chests now with all those added in we can place In some polished andesite blocks in the middle of all of these and then starting on the left side we can place in a flower pot on the second block across followed by an azalea inside of that you don’t really have to be this specific with all of these I’m just placing them In these specific places because I can so next leaving a gap of one we can place in a cake then leaving another gap of one we can place an extinguished campfire and then finally a large amethyst Bud directly to the right of that all right and now it’s on to the Final section for underneath here which is the super smelter so firstly what we’re going to be doing is removing these two blocks here directly to the left of our wall we can also replace this dirt block here with a stone block and also underneath here these dirt Blocks as well if you want to then in this Gap here we’re going to be placing a double chest then at the very back here we’re going to go one block up and place in a single chest and then above this we’re going to place a double chest Facing kind of this way now in front of our chest down below if you want to you can add this in just place in some Stone stairs like so just kind of makes it a little bit easier to access this chest next we’re going to be removing this Block directly to the right of our single chest and in there placing a redstone dust and then on the Block in front of it so right here we can place a lever now one block below our double chest here we’re going to be placing some Oak slabs three in total all the Way across here and then on the next block we’re going to place another slab followed by an additional two slabs to make a solid block here now below these we’re going to remove this entire strip here all the way down to the end and in All of these gaps here we’re going to be placing some Hoppers and these are all going to be pointing in towards the chest so let’s jump down place in our first Hopper and then we can just continue the chain all the way down to The end like so now on top of all of The Hoppers that we can actually place we’re going to be placing a furnace so it should be five in total so one two three four five and then behind all of these furnaces we’re going to be placing some Hoppers that are pointing directly into the furnace so making sure we’re right clicking on the back of this furnace and then another strip of hoppers on top making sure they’re all pointing downwards into the furnaces now before we jump out of here at the backs here we Can place in a powered rail make sure not to place another one here as they’re going to link up just place in your first rail here then above this we’re also going to be placing a lever and we can turn this on as well then in front Of this rail we’re going to be continuing this round all the way down to the end with just some regular rails of course and just continue this down here until we reach the end here we can place an additional powered rail now on top of this slab here we should be able To place air powered rail without these connecting and then we can continue this rail all the way until we reach the other rail down here and place in our last powered rail you should also see both of these powered rails should be powered by this lever and likewise for This lever over here as well if we turn it on both of them should get powered now before we close everything up let’s actually test it out and make sure everything is working so firstly we’re going to be placing two Minecarts with a hopper the first one on top of this Powered Rail and then the second one on top of this one then we’re going to access our back chest so this back single chest here is going to be our fuel storage well it’s not really storage it’s meant to be kind of collected by our Minecart Hopper here And then our top one is going to be our raw ore in this case I’m just going to Chuck some raw iron in and should see this should quickly leave the chest and all of our items should be in both of these Hoppers now we can flick the lever And our mikots with Hoppers should be sent all the way across and they should just continuously bounce back on the walls depositing all of our items into the the furnaces like so now if one of these furnaces isn’t lit up just go ahead and check it make sure there isn’t Like a rail or something stuck in there that might have been collected by a hopper you can also just double check that all of The Hoppers are facing the right way if your furnace isn’t powered as well now I’m just going to turn this lever off because it’s a little bit Distracting and now we’re going to be adding in some glass in front of all of these furnaces but before we do let’s actually add in one more pillar and this one is going to be in line with this slab here or the final Hopper and we’re Just going to extend this all the way up to the roof and then we’re going to fill in this entire rectangle here with some glass and there we go that’s it we’re now fully done with the entire bottom floor of the base all right and now Heading up to the second floor we can first head to the left and what we can just go ahead and do is till all of this dirt into farmland and now with all of that done we can just go ahead and plant in whatever crops we want I’m gonna go With wheat on the left carrots in the middle and spuds on the right and now that’s it for all of the Farms now let’s head over to this side where our storage is going to be and so to start off let’s head all the way down to the back right Corner of the base and just add in our first two double chests like so then we’re going to extend this all the way down pretty much until we meet at this pillar right here stopping one block shy of the pillar and then we’re just going to pretty much turn all of these into Double chests and also all of the chests above as well now on to the right side we’re going to pretty much do the same thing except we’re going to be leaving a gap so we’re going to be starting on this block right here so one block to the left of the Pillars and we’re going to extend it out to be three blocks wide we’re also going to add our chests on top of course I mean you could extend this to be in line with the pillar if you really wanted I mean I don’t see why not yeah screw it We can just add those in there as well I don’t know why I really had a gap there and then we’re going to do the same thing so leaving a three block Gap here and then we can just extend our chests all the way across here even underneath The stairs here as well and then on top of course just add in more double chests and once we’ve reached this point here we can just add in a single double chest followed by a single chest and yeah that’s it for the entire second floor And now for the final floor all we need to do is just cover in these gaps here I don’t know how I forgot those just fill those in with two slabs and then we’re gonna do the same thing that we just did below we’re going to be telling all of These farmlands and placing in some wheat carrot and potatoes okay and so that’s it for all of our Farms now we can head on inside to our house and the first thing we’re going to be doing in here is adding in our ceiling and for that we’re going to be adding some Oak Planks on on top of all of the kind of outer ring here And then on the inside here we can just pretty much replace all of the blocks with some Oak slabs now with all the ceiling added in we’re going to be adding in our wall now so we’re first going to add in some more stripped oak wood blocks in this Gap here and then We’re going to leave a one block Gap and then just pretty much extend our wall all the way across here extending this up to the top of the ceiling we can actually leave out these blocks just just to save a little bit of oak wood and then for this Gap here we’re just Going to fill in those with some Oak slabs and we’re also going to place another one here followed by some upside down Oak stairs and then finally an oak door right here and now for this area to the right here it was kind of hard to Come up with something to place in here so all that I did was just add in some decorations so firstly electin in the right corner here with a book and quill inside of it then to the left of that a stripped oak wood block with a lantern On top and then in this Gap here as well we’re going to be adding in our ladder removing this block and extending our ladder all the way up to the top here next heading back inside here we’re going to be adding in our bedroom of course and so the first thing we’re Going to be doing is filling in this Gap at the back here then in front of these walls here we’re going to place in three red beds and beside those a couple of barrels and also on top of those barrels we can place some flower pots and top of The left one a blue orchid and on the right one an azalea then at the very back here we’re going to add in some more Oak slabs just to strip across like so and then Below in the center so pretty much above all the beds we’re Going to place in some oak leaves below the central Leaf we’re going to place an oak slab and then wrap some Oak strap doors all the way around these leaves like so now in the two gaps on the left and right we’re going to be placing some Upside down Oak stairs and armor stand inside of those and then your armor of choice I’m a high baller so I’m going to place some diamond on the left one and then some netherite armor on the right one now we can add in our Lantern for This room so we’re just going to align ourselves up with the center here place in a slab and a lantern now for the back wall here we’re going to add some more crafting blocks along the bottom starting with an anvil followed by a crafting table smithing table and Finally a grindstone on the end then above this we’re going to add in a little shelf design with some Oak slabs followed by some Oak trap doors and then on top of this we’re going to add in a couple of double chests like so and now We’re fully done for the bedroom we can head outside and up our ladder up to the attic and up here we’re pretty much simply just cramming in as many double chests as we can so underneath these sections here we’re just placing some double chests all the way up until the End here placing the end ones kind of facing backwards just because it’s a little bit easier on the right side we’re also going to be leaving a gap here as well then above all these chests we’re going to be placing some more double chests like so and also on this Side as well and then finally in this Gap right here we’re going to place a lectin with a book and quill inside now we can chuck in a single Lantern right here in the center pretty much in line with our lectin and that’s it we’re pretty much now fully done with the Entire base so if you enjoyed this tutorial be sure to leave a like And subscribe as it helps me out a lot more than you think thank you so much for watching and I’ll see you in the next video Video Information
This video, titled ‘Minecraft: Ultimate Wooden House Tutorial (how to build 1.19)’, was uploaded by disruptive builds on 2022-09-25 05:59:47. It has garnered 242176 views and 6700 likes. The duration of the video is 00:40:30 or 2430 seconds.
Install Raid for Free ✅ IOS/ANDROID/PC: https://clcr.me/disruptivebuildsRaid and get a special starter pack💥 Available only for the next 30 days
In this Minecraft Tutorial I’ll show you how to build the Ultimate Wooden House, complete with a super smelter, gardens, animal farms, crops farm and more!
— s o c i a l s —
🏰Want to download this build? Check out my Patreon for build downloads & more benefits! ❤️Patreon: https://www.patreon.com/disruptivebuilds 📸Instagram: https://www.instagram.com/disruptive_builds/ 🔷Discord: https://discord.gg/QbDhscExU7 🔴Second Channel: https://www.youtube.com/channel/UCLu3lbamoD8-w1stjIpd8Kw
🌲Texturepack: Better Leaves Addon 🌞Shaders: Complementary
— m u s i c —
Music by: itsokaylove Spotify: https://open.spotify.com/artist/2sVmps13nPFt0iG10BtWzV
With music from Old School Runescape
— t i m e s t a m p s —
Intro: 0:00 Tour: 0:25 Sponsor: 4:42 Block List: 6:25 Exterior: 6:37 Interior: 23:03
#Minecraft #MinecraftTutorial #HowToBuild


![Charged Creeper [SMP] {Cross-Play} {McMMO} {Dungeons} {Mob Arenas} {Custom Loot} {Shops} {Chest & Inventory Sort} {Crates}](https://newsminecraft.com/wp-content/uploads/2024/05/Charged-Creeper-SMP-Cross-Play-McMMO-Dungeons-Mob-Arenas-Custom-Loot.gif)