Is your base overflowing with juicy loot and there’s no more room for adding extra chests the solution is simple build yourself the ultimate underground storage base complete with 570 chests so you basically never run out of space and if you still manage to run out of space Then you may have a hoarding problem let’s get into the tour all right so just walking past the base entrance i want you to tell me if you spotted it at all and no it isn’t that giant thing over there that’s gonna be the next tutorial so be sure to subscribe for That but the base entrance is somewhere around here and if you guessed right here then you were right so yeah the entrance down to this storage house is pretty much completely hidden from the outside you can of course just make whatever kind of entrance you want down To this if you don’t want it to be so secret but i’ll be showing you how to make a nice secret entrance similar to this one and now with all of that said let’s head down into the storage house so firstly arriving down the water elevator as you can see we have pretty Much just arrived at the entire storage house down here we’ve got a nice step up from the elevator and that can take us over to pretty much any side of the storage house that we want and just quickly taking a look at the overall design as you can see we have a nice Checkered pattern on the floor that repeats in the center and also on the outside as well so it’s kind of like two donut shaped checkered patterns we’ve also got a bunch of shroom lights around on the floor and i’ve pretty much had to add these in just to make sure that mobs Can’t spawn anywhere under here even with all of the lanterns there was still some areas that had a seven light level which meant that mobs could spawn still and yeah then taking a look at the roof we’ve got probably one of my most favorite ceiling designs that i like to Incorporate in most of my builds when i can and that’s with like these wooden support beams that run the length of the roof and then we have some slabs in between those and just gives this really nice effect i don’t really know how to describe it but yeah i just really like It and then we’ve got some lanterns pretty much placed around the entire ceiling and we’ve got this pretty cool intricate design here for the elevator entrance as well just so like it isn’t this plane opening in the roof and yeah now we can take a look at all of the Actual sections which are pretty much all just double chests as i wanted this area to just have as much storage as possible granted you probably could add more chests along the floor or around here if you wanted to i just really like the look of it being nice and open like This yeah each section in here has 15 double chests or 30 regular chests if you like to look at it like that which in all of these sections makes up 570 single chests in total and then also over here in the center we just have like a little crafting smelting station Just for some ease of use so if you had some stuff down here you don’t want to have to run all the way back up to your base to smelt or craft anything we’ve just got a little section here taken up by that you can of course just replace This with more chests if you really wanted to and that would get you up to 600 chests in total in here if this still isn’t big enough for you which i i i don’t understand how this would be too small for anyone you can’t of course just easily expand this you can make This entire area larger and just fit in more sections if you needed to there’s also plenty of room that you could take up in the middle area with more chests and just crafting blocks and whatever you needed you could just place them around the place and i mean probably the Easiest way to expand this entire base is just continue going down with your elevator and just make an entire another floor that is probably going to be the easiest way to do it and yeah with all of that said and done if you want to build this for yourself feel free to Stick around and we’ll get started on the tutorial right now all right so starting off we’re of course going to be making the entrance design and like i mentioned in the tour you can make this into whatever you want if you don’t want it to be secret at all Feel free to just make a staircase down into it but for this video i’ll be showing you how to make a nice hidden entrance that needs no redstone whatsoever so all you’re gonna have to do is pretty much just find a body of water similar to this or you can make it In a river or even in the ocean if you wanted to and you’re gonna have to find an area that’s at least two blocks down and preferably with a bunch of existing seagrass around the place to help you blend in your base and so i think right Here is a pretty good spot so what i’m going to do is just dig a couple of blocks down for now just to mark it out and then to cover it up all we’re going to do is surround every single block here with some sea grass and then in the Places that we can make tall grass we’re just going to make a couple of tall grass blocks we’re not going to make all of them into tall grass because it does look kind of weird that they’re all just in this one area so we’re instead just Going to choose maybe two or three to leave as tall grass just like that and now for some bonus points you could add some lily pads around the place if you wanted to making sure to add one directly above the hole and that’ll pretty much keep the eye just away from Your base entrance and yeah it just kind of helps conceal it a little bit more it might look a little bit out of place in an area like this so you might want to keep the lily pads to kind of like a swamp area or wherever lily pads have Naturally spawned i guess but yeah that’s pretty much it for the secret entrance as long as no one spots you going down here you should be fine so now what we can go ahead and do is jump down into the actual entrance you might need a water breathing helmet for this And now we’re going to be digging down quite a ways we’re going to probably want to go like at least 15 to 20 blocks down so let’s just keep going of course i’ve sprung into a cave which is a little bit annoying but around this Level should be fine just as long as the top of the water isn’t really like going to be breached when you destroy all the blocks and area for the base and now for bonus points what you can do also is add in a trapdoor i like the entrance to Your elevator and that will block all of the light coming out during the night time as well i’ve just gone and fixed up the entire cave that i dug into just to represent what you guys will probably find which is just going to be like an empty area all right now something to Note is our trapdoor is going to stop the water flow of the elevator so what we’re going to have to do is just place a water bucket inside of the trap door to make it waterlogged and just continue our elevator all the way down right and So i feel like this is definitely pretty far down so now what i’m going to go ahead and do is go one block up from the bottom and dig up a two block high kind of tunnel like this and then we can just clear out a small little area around This water elevator all right and now it’s time to get started with the excavation and for this you’re of course going to need a pretty manly pickaxe so from where we are we can pretty much just stand in the center of any of these walls and we’re going to be digging in By four blocks so one two three and four now let’s just quickly do this on every single side now what we’re gonna do is head to the end of any of these tunnels and dig to the left or right by five blocks so one two three four and five and now granted That we dug to the left we’re going to dig to the left again to meet back up with our tunnel that should be right here yes here it is and now once we’ve reached this area we’re just gonna keep going in by another five so one two Three four five then we’re gonna turn to the left again and just dig all the way to our tunnel and then we’re just gonna repeat this for this half as well and now with all of that done we should have like kind of this outer ring that Surrounds the area and now we can just stand in any of these corners and just excavate all of the stone and whatever else is in the inside here and just yeah just clear it out all right and now with all of that excavated we’re now going to Be raising up the roof to be seven blocks high so we’ve already got two here so one two three four five six seven and we’re gonna have to do this to every single block in the ceiling all right now with all of that done your area should be looking like this now It’s time to push out these walls even further but this time we’re going to be leaving the bottom layer of blocks so we’re going to be starting this excavation one block above the very bottom of the wall here and so we’re going to be going in by six blocks so I’ve already dug one block here so that’s one two three four five and six now let’s just do the same thing that we did to our original area here we’re going to do this in every single wall and now with all of those done we can Head into any of the tunnels all the way down to the end and start digging to the left we’re gonna go in by eleven so one two ten and eleven oops i didn’t mean to go that far now at the end of this tunnel we’re going to go left again and Just keep going until we meet back up to our tunnel that we excavated which is right here and now we’re just going to repeat this exact same thing once again around the entire area okay and now with all of that excavating done we should now have a ring that just Surrounds the entire length of the base and we’re going to be doing once again what we did before just excavating all of the stone and stuff on the inside of this ring and with all of that done we’re now going to be raising all of This up to be the same height as this area that we’ve already done in here so just four blocks one two three four and just do this to every single block around here okay and so that’s pretty much the main base area excavated we’re going to have to do more excavating as We add in our chests but for now what we’re gonna go ahead and do is make sure that every exposed block in the base is a stone block so replace all of this granite coal and whatever else is in the area with some stone okay and now with All of that done we can start actually adding in some stuff to the base starting off with all of our pillars that are going to surround the walls so let’s just head to any corner of the base and instead of placing directly in the corner we’re gonna go one block to The left and one block to the right of it now heading along any of the walls we’re going to be leaving a gap of three blocks between all of these pillars so one two three and then on the next block place in the base of our next pillar now We’re just going to continue doing this to the right once we reach back up to our corner right here and then we can just continue doing the exact same thing around the entire base and now with all of the base of our pillars added in it’s Time to just raise them all the way up to the height of the ceiling and while we’re at it we might as well just connect them all the way up in the center as well and we’re going to be doing this of course to every single Pillar so once you’ve raised one up to the height of the ceiling just connect it up to the next pillar across okay and now with all of our pillars added in we’re now going to be adding in the roof design so we’re going to just choose any Wall and we’re going to start placing some additional logs on the kind of intersection block here of all of the pillars we’re not going to be placing any on this block as it will just kind of look weird so uh don’t worry about doing the edges so we’re just going to Extend this pillar along the roof all the way down to the other side we’re going to be doing the same on all of these pillar intersection blocks here as well next up with all of these beams added in we’re going to be placing some spruce slabs pretty much covering up all Of the stone blocks in the ceiling so just every block in between all of these pillars that we’ve added in and now the last thing for the ceiling is we’re going to head to any of the sides over here look in the center of one of our Sections and we’re going to count a gap of two blocks so one two and on the next block we’re going to place an additional spruce slab and a lantern on that now in line with this we’re going to be adding a bunch more lanterns all the way down To the other end leaving a gap of three in between all these so one two three place a slab and then a lantern and we’re just going to continue doing this all the way down to the end making sure to place slabs not spruce logs and once We reach the other side here we should have a gap of two at this end and now we’re just going to repeat this exact same thing in every single section in the ceiling i will just quickly note you obviously don’t want to add a lenten in Where the elevator is as we’re going to be adding our elevator entrance design if you can call it that it’s really just like a decorational kind of thing so firstly to add this in we’re going to obviously head to our elevator and we’re going to remove a ring of slabs that are Around the kind of water stream here and we’re going to be replacing them with some stairs that are all facing away from the water itself so we’re just creating like kind of a ring like this around it and then below all of the middle stairs here we’re going to place Some closed trap doors so that we have kind of like a shoot entrance i don’t know how to explain it but yeah it just gives it a cool look i guess right and so that’s it for everything for the ceiling and now it’s time to turn our Attention down to the floor so firstly let’s head back over to our water elevator and remove this ring of stone around it and we’re going to be replacing all of these blocks with some stone stairs instead now if you want you can also choose to waterlog all of these stairs with Obviously some water it just makes it look a little bit cleaner and then at the very bottom block here the remaining stone block we’re going to be replacing this with a shroom light or you can use sea lanterns or whatever the hell you want redstone lamps it’s up to you now We’re going to be removing a ring of stone that is directly to the left of all of these stair blocks and it’s going to be a two block wide kind of ring as well so we’re going to continue this all the way up around here once we reach This point we’re going to turn back towards the where the stairs are and just keep removing this ring of stone around it like so now with all of that done we’re going to be adding in a checkered pattern of polished andesite and polished deep slate firstly starting off in one of the Outer corners with some polished andesite then let’s just place in all of the polished endocyte in a checkered pattern and then we’re going to once again go back and just add in some polished deepslate into all of the gaps Now with all of that done let’s add in a ring of spruce slabs around all of this kind of like step up area and now that’s it for this little like middle kind of lowered area and now we’re going to be once again adding in the same checkered Pattern on this area up here except this one’s gonna be three blocks wide so to mark it out we’re going to go one block away from this stone block here and destroy three blocks along and it should be spaced one block away from this pillar block as well now we’re simply Going to be pushing this all the way up until we reach the corner of the base up here stopping once we have reached this spot right here still one block away from the pillars then we’re going to turn to the right and just continue doing this exact same thing around the Entire base okay and with all of that done you should have like this just ring of emptiness and we’re first going to be heading up to any of the corners and starting off with a polished deep slate this time we’re going to be adding in our checkered pattern of just polished Deep slate and then we’re going to go back around and fill in all of the gaps with our polished undecide next with all of that done we’re going to have to go around and add in some more shroom lights along the checkered pattern just to keep the area nice and bright Starting off in the corner block right here replacing this polished deep slate with a shroom light or whatever light you want then we’re going to head all the way along to the center of the base here and remove this and replace it with another streamlight and then we’re going To head to the other corner and of course replace this one with a streamlight as well and now we’re just going to keep doing this along the entire length of the floor all right and now it’s time to add in all of our sections of chests and also our crafting Area firstly we’re going to be starting off by adding in the crafting area so we’re just going to choose the center of any of our walls i’m just going to choose this one right here and we’re going to start adding in our crafting area so for this we’re going to have to Excavate one single layer of stone blocks here then along the top we’re going to be adding in a strip of furnaces below this we’re going to add a spruce slab and then some spruce trap doors coming away from that then below this we’re going to be adding in another shelf design Exactly the same as that one except obviously with no furnaces above this time and then below this we can add in our crafting blocks starting with a crafting table in the center to the left of that in anvil and then to the right of the crafting table a grindstone now At the back we’re going to be adding a little checkered pattern of polished endocyte starting above the crafting table here then we’re going to branch off to the left and the right and then back up here as well just keeps the back wall looking a little bit more Interesting then in the center of our shelf here we can add in a flower pot with an azalea to the left of that a lantern and then to the right of the flower pot a large amethyst bud now at the top here in the corners we’re gonna Place some upside down spruce stairs in between them a spruce trap door and then below them as well we’re going to add some more spruce trap doors and now that’s it for our crafting section now to the left and pretty much in every other section around the base we’re Going to be adding in our next design which is obviously all of the chests so for every single section here we’re going to have to excavate a two deep layer of stone we’re also gonna have to make sure that every exposed block here is going to be stone then we’re just Going to fill up all of the areas that we excavated with a whole bunch of double chests It might be kind of tricky to place these last two in so what you can do is actually remove this center chest here and then just place these chests facing the other way and then just remove this chest again and place back in your other chest and then place this chest in like So it’s a little bit annoying you can also just remove part of the wall if you want to place in the rest of those chests a little bit easier as well now at the top we’re just going to repeat this exact same design that we’ve already done so adding in our stairs and Our spruce trap doors and now all that’s left to do for the entire base is repeat this exact same thing in every single section along all of the walls and so once you’ve added all of those in you should have something looking like this and that also means that we’re fully Done with the entire storage room so if you enjoyed this tutorial be sure to leave a like and subscribe as it helps me out a lot more than you think thank you so much for watching and i’ll see you in the next video Video Information
This video, titled ‘Minecraft: Underground Storage Room Tutorial (how to build 1.19)’, was uploaded by disruptive builds on 2022-09-21 06:00:06. It has garnered 302061 views and 8318 likes. The duration of the video is 00:14:45 or 885 seconds.
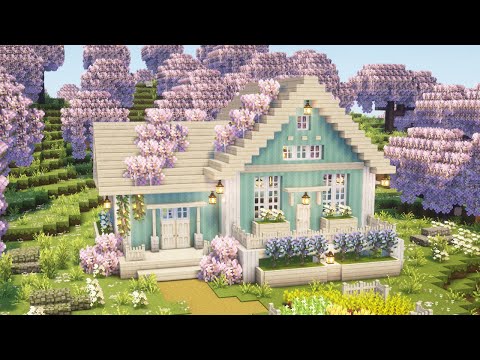
In this Minecraft Tutorial video I’ll show you how to build an Underground Storage Room, complete with 570 chests so you basically never run out of space! It also has a completely hidden entrance design with a water elevator, a very cosy design and also a crafting station for ease of use.
— s o c i a l s —
🏰Want to download this build? Check out my Patreon for build downloads & more benefits! ❤️Patreon: https://www.patreon.com/disruptivebuilds 📸Instagram: https://www.instagram.com/disruptive_builds/ 🔷Discord: https://discord.gg/QbDhscExU7 🔴Second Channel: https://www.youtube.com/channel/UCLu3lbamoD8-w1stjIpd8Kw
🌲Texturepack: Better Leaves Addon 🌞Shaders: Complementary
— m u s i c —
With music from Old School Runescape
Outro music by: itsokaylove Spotify: https://open.spotify.com/artist/2sVmps13nPFt0iG10BtWzV
— t i m e s t a m p s —
Intro: 0:00 Tour: 0:17 Block List: 3:07 Base Excavation: 3:09 Interior: 7:49
#Minecraft #MinecraftTutorial #HowToBuild


![🔥HUNT DRAGON NOW! 🐉[MINECRAFT ADD-ON] #ADSA](https://img.youtube.com/vi/pmoP3_R4czw/0.jpg)