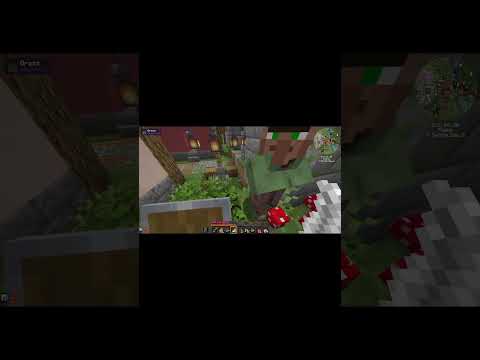
By the end of this video you also will have learned a secret on how to add animated textures to your java resource pack items so that you can make your servers look really freaking cool let’s get going hi there everybody i am kevin also known as art by kev here on The interwebs and in today’s video we are going to animate textures on top of item models in java minecraft this is super great if you are building resource packs and servers where you want to have some cool stuff for your players to play around with or to customize their gameplay with So before we get started i actually want to do a bit of an update here uh i feel like this beautiful little blue bar we’ve had here has been around for a while now and um it’s not really my color like my personal color i like orange and yellow So i’m going to swap that around actually give me just a second all right that feels a lot better so let’s get going starting with a java block item model we’re just going to call this nothing for now actually and i’m going to untick ambient occlusion because i Don’t feel like we have any use for that i’m going to keep the uv mode to be per face uv like so and then get going with building now if you are wondering about all of these boundary blocks and also a bit of why the blockbunch interface looks slightly different I’m not sure that you can actually tell at this point in time but there are some tweaks and differences that has been added like this navigation down here for example uh the next or newest version of blockbench actually provides some really nice new tools that i would like to go Through in another video and also some things that i used to love a lot that has kind of changed one of them being for example this transform space right here i want this to be set to a global when i’m working because one of the problems that you face otherwise Is that when you move your cubes around their pivots ain’t gonna follow and when i talk about pivots for those of you who are new to blockbench if i click this tool right here you see that we get a marker at this very corner if i now move my cube And i click the pivot again you see that this marker is now located at the same corner but it’s moved along with it if i were to go into local space which is set now to do by default and i move this cube around you can see that this little navigation thing it Down here still stays there and if i go to pivot then the pivot is still located at that very position and this is something that i personally don’t like a lot when i’m working with blockbench because i’ve been getting so used to moving around with the pivot attached to whatever Block i’m placing essentially so i would recommend that you always jump and click this into global whenever you’re starting up the program and get going with your models if you are the kind of guy who just like me likes to work with your models that way Some of you may also wonder a bit about why i have this type of display active and how to get it sorted if you go into file and you go into preferences and settings you can go something down here and you can see we have grid down here And the grid settings allows me to activate all of these boundary cubes that i have here you can see how we have this large box setting if i untick that then it disappears why is the launch box setting really good to work with well when we’re working with java models essentially And especially but essentially when we’re working with java models this is the boundary of how big our model can actually be within our block space so if i were to do this and i pull i cannot pull any further this guy goes to this edge and then it’s stuck You can see my cursor continues as i’m pulling the same thing this side continues but it’s not going to go any further so this is the maximum boundary size of whatever the cube can be now this also means of course if you are quick at math that a Model for java minecraft can actually be a total of 27 blocks in space because if you think about it three by three that’s nine nine by the depth of three that is 27 so 27 cubes is what you can get out of one cube in minecraft good information to know about if you Feel like that then in display settings we can always size our things up to a maximum four times our initial scale and that’s whenever it’s worn by a player in the head slot for example in the hand slot uh and also when it’s put on the ground Like floating on the ground as a dropped item and things of that nature but i recommend that you activate this type of boundary box if you want to work with java models you have an idea of how big they can actually be i have just rounded up the custom made Staff model gonna be part of this month’s patreon supporter packages for those of you who are available for that now what we’re gonna do here is that i’m going to add custom elements on top of this staff in this particular region which we are then going to add animated textures on top of Something you may notice is that the staff is already textured and the cube right here is not one thing that is really great about java minecraft stuff is that we can apply several different textures at once to our model this means that i can place this thing Somewhere in my model with no issues whatsoever and be able to texture that through another texture down here to my left at a later point why is this good well if i want to animate my textures i don’t have to go back and forth now between the staff model And the other texture that i want to animate unless i want to animate stuff on the staff as well like for example i maybe wanted to do a bit of like a glow up and down with these particular regions right here i could do that i’m not going to do that In this case though and what i will be doing instead is to try to figure out how much of a space i have this is the maximum height of this particular working space which kind of lines up perfectly if you ask me with this element Down right here and i think it would be really cool if we had some flames coming out of that so what i’ll be working on here is try to figure out sort of where i want to lay these planes out so that the motion and the design of my final Animated texture is going to look as dope as possible what i have in my mind here is that i’m going to have something that kind of travels outwards a bit like this it’s going to go something along that line and then i don’t want it to go too far I want to be using quite a limited space so potentially what i’m going to do is to do something like that maybe this is like a fire thingy that feeds into this hole right here and i’m going to duplicate this plane and make another copy right there and duplicate It again and rotate and make another copy right there so we get three streams running in at once and now these three streams are going to be animated one by one so that we get a bit of diversion going on on this side of the staff because there’s going to be An equal design on the other side as well so i’m going to build this side on the left and then i’m going to copy all of these cubes over to the other side i’m going to rename these cubes as well just to keep an eye on them so we’re going to call them Fire stream or just stream actually because they are essentially something that’s going to animate from one point and go into another so i know in my head when i’m working on this what i’m about to try to create then as well we have this plane on the top now It’s a bit of a difficulty trying to figure exactly what to do here but what i may do is to just make some kind of fiery flame here in the middle that goes up a bit now do i want to do that on one or more Of planes not sure at the moment i do think it would be more than fine in a second this one has gone a bit over these there we go probably do something like this just quite a regular type of stacked qbqb actually can they scale one more i Do believe they actually can yeah they can okay so we got two one more pixel or actually it’s two because there’s literally 32 by 32. so that’s what we have here we’re gonna have something that kind of um spits a bit of like a fire beam upwards and we’re gonna have these Three streams leading from this point into that sakisaki point right there i’m gonna call it sucky sucky point because there’s like a hole in the design i don’t really know but it’s just gonna turn out really cool in the end so let me get down cracking white just Kind of drawing out some initial texture here and then we’re gonna come back and start animating it so you get an idea of how that is done but first and foremost before anything of that is said and done i want to and need to add the texture For this and the texture resolution is going to be done by a template because i need to get all of the different sites of these elements available and i’m going to confirm this now i have my texture right here we zoom out we see all of these spaces are the Ones that we’re going to be using i am of course going to be deleting some of them because we don’t need particular ones for example we don’t need the duplicates of green and red right here we can actually just animate it on one side and flip it to the other It’s going to look completely fine in game same thing with the blue and the yellow on this one and the same thing with the blue and the yellows down here we just need one of them and then when i’m done tinkering without them i actually be able to shrink the texture as well Before i go any further i might be doing a bit of a favor here talking a bit about how to work with the remapping of the uv because right now i’ve just moved all of my elements up to the left here you can see i’ve kind of compiled it down so i only Have a 32 by 32 resolution sheet compared to before when i had a 64 by 64. now when i shrunk this sheet to 32 by 32 by right clicking and resize and then setting the new size for the overall texture definition what happened was that it kept the mapping coordinates so these cubes Still believe that they’re based on a 64 by 64 canvas this has to be changed because the overall document size is a 64 by 64 resolution so the good part about repainting stuff before you’re about to change it up is that now i can see the outlines of Where i need to pull these cubes to so this cube right here is going to be scaled out this way and then i click on the other side of the cube i can scale up this element as well by just clicking and dragging now i have this cube right here which is Going to be another one of the greens i’m going to scale that out like so here and then on the other side of the cube because they’re going to be using the same texture surface there is no reason to do doubled here and then same thing here We’re going to be pulling that down into there sizing it out and sizing it out this way i’ve now solved it so that my textures are actually applied proper and using and tinkering with the uv canvas can really help you efficienciate your entire workflow but also get things Where you want them to go let’s say for example there’s a surface of the staff here that i want to have placed somewhere else it would be quite easy for me to go into the uv and it requires that you don’t have box uv active in the old version of Block bench it had a tick box for box u instead and per face was the default unless boxy was ticked in this case you can actually choose if you want to have perfect uv or box uv in perface is what we have here we can choose every individual Side of a cube up down left right and so on so yeah just thought i’d mention that before we jump further into the actual video and where i’ve done the textures for this all right it’s time to take a bit of a look at what we have here this does feel Like something out of the 90s very vibrant in color and spicy but trust me this is just a starting setup so i can get an idea of where i want things to be so that i can then reference that when i’m going to add what the actual animation is going to be about So i try to draw out a bit of what i do believe that this magical thing is going to be like and something you can see already that i didn’t touch them previously is that these are flipped the wrong way around these are correct but these ones are not That is easily solved if we go into edit mode and we click these planes right here and i were to just use one of these tools right here we have the mirror x or mirror y in this case it’s a mirror x so i’m just going to take the faces and Click mirror x like so and if you don’t have mirrors you can always just click the toolbar settings right here and then customize and then search through them in this entire inventory phase that you have there were different tools that provided by janice and blockbunch But as you can see now it’s all in the right space every different beam has its own travels path for to look at them like that and now what i’m going to do is i’ve already opened this up in photoshop so i’m going to be going in here And the good part about texturing so they have different colors in the background is that i can now go in and deplete these colors with ease like that and i can always come back to photoshop and add more to them if i need but now i have the base Shapes in here and this is essentially going to be my animation sheet for this particular model and if i save like that it’s going to save over what i already had open so we’re going to jump back into here and now you can see all of these pretty cool beams like look At that as soon as the color and the background disappeared it is suddenly a completely different feel to it now when i’m going to add lights and actually do some movement to these animation chains it’s going to flip to the next level but first and foremost let’s select the Beams we have here click on transform after i’ve duplicated them of course so ctrl d to duplicate and then flip x and now we have on both sides i think this turned out really really really cool now if i wanted to i could always go Crazy and pull them down and sort of try to make the same kind of mishmash down here between those two but i don’t think i want to do that i don’t think it fits the design i like the idea of just having it here at the top of the uh The model i think it turned out really cool now i’m going to try to get this in the same kind of fiery color as the course within and then i’ll get back to you in a bit of a moment but we are also now going to take a look at this In blockbench as well so what i’m going to do is i’m going to just do a bit of more that and then we’re going to click ctrl save and open up blockbench and now suddenly you can see how that log is approach really brought the staff to life like if You wanted to you could just leave it be like so right here it wouldn’t really matter too much i think this turned out really cool bran this was a good stuff yeah i really really like this design actually looking forward to hearing what people’s over the patreon thinks about it But let’s get going and actually animating these parts right now we’re going to be animating all of it in photoshop we could do it sort of here by adding more to it but the only thing we need from blockbench is to take a look at what the resolution here is which is 32×32 Now i know that when i mean here i’m going to help myself out by creating a new layer add a dot markup here with black and a dot mark down there with black and what i’m also going to do is try to figure out how many frames i need but How would i know that would i just start up by setting up a new document which is going to be my animation sheet with all of the frames in it no there’s actually a much better tool in photoshop if i open a window and i go to timeline i can now create a Gif timeline down here by clicking animate like that and now i can pull up a bunch of copies of this main layer that i had like so maybe i’ll take five i think five frames could do it that gives us enough space to work with at least five that’s like one two three Four five and it reverts into the previous one yes and i’m gonna do this create five new frames down here i’m gonna go into them and hide all of the layers i’m gonna select the first frame and hide and unhide the first frame and do the same thing here but unhide again So that i have every frame being its own unique layer this is the manual way of doing it now the quick way around that is of course to click down on this button here and make frames from layers it’s greyed out for me because i’ve already done it the manual way around But for those of you who’ve animated pixels now comes the most tedious task we are now going to making every single frame that’s going to make up this animation right now there’s animation here and there is no animation really here well we do sort of have one set up But we’re gonna have to go into every one of these frames and what i mean by that is that we’re gonna have to go into every individual layer here and change what it looks like not just like add some noise effects or stuff like that well we could do it but What we’re gonna do is to actually change the shape a bit of these parts and then try to make it so that there is a motion that goes through frame one two three four and into frame five welcome back as you may noticed a few things are Moving or at least it feels like they are but they aren’t really moving what i’ve done here is that i’ve looked at what type of pixels i had in my shape and i’ve decided to try to push some of them around over the frame so to create the illusion of movement Let’s go down into business to see what i’ve actually done as you see i’ve also reduced the amount of frames to four and i put a bit of a black backdrop here so you can see this portion that we’re working with so frame one there are some elements in This one that i can consider shapes that people will keep an eye on with their tracks and or track on with their eyes sorry that’s the way around but we have the red dots and we have the yellow fields the overall shape in general is quite Orange so the red and the yellow are the ones we’re going to be able to keep them both track of throughout this motion in the second frame what i decided to do is to push all of the red ones as if they were continuing along a curve To the top same thing with the result here and then sort of do the same thing with the yellow so if we place one to the right go into second frame you see how the reds are now pushed over here and continued into there there’s another red growing out here Same thing this one is now growing out there’s another red coming into here this was still being pushed and climbing as you can see over there and then this one is now fading over this one is about to move into the position of where the initial Red one was there and we have one over here that came in from the left traveled over transferred and then it’s going to return to its full strength in terms of value same thing up here this one has started to get shaped and it’s coming around so we get this illusion of movement Going simply because for every new frame the thing that would catch our attention in this case the red dot is being placed at the new location along the axis of where we want the movement to travel simulated visually and through the illusion of movement that we create through putting these pixels in Different places so as you may see you think of it as a bit of a movement if i were to zoom out a bit as well you can sort of see how that kind of moves upwards and of course and i want to add that to the rest of the Shapes as well so we get the overall movement going i’m also potentially going to add some bits and bobs and kind of break it apart and try to change up the movement a little bit but we’ll see might be some more frames we’ll see when i get back to it and You get to see what i’ve done at that point and there we go i think i managed to put these four frames together quite well it’s gonna be interesting to see what it looked like in the actual model in a second but before we can do that we now have to break All of this up into an actual animation sheet because otherwise it could be quite difficult for minecraft to know what it’s supposed to do with this in game and it’s also a way for us to see the animation on the model through blockbench so let’s get going with that and start Up the sheet and back in blockbench i’m just briefly gonna take a look at what the resolution was 32×32 so double check we still have that in here as well if i wanted to change the resolution and see what it is in photoshop i just go to Image and image size i can see here it’s 32 by 32 as well we’re not going to do anything with this as a right now because it would scale the picture in that way we don’t want that to happen so what we’re going to do instead is That i’ve added a few new layers of this little black outlining that i did with a bit of a corner here and a bit of corner down here these are going to be the locators when we put these frames out and i’ve also named all of the frames correspondingly with an actual Number to them and it’s completely fine to merge these as well the way i’ve set them up because the black is not touching anywhere where the actual texture that we animated is so it’s not like a problem at all and it’s just going to help us to see Where things are going to go so i know now that it’s four frames our texture is 32 by 32 so if we make a new one we make the width 32 which is our texture resolution and then the height is now going to be 4 times 32 32 times 2 Is 64 64 times 2 which would give us 4 times 32 is 128. so we create that and we get this sheet up right here we can also close this animation tab because we don’t need that anymore now we’re going to pull this out in a New window and then take all of the layers like this and bring them into here this is now going to become our actual animation sounds a bit weird but that’s the truth so we’re going to take all of the frames as i mentioned here bring them up to the top i’m going to Delete the background layer because we don’t need that now i’m going to deselect all of the other layers that i’m not going to be using and i’m going to pull them down so that you can see here we get this little snap this is present in later versions of Photoshop for example cc which i’m running otherwise we use these liners that we gave ourselves as a way to kind of see where we are and if it’s on the line like you see how this pixel there should not break into this texture because that’s the new texture of 32 and then we Deselect another layer bring this one down again you see how we got it there and bring this down once more now i didn’t do any like cutting into the actual texture itself through this but it’s going to be quite simplistic and straightforward anyway so we’re going to merge all of these layers We’re then going to go in and select the black ones and remove them now here is our texture sheet and for this to work properly inside of minecraft at this point first of all we need to apply to a model but then we also need to make An emc meta file that’s going to go along with this texture to tell it that it’s supposed to be animated and let’s take a look at how all of that is done but first and foremost let’s take a look at what this looks like in blockbunch we can playback it As java minecraft textures are usually the same resolution like 64 by 64 32 by 32 and so on blockbench recognizes that this is something different this is a 32 by 128 pixel texture and it goes wait a second is this supposed to be an animated texture And yes indeed it is so blockbench gives us the tool to animate down here we can actually play the animation if we go into file preferences and settings and we go into the thing called preview we can actually change the frame rate of how fast this texture is going to be playing Now let’s set this to one so there’s going to be one frame per second let me click play here you’re now going to see that every one second it almost looks like lag right but it’s not like i can actually move around quite freely here But it looks like it’s a bit laggy it’s like playing one new frame of our animation per second into the animation sheet let’s go back into preferences settings and set this to 10 which i had it at initially like so and you can see now how smoothly that works How all of the different components kind of blend together to create this nice aesthetic i think this turned out really really nice i hope that the patreon supporters are going to like it as well when they get in at this month’s resource and now let’s jump into minecraft and Get this applied to an actual item so what’s it left then well all you really need to do now is to just pull your items into your resource pack folder and ta-da animated and good in the game well it’s not really that simple give a second i’m gonna Tap out here and sort of show you so in my browser here i have a few items and the one important one that you want to have is this mcmeta file right there you can just make a regular text document and then put that into Swirl and what i mean by that is that when you open that one up in here this is all it has to go in that file these five lines of code or even four or even one if you are just wanting to put them in a row which you can do Like you just said how fast the frames are going to play by the frame time this of course means that if you set it to one it’s going to be one frame per tick two frames per tick three frames per tick and so on like the More you have the slower it is and so on it’s quite straightforward then in the items of course we’re gonna have to dedicate our actual paths like in this case some dedicated it’s to a diamond hole so if i were to take away the resource pack you would just see the regular Diamond hole and it is currently on custom model data one and more custom model data is something you can find another video here in the channel as well ingredients if you’re into that and want to know more about how to add more models than one to a particular item And then of course also set up here as well uh there is just a desktop staff here because i usually export my stuff straight to my desktop instead and then i push them into my resource pack folders the thing here you don’t need to have a particle this tab Is never going to be placed in the world so just delete that and ctrl s save that up and it’s all fine and that’s pretty much all there is to it quite straightforward right i hope that you felt that after watching this video at least Now head over to twitter and let me see all your cool creations tag me with kev makes items yeah hashtag kevin i’m excited that the worst tag i could come up with but i think that’s gonna do fine enough yeah and otherwise check over to the community discord you can Always find a link down to there in the description below we share and comment and help out and stuff like that you can always post questions if you’re getting stuck with something and i want to know something there’s always somebody i think that can help you out at least And more than that i feel like uh there’s like a subscribe button here somewhere and i know that so many of you clicked that recently like i can already and i never thought that this was something i’d say in my life but i can already smell 2 000 subscribers yeah i i don’t know it’s like i smell it it’s crazy where are you coming from people are you like i don’t know i’m yeah i’m baffled and i’m amazed and yeah i just want to say thank you so much leave a like on this video if you Enjoyed otherwise don’t leave a like on the video i guess and i’ll see you in the next video have a great fantastic day i’ve been kevin and you have been amazing Video Information
This video, titled ‘How to animate item textures – Java Minecraft – Custom 3D items for your RPG Server Resource Pack’, was uploaded by ArtsByKev on 2021-03-11 14:40:45. It has garnered 133271 views and 4338 likes. The duration of the video is 00:25:07 or 1507 seconds.
In this video you get to learn the secret of how to add texture animations to your item models in java Minecraft. We are learning how to set up the mcmeta file, how to add the correct geometry to your model and then also animating it in Photoshop.
Get epic 3D item models, custom armor and more on our Webstore! https://www.artsbykevstudio.com/webstore
Follow please ➤ Twitter – https://twitter.com/artsbykev ➤ Instagram – https://www.instagram.com/artsbykev ➤ Discord – https://discord.gg/gwEaQMuvye
Join us live for games and creative streams during Tuesdays & Fridays over at https://www.twitch.tv/artsbykev
Become a member ➜ https://www.youtube.com/artsbykev/join Show support ➜ https://www.patreon.com/artsbykev
Buy your own copy of ArtsByKev’s creative Boss Models for Minecraft and other games here: https://www.artsbykevstudio.com/artsbykev-model-store
——————–
Texture animations, and animated textures in Minecraft require a flipbook sheet where your animation frames are stacked ontop of one another. Then you use a mcmeta file in the resource pack to get your texture animated.
In this video the custom Blockbench model is added to a diamond hoe using Custom Model Data, which ingame has the CustomModelData tag to it. You can then use a command to give yourself the unique item and have it in the gameworld. Animated textures are pretty cool, right?
If you run gamemode servers or an Minecraft RPG server, then you really want custom models, animations and unique textures. It helps to make the world really unique and memorable for your players. Give them lots of love, and they will love you equally in return.
Are you looking to make your custom 3D items? Are you new to Blockbench? I started my Blockbench journey in August 2020 but began with 3D all the way back in 2007. I love to give back to the community, and if you are looking for help then tell med down in the comments. Sometimes inspiration is all we need, you can let me know what you would like to see me create next here on the channel by checking out the community tab.
I’ve added a bit of tips and tricks on how to use the new version of Blockbench (March 2021) in this video, covering a few things I noticed when I was working models recently.
Blockbench is a free to use software. If you have not already installed Blockbench on your computer to create Minecraft Bedrock Models or custom Minecraft mobs, then download it via this link: https://blockbench.net/ Looking for more tutorials? Here is one I’ve handpicked for you!
In this video you will learn how to animate a realistic walk cycle for a spider. We will also look at how to model and rigg the spider in Blockbench. Textures are done using the drawing feature inside of Blockbench, and the base is made in Photoshop CC. The tutorial will give you a deeper understanding for how a spider is built up, how they move, and how the legs are built up https://youtu.be/sc-dsCZ-2Ck
Another way to customize your gameplay is by using Blockstates. I love to decorate Minecraft with hundreds of custom flowers, leaves and foliage models. Do you want to know how to add custom 3d leaves to Minecraft? The process is similar to the one shown in this video! Beware of the variables “shade” and “ambientocclusion”, both of these should be set to false if you want to get the most out of custom leaves. These variables are set in the models files. Blockstates allow us to make a texturepack diverse and colorful, even if we use a very limited palette of blocks. Make random block textures appear when you place a block on the ground, and you can even create epic and fun interactions if you replace fence gates and buttons with custom models. But it’s really easy to do, and here is how you do it https://youtu.be/VYsFNOGMFK0
Alternating textures is done in a few lines of code, and it’s super easy to learn. To see your updates while playing Minecraft, all you have to do is to press F3 + T and your game will reload the texturepack instantly.
Thank you all for the amazing support with the channel, we are growing fast and I am so incredibly thankful for your love and support. Let’s educate more people to create amazing stuff! Subscribe today and become part of this creative journey, I’m always ready at the video creation desk.