
Have you ever wanted to build a dome in minecraft but you weren’t really sure where to start what’s good everyone my name is hims and in today’s video i’m gonna be showing you how to build a dome in survival minecraft right now we are standing in season one Of my single player survival world in which i built this huge 64 by 64 starter dome and a lot of the people in the comments wanted me to do a tutorial on it so hey here we are i will be teaching you all the steps that i took to build this huge Dome not only will you be able to build domes with this tutorial you’ll be able to figure out how to build ellipsoids tauruses and a whole bunch of other cool shapes by the end of this tutorial if you guys learn anything then please drop a like it Would help others find this tutorial as well so hopefully it could help them but anyways let’s go ahead and get into the video now here we are in a super flat world of course you guys will be in whatever world you’re gonna build the dome in now the first step of this minecraft Tutorial is to actually pause the game minimize the tutorial and go straight to whatever web browser you use you guys can see right here i’m using google chrome you can use firefox internet explorer uh if you need to you’re gonna go straight to the search bar and type in p-o-o-t-z Enter now what this is going to do is bring you to plots model selection if you want to go to this website directly you can i just googled it to make it a little bit easier but it’s plots dot co dot uk go ahead and click on this website right Here and it’s going to bring you to this website now this has been a well-known secret in the minecraft community for a very long time and it is a very useful tool to have now if you guys just scroll down a bit you’ll see all the shapes that they Offer right here they have something called observatory which kind of looks like a dome but it does come with all this added stuff to it and that’s not what we’re looking for in this video so we’re going to go ahead and come to the very first option which Is a sphere now if you want to build a sphere awesome you already won’t be there but we’re going to go ahead and click on this now if you guys want to start out and build a dome what you guys need to do is go to this right bar Right here now this is basically the layer so you can see 32 it says 32 and this is basically how high the sphere is going to be so we’re on the 30 second layer if we go all the way down to the first layer boom you’ll see it right here and we Could hit the plus button to go up each layer now the gray blocks are the basically we’ll call them the inactive blocks of the layer so every time you go up the last blocks that you see right here in yellow will become inactive and a new set of blocks will appear We’ll call these the active blocks in the layer so the active blocks are yellow and these are the blocks that you’re going to be focusing on placing down inside of minecraft now each layer has a different set of blocks but sometimes you will come across a layer or two that are the same But don’t let it trip you up this is a very very tedious process but this is how you get a perfect sphere now over here on the bottom it says 32 now this is the size of the sphere so we can go up or down depending on how big you want To sphere and you could go really really tiny how tight you get eight you go eight with it so eight is the lowest one you could do that doesn’t even look like a sphere anymore uh what’s the highest you could do 256. whoa so in my survival let’s play world We did a 64 by 64 dome which is a pretty huge dome it’s the biggest dome i ever created and what i did to create a dome because right here you can see it’s a sphere it’s a huge circle right so what you Have to do to make it a dome is just cut off the bottom half it’s that simple so what we’re going to do is we’re going to click the minus button all the way down until we get to this level right here the level right below the yellow one so i’m going to Click one more time boom 31 level 31 is where you’re gonna start placing your blocks on the ground now of course if you want to build up if you want to make this a tower with a dome roof or something you can build all the way up you’ll just Do this layer however many times you want to build up say you want to build up 10 blocks and then put the dome you’ll just do this layer 10 times and then you’ll start going up does that make sense so i know this all kind of seems complicated if you’re New to it and it’s a couple little sliders and stuff like that it takes a while to get used to and right here on the top left i saved this for last for a reason this is kind of like the little help guide plot sphere generator click the sphere button Above for a home page and more models so like i said you can do different shapes and stuff like that use bottom slider to adjust sphere diameter use right slider to show layer you want to build don’t forget you can switch between 2d and 3d mode and zoom in both modes now that Is why i saved this for last because that is the last thing that we’re going to talk about in this little project manager type website thingy now this is what i followed i don’t go to the 3d one i usually do the 2d one just because It’s a little bit easier for my eyes to follow now this it just shows you in 2d so what you’re going to do is just it’s the same exact thing you’re going to hit the plus button every single layer apply the blocks every single layer And this also gives you the number so if you’re doing a huge dome like this then it’s going to be very helpful because inside of minecraft you can go five four three two one and actually count the blocks now speaking of going into minecraft this is the part of the Video where i actually show you how i set up my thing to do this thing to build it on so i don’t know about you guys i don’t have two monitors all right i’m not fancy like y’all so what i usually do is just overlap this With the minecraft so we are going to be building a much smaller dome as i would recommend you guys to start out with a smaller dome and then work your way up to building bigger domes it’s going to be a lot easier that’s what i did i started out With a really tiny dome let’s do a 32 by 32 dome so again with this we’re going to come to the 16th layer come down one more to the 15th layer and we’re going to start the dome right here and the reason why i’m going to show you This in a smaller dome is just to make the video a little bit shorter just to get straight to the point and just because this is going to be the same exact process for every single dome so you want to come into your inventory and get a block of your choosing i’m going To be using polish diorite for this tutorial specifically for the fact that it is uh well it’s the best block in the game and when you place them together it has a very harsh line that you can see throughout them so i’m gonna be using that to help aid me In this tutorial so first things first i like to start in the very right bottom corner i guess you could call it of the diagram and we’ll come to these two middle blocks right here and if you guys want to make it even uh or odd you guys can you can just Switch it up right now we’ll just do 32 just to keep it as what we were doing but come to this two middle blocks right here this is where i like to start so i’ll come right here and then i’ll count outwards so one two three so we’ll know that there’s two Middle blocks and then on either side one two three so then we switch over here to minecraft and it’s very simple guys you got one two as the middle blocks one two three here are the two middle blocks right here one two three right so that’s the very start of the Dome all right so i tried to set up this line kind of the same as this line right here but you can see right here we start with this line over here in minecraft we start with that line so then we come through right here We’re gonna go to the very next set of blocks one two three so then we’re gonna come into minecraft we’re gonna go one two three right and i’m sure you guys are gonna start catching on to the pattern right here so the next set is one perfect Right the next set where is it one two three one one two okay so that one’s two and if you get lost you can always like say i got lost right there i can always come to the start right here two middle blocks one two three that’s The very start and then just recount one two three one one one two one two okay so we’re back right here one and then one so then once you get used to it you’ll start kind of doing them in pairs so that one right there is kind of easy to Follow it’s one block and then one block diagonally and then right here one two one two one one one two three and then boom you’re gonna be at the very same point that you are in the beginning right here so we’re gonna go one two three One two those are gonna be the two middle blocks and then one two three so you have the three on either side and just like that you’re already a quarter of the way done and it’s very important that you fly up from time to time and just make sure You’re doing everything right because sometimes you can mess up which will force you to go back and start all over and no one likes to do that so just make sure you’re always double checking so all you have to do is fill in the remaining three-fourths of The circle it’s the same exact thing as the first quarter of the circle just repeat it right just repeat it and reconnect it so now this is where you go over here and then you click up and then this is where stuff starts to get tricky so i’m gonna Come back in here and try to explain this again so again start at the bottom right corner it’s just gonna be a little bit easier for you to follow along with the tutorial and really with the circle you could choose any side of the circle right don’t really trip off of that But right here you could see layer 16 on the very front of it it’s going to be the same exact thing as layer 15 so place the same exact thing and this will matter for bigger circles but it looks like for this 32 by 32 circle The second layer is going to be pretty much the same exact thing as the first layer that we put down so go ahead and just follow along and do that so now go ahead and go to layer 17 and again this is going to be the same layer now depending on how Tall you want your dome you can cut this layer out i would not suggest going any lower than this or else the dome will look kind of flat if that makes sense so it’ll look like you have like a squashed dome so in the next layer we’re going to go ahead And skip one of the layers just so we don’t make this dome too tall for the 32 by 32 size we’re going to go to layer 19 and we’re going to start to bring it in now this is where it’s gonna start to kind of concave in on itself if that makes sense So we have this very first one it’s the two center blocks with two on either side instead of the three then we’re gonna come in one two three then we’re going to come in one more time one two and it’s gonna land on that block right there then we’re gonna place two On top of this one and this middle bit is basically the same right and then we’re gonna do two because that’s exactly what we did on that side right just kind of reverse it flip it two right there we’re gonna do three right there one two then the two center blocks and Then the other two on that side and right there we have a quarter of that done so i’m gonna go ahead and repeat this for the whole entire dome guys and this is this is the process i mean this is as easy as you can get it you have the diagram On the left side right here then you have minecraft on the right side or however you want to put it you know that’s up to you but you have the whole setup now the only thing left to do is for you to actually just get in there and do it i Mean it’s a process it really is especially if you’re going to be doing it with something like glass it’s going to take a long time and it’s going to be very tedious and boom there is the next layer done and you can even start to see it starting to wrap in on itself And you’ll be able to see it as we start to build this up it’s going to come up but to finish off this little tutorial video guys i wanted it to be a short one too so to finish it off we’re going to go ahead and do a little Time lapse of me building up the rest of this dome just so you guys could see me building it up placing in each block hopefully you know that’ll give you a guide to follow along to as well and here we have it everyone there is the dome it is that Simple and you can build it whatever size you want like i said it all depends on what number you click in in the sliders but here we go this is what it looks like on the inside it’s a little dark here we go some night vision Clears that up but anyways this is what it looks like on the inside and even a 32 by 32 is really really big i would highly suggest you guys start with this size or something even smaller maybe even like 24 by 24. now i really hope you guys found this Tutorial useful if you did leave a like it would help other people find this video and hopefully it would help them too leave a comment as well if you guys want me to walk you through any of the other shapes that’s available on plots.com.uk and if you guys want to see more videos Like this then go ahead and subscribe but until next time guys i’m out Video Information
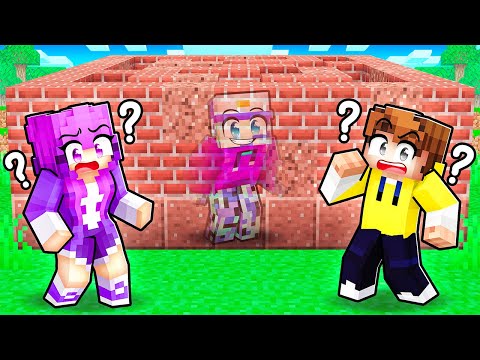
This video, titled ‘How to Build a Dome of ANY SIZE in Minecraft!!! [Tutorial]’, was uploaded by hiimz on 2021-04-15 07:00:36. It has garnered 239900 views and 6065 likes. The duration of the video is 00:12:23 or 743 seconds.
In this step by step, very detailed tutorial, I will walk you through the exact process I use to build my Domes in Minecraft! 😀 We visit a website called Plotz and use it as a project tool to help us plan out our Dome! Not only can you build domes from this website, you can build spheres, torus, wizard towers, and all kinds of cool shapes! I am NOT sponsored by this website in any way, it is just a great tool that I have been using for many years now 🙂
Link to Plotz website: https://www.plotz.co.uk/
————————————————-links & stuff——————————————————— ✭✭✭DISCORD/TWITTER/INSTAGRAM/TWITCH : CLICK LINK BELOW!!!✭✭✭ ☛ https://linktr.ee/hiimz ☚ ———————————————————————————————————————– Specs: – Intel(R) Core(TM) i5-4440 CPU @3.10GHz – 16GB RAM – AMD Radeon R9 280 Graphics Card – Samson G-Track Pro Microphone
“ALL MUSIC” by Kevin MacLeod (incompetech.com) Licensed under Creative Commons: By Attribution 4.0 License http://creativecommons.org/licenses/b… ———————————————————————————————————————–
Timecodes: 00:00 – Intro 01:10 – Explaining PLOTZ 06:10 – How To Build A Dome 12:00 – Bye 🙂
Minecraft is a sandbox video game developed by Mojang Studios. Created by Markus “Notch” Persson in the Java programming language and released as a public alpha for personal computers in 2009, the game was officially released in November 2011, with Jens Bergensten taking over development around then.


![How to Build a Dome of ANY SIZE in Minecraft!!! [Tutorial]](https://newsminecraft.com/wp-content/uploads/news/minecraft-news-top-5231.jpg)