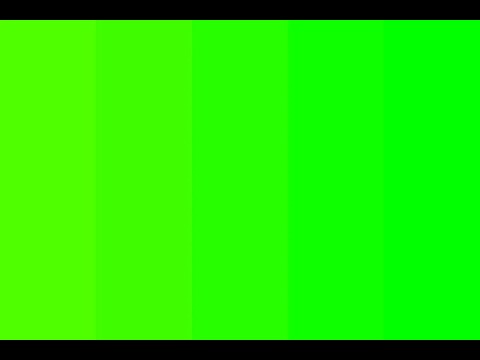
Hello everyone and welcome to my channel i’m jingles and today i’m going to be giving a tutorial or guide on ombre or color fades for hair on skins coming from someone who started at zero i can tell you that ombres are perhaps one of the most difficult skills to learn for Skin making especially for beginners so thanks for tuning in and i hope you learned something from what i’m about to show you enjoy Okay so step one is going to be determine your colors you’re going to need both a starting color and an ending color anywhere on the color wheel it doesn’t matter all depends on what you’d want alternatively you can use my favorite little website over here coolers You can make a gradient palette which is selection over here if this will actually load yes right here make a gradient palette uh this is super helpful you can use just the color hexes whatever you want so we find them on the editor right here you can just you know type in that Little code copy and paste it or if you don’t really know what you want you can browse more gradient palettes and find something that catches your eye um let’s see yeah has a lot of great selections not just gradients too um this site’s just super helpful for anything you can also do This manually um but it’s just really a lot more easier with the site so once you have your colors i selected some here already we’re gonna be doing a greenish bluish little palette um you’re going to determine you’re starting your ending and you’re going to want to get them into coolers um Over here so you’re going to get the hexa your starting color and your ending color you’re going to want to select 20 shades if you’re doing a standard long hair really it can be however long you want your hair to be but since we’re going to be doing let me just mark the Front of the skin real quick um we’re going to be doing like a standard long length the um top or the head i should say is eight pixels long and then the body is twelve so you know eight plus twelve is twenty it’s got some good math right there Okay so the next step is you’re going to want to take your darkest shade you can just click it it copies it automatically what a lovely site um you get it into an editor i like to use the skindex one but you can really use whatever you’d like Um planet minecraft or another website so you’re going to copy and paste that and this is our darkest color i’m going to start on the back side and you probably should as well it’s just easier but you know whatever you want um we’re going to do this by my shading but Obviously you can do whatever shading you want so you’re going to start with the top i’m going to go from darkest to lightest um so lighters my letters are going to be at the bottom um and we’re just going to fill in the first little top shade so that’s all Going to be the same no ombre yet so just you know do your normal shading whatever you want i probably should do a regular hair tutorial at some time would anyone like to watch that i’m not really explaining what i’m doing here right now just ombre all right so once you’ve got the First shade down you’re gonna go you guessed it to the second shade um copy that and you’re just gonna continue shading as if you would normally but only for the darkest color that’s very important only your darkest shade so whatever shading you have just do the darkest ones That’s third and you’re just gonna go all the way down the head i’m doing my little hook chain in here but i’m just gonna keep going all right so i finished that i’m now going to delete these four pixels since they’re not actually there in my shading they’re a lighter shade um Once you’ve done that you are going to you know take the shade that you already have right here and that’s going to be your baseline for the difference between your darkest shades and your lightest or your lighter shades the second darkest um so you should try to match this Difference um somewhat somewhat with the colors that you get lighter obviously it’s going to start getting a little bit like bigger since you’re going into lighter shades but um just keep that in mind so we’re going to go to our second darkest just use the color picker um Pick that up and make it a little bit lighter um if as you can see these are almost exactly identical which is what you want if you want a smooth ombre um you’re just gonna shade that like you normally would um then we are going to go here for our Third darkest shade and do the same thing just make it a little darker they should be about the same you know it’s a little bit lighter i might change it later but that’s looking quite good um and then i just realized i actually made a mistake you want to keep these um Colors here All right all ready and you’re going to keep on doing the same thing so you’re going to select the fourth um darkest shade that you have make it lighter again should be about the same you can actually put that there now since you know that’s the mistake i made Um it’s actually going away and you’re just gonna keep on doing that for your second darkest shade Um this is just the same thing i’m doing at the top here um still the second darkest shade that we’re going to be using my shading uses four different um different shades so we have the hooks which are the darkest we have the um outer filling second darkest we have Little c’s and then the filling up here and then the final lines four shades all right so after this you’re going to take your second darkest and notice how i’m all using shades that are level with each other horizontally because you know the farther you go down The lighter shades get so you’re gonna take this right here and you’re gonna make it lighter so now we’re getting our third darkest shade you’re gonna go there and just you know do the same thing down the line notice how these shades are pretty much the same they should be very similar that That’ll make your ombre look nice and smooth and good like we talked about before all right so here’s something a little problem that we ran into it’s not that big of a problem you see how we have this shade which is the second darkest or sorry the third darkest and this Shade right here is the second darkest these are almost exactly the same notice how up here they’re a little bit different don’t be afraid to just make that shade lighter i know it’s not the same shade as this right here but trust me it’ll it’ll look fine Um lastly we are going to be going into our you know final little lines here the lightest shade so you’re going to take your third darkest shade right here and just make it make it lighter you might have to fool around with the shades a little bit so you make it look Right like this is a little bit sketchy right here this little area because this is supposed to be lighter than this um keep in mind it might always be perfect because you are whoopsies wrong way um you are dealing with shades that are getting lighter so they are going to you Know have to change around a little bit so you know this looks kind of weird maybe you can just change that up a little bit making this a little bit darker it’s a lot of just trial and error and seeing what works best there you go that looks awesome Um and once again you can change things as you go once you finish everything you can literally go back and change whatever you want Okay so congratulations you finished your first side but what if i were to tell you that you’ve actually finished one two three sides this is probably the most valuable thing that you’re going to learn in this video even if you don’t want to do an ombre literally anything in skinning this is super Useful so if you’re already using the pmc editor that’s awesome if you’re not what you’re going to do is download that right here pull up the pmc skin 3d editor go to file open your file um and get that down they just did and it’ll open it in the editor So what you’re gonna do is not including the outer layer you’re just gonna have the body layer um you’re gonna go to this button right here clone mode super helpful you’re going to go to the square brush you’re gonna make it eight by eight because that is the dimensions of the Head right here unfortunately you cannot do this if you’re doing a horizontal ombre um which is you know why those are kind of annoying but since we are doing a vertical one you can just copy that right here and copy that right here um and congratulations you have now Completed not one not two not three actually four sides awesome and then you can just get that right back into your um into your skin text editor okay so now that we have this back door’s handed sundex editor looks awesome um what you’re gonna do is you’re basically going to repeat this Same process but on the body so remember what we started with um actually what i like to do is repeat the shade that you just used on the head like the last shade like right here and put that as the first shade on the body it just you know makes it look more Smooth um i found that it looks kind of awkward if you have that like little crevice there and you’re still switching shades um but it’s not bad if you don’t do that um so after that you’re going to do the same thing you’re going to start with The darkest shade and then find your next shade on cooler so where’s that tab right here um so this is going to be our eighth this is going to be our ninth shade one two three four five six seven eight nine copy that and get that in here And you’re going to just continue on your merry way um with the darkest shades okay so for this one you don’t want to do the same thing as the head doing the darkest all the way down because for my shading i only use the darkest um shades In the body for like these two hooks right here the rest is all the second darkest so you’re going to take your um little example one right here and notice the the difference between um the second darkest shade you have here and the darkest you have on the Body um you’re going to then select your darkest shade and just make that a little bit lighter it should be a little bit light um you should make it a little bit or basically the same as this shade once again you can always adjust if you think Something is not right you’re gonna go to the third one and then just keep doing that okay so now here’s where a little bit um of the complicated stuff comes in so what is this this is our eighth um you know actually i can just look at Right here this is four eight nine all right so you’re going to take your next shape you are going to put it in so notice how i copied and pasted that this is our next shade it’s a little bit lighter than this one you’re not actually going To put it there you’re just going to keep it in your little bar over here and make it lighter just right off the bat and then you’re just going to place it down so you don’t need to actually place it and you’re going to keep doing that all the Way until you get down to the very bottom All right so now that we’ve finished that we are going to repeat our process like we did up here with our second darkest look at that it’s looking so nice already just you know take a minute to admire the work that you’ve done so far it’s already taken me a little bit Of time um although i am explaining every step um so just it’s nice to like look at your work and see what you’ve done so far and be proud got that motivation to finish so let’s continue so we’re gonna get our um this is this is gonna be the third darkest shade Um i’m actually gonna stake up the up here if these are the same you don’t want that um you’re gonna take your second darkest shade you’re gonna make it a little bit lighter and start placing that down here it’s the same thing as right here so you go from the second to this The third lightest i mean third darkest my back let’s do that all the way down the way okay so i’ve reached the bottom here don’t panic the bottom is literally the hardest part um to get right and i never get it right until the very end so It doesn’t look that great right now you know this to here is kind of big it’s kind of blendy like it’s okay trust me um just come back to that later next we’re going to do the lightest shape look how it’s all coming together so you’re going to take your third Lightest shade one two three um and you’re just gonna make that a little bit lighter to get your lightest shade um you don’t want a little bit a little bit lighter than that and you’re gonna go all the way down the way okay so that’s done um i’m gonna take a Look at the bottom right now i think that this is too light and make that a little bit darker just remember that you can always change things um and nothing is final okay uh that looks fine enough actually uh i might change that a little in a little bit but Who knows we will see um only time will tell okay so next step if you want hair in the front which i’m assuming you probably do or will at some point um good for you you don’t actually have to um like manually copy these colors and do That in the front i used to do that and it was a pain you know i used to do this without um pmc at all and i would literally copy every shade it took me so long i hated it but you know i have struggled for you and i am here to give You the easiest ways possible in this guide so you’re gonna download this again like we did before um get this into pmc you can actually use this all at once if you want like this side copied over here but um you know i thought it was better to explain This way you’re going to note clone mode again square brush this time we’re going to do an 8 by 12 because that is the height um and width of the body gonna copy that flip it over to the front side and paste it over there obviously that Does not look right that’s not what hair looks like but you know just to wait um you’re going to download that and then get it into your skin next editor okay so now that we have this here what you’re going to do this is the back side The side that we already did so you’re going to flip it over the front um you should always mark the front of your skin i’ve seen way too many people fall for this and like have their skins on backwards whatever i mean not like wearing them that’s probably something You do on purpose but like uploading skins backwards it’s just really really sad so now you’re going to delete the pixels that you don’t want for your hair so i don’t want the middle here you see it’s already looking more like hair already um i don’t want this Um this is like a little bit of a brain exercise for me um i don’t actually normally do it this way let’s see i don’t want this um and i don’t want that yeah that looks good um and then i don’t want that and i don’t want this Okay so that’s what my hair looks like you might just have to make this a little bit um darker since i like to do my darker shades like that that should be no it should be level with this one my best and then you make this shade darker You can also get the exact shade if you want from the backside but like that’s too fancy for me um and you do the same thing on the other side alright and now you have your front hair um next we’re going to be doing our head Also by the way this does not look complete right now if you’ll notice if you’re new to making mine scrap minecraft skin something really important is the outer layer and we will get into that in just a bit so now we’re going to be doing the head you can Delete this now that you know that this is the front side due to like your you know your hair in the front and the back um and you’re going to at least for the style that i do um go horizontally across for three pixels taking your darkest shades I’m just using the color picker here and then complete that line the rest of the way down but like not across so just like one pixel wide okay to make your eyebrows i normally just take a darker shade of what is already there um so let’s do this just Make it a little bit darker do the same thing for here and once again you want these shades to be pretty much the same but it’s gonna be slightly different since you’re changing the hue um it’s too light just check it right up against it perfect Um and then i usually make the top of the eyes the same and then you choose a color from let’s say i don’t know here that looks pretty nice i like that do i want it darker just fool around with a little bunch yeah i like that um You can make your eyelash i mean sorry the rest of your eye it’s not your eyelash and bam eyes are done looking pretty okay um you just want to fold your eyelashes over too on the side okay looking good um and now we’re going to be focusing on the front Um so you’re going to make your eyelashes the same color whoopsies these are not the same these are different okay um and you’re gonna start with the darkest again um i think it’s just the easiest way so you’re going to take uh this shade that i just deleted while I’m so smart um so let’s see what’s that um one two three no it’s right here i’m done okay um and there’s a lot of different styles of banks um you can do really whatever you want maybe i’ll make a tutorial to how to make um Bangs at some point but i’m just going to do my simple style that i just normally do so i’m going to do the darkest first i’m not going to really explain this all right then you’re going to look to the sides to get your lighter colors and Then just fill those in as well make sure you’re paying attention to where they are vertically you don’t want to use the wrong shades really All right um and then once you’ve done all four of the shades you have finished um i normally like to just get my hair set up and i do like trimming you know little things just like that i like it with one maybe i’ll make it shorter today who knows That looks pretty good i don’t know what i want we like this better do we like this better um i don’t know i think i’ll just go standard today it looks fine um i’m gonna curl this over here and as you probably might have noticed that was the beginning of our outer layer Um so this is not an outer layer tutorial once again this is just ombre but now that you have all the shades that you need you’re just going to use this color picker over here um select the shades you want and make whatever outer layer That you want i’ll see you back in a bit okay so you made it this far congratulations you are almost done we’re just going to do the finishing touches so i did this on this side over here i’m just going to fold over everything so it looks more realistic Like that doesn’t look good no one wants to look at that so you’re just going to fold it over just using the color picker um that looks good we haven’t done this side this is super simple don’t worry all you have to do is take the bottom darkest shade of your um head And put it in the shape you want i generally just go like three lines like this and then pick out where i would like to stop and then just you’re gonna do the same fold over strategy here and then create your outer layer right there looking good um and then finally um what We have to do is just from the sides this actually only started recently but it’s really important to make it look realistic um you’re going to fold these um everything actually over like the front hair the back hair even like right here you’re gonna fold that over so it just looks more realistic Like this once again just using the color picker don’t like do it all the way like that you just want to have the front in the back so you’re gonna do fold over right there and then also on this side over here but it’s like the same all right Well that reminds me of one more thing look at this you have to do over here too so just you know connect the dots over here just like you would imagine hair resting around your neck like this this hole right here is your neck um it’s just gonna go around that And would you look at that we are all done um so this process is lengthy it can be difficult it can be frustrating you don’t get um whatever you want like the good look once again this progress has taken me so long i’ve done so much trial and error i’ll actually show a Picture of my first um ombre on the screen it was horrible it’s it’s so sad um it’s amazing how far i have come and how much practice can really do for you um so yeah that was the last step all right guys thank you so much for Watching and i hope this helped just remember that getting to the skill level literally took me over six months of frequent practice alternatively if you’ve decided that this is too hard you can’t seem to nail it feel free to browse my basis account for pre-made hairs or ask for a Commission on discord if you’re looking for something specific see you next time Video Information
This video, titled ‘How to Make FLAWLESS Ombré Hair for Minecraft Skins! (Tutorial)’, was uploaded by Jingles on 2021-11-22 21:19:48. It has garnered views and [vid_likes] likes. The duration of the video is or seconds.
Hey there! This video took FOREVER (4+ hours) to make, but it was worth it!! I hope you guys enjoyed this ~voice reveal~ as well …