
Hi everyone in this video i’m going to show you how to build a hidden underground base this design will feature a hidden water entrance in a pond a bedroom with another portal in with some room for storage a farm with a mine entrance in and a Storage crafting and enchantment room i really hope that you enjoy this video and if you do please leave a like and consider subscribing if you’re new here to start dig out an area of ground for the pond this can be any shape and as Big as small as you want it to be make sure that it has some depth to it though at the deepest point of the pond choose a block for the entrance and dig down around 10 blocks if you’re doing this in survival you may Want to place the water first so that you’re able to get back up just keep an eye on your air fill in the rest of the pond with water and add seagrass by using boatmeal on the ground inside the pond Make sure that the entrance is hidden by long seagrass you can also add some lily pads to the top to make sure that it’s all hidden go down the hole that you made and dig a doorway one block above the bottom so The water doesn’t flow into it then follow the graphic on screen to dig out the entry room of the base and mark out the doorways for the other three rooms in the centre of each seven block wall The room to the left will be the farm follow the graphic on screen to dig this room out too dig out an extra two to three blocks for the roof of each room directly opposite the farm on the right hand side of the entry will be the storage crafting and enchantment room This is exactly the same size as the farm room the final room is the bedroom as shown on the graphic the entrance for this room is two blocks thick and the room is circular shaped so that all the rooms could fit nicely together the first room i’ll be showing you how To decorate is the entry room start by placing strip dark oak logs in the corners of the room and dig out a two block wide area next to the water stream on both sides place stone bricks going up by three Blocks on either side and then add upside down stone brick stairs next to these as shown to create an entrance then add more upside down stone brick stairs across the top of the wall to join it all together behind the water stream remove the ground and replace it with spruce planks As they are a similar colour to the dirt and won’t stand out we will now do the same style for all of the other walls place strip dark oak locks reaching to the ceiling in the other two corners of The room and then remove all of the dirt at the entrance to the farm room after this place stone bricks on either side and across the top leaving a three block gap in the middle for the doorway then place upside down stone brick stairs to create an archway and add more upside Down stairs across the top to join it all together as the doorway for the bedroom will be two blocks thick just remove the first layer for now and repeat all of the steps the same as you did for the farm entrance finally create the same archway again For the entrance to the storage and crafting room remove all the blocks from the ceiling including the blocks above the upside down stairs you have placed on all sides of the room fill in the gaps above the stairs with stone bricks all the way around to Create a border and then fill in the rest of the ceiling with smooth stone slabs slabs are great to use to create the ceiling of the room to make it a bit higher if you’re struggling for space compared to using full blocks add an extra slab in each corner of the Room so that you can hang some lanterns from them to light up the space finally remove all of the ground and replace with spruce planks it’s best to place the planks around the water stream first so that it doesn’t flow throughout the room if you’re enjoying the video so far Don’t forget to leave any feedback you have in the comments and consider subscribing if you’re new the next room i’ll be showing you is the farm room place strip dark oak logs in the corner of the room on the side where the doorway is and fill in the rest of this Wall with stone bricks on the sidewall count four blocks away from the strip dark oak logs that you placed and add another column on the fifth block repeat this again and then fill in the corner block with dirt continue this pattern around the whole Room making sure that there is a four block gap between each strip dark oak column and that the corners are filled in with dirt make sure that you lighten up the area as you’re building so that no mobs or bats spawn fill in the rest of the front wall next To the arch with stone bricks in the four block gaps between the dark oak columns remove the ground and replace with oak planks repeat this pattern for every wall section around the room i’ve kept the wall and floor designs consistent throughout the build to make It easier for you to gather the resources needed and to make sure that it isn’t too complicated you can leave the wall gap in the far right of the room empty for now as this is where the mine entrance will be Fill in the final wall section and then we will move on to the ceiling design remove a layer of the ceiling so that the total height of the room is five blocks high remove the ground above the archway and replace with sideways facing strip dark oak logs And add an extra strip dark oak log on top of the column to neaten it up after this add upside down spruce stairs above the oak planks that you have just placed in all of the wall spaces make sure to add an extra strip dark oak Log to each column as well you can miss out the spruce stairs above the mine entrance for now remove a final layer of the ceiling so that we have more room to decorate then place upside down polished underside stairs on the ceiling going around the whole of the room as shown Fill in the rest of the ceiling with spruce slabs and add a cross using polished underside slabs in line with the centre of the room on the ceiling as well if you’re struggling for resources you can miss out this step and just fill in The ceiling in front of the spruce stairs using spruce slabs if you’d like in the center of the room and in front of each of the columns add extra slabs or blocks so that we can hang up lanterns to make the room nice and light In order for the crops to be able to grow in here these lanterns can also be replaced with torches that you would place on each column now remove all of the ground on the floor so that we can build the floor design Place a border of stone bricks on the floor going around the whole of the room in between each of the columns as shown then place alternating stone blocks on the floor as shown to create a checkerboard pattern make sure to leave the gaps Empty for now as we will be filling them in with polished andesite if you haven’t already check out my instagram for photos of each build i post along with some picture tutorials the link is in the description fill in All of the gaps with polished andesite this will be the floor pattern in every room if you don’t have enough andesite you can craft more using diorite and cobblestone or you can do a solid stone floor without any andesite if you’d like Now we will make the farms on the left of the room place a four block wide section of dirt stretching across the whole side of the room surround this with open spruce trap doors on all sides so that it looks like a planter You can also skip this step if you’d like to save on resources remove a few blocks of dirt to create water holes that will provide the crops with water and remove the floor underneath so that we can place some extra lighting in the form of Jack-o’-lanterns then fill in the gaps with water and place lily pads on top so that you can walk across without falling in on the right hand side we will be creating another smaller planter in line with the one on the left this one will be four by four blocks Surround this planter with spruce trap doors too if you want to add extra detail remove a couple of blocks from this planter to create the same water holes that we did in the other one using jack-o’-lanterns again for lighting now plant any crops you like we are able To plant and grow crops underground like this because the light level is high we will now build the entrance to the mine in the wall here place stone bricks on both sides with upside down stairs going across the top then add spruce planks in the top two Corners and upside down stairs below these and add some torches on spruce fences for some extra detail then you can begin mining i have dug out a small area and decorated it with stone and stone brick stairs to give an example of how you can make your mind look neater And nicer to look at this is optional of course and you can leave your mine looking natural if you prefer we will now add the final decorations to the room create a simple shelf using upside down spruce stairs with spruce trap doors on either side in the center of the wall Add decorations such as flower pots or sea pickles on top to finish it off and then repeat this shelf design on the other walls as shown leaving out the wall in front of the mine entrance these simple shelf designs don’t require Many resources and can add a really nice level of detail to your rooms finally we will be creating an area for crafting and storage for the mine place a crafting table and a furnace next to each other and add some spruce slabs half a block up with a double chest on top Then surround this with spruce trap doors going up by three blocks across and back down to the other side as shown and that’s the farm room with the mine entrance completed we will now build the storage crafting and enchantment room remove the three blocks of ground in the Wall next to the arch and fill with two rows of stone bricks and one row of strip dark oak logs do the exact same on the other side of the arch in the corner of the room place a column Of oat blocks and then count across four blocks and place another column on the fifth block following the same pattern that we did in the farm room fill in the corners with dirt again and then continue this pattern around the whole of the room until you get back to the front wall If there are any other bills you’d like me to do a tutorial for let me know in the comments section below in the middle of the room at the back add another section of wall by counting four blocks away from the middle column and placing the oak logs on the fifth block Now fill in all of the sections between the oak log columns without planks the same as we did in the farm room the only section you won’t be filling in is the section sticking out into the middle of the room We will now work on the ceiling remove a layer of blocks from the ceiling making the room five blocks high in total and then place a border layer of upside down spruce stairs around the whole room as shown This time make sure to bring the border around the columns but leave a gap in front of the column so that we can add a lantern there the only places you won’t be leaving a gap are at the front two corners Try to make the border fit neatly around these columns although it might be a bit tricky in parts in the gaps you left in front of the columns add spruce planks and make sure to continue the border around the column in the centre of the room leaving a Space for a lantern in front of it you can then add the lanterns to the planks a cheaper alternative would be to add torches to the columns instead now fill in the ceiling with spruce slabs and we will move on to the flooring remove the ground and place a border of Stone bricks around the room like i said previously all of the rooms will have the same floor and wall patterns to make it easier for you to build you can follow the checkerboard style here or you can just do a plain stone flooring if that’s easier If you decide to do the checkerboard style we will be filling in the gaps in the stone with polished andesite to make sure that the room has enough light you can remove a few blocks and place a torch with a piece of light gray carpet above it Make sure that they are all in line to make the room look neater after this we will build the main room decorations on the right hand side of the room place spruce slabs half a block above the floor on the wall between the oak logs and add stacked double chests on top You can still open the top chest because there are stairs above them not a full block repeat this again on the two walls next to this as shown do the same for the column coming out into the middle of the room to create a Wall of chests by crouching you can place the chest next to each other without opening them behind all of the chests place oak trapdoors to cover up the back of them to make it look neater again you can place the trapdoors on the chest by crouching If you have one place an ender chest in front of the middle column to finish off the storage area for the furnace area add spruce slabs between the oak logs on the far left wall then place a row of furnaces a row Of smokers and a row of blast furnaces you could skip the other furnace types and just put normal furnaces here if you’d prefer on the back wall add spruce slabs again then place two armor stands a crafting table and an anvil to create the crafting area At the remaining wall place an enchanting table and surround it with bookshelves making sure that you’re able to reach the level 30 enchantments with the formation shown you’re able to do this you can add some spruce trap doors on top of the bookshelves to add some extra detail if you’d like And that is the storage crafting and enchantment room finished the final room is the bedroom with nether portal in as the entrance to this room is two blocks thick remove the remaining dirt from the wall and fill in with stone bricks Add upside down stone brick stairs to create an arch and then replace the remaining dirt on either side of the arch with more stone bricks remove the three corner blocks on the wall and replace all of these with strip spruce logs to create three columns do this for all of the corners Let me know down in the comments what you’ve thought of this build and if you’re going to build it in your own minecraft survival world following the theme from the previous rooms remove the remaining ground in between the columns and replace with oak planks Do this for the left and back wall but not the right wall for now on the right wall place one row of oak planks next to the columns and then add another strip spruce column next to this do this on both sides leaving a three Block gap in the middle in the gap clear out three layers and then remove the ground on either side so that you can see the oak planks this is where we will be building the nether portal fill in the side walls with oak planks as shown And then remove the last layer of ground dig a three block gap and place obsidian in there then place it at the sides and across the top as shown this is a slightly larger portal design so that it fit nicely in the room We will now do the floor remove all of the ground and place a stone brick border around the room same as with the other two rooms you can do the checkerboard style flooring here or a plain stone flooring Remember to continue the floor into the part of the room where the nether portal is please leave a like if you’ve enjoyed the video so far it really helps me out now onto the ceiling remove all of the ground on the ceiling making the room five blocks high Then do the border of spruce stairs that we have done in the other rooms add an extra strip spruce log onto the columns in front of the nether portal and continue the border around the portal and back out the other side Again it can sometimes be quite tricky to get the stair placements right around the corners of the room in the middle of the wall border add spruce planks and a lantern hanging from it alternatively you could just place torches around the room then fill in the ceiling with spruce Planks you can add a bit more of a border between the columns where the portal is if you’d like # after this continue adding lanterns or torches to make sure that the room has enough light remember to add some light to the nether portal area and replace the ground Behind the portal with oak planks you can then light the portal and it is ready to use add some fence gates between the columns in front of this just in case any piglens come through the portal for the bed place a 3×3 square of spruce planks with an extra spruce plank at the Front then surround this with spruce stairs to make a raised platform for your bed in the middle at the back add another spruce plank with spruce stairs on either side and a spruce slab on top to make a headboard then place a bed in the middle on the Outer corners place spruce fences going up to the ceiling do this on all four corners replacing the back stairs with a block then join the fences across the top with spruce fence gates to create a bed frame we will now create a small storage and Crafting area where you can keep emergency supplies in case you die place a crafting table and a furnace one block apart then add spruce slabs with a chest on top above these if you’ve placed light in here it will have to be moved after this place spruce trap doors up The side over the top and back down to the other side as shown finally add a spruce plank in the middle gap and add an armor stand on top we can use the torch under the carpet trick again here to light up the room Without it being obvious you can also add more lanterns or torches to the columns on either side of the shelf to make sure that it is well lit add some more floor lighting around the room and then add some brushes using a flower pot a dead brush and a leaf block to add A bit more colour and decoration to the room and that is the entire underground base design completed thank you so much for watching i really hope that you’ve enjoyed watching this video and thank you again if you’ve watched all the way through i’m so grateful for everyone’s support and kind comments Don’t forget to leave a like and if you’re new here consider subscribing for more build tutorials like this Video Information
This video, titled ‘Minecraft: How to Build an Underground Base [Tutorial] 2020’, was uploaded by Spudetti on 2020-09-11 10:02:53. It has garnered 1869266 views and 63063 likes. The duration of the video is 00:18:45 or 1125 seconds.
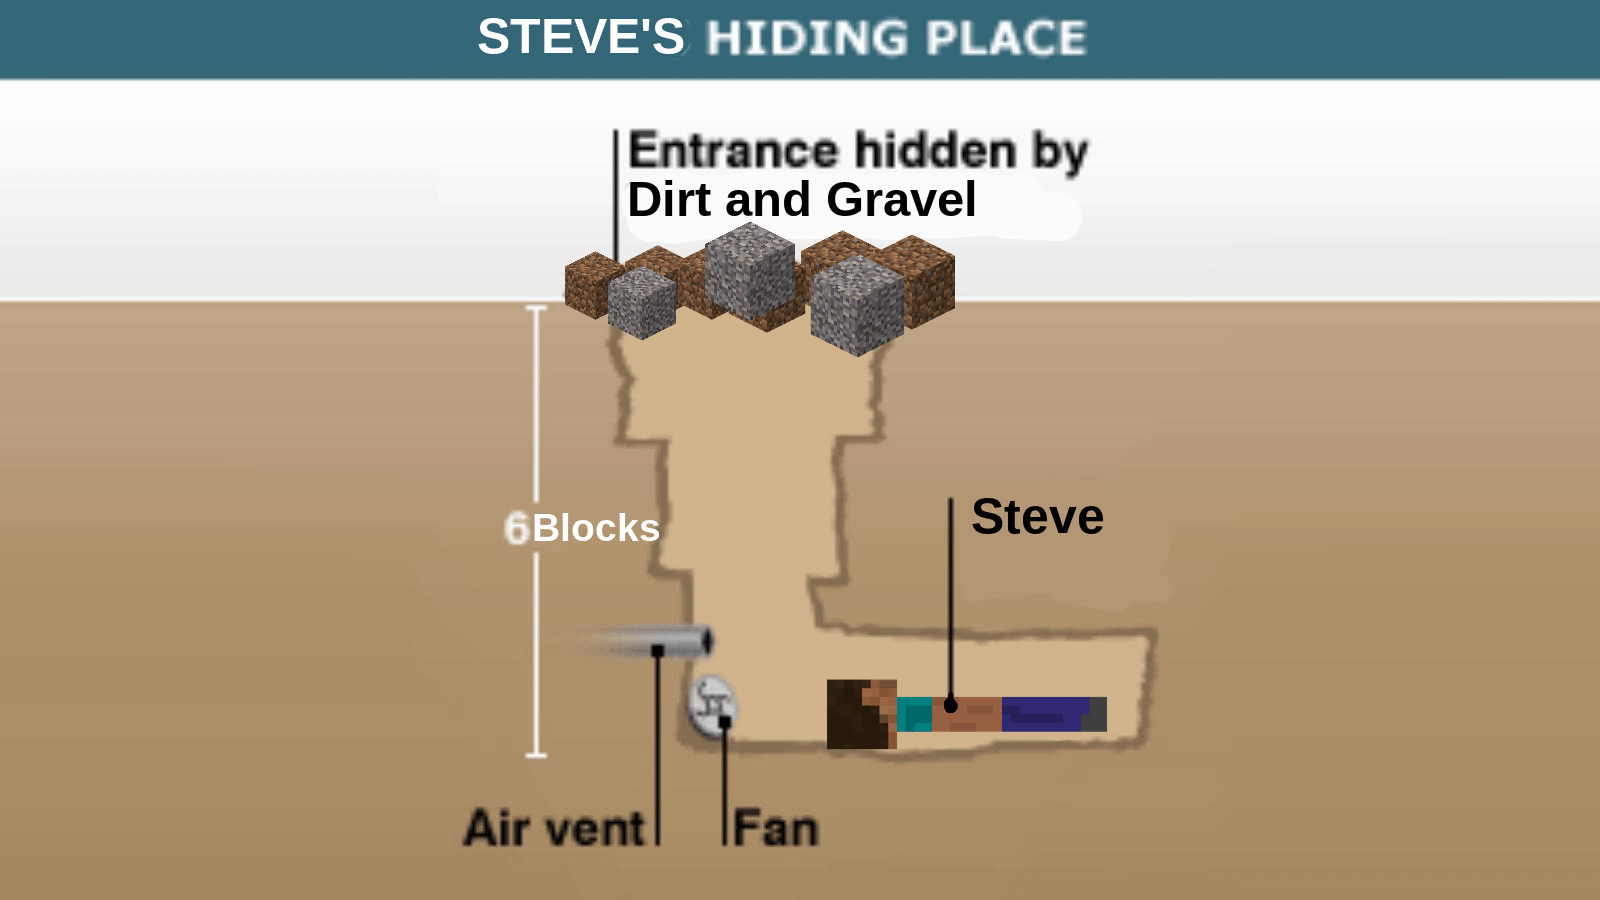
Learn how to build a hidden underground base in your own survival world in Minecraft. The underground base contains; a hidden water entrance, entry hall, a farm and mining room, a bedroom with nether portal and a storage and crafting room.
** BEST NEW Hidden Underground Base 2022: https://youtu.be/G2O28YSDerw **
Need MORE storage? Extend your build with my underground storage room: https://youtu.be/w5uNrpp17A8
Add an underground trading hall to this build: https://youtu.be/yu-ov87GkBg
If you’ve already built my underground base why not check out my underground survival bunker here: https://youtu.be/9-B5BtTFxrQ
If you’d like to try a smaller underground base you can check out my underground house tutorial here: https://youtu.be/jBzF6RM4A2I
Join this channel to get access to perks: https://www.youtube.com/channel/UCCG0k1eqamuln38WBqUSU8g/join
➜ Minecraft: How to Build an Underground Base in Minecraft ➜ Thumbs up & Subscribe for more! ► https://bit.ly/SubscribeSpudetti
Join my Official Discord: https://discord.gg/vs3zGVcQfx
➜ Follow! ● Instagram: https://www.instagram.com/spudetti/ ● Facebook: https://www.facebook.com/spudetti/ ● Twitter: https://twitter.com/5pudetti
➜ Let us know what you think in the comments section below!
➜ Download music: https://www.epidemicsound.com/referral/3x3vt6/
➜ Texture pack: Faithful v1.16.1 ➜ Shader pack: BSL Shaders
#Minecraft #UndergroundBase #Tutorial
Timestamps: 0:00 Intro 0:23 Hidden entrance 0:55 Initial room creation 1:34 Entry hall construction 3:29 Farm room construction 6:45 Farm room decoration 9:08 Storage room construction 11:45 Storage room decoration 13:32 Bedroom construction 16:52 Bedroom decoration 18:24 Outro
————————– Don’t reupload or modify my videos in any way on YouTube, TikTok or any other video sharing services without my permission.
If you use my builds in a YouTube video then please credit me for the design.
Copyright 2021 © by Spudetti.


![Minecraft: How to Build an Underground Base [Tutorial] 2020](https://newsminecraft.com/wp-content/uploads/news/minecraft-news-best-25.jpg)